• Skip to primary navigation
  • Skip to main content
  • Skip to primary sidebar
  • Skip to footer

Kim Power Style

  • Home
  • Contact
  • About
  • Tutorials

kim

How to Wash IKEA Slipcovers

6:00 am by kim 32 Comments

How to Wash IKEA Slipcovers

How to wash IKEA Slipcovers

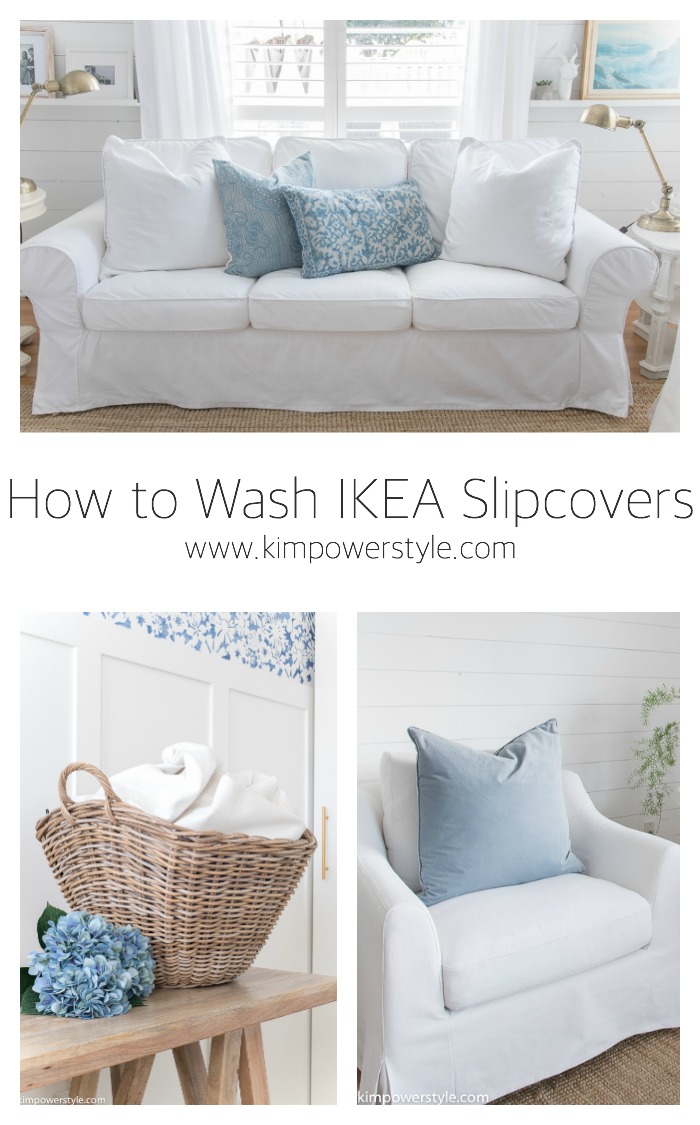
One of the questions I get asked all the time is how to care for and how to wash IKEA Slipcovers. I’ve had slipcovers for almost twenty years now and I’ve washed quite a few and learned a trick or two in that time.

Let me start off by asking you to read the care instructions for your particular slipcover on the IKEA site. Different colours and patterns of the IKEA slipcovers are made from various fabrics and various mixes of fabrics and require different care.

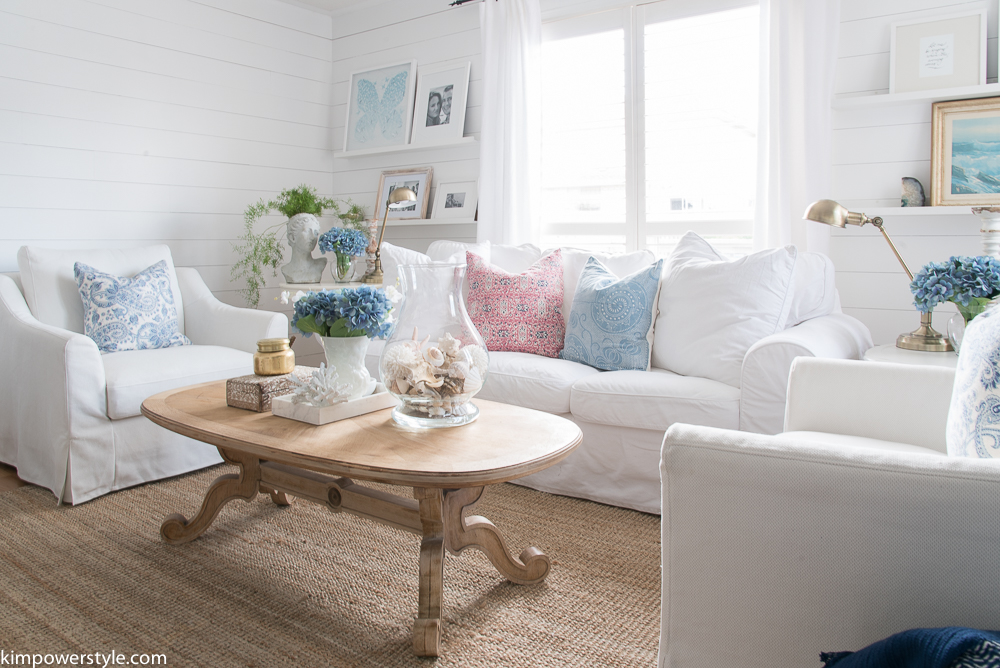
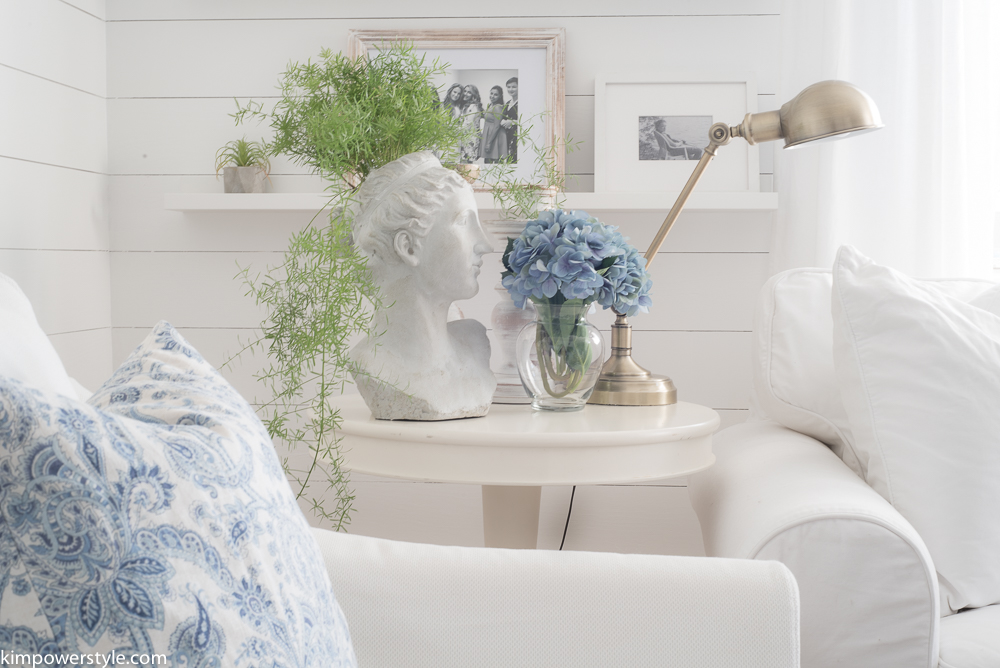
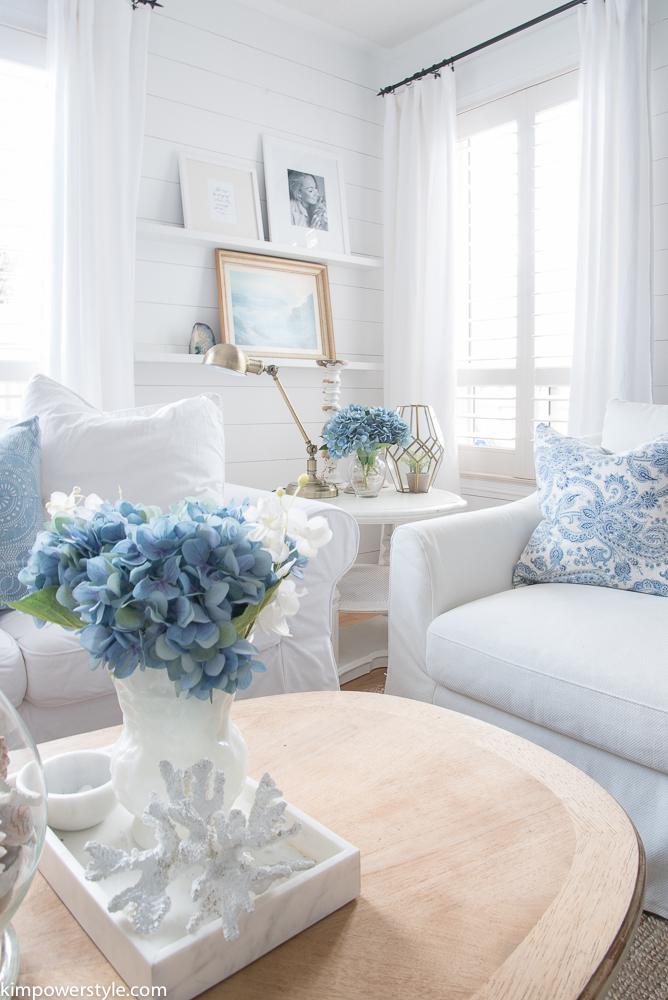
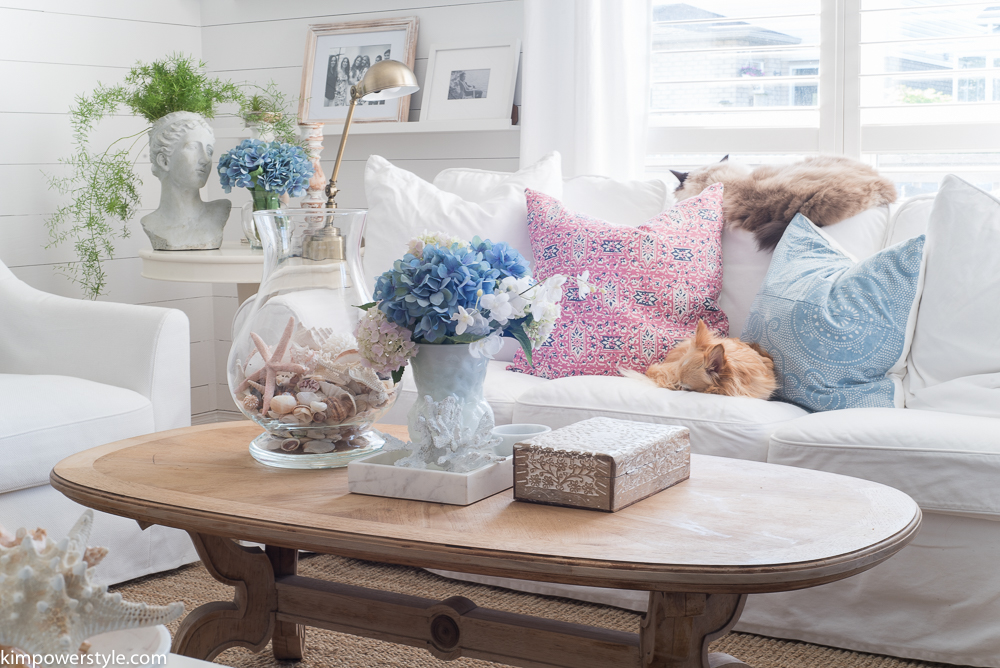
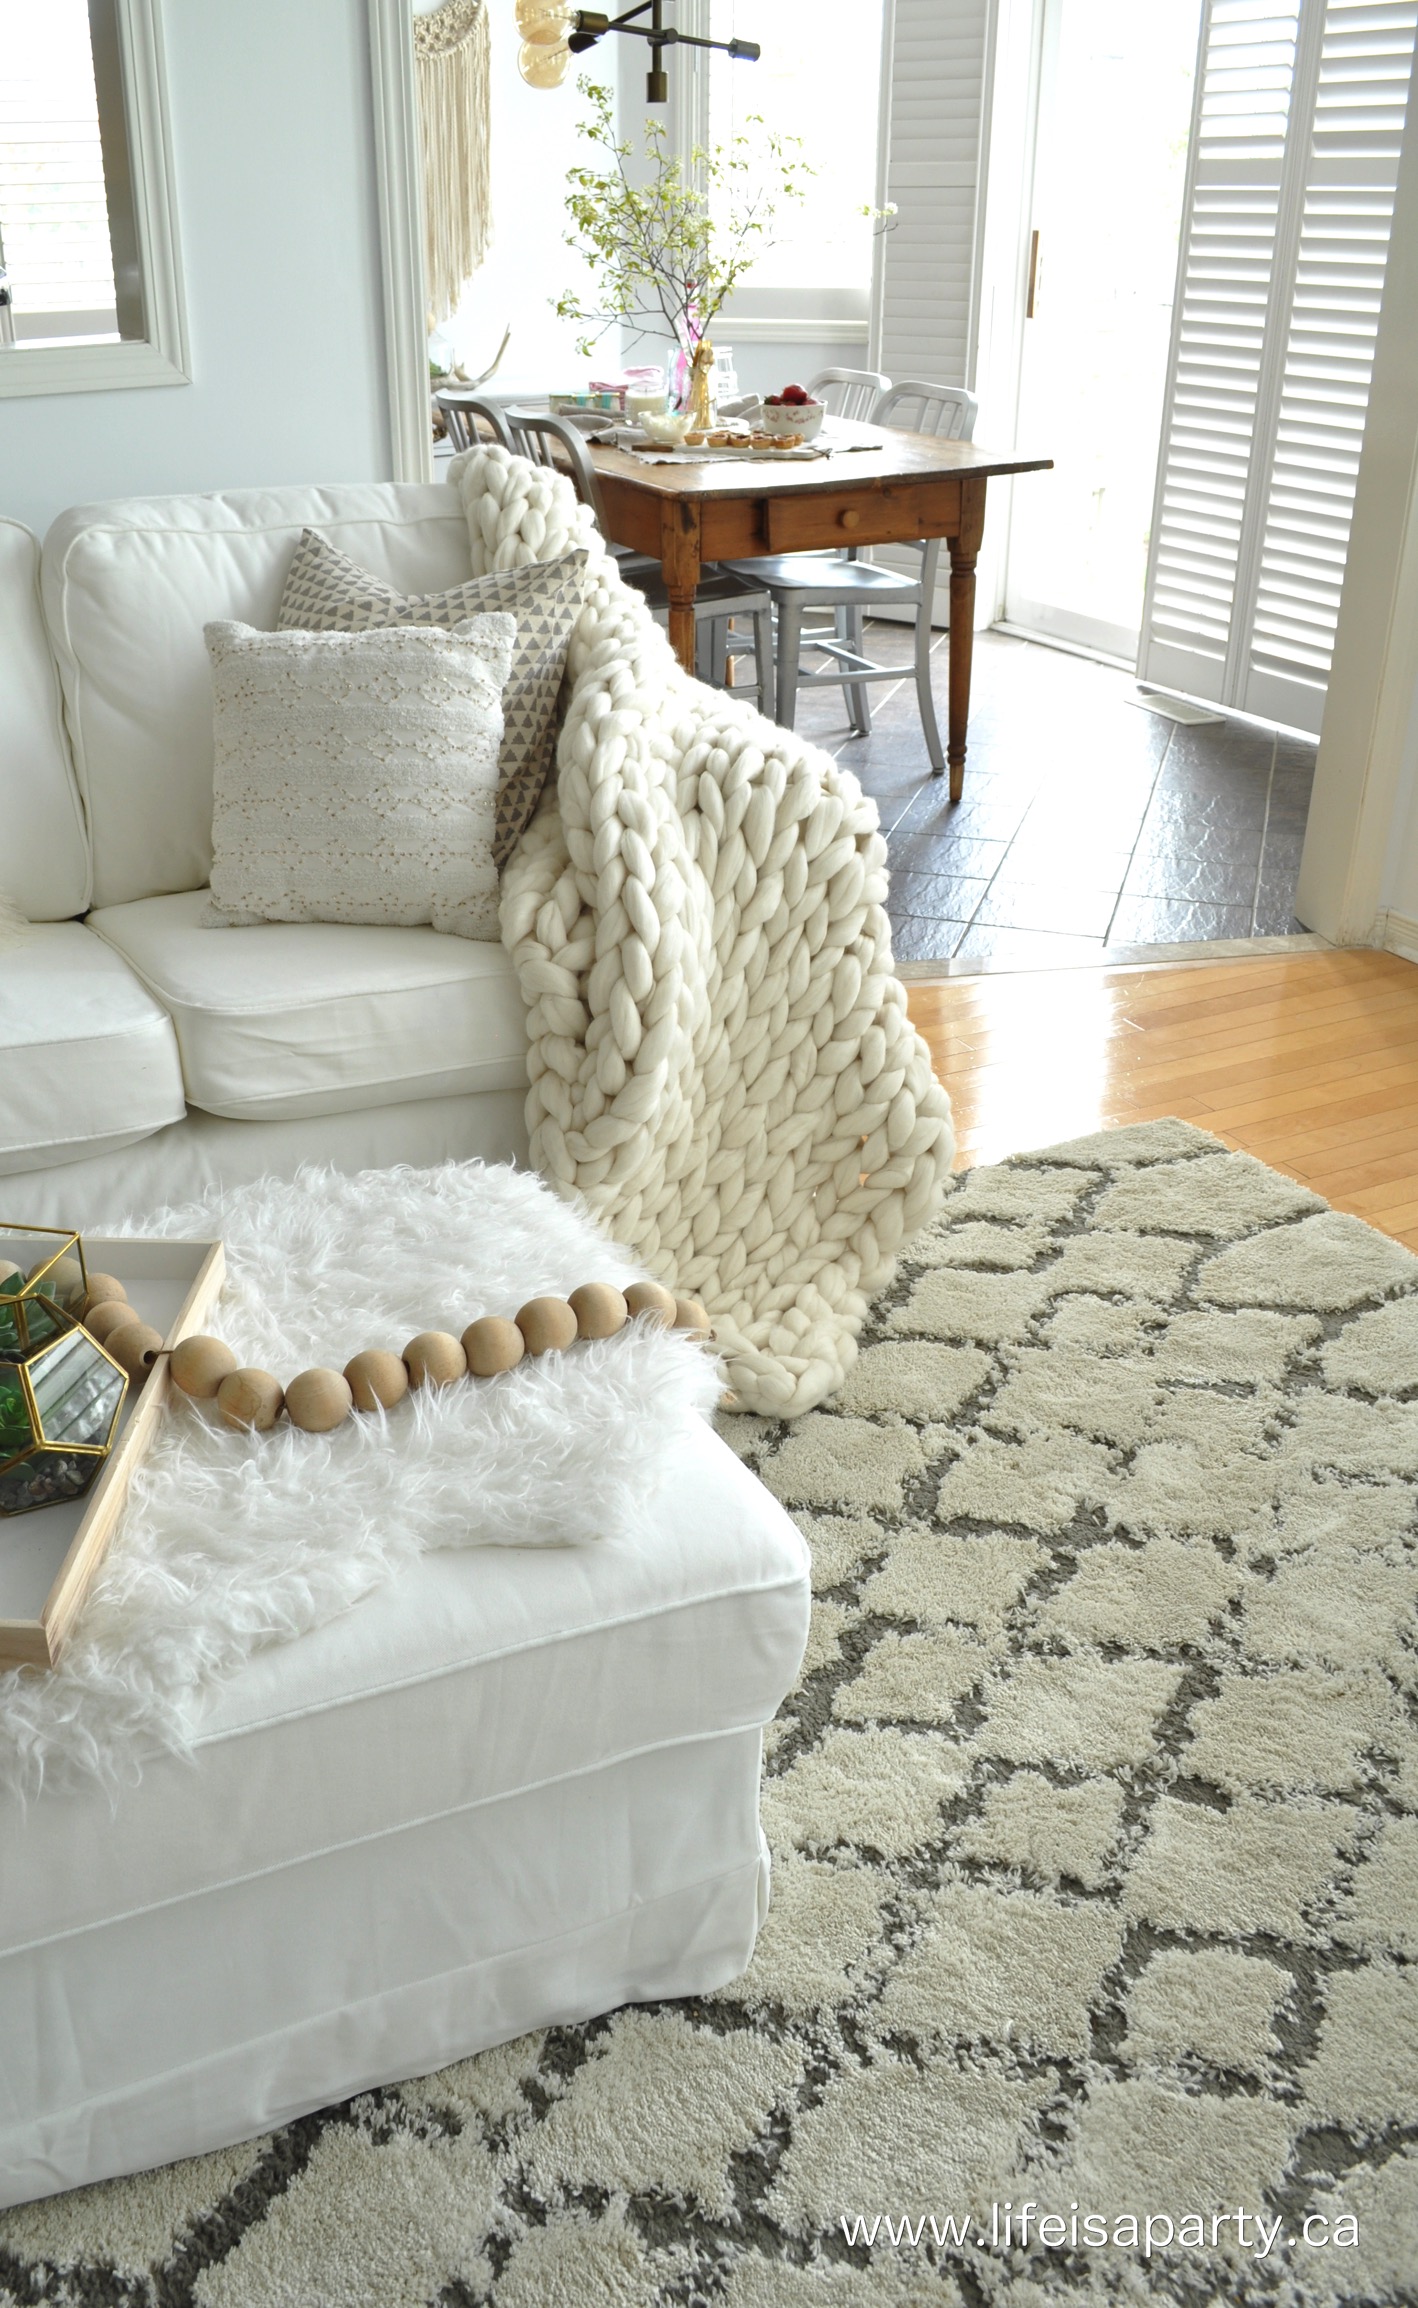
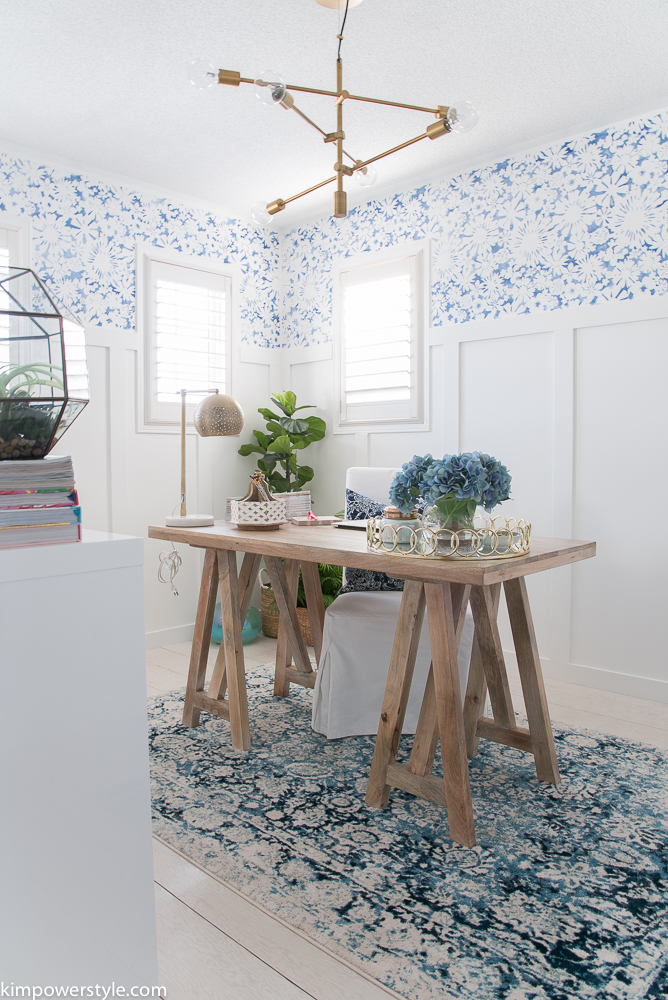
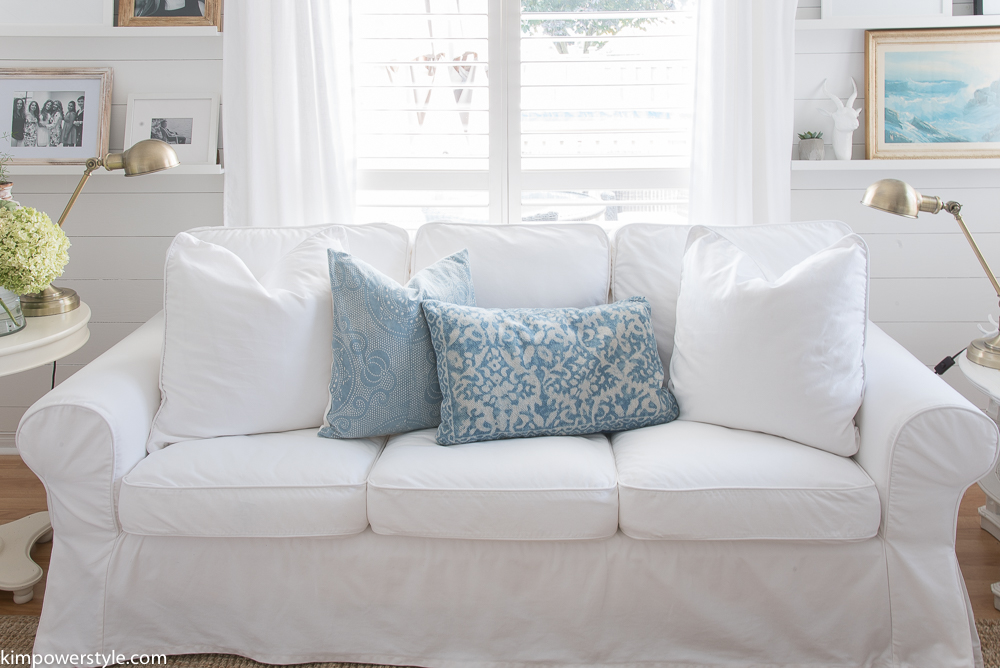
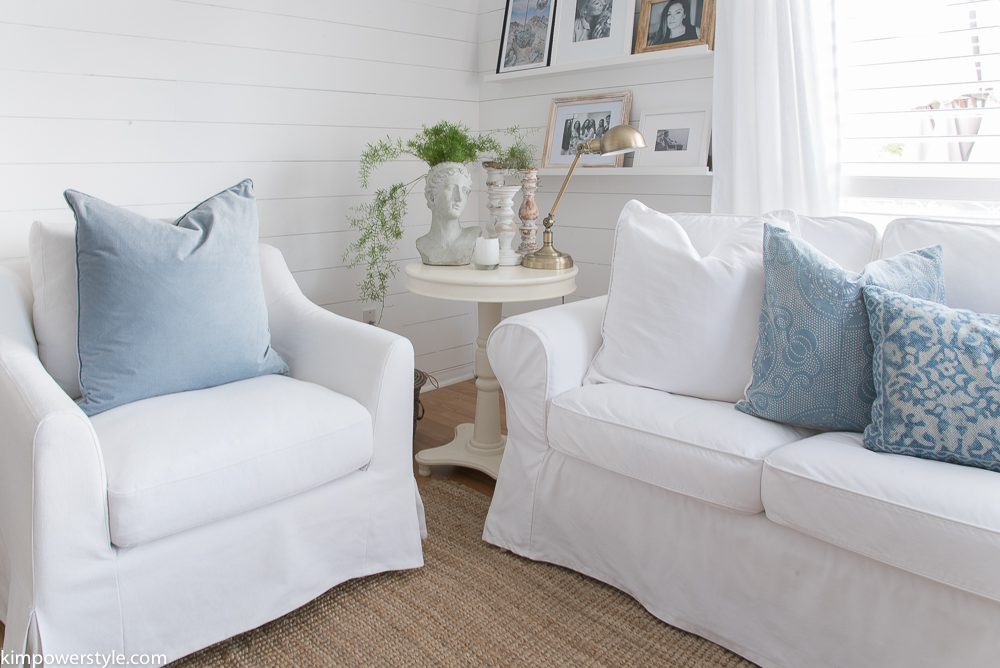
My sofa is from the Ektorp series and has the ” Vittaryd White” Slipcover.

Care instructions from IKEA:

Removable cover
Machine wash, warm, normal cycle.
To be washed separately.
Do not bleach.
Do not tumble dry.
Iron, high.
Dry clean any solvent except trichloroethylene.
Product description
65 % polyester, 35 % cotton
How to clean IKEA slipcovers
My armchairs are from the Farlov series and  have the “Flodafors White” slipcovers.
Care instructions from IKEA:
Removable cover
Machine wash, warm, normal cycle.
To be washed separately.
Do not bleach.
Do not tumble dry.
Iron medium temperature, max 300°F/150°C.
Iron on reverse side.
Dry clean any solvent except trichloroethylene.
Product description
59.5 % cotton, 24 % polyester, 16.5 % linen
I bought these Farlov Armchairs last March and I’ve washed them recently for the first time. I think they turned out great. I’ll share how I did both the farlov and ektorp covers.
                                                                                      How to clean IKEA Slipcovers
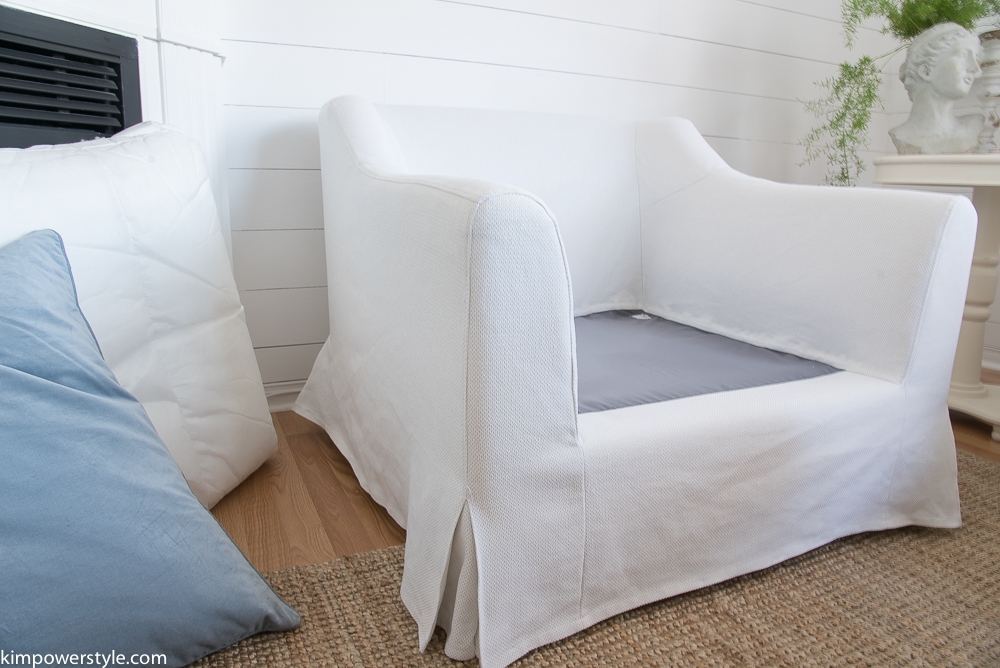
  1.  I Always start by removing the main cover first and get that in the machine.  While thats washing I’ll start  wrestling with the seat cushions. I like the main cover to be the first piece on after the wash. (I start this process in the evening so that the covers have time to dry overnight.)How to Clean your IKEA Slipcovers
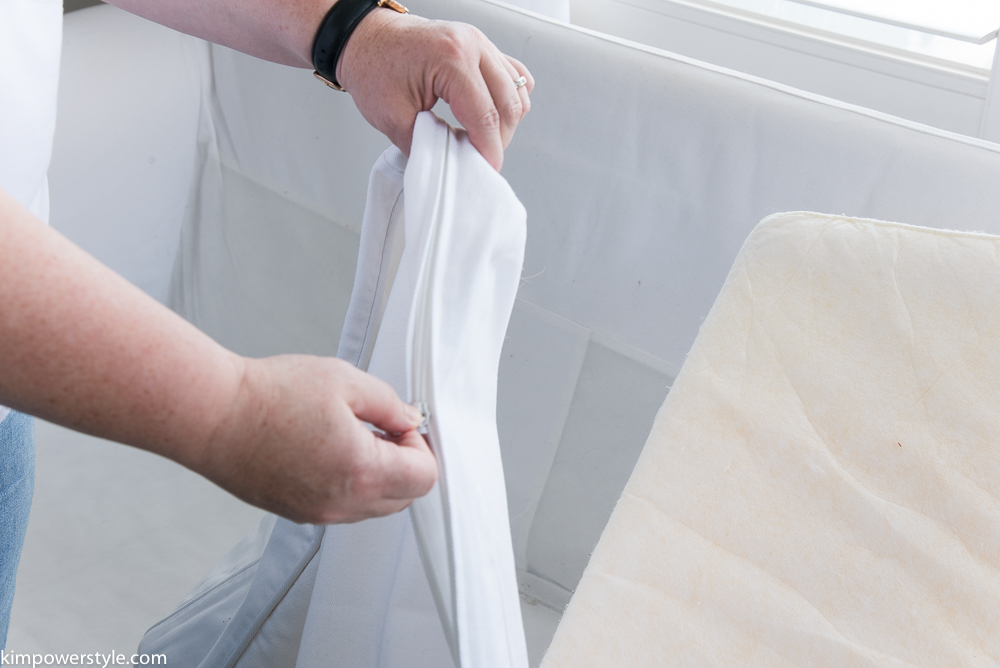
  2. Remove the seat covers.  This is not an easy feat and the whole darn process is like doing a workout to tell you the truth. But like all workouts, worth the effort when you’re done!untitled-6127
  3. After I remove the covers, I always do up the zippers before washing. It just helps to prevent them from getting caught up and becoming damaged.How to Clean your IKEA Slipcovers
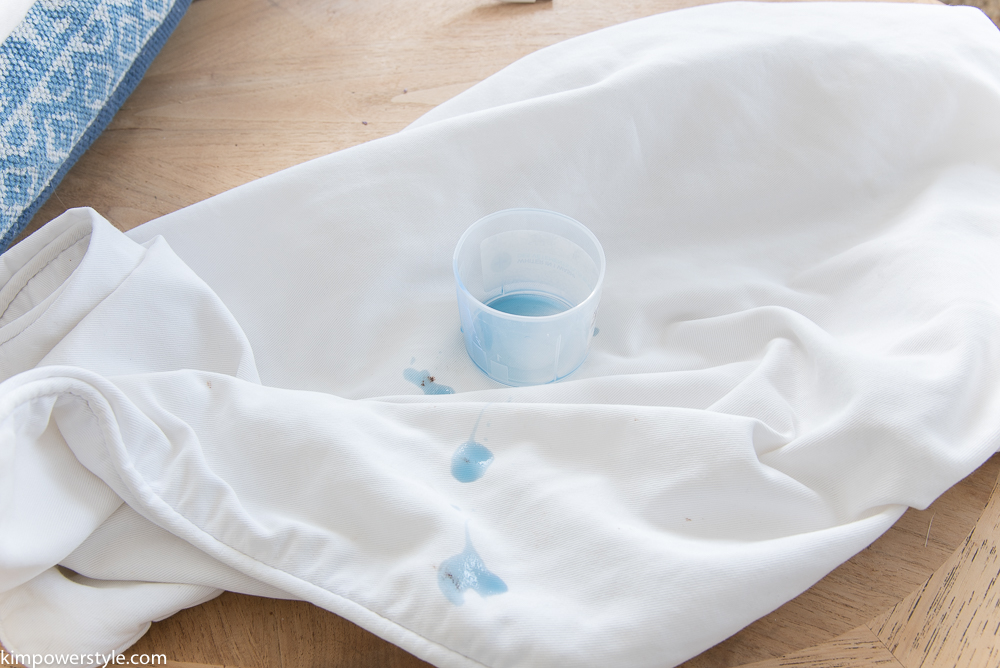
  4. Next, I will do spot treatments if needed. I use the same detergent I use to wash the covers as I do to spot treat. I knew that chocolate fell somewhere!How to Clean your IKEA SlipcoversHow I clean my IKEA slipcovers
  5. If you’ve read the IKEA instructions they say not to use bleach and I  very rarely do. I find it’s very rough on fabric. Usually I place the recommended amount of detergent and oxi-clean in my front loader first and then add the slipcovers. I wash it in a normal wash cycle but add an extra rinse to make sure they’re as white as can be.
  6. This is where I’ve added my own spin to how to wash Ikea slipcovers. (This step is contrary to the IKEA instructions and you do so at your own risk!) After the covers are washed, I remove them from the washer and give them a good shake. Then I will put them in the dryer for 2-5 minutes! I put them on timed dry and check after 2 minutes. I’m basically letting the covers barely come to a warm. This works every time to relax the fabric. I do not leave them in any longer than that even if the dryer doesn’t feel warm. Any longer than that and you run the risk of your covers shrinking! Which they will and you will not be able to fit them back onto your furniture!
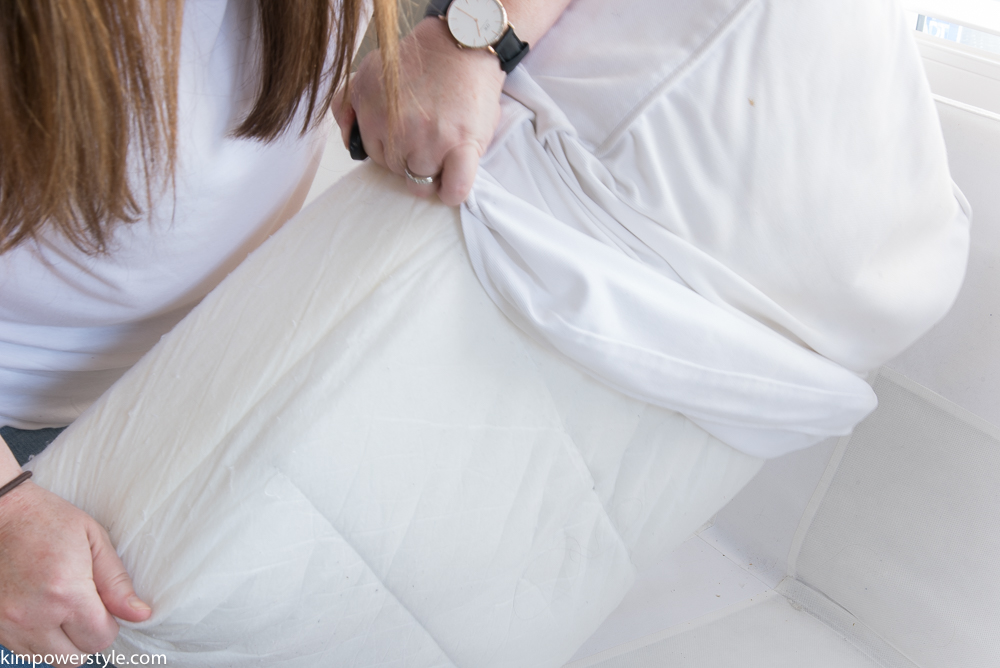
  7. I quickly take them out, shake them again and race them upstairs. If its the cushion covers, I’ll lay them smoothly over the kitchen chairs while I put them on one at a time. If it’s the main cover, I get that sucker on asap and begin my smoothing process.
  8. Lastly, I put the cushion covers back on and begin to smooth and stretch them out with my hands. This helps get out the wrinkles. It’s kinda like ironing with your hands!

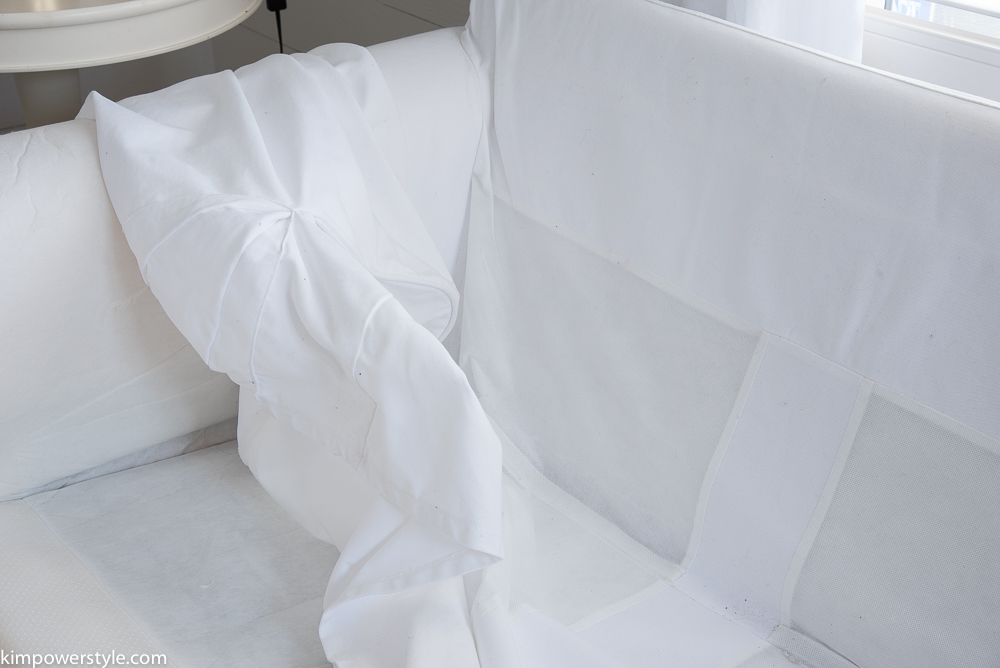
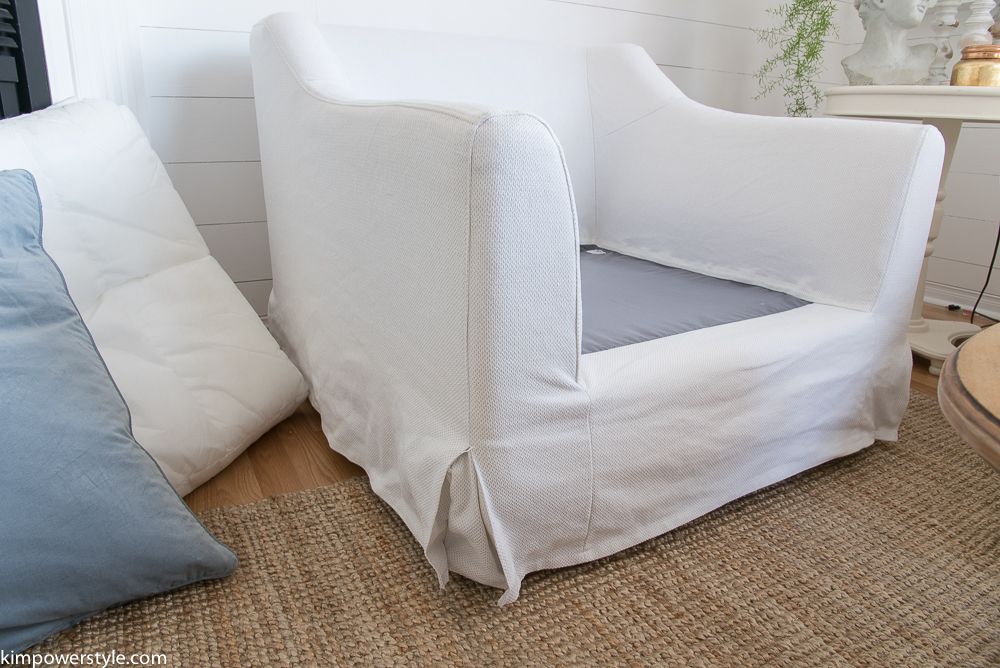
This is before I do my “hand ironing”, notice the bottom of the slipcover:

How I clean my IKEA slipcovers

My hand ironing thingy:

I bought these Farlov Armchairs last March and I've washed them recently for the first time. I think they turned out great. I'll share how I did both the farlov and ektorp covers.

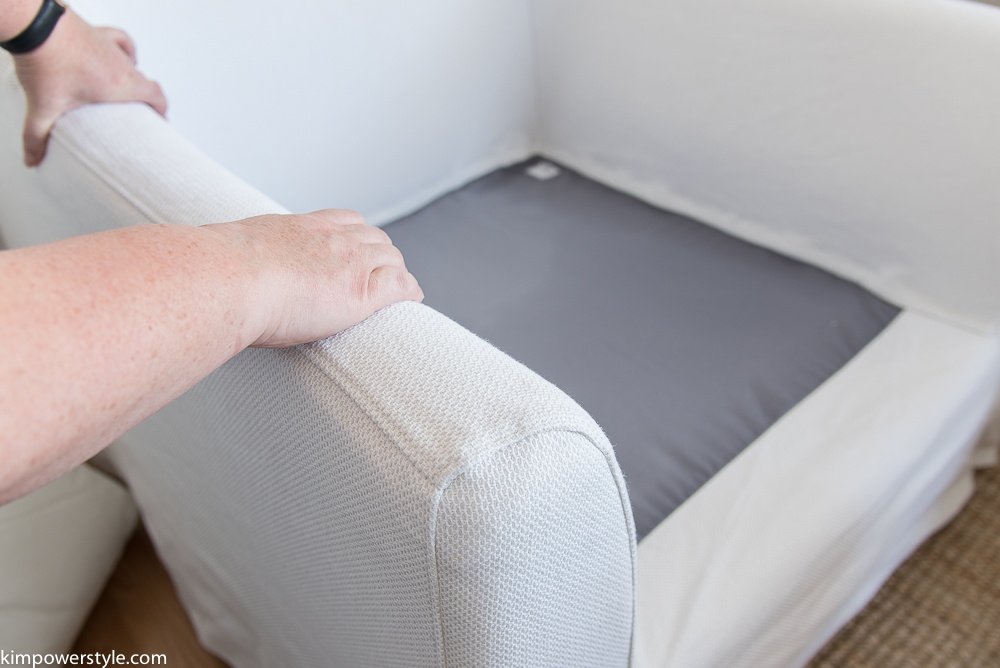
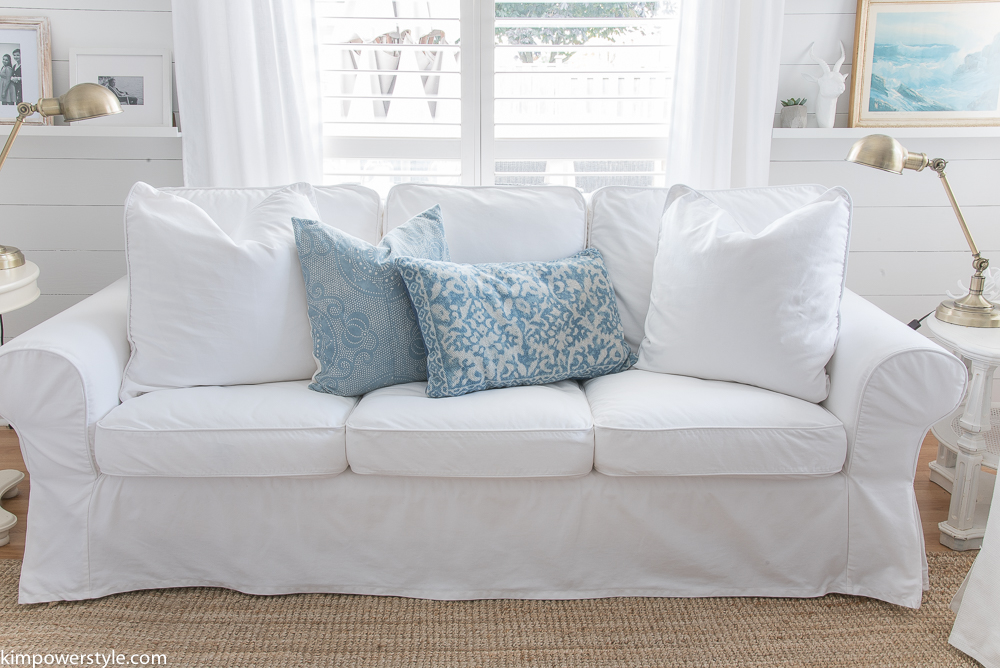
This is the after, notice the bottom wrinkles are almost gone:

I bought these Farlov Armchairs last March and I've washed them recently for the first time. I think they turned out great. I'll share how I did both the farlov and ektorp covers.

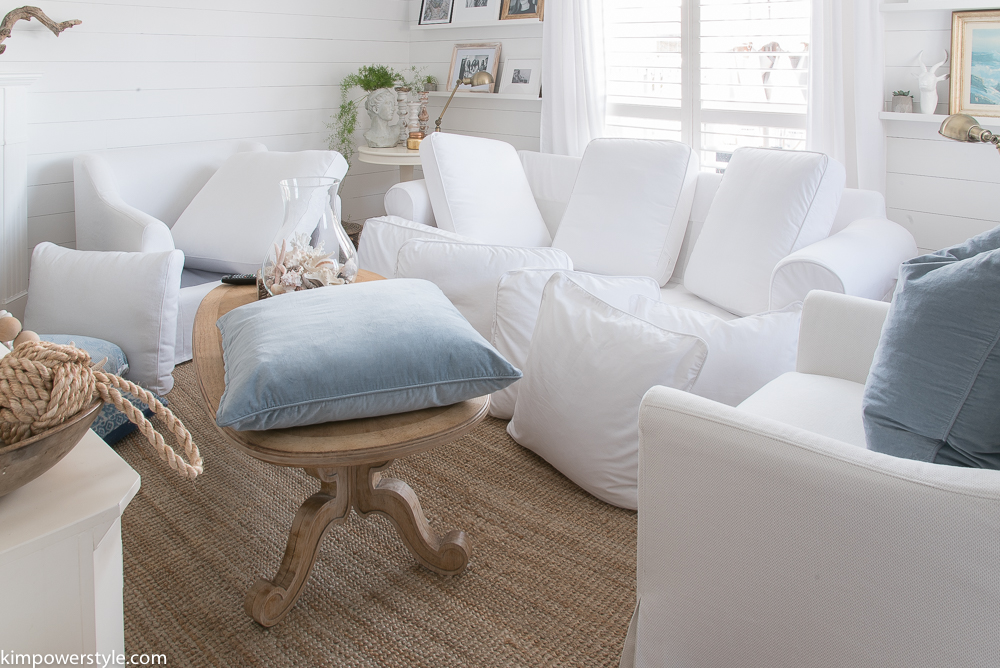
Now that the covers are all on and smoothed out I place the cushions all around so that they stay smooth and they can dry evenly all around. It’s a bit of a mess and that’s why I do it in the evening. By the morning everything is dry and has stayed wrinkle free! Simply put the cushions back together and your good for another few months!

How I clean my IKEA slipcovers

How I clean my IKEA slipcovers

How to wash IKEA slipcovers

I hope this tutorial on how to wash Ikea slipcovers has been helpful to you! There’s nothing like having clean and great looking slipcovers every few months.

Blessings,

Kim


Filed Under: Home decor, Tutorials

Coastal Farmhouse Finds From Amazon

3:10 pm by kim 3 Comments

If you’ve followed along with me for a while you’ll know that I’m an avid fan of the Coastal Farmhouse look. There’s just something about the light, bright airy and sea washed look that calls to me. Whats not to love about coastal shades of  blues, sandy whites and  taupes interspersed with gorgeous faded driftwood and dreamy hydrangeas. For whatever reason, Coastal  with the right touch of Farmhouse is my first love when it comes to decorating.

For those of you who have wondered how to go about achieving this look, I’ve created a roundup of some of my favourite Coastal Farmhouse go-to’s. All of these items can be found on Amazon and I’ve provided you with affiliate links below so you can shop the look!

(Below are affiliate links.)

Coastal Farmhouse Finds from Amazon

Coastal Farmhouse Collage


1.Ektorp 3 seater replacement slipcover in white | 2. Indigo blue throw pillow | 3. Wooden candle sticks | 4. Large seagrass basket | 5. Jute Rug  | 6. Artificial silk hydrangeas | 7. Wood coffee table | 8. Blue floral ginger jar | 9. Blue ticking throw pillow

I have all these items (or very similar) and they have been the basics that help me create this look in my own home.

  • Neutral furniture makes it easy to throw on any colour and style of pillow, while slipcovers give a relaxed feel and they’re easy to clean.
  • Pillows to pile on and add colour, coziness and comfort.
  • Candlesticks with pale wood that reminds you of driftwood you’d find along the beach.
  • Wicker baskets and jute rugs that bring in a relaxed feel and texture.
  • Hydrangeas whether real or faux especially in blue reminds me of gorgeous houses in the Hamptons.
  • Coffee tables with more pale driftwood like wood.
  • Blue and white anything, especially these gorgeous ginger jars.

I hope this has made it a little easier for those of you who are trying to achieve this look. If you have any questions, leave them in the comments and I’ll get back to you.

To receive these posts straight into your inbox simply subscribe! You can also join me on Instagram and Pinterest for more Coastal Farmhouse inspiration.

Blessings,

Kim


Filed Under: Home decor

Easy Mexican Pico de Gallo

2:41 pm by kim 4 Comments

I’m sharing one of my favourite’s with you today folks. It’s a basic, Easy Mexican Pico de Gallo recipe. If you’ve never made this before, prepare yourself because you’re in for a real treat! This Pico de Gallo can be used for everything from topping on your chips to toppings on  fish, chicken and eggs.  Whenever I’ve gone to Mexico, It’s on my plate with every meal. I’m using it on my turkey breast and ciabatta sandwich right now!

You can make this anytime but it’s especially good when tomatoes are fresh from the garden! I love all the fresh colours that make up this wonderfully versatile dish.

Easy Mexican Pico de Gallo

Easy Mexican Pico de Gallo

Let me start off by saying that this is the basic Mexican recipe. You can add whatever else catches your fancy! Also, these measurements are reflective of how I like my Pico de Gallo to taste. If you like more heat, add more jalapeño peppers. If you don’t like cilantro, omit it. If you like lots of tartness, add more lime juice etc. This dish is customarily chopped by hand but you can use a food processor if you like. Plum tomatoes are more meaty and firm but you can try other types as well. For this recipe I used vine ripe tomatoes that were on sale. This dish can be made a few hours ahead of time and can be eaten within 24 hours. However, I’ve kept it for longer and once you drain off the liquid  that can accumulate (I actually drink that stuff much to the chagrin of my daughters) It still looks and tastes great!

Easy Mexican Pico de Gallo

You’ll need:

  • 4-6 Plum tomatoes, diced
  • 1 small red onion or 1/2 a large one, minced
  • 1/2 a bunch of cilantro, finely choppped
  • 1/2 a jalapeno pepper, seeded and finely chopped
  • 3 cloves of garlic, minced
  • juice of 1 lime
  • salt and pepper to taste

Easy Mexican Pico de Gallo

Place all your ingredients into a bowl and mix together adding salt and pepper to taste. You can use it right away or wait an hour or two for all the delicious flavours to meld together.

Easy Mexican Pico de Gallo

Easy Mexican Pico de Gallo

You can use it with tortilla chips or top it on your favourite foods.

Easy Mexican Pico de Gallo

 I hope you get the chance to make this dish. I think you’ll really enjoy it!

Thanks so much for stopping by! To see more and to receive these posts straight to your inbox, Just click the box on the right and subscribe. You can always find me on Instagram, and pinning away on Pinterest.

Blessings,

Kim

Filed Under: recipes

Driftwood Candle Holder Tutorial Redo

2:22 am by kim 6 Comments

 Driftwood Candle Holder Tutorial Redo

One of the first projects/tutorials I did when I first started my original blog “Restoration House”  was this Driftwood Candle Holder tutorial. That was seven years ago and I still have my original piece! This is such a simple and easy project to do and literally only takes minutes and makes a bit impact! I’ve also included a wooden post I had cut into 3 foot lengths to show you that you can use practically anything made out of wood and turn it into a candle holder. You can find the original tutorial here.

Simple & Easy Candle Holder Tutorial

Here is my original piece and my favourite, I love the organic shape of it. This one was made with a 1.5″ spade bit which is the perfect size for tea lights.

Driftwood-Candle-Holder-Tutorial

Driftwood-Candle-Holder-Tutorial

You’ll need:

  • A piece of driftwood or wood that is at least 1.5″ thick.
  • Drill
  • Spade bits. They come in many different sizes and are used according to the size of the candle you want to use.
  • Sandpaper to sand off any bits from around the holes.
  • The candle of your choice.

Driftwood-Candle-Holder-Tutorial

For my tapered candles I used a 3/4″ spade bit which was a little small but I was able to whittle the candle bottom to fit snuggly. The 7/8″ was a little too big and I want the candles to be snug so they don’t fall over.

Driftwood Candle Holder Tutorial

Because driftwood is an organic shape, you have to lay it down on the floor so it levels itself out. Every piece will lie differently.

Driftwood Candle Holder

Once it’s level, decide how many candles you’d like and how far apart  you’d like them to be. If you need to, you can get a measuring tape and mark your places. I just eye balled it.  You will drill straight down so that your candles will stand level. You can drill down to an inch depth or more if you’re using tapered candles. Tea lights should only go as deep as the candle itself to avoid fire hazards. (I would suggest using faux tea lights, they make such pretty ones now and it’s much safer!)

Driftwood Candle Holder

Driftwood Candle Holder

I drilled down about an inch. If you need to you can place some tape on your spade bit to mark how far your bit needs to go.

Driftwood Candle Holder Tutorial

You may need to sand around the edges for any jagged pieces. I found the harder the wood the more sanding was needed. You can see that the new wood piece needs more sanding.

driftwood candle holder tutorial

My holes were slightly smaller than my candles so I had to whittle down the ends so that candle ends fitted in really snuggly. You don’t want your candles wobbling around!

Driftwood Candle Holder Tutorial

Driftwood Candle Holder Tutorial

Driftwood Candle Holder Tutorial

Driftwood Candle Holder Tutorial

Driftwood Candle Holder Tutorial

I found a wooden post at my local HD and had it cut into 3 pieces. You can stain or paint your wood to suit your needs. I left mine natural. You can also use larger spade bits and make a pen/pencil holder. There’s no end to what you can create.

Driftwood Candle Holder Tutorial

Driftwood Candle Holder Tutorial

Driftwood Candle Holder Tutorial

Driftwood Candle Holder Tutorial

untitled-5646

Safety Precautions:

  • I have real tea lights in the candle holder above but I would suggest using the little faux ones. It really is much safer. Driftwood by nature is extremely dry and can ignite so quickly! I’ve heard from others how this has happened.
  • Make sure your tapered candles are in snuggly if you’re using real ones.
  • Never, ever leave candles burning unattended!

A Driftwood Candle Holder Tutorial

I’m hoping that you will give this a try, it really is quite easy and can be done in minutes!

Thanks so much for dropping by! If you haven’t already done so, subscribe so you don’t miss a post, they’ll go straight to your inbox!

Blessings,

Kim

Filed Under: diy, summer, Tutorials, Uncategorised

Canada Day Celebrations and a Simple Summer Sangria!

6:00 am by kim 8 Comments

Canada Day Celebrations and a Simple Summer Sangria!

Canada Day Celebration and a Simple Summer Sangria

Canada-Day-Celebration-and-a-Simple-Summer-Sagria

On July 1st, we Canadians will be celebrating Canada’s 15oth birthday! So that means lots of Canada Day family and friend get togethers to celebrate this amazing country that we live in. There will definitely be a sense of national community happening across the nation. My little shore community already has flags outside our homes and some of the streets will be lined with tiny little maple leaf flags and lots of parties going on. You can check out my previous Canada Day Post here.  This fits right in with our #YearofFeasting as I, along with 5 other bloggers get intentional about opening up our hearts and homes and inviting others to feast together with us no matter the occasion.

Canada Day Celebrations and a simple summer sangria

I love pot-luck get togethers where everyone pitches in and brings their share of the food. It takes a huge burden off of the host and other people’s food always taste better, (probably because I didn’t have to make it;) ) This year I’m in charge of the drinks, so I’ve set everything up and will mix it all together before everyone arrives. I’ll have a tasty simple Summer Sangria, pre-made jug of Ceasars, Cold beer, and a mix of different lemonades. I’ve set up the table in the nook where people can grab their drink and a  beach towel and head on outside. I found these Canadian flag beach towels at Giant Tiger. I rolled them up and placed them in a basket, which makes it convenient for everyone to grab and run.

Canada Day Celebration and a Simple Summer Sangria

Before I mixed the drinks I brought everything outside to make it more convenient and accessible for guests to go back and forth for fill ups! To decorate I  used some Canada flag bunting and strung it up along this room divider. I found some glass lanterns with rope handles at Giant Tiger and filled them with candles. I also found these sweet little mason jar cups complete with straws along with a Canadiana plastic tub that I  filled with ice to keep beverages chilled. My favourite find was this great glass jar to mix my sangria in where everyone can help themselves. The bottom can be removed and used as an ice bucket, but I liked having the spout a little higher so you can place your glass under it. Giant Tiger is a great go-to shop for budget friendly decor and food!

Simple Summer Sangria:

  • White Wine 750ml.
  • Orange liqeur 25oml.
  • 2 Limes sliced
  • 2 Lemons sliced
  • 1 Orange sliced
  • 1 cup Strawberries
  • 1 cup Raspberries
  • 1/4 cup of Sugar (optional)
  • 4 cans of San Pellegrino Limonata

Canada-Day-Celebration-and-a-Simple-Summer-Sangria

First add your white wine. I chose my favourite Chilean wine.

Canada-Day-Celebration-and-a-Simple-Summer-Sangria

Next add your orange liqueur, I chose triple sec.

Canada-Day-Celebration-and-a-Simple-Summer-Sangria

Next add all your fruit and berries. You can add any fruit or berries that you like here. I just find that a citrus base is always light and refreshing. At this point if you wanted to make this ahead of time, you can add the sugar and then chill it in the fridge until you’re ready to serve.

Canada-Day-Celebration-and-a-Simple-Summer-Sangria

Lastly, you add your lemon drink. You can add any sweet bubbly/carbonated drink of your choice here. Including, soda water, ginger ale, fresca etc. This step should be done right before you serve so that your bubbles don’t go flat. Sangria is so tasty and just screams summer to me!

Canada-Day-Celebration-and-a-Simple-Summer-Sangria

I also cut up a bowl of the fresh fruit and berries so guests can add more to their individual drinks. As you can see, it was hot out and I already started partaking of this tasty refreshing drink! 😉

CaCanada-Day-and-a-Simple-Summer-Sangria

I also had lots of refreshing lemonades for people who wanted a non-alcohol alternative.

Canada Day and a Simple Summer Sangria

Making a spicy jug of Caesars (or Bloody Marys) is an easy way to make everything ready and available so  your guests have lots of refreshing and tasty options to try.

Canada-Day-and-a-Simple-Summer-Sangria

I hope you all get the chance to join with friends and family to celebrate Canada Day or The Fourth of July for my American friends! Whatever excuse you need to celebrate and feast on life together, do it!                 Be sure to check out my friends below for more Canada Day inspiration as they join in on the Canada Day  #YearofFeasting fun.

Blessings,

Kim

Disclosure: This post was sponsored by Giant Tiger. All thoughts, opinions, photography and fun are my own! Thanks for supporting the brands that make KimPowerStyle possible!


Life is Party

Personally Andrea

Flourish and Knot

Learner Observer

Kim Power Style

Woman In Real Life

Canada Day Celebration

Filed Under: recipes, summer

An Easy Stamp DIY for Canada Day

4:29 pm by kim 4 Comments

An Easy Stamp DIY for Canada Day

Hi everyone! Today I’m sharing the eeaassiest DIY that you can do by yourself or with your kids. It literally took me ten minutes! It’s an easy stamp DIY for Canada Day.

This July 1st we will be celebrating Canada’s 150th birthday, so it’s a pretty big day for those of us up North! I thought I would share a little DIY anybody can do to help with our holiday decorating. There are so many great celebrations going on and our neighbourhood is very big on showing our Canadian pride so most porches/verandas will be decked out. I always have some pillows on my muskoka chairs on the porch so I thought I’d get festive with some Canadiana ones.

Canada Day DIY

I picked up some plain white cushion covers from IKEA for $4.99 each. I found some fabric paint at Michael’s Craft Store and I had a potato. I cut my potato in half and then cut out my rendition of a maple leaf. Next you grab some cardboard to put inside your cushion cover to prevent the paint from leaking through and to give you a nice flat surface to stamp on.  I put some fabric paint on a foam plate and dipped my potato into it. It really is that easy. I just freehanded where to place my leaves.

Canada Day DIY

Canada Day DIY

Canada Day DIY

The beauty of this DIY is that it doesn’t have to perfect…Right up my alley! The fact that your leaves all have the same shape gives it a uniformity that makes it look cohesive and put together. Great for anyone to try. The possibilities of what you can stamp on your pillow are endless.

Canada Day DIY

Canada Day DIY

Pretty easy to do right? I’m coming up with all kinds of things I could stamp on fabric now! 😉

Special thanks to Lucy at Craftberry Bush for hosting this blog hop. Now you can check out some more of my favourite bloggers below and see all of their wonderful Canadian Celebration Ideas!

An InLinkz Link-up


Filed Under: diy, summer, Tutorials

Simple Coconut Lavender Salt Scrub

8:31 pm by kim 5 Comments

A Simple Coconut Lavender Salt Scrub DIY

I’m sharing a quick and simple DIY Coconut Lavender Salt Scrub with you today. This is an easy to do scrub with things you probably already have in your home. You really don’t need a big bunch of dried lavender 😉 or essential oils. I’ve made this in under a minute running out to the gym by throwing in some salt and a handful of coconut oil into a plastic baggy..so no excuses!

A Simple Coconut Lavender Salt Scrub

You’ll Need:

  • Organic Coconut Oil
  • Epsom Salt
  • Lavender (optional)
  • Lavender Essential Oil (optional)
  • Measuring cup
  • Container to put your scrub in
  • Mortar and Pestle (If you’re grinding up herbs/flowers etc.)
  • Mixing bowl
  • Mixing spoon

A Simple Coconut Lavender Salt Scrub

I chose to use lavender because I love the scent and I happened to have a bunch of dried lavender. As I mentioned before, you really don’t need to add anything but the coconut and epsom salt to use this as an effective body scrub.

A Simple Coconut Lavender Salt Scrub

If you’re using lavender or other herbs. You can grind them up as fine as you’d like. Remember, you will be slathering this all over your skin so you don’t want it to to be too rough!

A Simple Coconut Lavender Salt Scrub

I mixed in 3/4 cup of coconut oil to every 1 cup of epsom salt. You can always change this up to whatever suits you. I also like the coconut oil to be in a solid form as it’s much easier to use.

A Simple Coconut Lavender Salt Scrub

untitled-5011

I added a tablespoon of the dried lavender. Once again, you can add as little or as much as you’d like.

A Simple Coconut Lavender Salt Scrub

A Simple Coconut Lavender Salt Scrub

I added ten drops of lavender essential oil to my batch. You can add more or less according to how strongly you want it scented

A Simple Coconut Lavender Salt Scrub

Now you can give it a good stir. This may take a  couple of minutes to incorporate all the ingredients together.

A Simple Coconut Lavender Salt Scrub

I used these little jars I found at the dollar store, they’re cheap and  you can make them air tight. They also make cute little containers if you’re giving them away as gifts.

You can now decorate them with labels, ribbons etc.

A Simple Coconut Lavender Salt Scrub

Simple Coconut Lavender Salt Scrub

A Simple Coconut Lavender Salt Scrub

How simple was that! I hope you try and make your own.

Blessings,

Kim


Filed Under: diy, Tutorials

Joyful Summer Home Tour 2017

6:00 am by kim 44 Comments

Joyful Summer Home Tour 2017

Welcome to our Joyful Summer Home Tour! I’ve joined together with eight other amazing bloggers to share our homes all dressed for summer! You can follow along with all the other tours by clicking on the links at the bottom of this post. Now grab a drink, sit back and enjoy!

 Joyful Summer home tour

We love the coastal feel in our home. My parents were born on an Island, so I guess its in my blood. We also live in a lakeside community which all naturally lends itself to a coastal vibe in our decor. I’m drawn to the soft colours of watery blues and sandy neutrals. I just find it all very calm and soothing, much like being on the shore with the waves coming in.

(Some products have been sponsored, all thoughts, opinions and photography are my own)

Summer Home Tour 2017

If you’ve followed me for a while, you’ll know that I love blues and hydrangeas. So it’s not a far reach to go coastal! I simply added some seashells in a large vase, coral, some blue ginger jars and my driftwood candle holder on the mantel.

Summer Home Tour 2017

I got these gorgeous “Cordoba” pink  and “Chinese Batik” blue pillows on the sofa from Danielle Oakey Shop. I simply adore all her beautiful pillow covers and they’re so well made too.

Summer Home Tour 2017

Summer Home Tour 2017

Summer Home Tour 2017

Summer Home Tour 2017

Summer Home Tour 2017

I picked up that little picture of Peggy’s Cove in Nova Scotia, from a thrift store. It goes so well in the room.

Summer Home Tour 2017

Summer Home Tour 2017

Summer Home Tour 2017

The driftwood candle holder was one of the very first projects I did when I first started blogging seven years ago. I love the quirky shape and how I managed to get tea lights all along  it.

Summer Home Tour 2017

Summer Home Tour 2017

Summer Home Tour 2017

Summer Home Tour 2017

Summer Home Tour 2017

The last shot of this room and the boys have already been all over the cushions and couldn’t wait to take a nap!

Shop the Living Room/Get the Look

[show_shopthepost_widget id=”2714341″]

Summer Home Tour 2017

From our cozy living room we go into the breakfast nook. I love these little hooks and they’re the greatest for hanging decor and a aprons etc.

Summer Home Tour 2017

When I’m preparing a meal or having people over, I prefer to do a buffet. I find it so much easier and relaxed  and less stressful than setting a table.

Summer Home Tour 2017

I already had the hydrangeas and picked some wildflowers in the park on my way home from the shop. It made for a lovely bouquet.

Summer Home Tour 2017

I set the table and used a linen curtain panel for a table runner. Use whatever you have on hand.

Summer Home Tour 2017

I love these blue floral pillows! They are such a classic pattern and they fit well with my salad plates too!

Summer Home Tour 2017

Shop the Nook/Get the Look

[show_shopthepost_widget id=”2714360″]Sources:

Pillows on Sofa, Danielle Oakey Shop

Sofa and Chairs, IKEA

Basket, Paisley Pillows, Throw, Homesense

Dining Chairs, IKEA

Table,Thrift find

Blue Floral Pillows, Market Bag,  Penney & Co.

Dinner Plates, Placemats, Wine glasses, IKEA

Salad Plates,Gold Cutlery, Pier 1

Water glasses, Urban Barn

I hope you enjoyed the tour! I’ll be sharing Part two soon so be sure to subscribe and don’t miss a post! Don’t forget to check out my friends and their tours for some amazing summer decor, the links are below.

Blessings,

Kim

Wednesday, May 31st
Kate – White Lane Decor
Lisa- Farmhouse On Boone
Natalie- My Vintage Porch 
Thursday, June 1st
 
Laura- Meaningful Spaces
Stephanie- Belle Amour Blog
Marci- Lemons to Lovelys
Friday, June 2nd
Hayley- A House With Books
Jordon- Jordecor
Kim- Kim Powers Style 

Filed Under: Home decor, Seasonal tours, summer, Uncategorised

It’s Friday I’m in Love

4:56 pm by kim 6 Comments

It’s Friday I’m in Love

Hello everyone! I wanted to introduce you to a new series I’m starting called “It’s Friday I’m in Love”, where I share my weekly loves on Fridays. I’ve been planning this idea for months and have finally gotten around to doing It! I also managed to get through as many ORC shares as possible this week, so my first instalment of “It’s Friday I’m in love” series will be sharing my favourites/loves from the One Room Challenge. There were so many amazing contributions to the ORC but there were a few that really resonated with me. Whether it was because of the style, colour, transformation etc. these are the ones that caught my eye. I know that at least one of them will be a little surprising!

Beautiful ORC makeover by AKAdesign

Akadesign.ca

Shannon and her hubby Dean, from AKA Design absolutely outdid themselves on this kitchen remodel. It’s been one of my faves and I was so excited joining in every week to watch it all unfold and it certainly didn’t disappoint! It’s hard to pinpoint what exactly is my favourite element from their new kitchen but they kind of had me at the custom wood range hood cover…and the stainless steel apron front sink…the butcher block counters are pretty sweet too and I love open shelving! Lol, you get that I love it all right?

thediymommy.com

I love the transformation Christina from thediymommy.com made to this room that was previously a  pretty sitting room but not being used. She turned it into a totally usable dining space and I love everything from the fabric in the curtains to the gorgeous colour of the rug. Who wouldn’t want to linger at this table after a lovely meal?

Makingitinthemountains.com

Makingitinthemountains.com

When I first saw this farmhouse powder room by Kristi at makingitinthemountains.com, my heart skipped a beat! That gorgeous wooden vanity and mirror, marble, shiplap and barn door were all a delight for my farmhouse loving eyes. What a great use of space!

Almafied.com

Almafied.com

How gorgeous is this breakfast nook by Alma from Almafied.com? Alma is amazing at bringing gorgeous texture and colour together and maintaining bright and airy spaces. I always have the heart eyes whenever I see one of her beautiful rooms.

 Lifeisaparty.ca

Lifeisaparty.ca

Dannyelle from Lifeisaparty.ca did an amazing job on transforming her living room and eating area into this bright and airy scandinavian inspired space. Doesn’t this look so inviting? The before and after is incredible!

Simplicityinthesouth.com

Simplicityinthesouth.com

As soon as I saw Tricia from Simplicityinthesouth.com‘s guest shed I decided that I wanted to be the first guest in there! There are so many sweet details in this guest shed (can your really call this a shed?!) that you will immediately be calling Tricia to book a weekend away.

Kellyrogersinteriors.com

Kellyrogersinteriors.com

And for those of you who think I don’t love colour, how about this? Kelly from Kellyrogersinteriors had me at the blue Jenny Lind beds. I love the pink and that wallpaper creates such a great focal wall to place those beds against. The rug and light fixture are just the icing on this colourful cake!

Meaningulspaces.com

Meaningfulspaces.com

And lastly, Laura and her hubby from Meaningfulspaces.com did such a great job of taking a large two story space and making it appear cozy and inviting. By adding board and batten and this area rug, among a few other changes,  they totally transformed this room!

Well those are my favourites pics and choices for the first ever instalment of “It’s Friday I’m in Love”.  I’m sure that we all have our own favourites and some that just caught our eye for one reason or another. I’m  just so proud of everyone who entered the challenge, it can be a difficult process and we’re all winners! If you wanted to see my final reveal you can find that here!

Blessings,

Kim

Filed Under: Home decor, It's Friday I'm in Love, Makeovers, One Room Challenge™

One Room Challenge™ | Spring 2017 | Week 6 The Reveal

5:04 pm by kim 44 Comments

The One Room Challenge Final Reveal

Well the day has finally arrived for the One Room Challenge™  final reveal! It’s been a long, crazy  and busy six weeks for so many of us and now for the pay off! I’ve been working on making over an unused and dysfunctional office/workroom space into a  Modern Coastal Farmhouse inspired room that’s both functional and pretty. It’s been so much fun following the designers and other participants as they make over rooms in their homes all in six weeks! If you would like to see where we started  from and how we got to the final reveal,  you can follow along with our previous weeks here:

Week 1 | Week 2 | Week 3 | Week 4 | Week 5

And to give you a little reminder of what we started with:

Before:

ORC Before Pic

ORC Before Pic

ORC before

After:

One Room Challenge Spring 2017 Final Reveal

I love it! This space will function as both an office and a workroom for me. It’s a small 9’x12′ room so I wanted it to be very functional without appearing cluttered. I removed the shelving units because I knew from past history that they can become a “catch all” for me. I replaced it with this gorgeous modern sideboard from Structube that is clean and sleek and contains so much storage space. The sideboard will hold everything to do with the “office” portion of the room. Everything is neatly hidden away and no clutter means no stress for me!

And did you see that awesome light fixture? I fell for this fixture as soon as I saw it in the Westelm showroom this spring. I love the modern look of it mixed in with some of the wooden pieces in the room. It adds the right amount of tension for my modern coastal farmhouse vibe I was going for.

ORC 2017 The Final Reveal

The top of the sideboard allows me a surface to add some pretty accessories that will change with the seasons. All the lovely accessories here and on my desk (except for the wooden tray and anthropologie candles) are from Homesense!

ORC 2017 The Final Reveal

If you follow me on Instagram, you know how much I love decorating with flowers and these faux hydrangeas from Afloral look so real! They’ll definitely see a lot of use.

One Room Challenge 2017 The Final Reveal

ORC 2017 The Final Reveal

One Room Challenge Spring 2017 Final Reveal

I already had this brass mirror hanging in my dining room but I knew it had to come into this room to play off the light fixture and other brassy accents. It really goes so well in here!

One Room Challenge Spring 2017 Final Reveal

Every room needs some texture and something to hold extra pillows and throws and these baskets from Canadian Tire’s CANVAS collection do the job wonderfully!

The pillow in the back is a diy pillow I made from a scatter rug, you can find the tutorial for that here.

One Room Challenge 2017 The Final Reveal

One Room Challenge 2017 The Final Reveal

One Room Challenge 2017 The Final Reveal

One Room Challenge 2017 The Final Reveal

We added this barn door because previously there was so much “junk” in our little walk-in closet that there was no room to close the door! I’ve always wanted a barn door and this was the perfect place for one. It really does help with allowing more usable floor space in the closet. The closet will hold  everything to do with the “workroom” function of the space, such as my sewing machine, fabric, craft supplies etc.

One Room Challenge Spring 2017 Final Reveal

We still hadn’t figured out what to do for wall treatments until the first week of the challenge! We then decided on board and batten and it was the best decision. I knew I wanted something to go above it to add some colour and pattern. For budget’s sake we decided on this gorgeous stencil called the Floral Fireworks Allover Stencil by Royal Design Studio. I stencilled it using “liberty blue” by Fusion Mineral Paint and it turned out beautifully, you can find the stencilling tutorial here.

One Room Challenge Spring 2017 Final Reveal

We had originally picked another chair for this space but it just wasn’t the right colour and not the most comfy for sitting on for any length of time. I had wanted an office chair with wheels, but couldn’t find one that was both pretty and comfortable. We decided on one we already had and it’s suitable for now until I find that elusive “perfect desk chair” someday.

one room challenge final reveal

One Room Challenge 2017 The Final Reveal

ORC 2017 The Final Reveal

This rug from Rugs USA, is one of my favourite pieces in the room. It is so pretty and soft to walk on and goes so well with my coastal theme too.  I think I want one for my bedroom now!

You’ll also notice that I switched out the above dark indigo cushion for a lighter one. The indigo one was made by yours truly!

One Room Challenge 2017 The Final Reveal

Modern Coastal Farmhouse Office Reveal

I’m so happy with my new office/workroom! It ‘s such a bright, airy and functional space now. I know I’ll get so much use out of it, it’s too pretty not to want to sit in there! Stay tuned for a post on what’s in that sideboard and how I organized the closet coming later. Thanks so much for joining me on my first One Room Challenge journey and don’t forget to catch up on all the other reveals!

Thanks to Linda of Calling it home for creating and hosting this biannual design challenge. It was a great first time experience for us and you know I’m already deciding which room to do over in October. 😉

And a huge thank you to all our amazing  Sponsors who made this project possible! I felt honoured to partner with each of these great brands and businesses and share their wonderful products.

(This post was sponsored by the following sponsors. All product given, was chosen by me and all photographs, thoughts and opinions are my own.)

ORC Sponsors

Source List

  • Light Fixture: “Mobile Chandelier” in Antique Brass, West Elm
  • Rug: “Aerial Decorative Plumes” in blue 5×8 Rugs USA
  • Desk: Homesense
  • Sideboard: “Moby” in white, Structube
  • Mirror: Homesense
  • All Decorative Accessories on Sideboard and desk: Homesense
  • Large Baskets: “Nola” Canvas at Canadian Tire
  • Chair: Henriksdal, Ikea
  • Hydrangeas: Faux Hydrangea, Afloral.com
  • Fiddle leaf fig: Faux, Homesense
  • Turqoise Vase: Homesense
  • Stencil: “Floral Fireworks Allover Stencil 21″x23” by Royal Design Studios Stencil
  • Paint for Stencil: Fusion Mineral Paint in “Liberty Blue”
  • Cushions: The grey neutral one in the basket and the paisley one on chair: Homesense
  • Cushions: Dark blue indigo and the one in the back of the basket: KimPowerStyle
  • Gold file holder: Homesense

Filed Under: diy, Home decor, Makeovers, One Room Challenge™, spring, Uncategorised

  • « Go to Previous Page
  • Go to page 1
  • Go to page 2
  • Go to page 3
  • Go to page 4
  • Go to page 5
  • Go to page 6
  • Interim pages omitted …
  • Go to page 16
  • Go to Next Page »

Primary Sidebar

Hi, I'm Kim Read More…

Instagram

Follow along on Instagram

Sign up and don't miss a post!

Recent Posts

  • Festive Bacon Wrapped Chestnut Holiday Appetizer
  • DIY Mantel Decorated for Christmas
  • Simple and Cozy Fall Home Tour
  • Simple Fall Tablescape

Archives

Footer

Copyright © 2025 · Foodie Pro Theme by Shay Bocks · Built on the Genesis Framework · Powered by WordPress