• Skip to primary navigation
  • Skip to main content
  • Skip to primary sidebar
  • Skip to footer

Kim Power Style

  • Home
  • Contact
  • About
  • Tutorials

Makeovers

Custom Slipcovers for my IKEA Sofa

7:00 am by kim 7 Comments

I partnered with Bemz for this post. 

Hello friends!

If you know me, you know I love a good slipcover! This white/neutral loving girl has been using them for almost twenty years. You can’t beat the ability to take off your covers and throw them in the wash. It’s like having new, clean furniture all the time. So, I’ve partnered with the wonderful people at Bemz again to make a custom slipcover for my Ikea sofa.  Bemz  had made me two beautiful slipcovers for my my Farlov Ikea armchairs and I was so impressed with the fit and quality of their covers I knew I needed a new cover for the sofa! You can click Here to see the updated Ikea armchairs.

Custom Slipcover for my IKEA Sofa

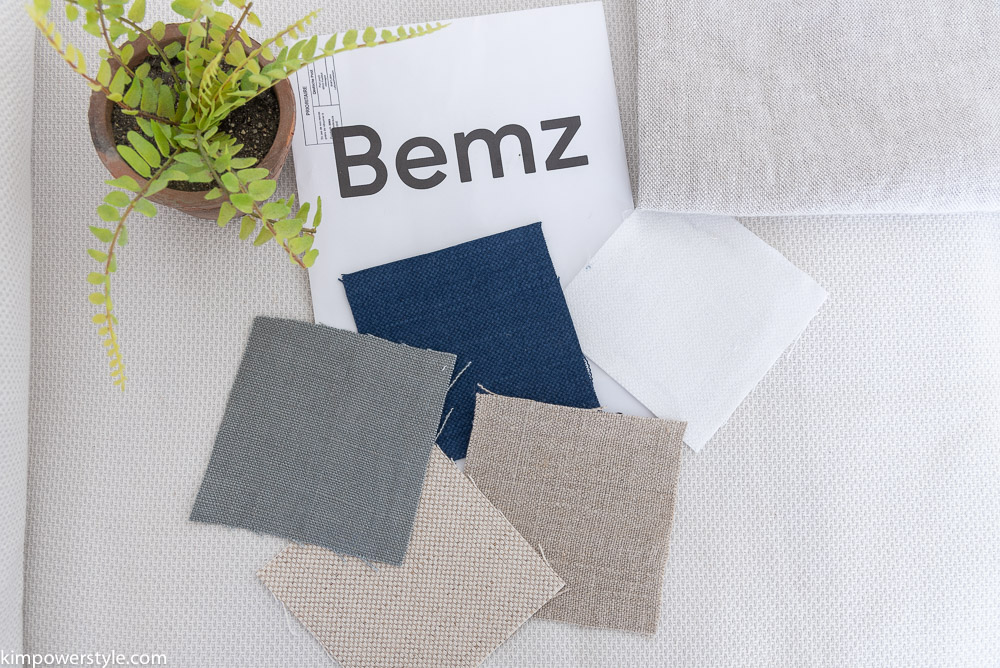
For those of you who haven’t heard about Bemz, they make custom covers for Ikea furniture that are machine washable and made to order in Europe. If you want to personalize and update your current Ikea furniture, simply go onto their site, find your type/series of  furniture and then check out all the fabrics you can choose from. To help you to decide, you can request samples of the fabrics you’re interested in (This will be the hard part because you’ll want them all!) and Bemz will send you up to five samples for free.

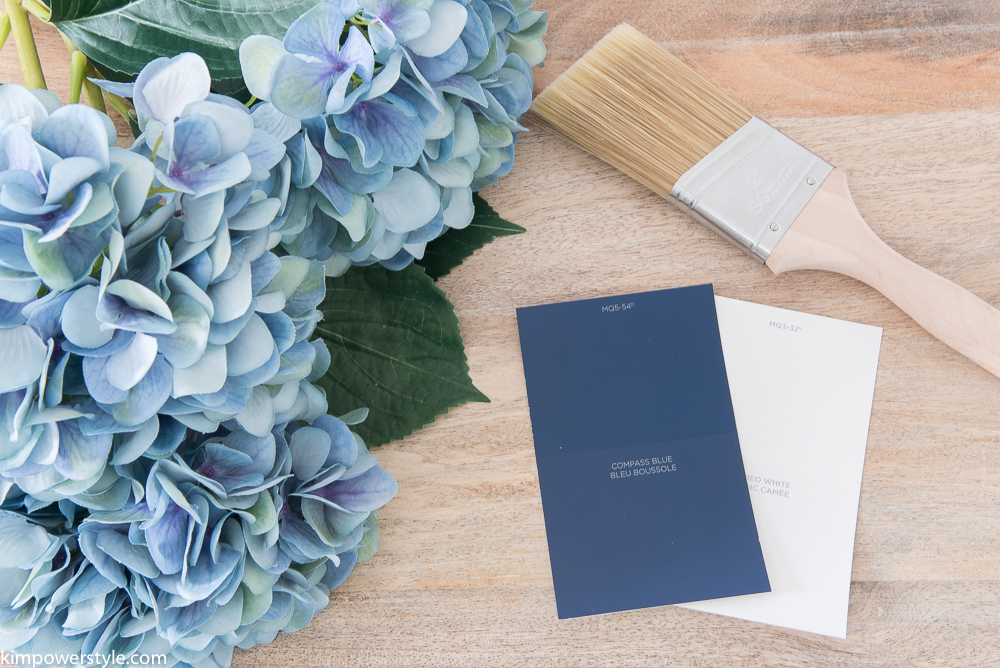
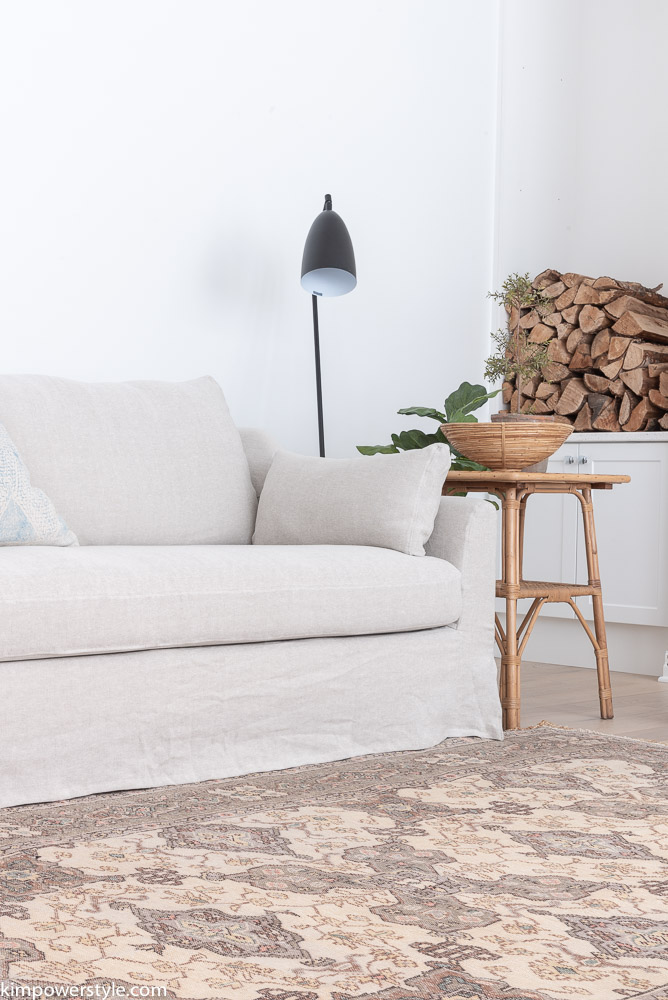
 The samples above are the gorgeous fabrics that caught my eye but in the end I stuck with the same beautiful 100% Linen in “brera lino-natural” that I had chosen for my Farlov chairs. You can see it up there in the right hand corner. (The struggle was real though folks, aren’t they all swoon worthy?!)

Custom Slipcover for my IKEA Sofa

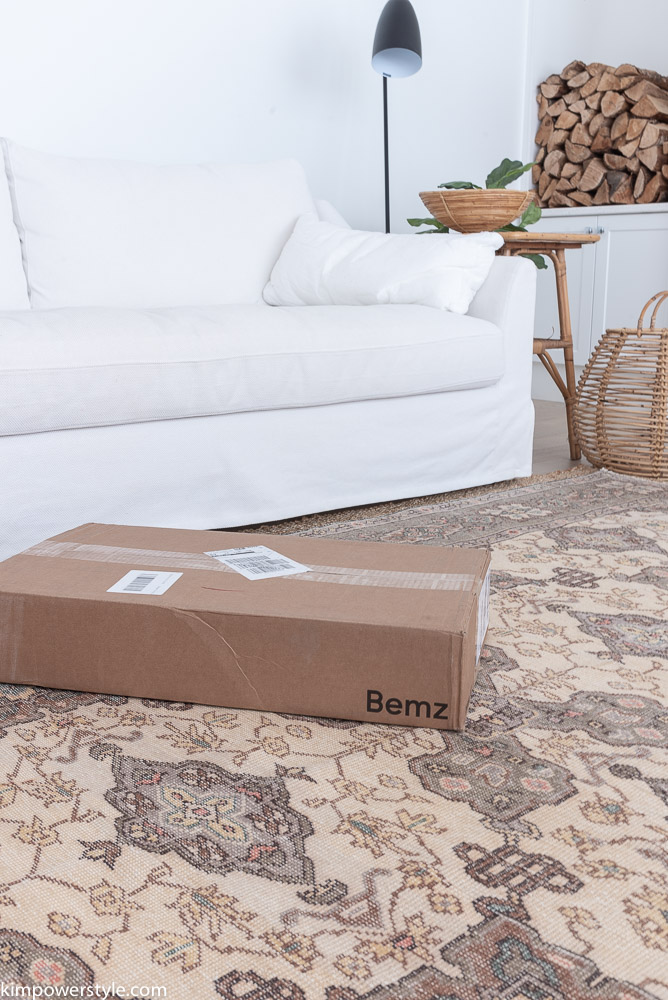
Once you choose your fabric and place your order, your new slipcovers will come in a box in a few weeks. Seeing the mailman drop that box off at the front door is kinda like Christmas morning!

Custom Slipcover for my IKEA Farlov Sofa

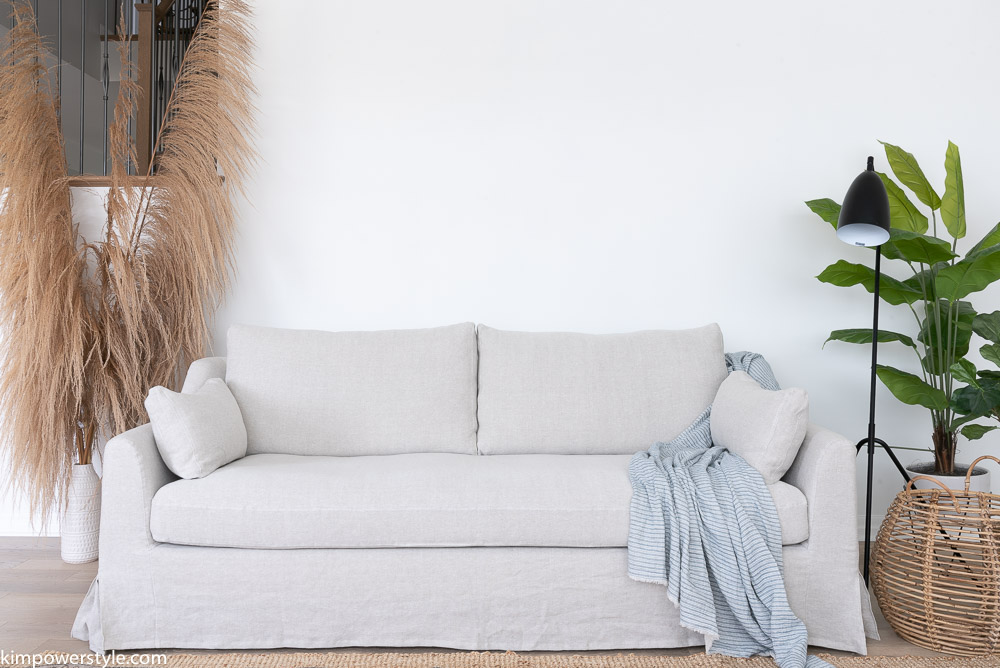
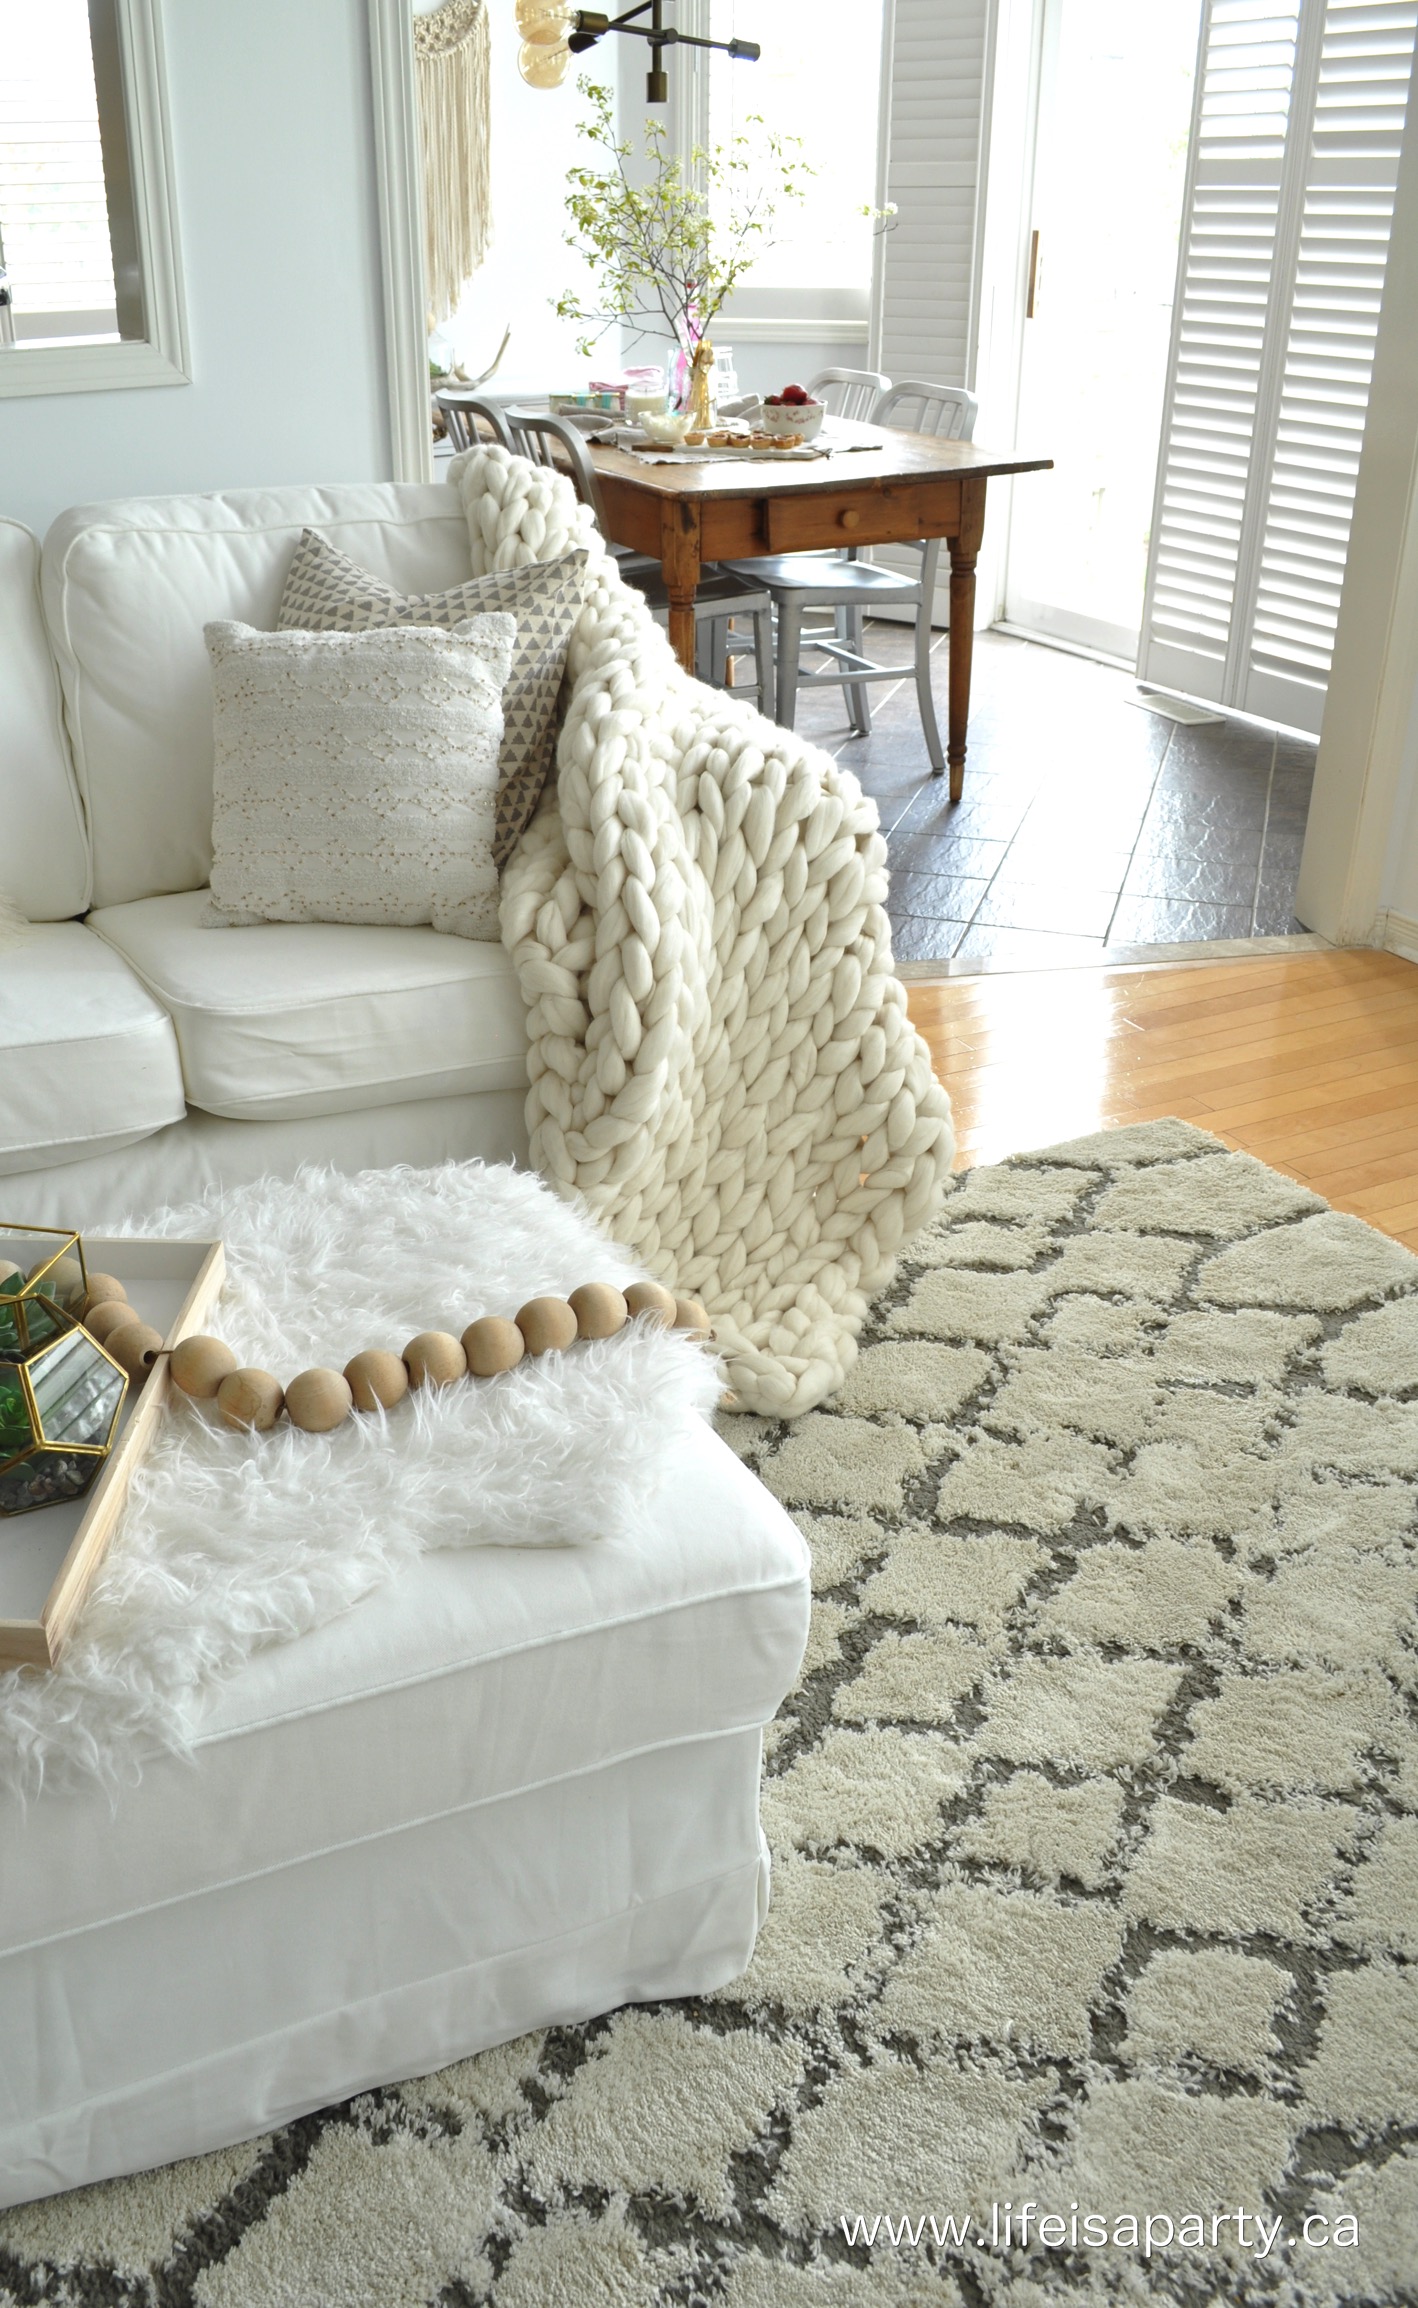
I love this beautiful 100% linen fabric. It comes pre-shrunk and is machine washable…which comes in handy with a grandson, dog and cat!

Custom slipcovers for my Ikea Farlov Sofa

Custom Slipcover for my IKEA Sofa

Custom Slipcover for my IKEA Sofa

Custom Slipcover for my IKEA Sofa

Custom Slipcovers for my Ikea Farlov Sofa

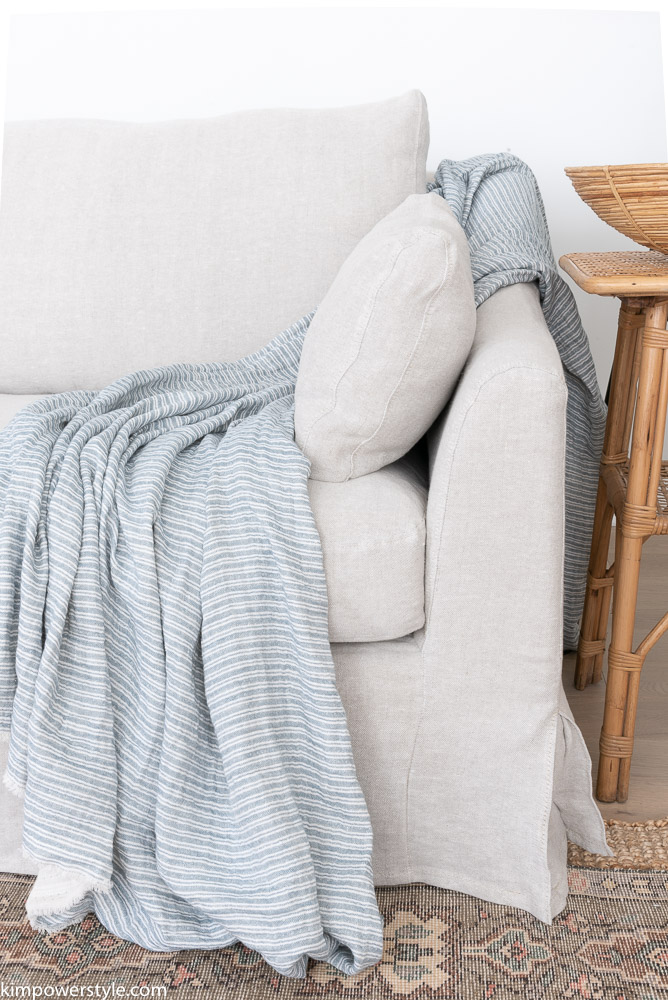
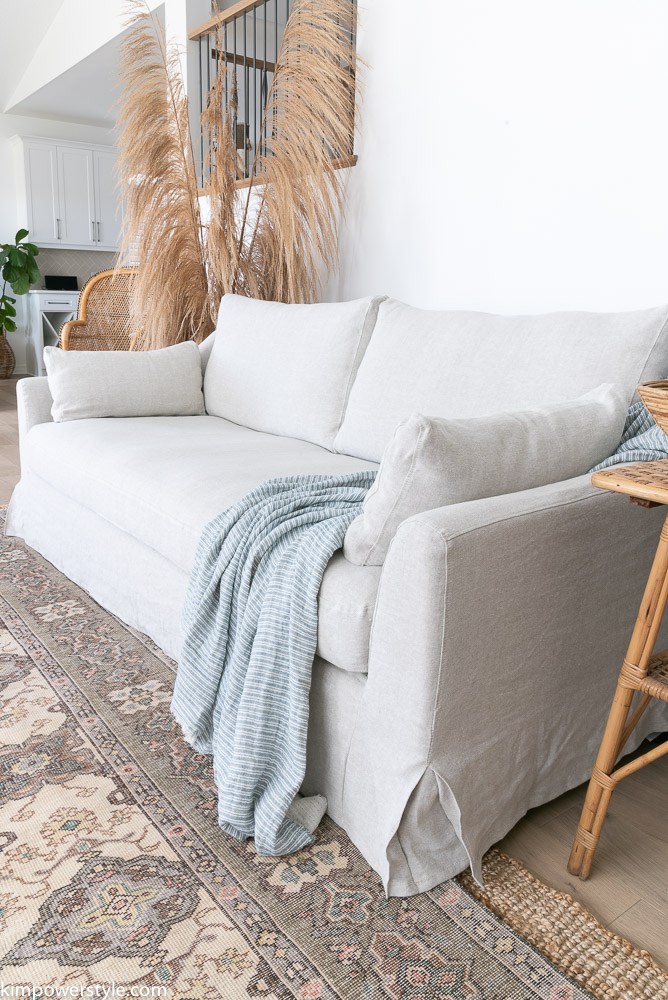
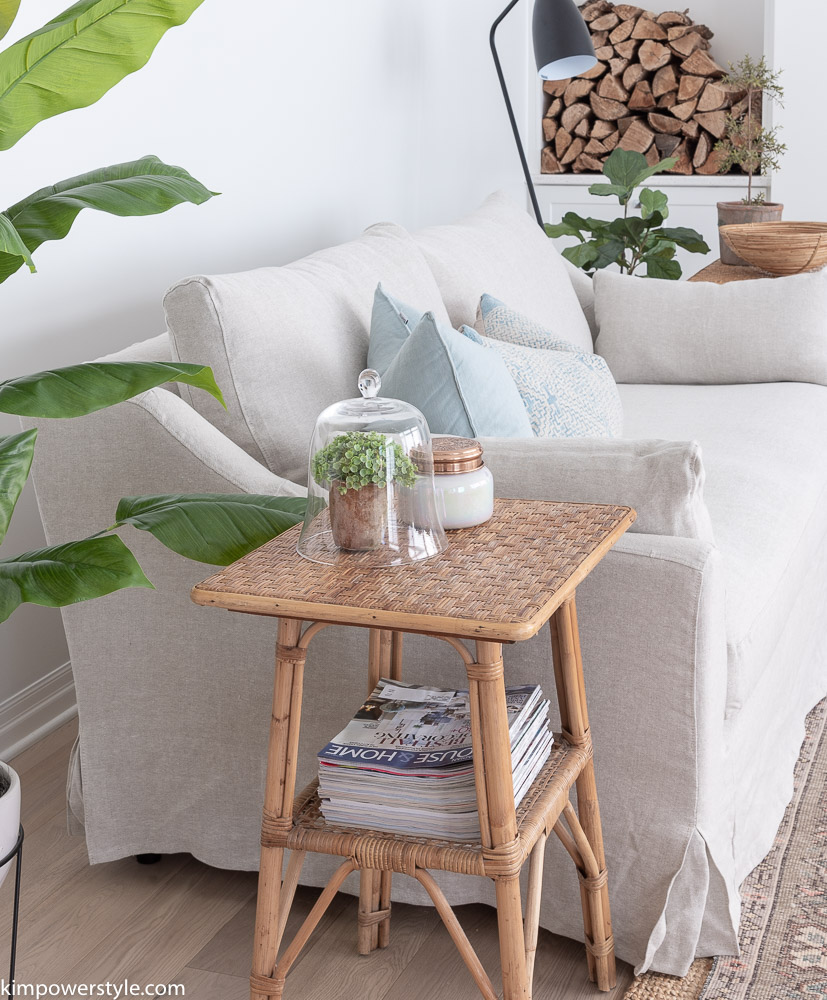
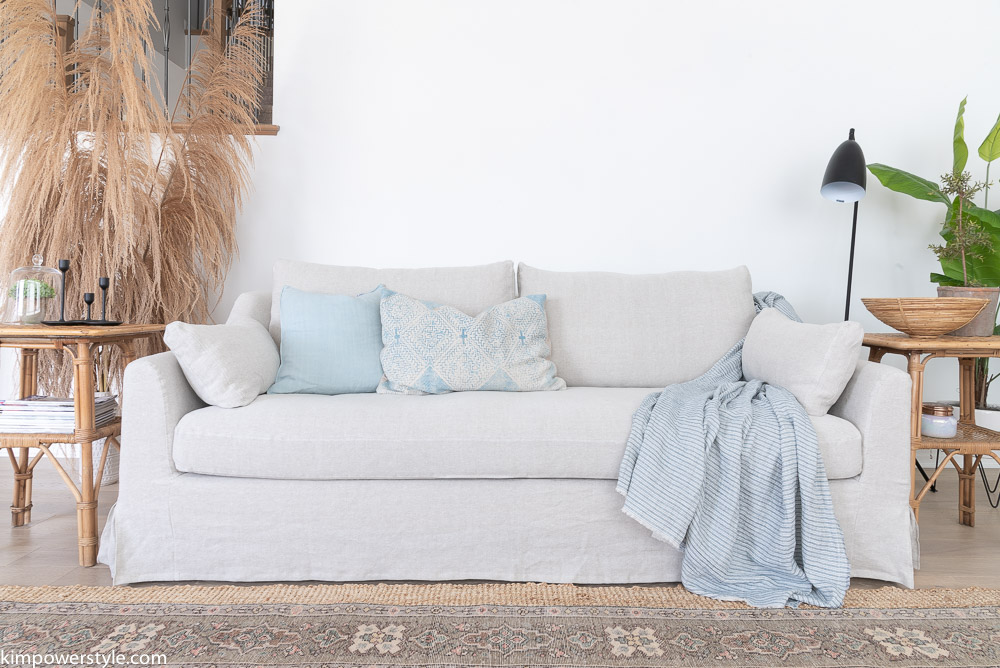
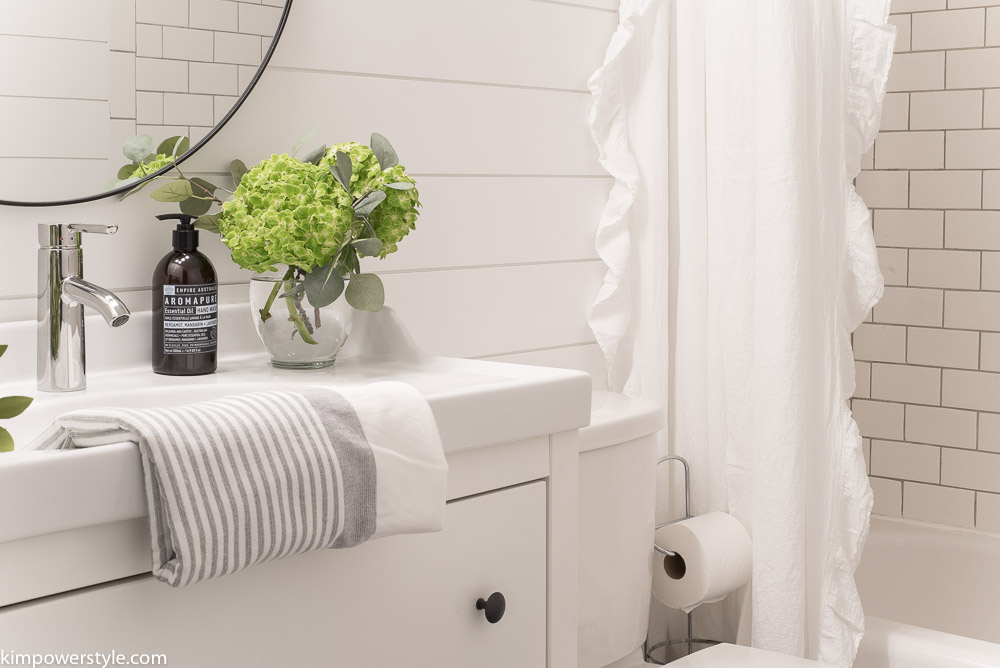
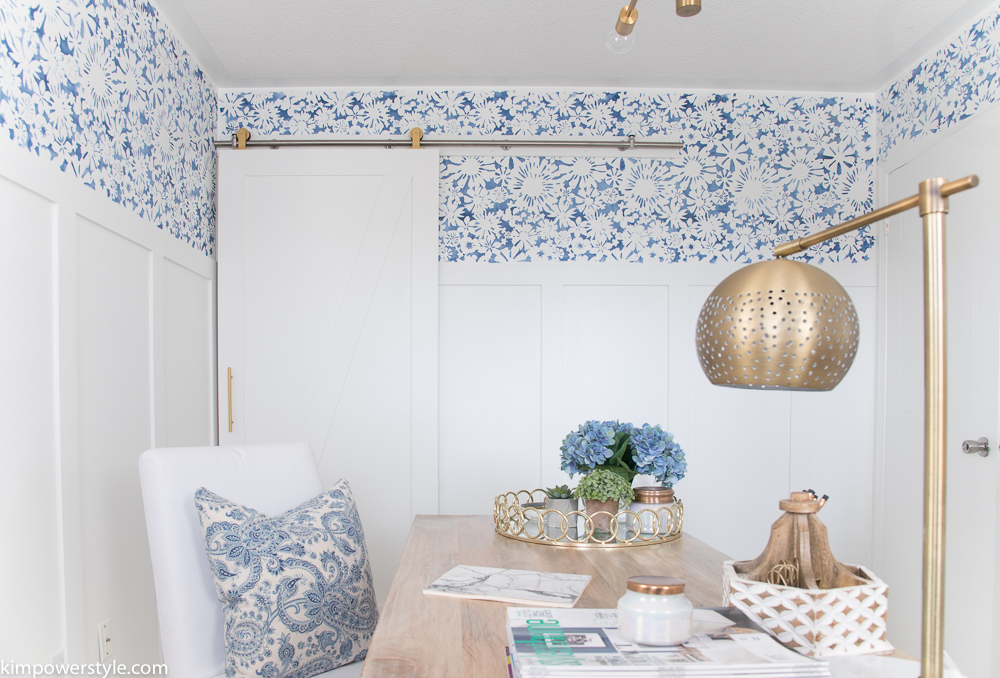
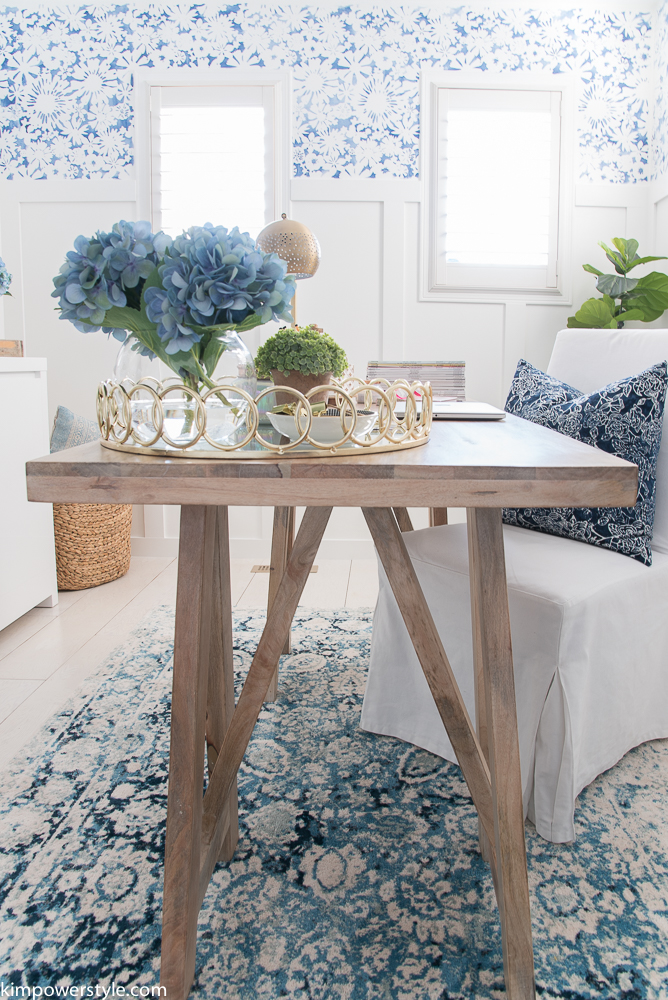
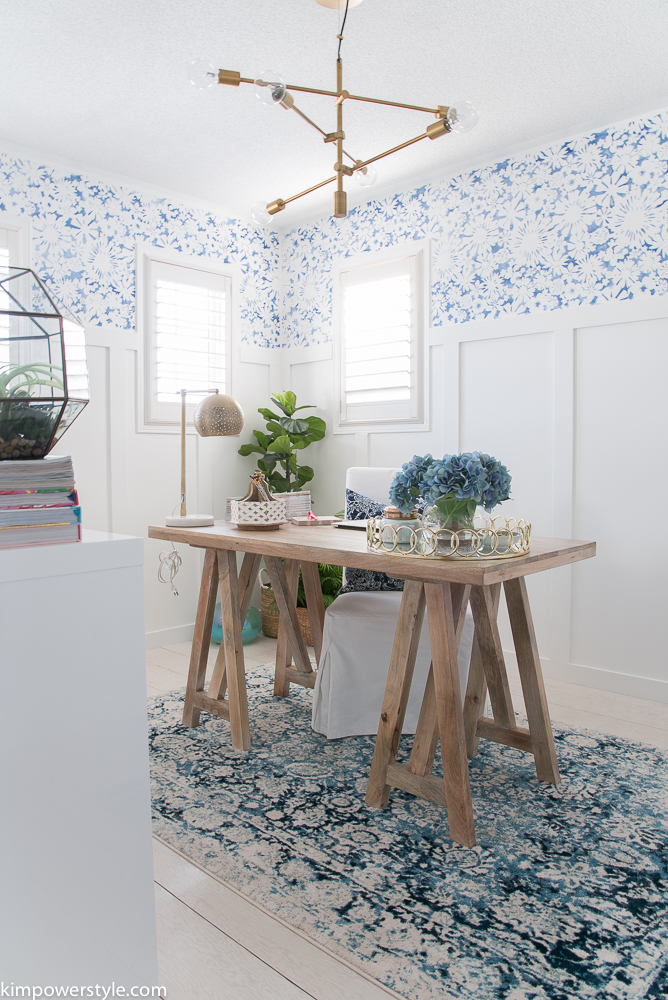
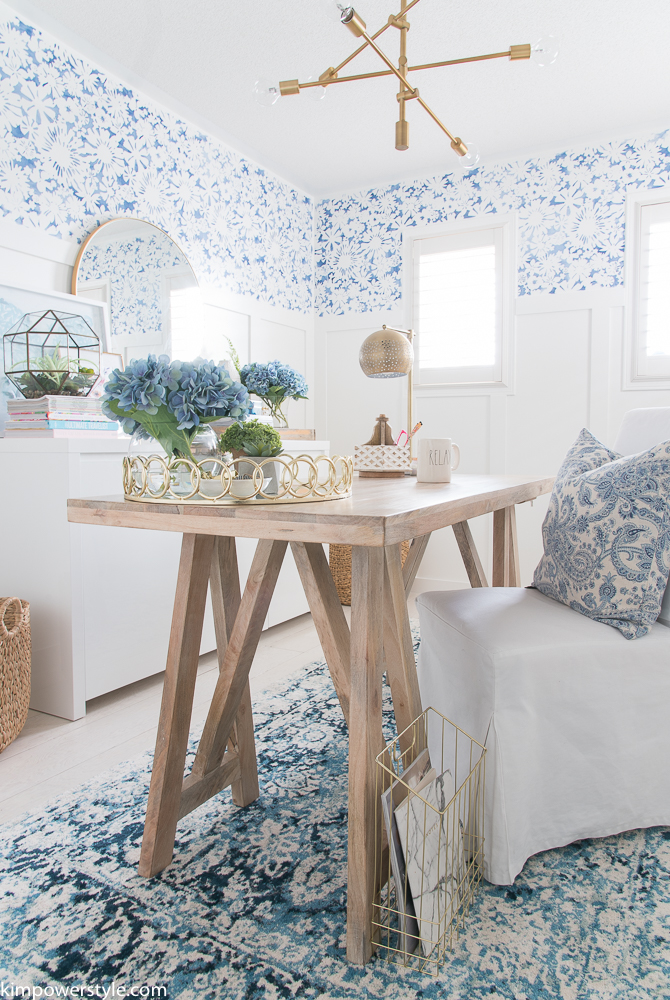
It looks and feels so much cozier in here now.

Custom Slipcovers for my Ikea sofa

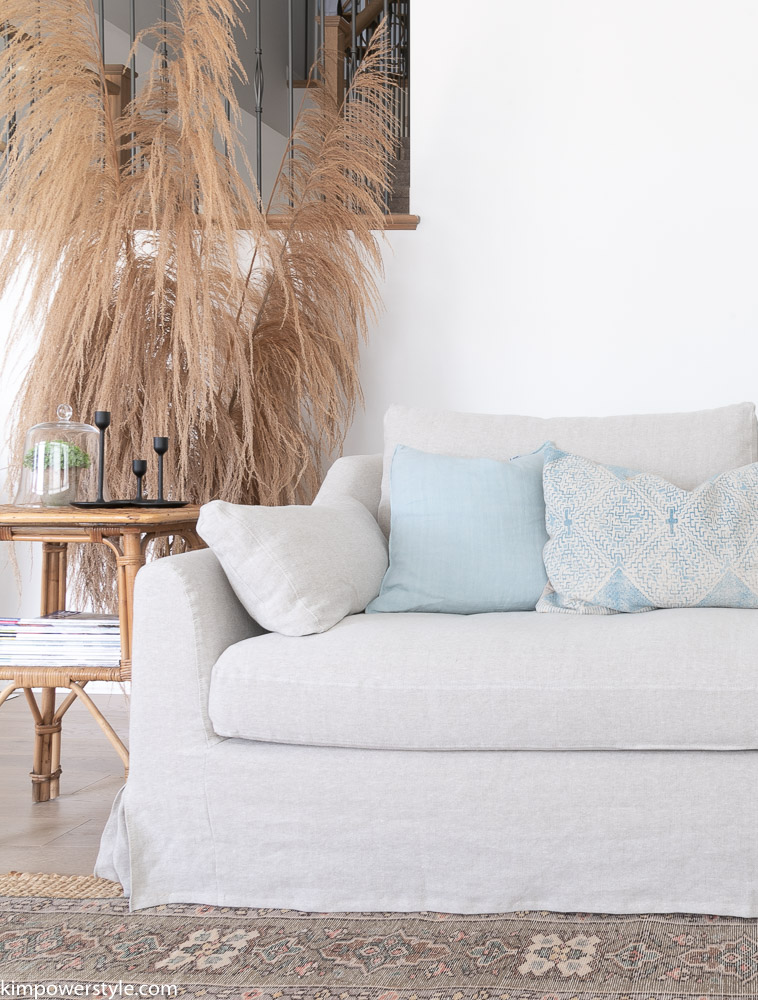
When I walked into the living room today I was struck again at how much richer and cozier my sofa looks. It’s made such a difference to the whole space!

Be sure to tune in next week as I’ll be participating in a fall home tour along with 4o other amazing bloggers. I’ll be sharing the living room and more of these beautiful covers just in time for the fall season!

Blessings,

Kim

Filed Under: Home decor, Makeovers

One Room Challenge | Modern Farmhouse Bathroom | The Reveal

7:46 pm by kim 40 Comments

Hello friends and welcome to Week 7 of the One Room Challenge and the final reveal of my Modern Farmhouse bathroom! Today is the day that designers and bloggers have been working on and documenting for the last six weeks. Transforming spaces, designing, demoing, styling. For some of us It’s been 6 weeks of excitement, breakdowns, sore backs and questions as to why the heck we agreed to do it! Lol. Well today is the day we share the culmination of everything we’ve been working towards. You can follow along with my previous weeks to see the process here:

Week 1 | Week 2| Week 3 | Week 4 | Week 5| Week 6

One Room Challenge Fall 2017

One Room Challenge Modern Farmhouse Bathroom The Reveal

I decided to do the main bathroom on the second floor. It’s small and is basically used as a guest bathroom for my daughter and son in law when they come to visit. I had recently painted it white in the hopes of making it a little brighter but nothing could brighten the black tiles that covered the tub and shower enclosure. I thought it would be the perfect candidate for a reno/makeover.

So let’s see what we started with!

The Before:

Bathroom before photo

Bathroom Before Pic

One Room Challenge bathroom before photos.

You can see that black tile I was talking about!

The Final Reveal!

The After:

Modern Farmhouse Bathroom #Makeover

Modern Farmhouse Bathroom #Makeover

I basically threw everything that I love into one small room! Shiplap, white subway tiles, cement tiles, wood, linen, what’s not to love?

Modern Farmhouse Bathroom #Makeover

Modern Farmhouse Bathroom #Makeover

This black and white floor tile is the star of the show and I absolutely love it! The tile was definitely worth the splurge and using it in a smaller space made it more affordable. It may be on trend now but I didn’t mind making a trendy statement in a little space. I also used white subway tile, It’s simple, classic and you can never go wrong with that!

Modern Farmhouse Bathroom #Makeover

The Metrie Shiplap was one of the easiest projects we did in this bathroom and next to the floor tile, is my favourite thing! It’s Metrie’s Complete shiplap and comes pre-primed and pre-painted in  “Polar White”  a gorgeous clean, crisp white. I can’t tell you how beautiful this shiplap looks in person. It’s has a beautiful and uniform finish and looks like it was professionally installed. I want this all over my home now! You can see how we installed it here.

This mosaic tile is the star of the show and I absolutely love it! The tile was definitely worth the splurge and using it in a smaller space made it more affordable. It maybe on trend now but I didn't mind making a trendy statement in a little space.

I changed up the original lighting I had chosen in my vision board. I realized that we didn’t have the room to have the sconces I had planned on. The lighting I installed is part of  the Home Decorators Collection lighting from the Home Depot and is perfect for the space.

Modern Farmhouse Bathroom #Makeover

Isn’t this little wooden stool so cute?  It’s the perfect size for my small bathroom and a great place to set a book, cup and candle on when you’re taking a bath. All these great accessories in our bathroom are from Homesense.

Modern Farmhouse Bathroom #Makeover

We chose to use the over the door rack to hang all the towels on. I loved this shiplap so much I didn’t want to ruin it by placing hooks into it! I wanted to keep the bathroom as clean and clutter free as possible. The rack is also great for holding some bathrobes for your guests when they come to visit. I found these lovely turkish towels and bathrobes  along with the rack at Homesense!

Modern Farmhouse Bathroom #Makeover

Modern Farmhouse Bathroom #Makeover

Modern Farmhouse Bathroom #Makeover

Source List 

Shiplap: Metrie Complete® Pre-painted Shiplap

Vanity Light: Glenhurst 3 light vanity fixture, Home Decorator’s Collection, Home Depot

Mirror: Homesense

Floor Tile: M2 Tile

Vanity: Ikea

Faucet: Ikea

Stool: Homesense

Turkish towels, Cotton terry Bathrobes, Shower Curtains, Soap dish, Dispenser, Candle, Towel rack, Toilet paper stand: Homesense

Thanks so much for following along on this makeover journey with us! This was our first real reno and there were a lot of ups and downs, problems that we weren’t sure how to deal with and lots of youtube video watching! We were the designers, contractors and tradesmen for this project. Next time I think I just want to design and leave the rest of the work to the real tradesmen 😉 Thanks to Linda from Calling it Home for hosting another great Challenge. Be sure to follow along with all the other designers and participants to see their finished projects.

Thanks to all our Sponsors who helped to make this makeover possible!

Sponsors for ORC Fall 2017

Filed Under: diy, Makeovers, One Room Challenge™

Bathroom Makeover | One Room Challenge | Week 6

11:38 pm by kim 12 Comments

Hi everyone and welcome  to Week 6 of the One Room Challenge! If you’re new here, I’m a guest participant in Linda’s from Calling it Home One Room Challenge. A biannual event where a group of designers and bloggers  chronicle a makeover of one room in their home in 6 weeks. We’re on week 6 right now but this year the challenge has been extended for another week. So next week will be the final reveal and I’m so excited to share our makeover with you all!

You can follow along with the previous weeks here:

Week 1 | Week 2 | Week 3 | Week 4 | Week 5 |

One Room Challenge Fall 2017

Bathroom Makeover One Room Challenge Week 6

This week’s progress:

This week we finally got the grout done on the floor tile. We used a charcoal coloured grout that fits right in with the charcoal of the tiles. We used a slow drying grout and had to stay off the floor for 72 hours. It was wonderful! We basically had the weekend off which was great because the hubby and I needed the break. Don’t those tiles look amazing?

Once the grout was dried and cured we were able to get back in there and put the baseboards on.

One Room Challenge Fall 2017 Week 6

We also got the vanity in after the hubby did some (a lot) of maneuvering with the pipes. Yahoo!

One Room Challenge Bathroom Makeover

Remember those nasty pipes that came up out of the floor that couldn’t be moved? Well the hubby used the Metrie baseboards to make a box around them. It’s hardly noticeable, unless you’re down on the floor where I was when I took this photo. Once I caulk the corners and fill in the nail holes it will look great.

One Room Challenge Fall 2017 Week 6

One Room Challenge Fall 2017 Week 6

I’m so glad the vanity fit! It looks great with the gorgeous shiplap and tiles. These pictures don’t do the room justice.

One Room Challenge Fall 2017 Week 6

Task list before the final reveal:

  • Add the mirror
  • Install the toilet
  • Caulk the baseboards, sink and tub
  • Install the tub/shower hardware.
  • Accessorize

Well that’s it for this week.  It’s such a small room that there’s only so much to show without revealing it all..and that’s for next week! You can subscribe to the blog to make sure you don’t miss out on any posts. They’ll come straight to your inbox.

Blessings,

Kim

Filed Under: diy, Fall, Makeovers, One Room Challenge™, Uncategorised

One Room Challenge Fall 2017 | Week 2 | Demo Week

8:45 pm by kim 16 Comments

Demo Week

Welcome to week 2 of the ORC. If you’re just joining in with me today, here is a link to week 1 where I explain my plans to turn this dated room into a Modern Farmhouse bathroom. We’ve all  watched the home makeover shows where the “demo day” is  that amazing day where you’re able to start tearing out walls, tiles and aged appliances etc. At the end of the day everything has been removed and you’re left with a clean slate to start building from. Well folks, as the old saying goes, “only on TV”!  Unless you have a team of workers working behind you, there is no such thing as a demo day! It’s taken the hubby days to remove tile, drywall, a vanity, mirror, toilet and the dreaded floor tile. This One Room Challenge week 2, has kicked our butts. What we thought would be that lauded “demo day” has turned into the seemingly never ending “demo week”!

One Room Challenge Fall 2017

So this is what happened…get ready for some non-pretty pics.

Week 2 ORC, demo week

At first my hubby tried to take each tile off at a time. With the hopes we could save the drywall behind it and not have to worry about replacing it. No. somewhere or somehow you damage that drywall behind and you end up having to take it all down. After this lesson was learned, my hubby just took the drywall and tile down together in sheets. It was a much faster process doing it this way.

Week 2 ORC, demo week

Week 2 ORC, demo week

When it came time to take out the vanity, we noticed there were no water shut-off valves. So after turning off the water in the whole house and many trips to the Home Depot later, we were able to avoid a flood and remove the vanity…only to find this!

Week 2 ORC, demo week

The water pipes come up straight out of the floor! There is also this gigantic black drainpipe jutting out of the floor and into the wall. If you look at my mood/vision board you’ll notice that the vanity I wanted  was up off the floor. In fact every vanity I liked was up off the floor. It makes a smaller space seem airier and larger. Well now I have to change my plans on that vanity. This whole pipe mess will have to be covered up.

Week 2 ORC, demo week

The floor tile, mesh and concrete thingy was the worst. We finally called up a friend and we borrowed a jack hammer, yep, we ( and by “we” I mean the hubby)  were jack hammering this room until late last night. We finally got it all up. Other than removing a few staples and a few stray pieces of dry wall, I think we’re done the demo stage. Phew! When things look like this, it’ hard to believe it will ever be done!

So now before those pictures burn a hole into our retinas, let’s take a look at how I envisioned this room to look. It may completely change by the time I get through but nevertheless  lets focus on my pretty vision.

Modern Farmhouse Bathroom


Here is some lovely inspiration via Studio Mcgee because Shea and her team know how to do a bathroom!

Studio Mcgee

(source)

Studio Mcgee

(source)

Studio Mcgee

(source)

My vision for how this space can look is the only thing that’s keeping me sane at this point. This reno thing is not for the faint of heart! Don’t forget to join me back here next week to follow along as well as pop in and see all the other participants, I’m hoping there will be major progress in this room by then. Please let there be progress!! Lol.

Thanks to my sponsors who are contributing to my Modern Farmhouse Makeover this time around!

Sponsors for ORC Fall 2017

Filed Under: diy, Fall, Makeovers, One Room Challenge™

Bedroom Update with BEHR MARQUEE Paint

6:00 am by kim 20 Comments

We Partnered with BEHR® for this project. All thoughts, opinions and project ideas  are my own.

My master bedroom has been due for an update for a while now and although I love white, it was time to inject some colour. Dark and moody paint colours are really on trend right now and I’ve wanted to take the plunge and try something new for a while now. But as much as I love making a design statement, the thoughts of diving headlong into a room full of a dark colour scared the heck out of me! I tried out BEHR MARQUEE® Interior Paint & Primer in One, it was just the opportunity I needed to tip-toe into this new world of colour.
I had applied board and batten in my office last spring and knew I had wanted to try it again in my bedroom. It really lends to the coastal cottage vibe of my home and works perfectly for those of us who want to try a more dramatic colour but are a little timid to commit to a full room of it.

Bedroom Update with BEHR MARQUEE Paint

Here is the bedroom before… kind of blah right?

Bedroom Update with Behr Marquee Paint and Board and Batten

Here is the After… amazing what a bit of paint can do! Follow along and we’ll show you how we did it.

Master Bedroom Update

Board and Batten:

You’ll need:

  • MDF boards in the size of your choice
  • Brad Nailer
  • Table Saw
  • Jig Saw
  • Level
  • Wood filler
  • Latex Caulking

The hubby and I removed everything from the room so we would have space to work.

We started by removing the existing baseboards, a bit of a pain I know but we wanted all the board pieces to match up evenly and this base trim was just too thin.

Bedroom Makeover with Behr Marquee Paint

We used the 1/2″ x 3 1/2″ MDF pre-primed base boards in the valupak from the Home Depot. They come in 8′ lengths and there are 10 pieces in the valupak. This was used for all the board and batten in the room, approximately 3 valupaks.

Mater Bedroom Update

Next we applied our MDF baseboards  all around the room using a brad nailer.

Master Bedroom update

Once the  baseboards were applied, we rested the vertical pieces on top of the baseboards starting in the corners. Making sure they were level! Our vertical boards were 59″ in height. You can decide how tall you want your board and batten to be. It was roughly 2/3 of our 8′ walls.

Master Bedroom Update with Board and Batten and Paint

This next part can be tricky and includes that four lettered word “Math”! My husband was the one who figured this part out. We started by laying our boards against the wall to see approximately how far apart we wanted  them to be. Not all of your walls will be the same size so you may find that on one wall your boards are 21 inches apart and on another they are 19 inches apart. As long as they look uniform and there isn’t  that big of a difference from wall to wall. Remember to measure twice and nail once! Make sure that each board is level before you nail too.

Master Bedroom Update with Board and Batten and Behr Marquee© Paint

For outside corners we just butted the joints up. We didn’t bother with tricky angle cuts as we’ll be filling in all the joints with wood filler and/or caulking. We then laid the upper horizontal boards across. Don’t worry if there are some small gaps, you’ll be filling them in with wood filler.

Master Bedroom Update with Board and Batten and Paint

When all our boards were applied we used wood filler to fill the nail holes and gaps where MDF meets MDF. Once it was dry we lightly sanded to a smooth finish.

Master Bedroom Update with board and batten and Behr Marquee Paint

We added latex caulking wherever the boards met the wall. This is time consuming but finishes the job off so nicely. Caulking covers a multitude of sins!

Master Bedroom Update with board and batten and Behr Marquee Paint

Painting:

For paint we used the BEHR MARQUEE one coat coverage interior paint from Home Depot. We applied Compass Blue to the upper walls and Cameo White for the board and batten. When my husband saw the first brush stroke of the Compass Blue applied to the walls, he was a little shocked! I told him not to worry, it was going to look great, “I know what I’m doing”.  Inwardly I was asking myself what the heck was I doing and trying not to let my own panic show!  It didn’t take long till I realized It looked great and I had made the right choice. That happens all the time.

Master Bedroom Paint Update

We started with the upper portion of the wall and applied Compass Blue. I taped off the ceiling using painters tape to avoid any mishaps while I used a brush to cut-in. A quick roll was all that was needed to apply this super thick paint to the walls. I had to touch up a few places where I cut-in otherwise this really is one coat coverage!

Master Bedroom Update with board and batten and Behr Marquee Paint

For the board and batten we used Cameo White. I used a brush to do all the trim work and then used a roller for the wall.

Master Bedroom Update with board and batten and Behr Marquee Paint

It turned out beautifully!

Master Bedroom Update with board and batten and Behr Marquee Paint

The after…I painted the “blah” out of that room!

Master Bedroom Update with board and batten and Behr Marquee Paint

The hubby was so impressed, he kept walking around the room saying “wow!”

Master Bedroom Update


Bedroom Update with Paint and Board and Batten

Master Bedroom Update


Master Bedroom Update

Bedroom Update with New Paint and Board and Batten

Bedroom Update with New Paint and Board and Batten

Master Bedroom Update

I’m so glad we decided to try something that was a little out of our comfort zone. The room has a dramatic edge to it but still has that simple, cozy cottage look that I love. I hope this gives someone the courage to step out and try something new!

Blessings,

Kim

Filed Under: diy, Home decor, Makeovers

It’s Friday I’m in Love

4:56 pm by kim 6 Comments

It’s Friday I’m in Love

Hello everyone! I wanted to introduce you to a new series I’m starting called “It’s Friday I’m in Love”, where I share my weekly loves on Fridays. I’ve been planning this idea for months and have finally gotten around to doing It! I also managed to get through as many ORC shares as possible this week, so my first instalment of “It’s Friday I’m in love” series will be sharing my favourites/loves from the One Room Challenge. There were so many amazing contributions to the ORC but there were a few that really resonated with me. Whether it was because of the style, colour, transformation etc. these are the ones that caught my eye. I know that at least one of them will be a little surprising!

Beautiful ORC makeover by AKAdesign

Akadesign.ca

Shannon and her hubby Dean, from AKA Design absolutely outdid themselves on this kitchen remodel. It’s been one of my faves and I was so excited joining in every week to watch it all unfold and it certainly didn’t disappoint! It’s hard to pinpoint what exactly is my favourite element from their new kitchen but they kind of had me at the custom wood range hood cover…and the stainless steel apron front sink…the butcher block counters are pretty sweet too and I love open shelving! Lol, you get that I love it all right?

thediymommy.com

I love the transformation Christina from thediymommy.com made to this room that was previously a  pretty sitting room but not being used. She turned it into a totally usable dining space and I love everything from the fabric in the curtains to the gorgeous colour of the rug. Who wouldn’t want to linger at this table after a lovely meal?

Makingitinthemountains.com

Makingitinthemountains.com

When I first saw this farmhouse powder room by Kristi at makingitinthemountains.com, my heart skipped a beat! That gorgeous wooden vanity and mirror, marble, shiplap and barn door were all a delight for my farmhouse loving eyes. What a great use of space!

Almafied.com

Almafied.com

How gorgeous is this breakfast nook by Alma from Almafied.com? Alma is amazing at bringing gorgeous texture and colour together and maintaining bright and airy spaces. I always have the heart eyes whenever I see one of her beautiful rooms.

 Lifeisaparty.ca

Lifeisaparty.ca

Dannyelle from Lifeisaparty.ca did an amazing job on transforming her living room and eating area into this bright and airy scandinavian inspired space. Doesn’t this look so inviting? The before and after is incredible!

Simplicityinthesouth.com

Simplicityinthesouth.com

As soon as I saw Tricia from Simplicityinthesouth.com‘s guest shed I decided that I wanted to be the first guest in there! There are so many sweet details in this guest shed (can your really call this a shed?!) that you will immediately be calling Tricia to book a weekend away.

Kellyrogersinteriors.com

Kellyrogersinteriors.com

And for those of you who think I don’t love colour, how about this? Kelly from Kellyrogersinteriors had me at the blue Jenny Lind beds. I love the pink and that wallpaper creates such a great focal wall to place those beds against. The rug and light fixture are just the icing on this colourful cake!

Meaningulspaces.com

Meaningfulspaces.com

And lastly, Laura and her hubby from Meaningfulspaces.com did such a great job of taking a large two story space and making it appear cozy and inviting. By adding board and batten and this area rug, among a few other changes,  they totally transformed this room!

Well those are my favourites pics and choices for the first ever instalment of “It’s Friday I’m in Love”.  I’m sure that we all have our own favourites and some that just caught our eye for one reason or another. I’m  just so proud of everyone who entered the challenge, it can be a difficult process and we’re all winners! If you wanted to see my final reveal you can find that here!

Blessings,

Kim

Filed Under: Home decor, It's Friday I'm in Love, Makeovers, One Room Challenge™

One Room Challenge™ | Spring 2017 | Week 6 The Reveal

5:04 pm by kim 44 Comments

The One Room Challenge Final Reveal

Well the day has finally arrived for the One Room Challenge™  final reveal! It’s been a long, crazy  and busy six weeks for so many of us and now for the pay off! I’ve been working on making over an unused and dysfunctional office/workroom space into a  Modern Coastal Farmhouse inspired room that’s both functional and pretty. It’s been so much fun following the designers and other participants as they make over rooms in their homes all in six weeks! If you would like to see where we started  from and how we got to the final reveal,  you can follow along with our previous weeks here:

Week 1 | Week 2 | Week 3 | Week 4 | Week 5

And to give you a little reminder of what we started with:

Before:

ORC Before Pic

ORC Before Pic

ORC before

After:

One Room Challenge Spring 2017 Final Reveal

I love it! This space will function as both an office and a workroom for me. It’s a small 9’x12′ room so I wanted it to be very functional without appearing cluttered. I removed the shelving units because I knew from past history that they can become a “catch all” for me. I replaced it with this gorgeous modern sideboard from Structube that is clean and sleek and contains so much storage space. The sideboard will hold everything to do with the “office” portion of the room. Everything is neatly hidden away and no clutter means no stress for me!

And did you see that awesome light fixture? I fell for this fixture as soon as I saw it in the Westelm showroom this spring. I love the modern look of it mixed in with some of the wooden pieces in the room. It adds the right amount of tension for my modern coastal farmhouse vibe I was going for.

ORC 2017 The Final Reveal

The top of the sideboard allows me a surface to add some pretty accessories that will change with the seasons. All the lovely accessories here and on my desk (except for the wooden tray and anthropologie candles) are from Homesense!

ORC 2017 The Final Reveal

If you follow me on Instagram, you know how much I love decorating with flowers and these faux hydrangeas from Afloral look so real! They’ll definitely see a lot of use.

One Room Challenge 2017 The Final Reveal

ORC 2017 The Final Reveal

One Room Challenge Spring 2017 Final Reveal

I already had this brass mirror hanging in my dining room but I knew it had to come into this room to play off the light fixture and other brassy accents. It really goes so well in here!

One Room Challenge Spring 2017 Final Reveal

Every room needs some texture and something to hold extra pillows and throws and these baskets from Canadian Tire’s CANVAS collection do the job wonderfully!

The pillow in the back is a diy pillow I made from a scatter rug, you can find the tutorial for that here.

One Room Challenge 2017 The Final Reveal

One Room Challenge 2017 The Final Reveal

One Room Challenge 2017 The Final Reveal

One Room Challenge 2017 The Final Reveal

We added this barn door because previously there was so much “junk” in our little walk-in closet that there was no room to close the door! I’ve always wanted a barn door and this was the perfect place for one. It really does help with allowing more usable floor space in the closet. The closet will hold  everything to do with the “workroom” function of the space, such as my sewing machine, fabric, craft supplies etc.

One Room Challenge Spring 2017 Final Reveal

We still hadn’t figured out what to do for wall treatments until the first week of the challenge! We then decided on board and batten and it was the best decision. I knew I wanted something to go above it to add some colour and pattern. For budget’s sake we decided on this gorgeous stencil called the Floral Fireworks Allover Stencil by Royal Design Studio. I stencilled it using “liberty blue” by Fusion Mineral Paint and it turned out beautifully, you can find the stencilling tutorial here.

One Room Challenge Spring 2017 Final Reveal

We had originally picked another chair for this space but it just wasn’t the right colour and not the most comfy for sitting on for any length of time. I had wanted an office chair with wheels, but couldn’t find one that was both pretty and comfortable. We decided on one we already had and it’s suitable for now until I find that elusive “perfect desk chair” someday.

one room challenge final reveal

One Room Challenge 2017 The Final Reveal

ORC 2017 The Final Reveal

This rug from Rugs USA, is one of my favourite pieces in the room. It is so pretty and soft to walk on and goes so well with my coastal theme too.  I think I want one for my bedroom now!

You’ll also notice that I switched out the above dark indigo cushion for a lighter one. The indigo one was made by yours truly!

One Room Challenge 2017 The Final Reveal

Modern Coastal Farmhouse Office Reveal

I’m so happy with my new office/workroom! It ‘s such a bright, airy and functional space now. I know I’ll get so much use out of it, it’s too pretty not to want to sit in there! Stay tuned for a post on what’s in that sideboard and how I organized the closet coming later. Thanks so much for joining me on my first One Room Challenge journey and don’t forget to catch up on all the other reveals!

Thanks to Linda of Calling it home for creating and hosting this biannual design challenge. It was a great first time experience for us and you know I’m already deciding which room to do over in October. 😉

And a huge thank you to all our amazing  Sponsors who made this project possible! I felt honoured to partner with each of these great brands and businesses and share their wonderful products.

(This post was sponsored by the following sponsors. All product given, was chosen by me and all photographs, thoughts and opinions are my own.)

ORC Sponsors

Source List

  • Light Fixture: “Mobile Chandelier” in Antique Brass, West Elm
  • Rug: “Aerial Decorative Plumes” in blue 5×8 Rugs USA
  • Desk: Homesense
  • Sideboard: “Moby” in white, Structube
  • Mirror: Homesense
  • All Decorative Accessories on Sideboard and desk: Homesense
  • Large Baskets: “Nola” Canvas at Canadian Tire
  • Chair: Henriksdal, Ikea
  • Hydrangeas: Faux Hydrangea, Afloral.com
  • Fiddle leaf fig: Faux, Homesense
  • Turqoise Vase: Homesense
  • Stencil: “Floral Fireworks Allover Stencil 21″x23” by Royal Design Studios Stencil
  • Paint for Stencil: Fusion Mineral Paint in “Liberty Blue”
  • Cushions: The grey neutral one in the basket and the paisley one on chair: Homesense
  • Cushions: Dark blue indigo and the one in the back of the basket: KimPowerStyle
  • Gold file holder: Homesense

Filed Under: diy, Home decor, Makeovers, One Room Challenge™, spring, Uncategorised

One Room Challenge™ Spring 2017 | Week 5 | Our Modern Coastal Farmhouse Office

10:53 pm by kim 29 Comments

One Room Challenge | Week 5

Hello again everyone,  It’s hard to believe that it’s week 5 already and that next week is the final reveal! I’m not sure where the time has gone but this challenge has been fun, crazy and scary all at the same time.  This week we’ve been busy  trying to pull everything together for our Modern Coastal Farmhouse Office/Workroom  makeover so that we’ll be able  to style and photograph it on the weekend. If you’d like to get caught up from the previous four weeks:

Week 1: The Plan

Week 2: Board and Batten

Week 3: Stencilling Tutorial

Week 4: The Barn Door

This was the mood board I had created and helped to guide me in my plans of the makeover:

Mood board for ORC 2017

This post contain affiliate links, all photography thoughts and opinions are my own.

There have been some additions and changes to our plans since I first created this board so let’s get caught up !When I first created the board I didn’t have any idea what I was going to do with the walls. After some thought I decided to go ahead with board and batten and was so pleased with the results. You may just see a little more of that being put up in another room soon! We also stencilled  the upper part of the wall above the board and batten using a gorgeous stencil called the “Floral Fireworks allover stencil” fromRoyal Design Studios. I used  my favourite Fusion Mineral Paint in Liberty Blue. The lovely water colour effect  adds to the look and feel we were going for.

How to stencil a wall. One Room Challenge

(Week 2 and 3 saw us adding board and batten along with stencilling)

Another element we added to the room that was not on the mood board was the addition of our barn door. The barn door was added to help with the function of the closet as well as my dream to put one somewhere in my house! I simply love it! I had spray painted some of the hardware along with the handle to mimic the look of brass that would go along with the light fixture we were adding. It wasn’t brassy enough for me so I overlaid it with a couple of coats of Fusion Mineral Paint in Pale gold and it looks so much richer now and matches the brass light fixture perfectly.

A modern barn door with brass hardware

Brass painted barn door handle

(Week 4 had us adding a barn door)

So this is where we are as of today! You’ll notice that we’ve changed the chair from the one in our mood board. I’m still not sure about this one either. I’d love an office chair with wheels on the bottom but have yet to find one that is pretty to look at and comfortable too. Stay tuned to see how that saga plays out!

We have this gorgeous rug from rugsusa, desk, mirror, chair and pretty faux hydrangeas from Afloral in the room right now. My light fixture from Westelm came in on Monday and I am smitten with it! I’ll wait until next week to share that beauty! I’m still waiting for our sideboard storage unit that’s to be picked up from the store tomorrow (fingers crossed it’s arrived from another province, Ack!) I also have two deliveries scheduled for tomorrow which hold all the accessories for the room! Oh yes, I’m also waiting for delivery of a couple of cushions to add to the seating and hoping they’ll be here on time too…Phew!

I’ve learned a lot of what not to do here on my first challenge. The next time (If I survive this one) I’ll have a  better idea of how things should work! 🙂

One room challenge spring 2017 Modern Coastal Farmhouse Office

So that’s a rundown of where we started and where we are as of today. There is still so much to do but I’m excited to see all our plans come together and praying for sunny skies to photograph it all! Don’t forget to come back next week to see the final reveal. You may want to subscribe to get my posts sent directly to your inbox. You can also follow along on Instagram for more pictures and progress stories. Have a great week!

For more great design inspiration take a look at the designers and participants link up  here.

One Room Challenge

Filed Under: diy, Home decor, Makeovers, One Room Challenge™, spring

Barn Door | Week 4 | One Room Challenge™ Spring 2017

4:28 pm by kim 30 Comments

Modern Barn Door
One Room Challenge™ Week 4

One Room Challenge

Welcome to week 4 of the One Room Challenge™ hosted by Linda from Calling it Home, where designers and bloggers makeover a room in their home in 6 weeks. For those of you just tuning in, you can go back and follow the progress by reading Week 1, Week 2, and Week 3. This week I’ll be sharing this Modern Barn Door we’ve added to the space. We had planned on building our own door from plywood and molding, but when we factored in the time and cost, we decided that buying this ready-made door made more sense for us.

Modern Barn Door with brass hardware.

I had wanted a barn door for a really long time but I have a smaller home and a more open concept main floor. Meaning, there was no room anywhere for a barn door except in this room. When we were deciding on how to make this room more functional, we realized there was so much junk in our tiny walk in closet that we couldn’t even shut the closet door! However, we had to utilize as much floor space as possible in this closet, so a barn door was just what was needed! You can use all the floor space without having to worry about a door being swung open or shut. It was the  perfect solution and I got my dream of having a barn door!

If you remember my mood board, I had wanted this room to take on a Modern Coastal Farmhouse vibe:

Mood board for ORC 2017

So that meant along with some cozy pieces and texture, it would also have some clean lines and brass finishes. When we decided on the barn door, I wanted it to have the same aesthetic. Instead of going with the black hardware that I had always thought of having on a barn door, I chose this clean steel hardware. I had wanted hardware that incorporated  brass, but that was difficult to find, so I came up with my own solution.

A Modern Barndoor with touches of brass

The brass hardware is to tie in with the brass mirror and light fixture that are coming. I spray painted the two pieces that attach the door to the track, a soft gold using Rustoleum Metallic in Pure Gold before we hung the door.

A Modern Barn door with brass hardware.

I also found this clean lined and modern door handle from the Home Depot and spray painted it in the same finish. It really tied it all together. The door is painted Benjamin Moore’s “Simply White” along with the walls.

A modern barn door with brass hardware

Modern barn door with brass hardware

Our old door is still attached in there! Lol. The closet will be cleaned out and the old door removed this week. You may have noticed that I didn’t leave the space by the ceiling empty, but brought the stencil as close to the ceiling as possible. I didn’t mind it in the room at the time, but after seeing it on the blog last week, it looked too unfinished to me so I filled it in this week. I’m still loving that watercolour look!

A modern barn door with brass hardware

Thanks for stopping by to check out the progress. It’s hard to make these update posts exciting when you’re only showing little bits at a time, I know.  Stay tuned though, only one more progress post and then the final reveal! Don’t forget to follow along with the other participants here!

Blessings,

Kim

Filed Under: diy, Home decor, Makeovers, One Room Challenge™, spring

Wall Stencilling How-To | Week 3 | One Room Challenge Spring 2017

2:31 pm by kim 58 Comments

Wall Stencilling How-To

How to stencil a wall. One Room Challenge

One Room Challenge

Well it’s week 3 of the One Room Challenge and oh how the weeks have flown by! This week I’ve added some colour and pattern above the board and batten by using a stencil. I’ll share a little wall stencilling how-to but first let’s look at where we’re going. If you’re just tuning in now you can follow the progress by reading week 1 and week 2.

Here is the mood/inspiration board for the room:

Mood board for ORC 2017

If you notice, the board and batten as well as my stencil treatment above it aren’t on my mood board. I still hadn’t decided at the time what kind of a treatment to add. I knew that I wanted a modern coastal farmhouse look thats much in keeping with the rest of my home right now. Once I decided on the board and batten I knew I wanted to do something above it. Wallpaper can be pretty pricey even for a relatively small space so I decided on stencilling. There are so many gorgeous patterns out there now and when you add the colour factor, the possibilities are endless! I decided to go with Royal Design Studios Stencils for my stencil and chose the Floral Fireworks allover stencil 21″x 23″. I had the paint colour already and had been waiting for a chance to use it. I used the Fusion Mineral Paint in “Liberty Blue”.

How to Stencil a Wall to look like Wallpaper

How to stencil a wall. One Room Challenge

I have to say that I love the way it turned out! I’m still deciding on wether or not to finish the very top as I’m kind of liking the somewhat scalloped looking edge. I guess you’ll find out on the final reveal! 😉

Wall Stencilling How-To

Let’s start with what you’ll need:

How to stencil a wall. One Room Challenge

  • You’ll need a stencil of your choice
  • A small roller and/or a stencilling brush
  • Good quality painter’s tape
  • Lot’s of paper towel
  • A small paint tray or a styrofoam plate will do
  • A level
  • Measuring tape
  • Spray on adhesive for the back of your stencil (optional)

How to stencil a wall. One Room Challenge

1.Using your measuring tape, find the centre of the wall. Affix your stencil to the top and centre of your wall. Check to make sure that your stencil is level.

How to stencil a wall. One Room Challenge

2. Load up your roller/brush with paint , enough to cover the entire thing evenly.

3. Remove most of the paint by off loading it onto some paper towel. This is important as you don’t want excess paint to bleed underneath the stencil. Less is better when it comes to stencilling!

How to stencil a wall. One Room Challenge

4. Begin to roll out over your stencil. You can lift up the corner of the stencil to make sure you’re not applying too  much paint and bleeding through.

5. Move your stencil over to the the next position. Your stencil will have registration marks that will guide you to the correct placement. I found that the paint was dry enough to move onto the next placement without disturbing the previous paint.

How to stencil a wall. One Room Challenge

6. Once you come to a corner or edge. Apply your painters tape to protect the edge and the adjacent corner.

How to stencil a wall. One Room Challenge

7. Place the tape on the side of your stencil that you will be stencilling. In this case the left of the corner. Don’t tape the right side down as this will need to be flexible. (In the above pic. The right side is taped just to hold the stencil up while I photographed the pic, otherwise that side should not be taped)  Using your roller to paint into the corner by pressing into it.

How to stencil a wall. One Room Challenge

8. When doing edges and corners, you can use your roller to press into the corner/edge and  then use your fingers to press your stencil down into the corner/edge. You can continue to roll at this point or use a little stencil brush to get right into the edge. I just continued on with my roller.

How to stencil a wall. One Room Challenge

9. Continue to go around the room until you have finished. You may have to stop and clean the excess paint buildup from your stencil. I did this once and placed it in my bathtub to clean.

Royal Designs Studio has some great how-to videos and instructions on their site that I would encourage you to watch if you’re thinking of trying this out.

If you look at my walls there are lighter and darker areas. I actually love this as it gives the appearance of water colour. I also found that in places near the corners and edges where It seemed that I made some major “out of the lines” mistakes, the pattern was very forgiving. If there are areas that you feel you need to address, you can simply get a little brush and use the base colour to help clean up the lines. I thought I was going to have to do a lot of cleaning up of the lines but it seems to blend in and has just become part of the pattern.

How to stencil a wall. One Room Challenge

So here is a little peek into my Modern Coastal Farmhouse Office/Workroom. If you look to the right of the photo, you’ll see a peek of something else we’ve been working on! 🙂 Thanks so much for joining me on my first journey with the One Room Challenge and stay tuned for more projects on the way! You can follow along with others on their journey as well right here!

(This post was done in collaboration with Royal Design Studio Stencils, all photography, thoughts and opinions are my own.)


Filed Under: diy, Home decor, Makeovers, spring, Tutorials, Uncategorised

  • Go to page 1
  • Go to page 2
  • Go to Next Page »

Primary Sidebar

Hi, I'm Kim Read More…

Instagram

Follow along on Instagram

Sign up and don't miss a post!

Recent Posts

  • Festive Bacon Wrapped Chestnut Holiday Appetizer
  • DIY Mantel Decorated for Christmas
  • Simple and Cozy Fall Home Tour
  • Simple Fall Tablescape

Archives

Footer

Copyright © 2025 · Foodie Pro Theme by Shay Bocks · Built on the Genesis Framework · Powered by WordPress