• Skip to primary navigation
  • Skip to main content
  • Skip to primary sidebar
  • Skip to footer

Kim Power Style

  • Home
  • Contact
  • About
  • Tutorials

Uncategorised

DIY Mantel Decorated for Christmas

5:00 am by kim 8 Comments

Hi friends, It’s the most wonderful time of the year again and I’m sharing this DIY mantel I made and decorated for Christmas.

So settle in, grab a refreshment and join my friends and I from the Seasonal Simplicity Christmas Series hosted by Krista from The Happy Housie.

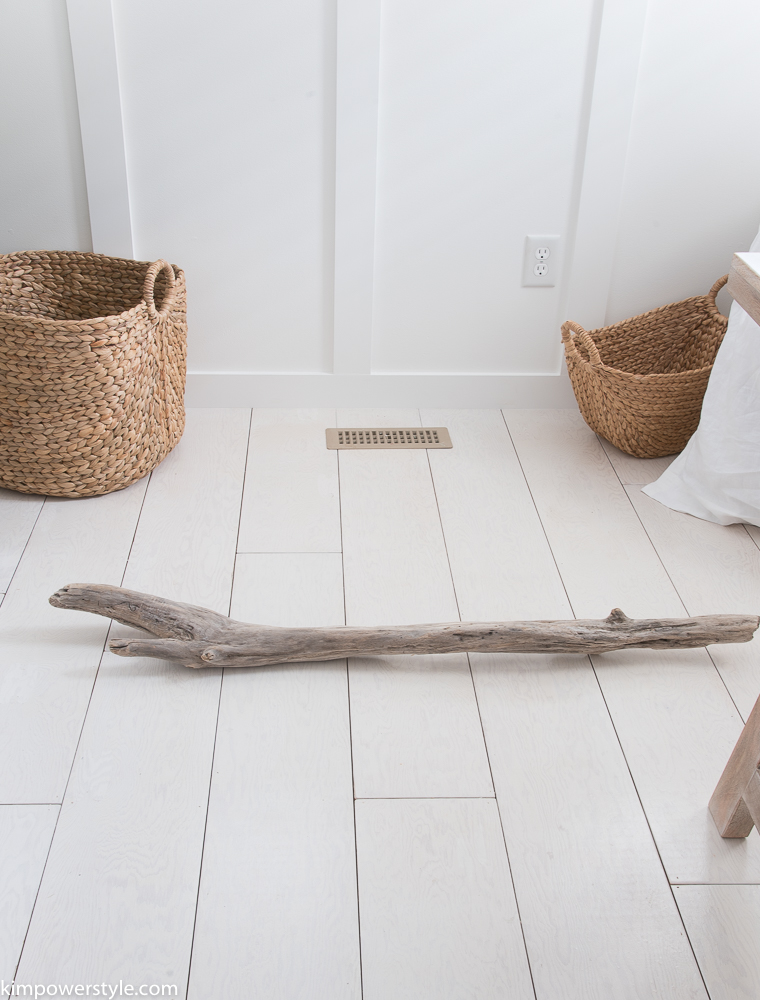
If you’ve followed me for a while you’ll know that I had every intention of adding a mantel as soon as we moved into our new home. I was looking for old barn beams but realized they would be too heavy to install without a lot of tweaking from yours truly…I knew I’d have to  make my own lighter version. Well it’s taken me 10 months to do but I made one just in time to decorate for Christmas!

DIY Mantel Decorated for Christmas

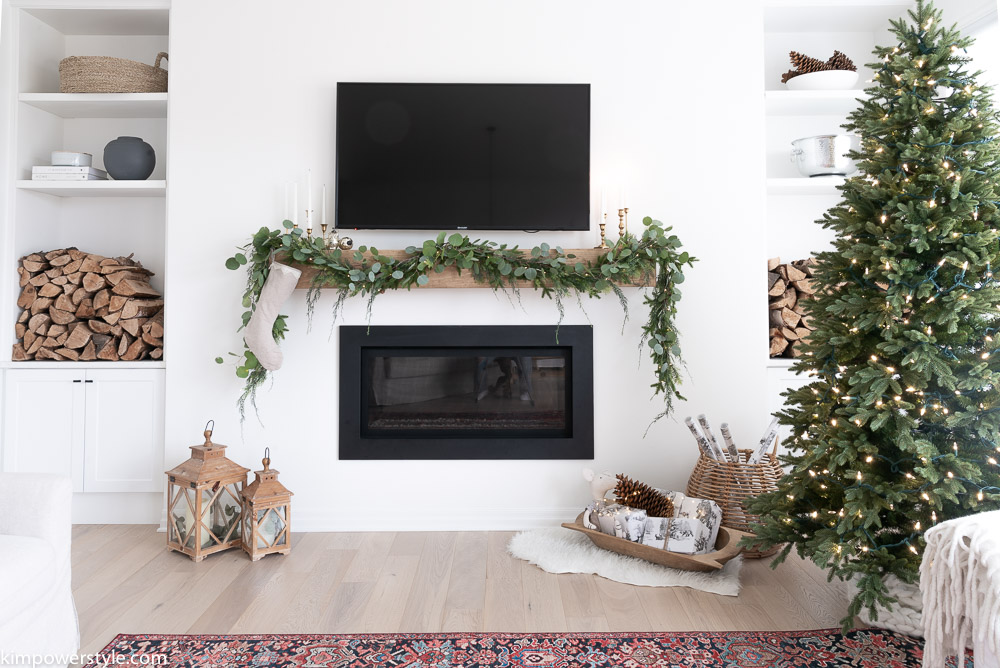
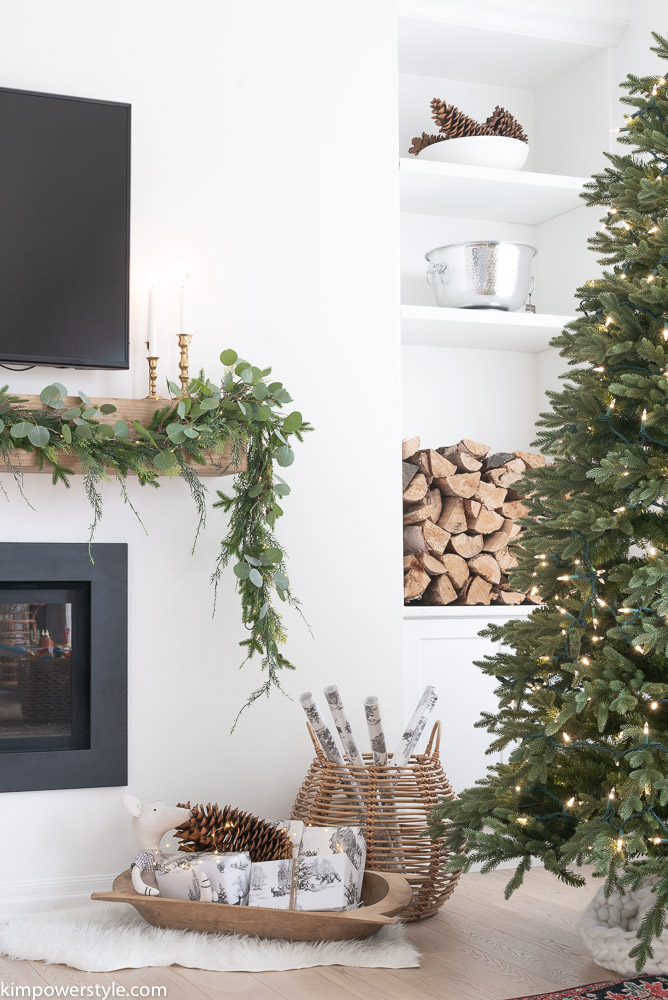
I love It! It’s added so much character to the space and I wish I had done it sooner.

Coastal Farmhouse Summer Home Tour

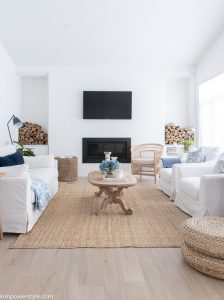
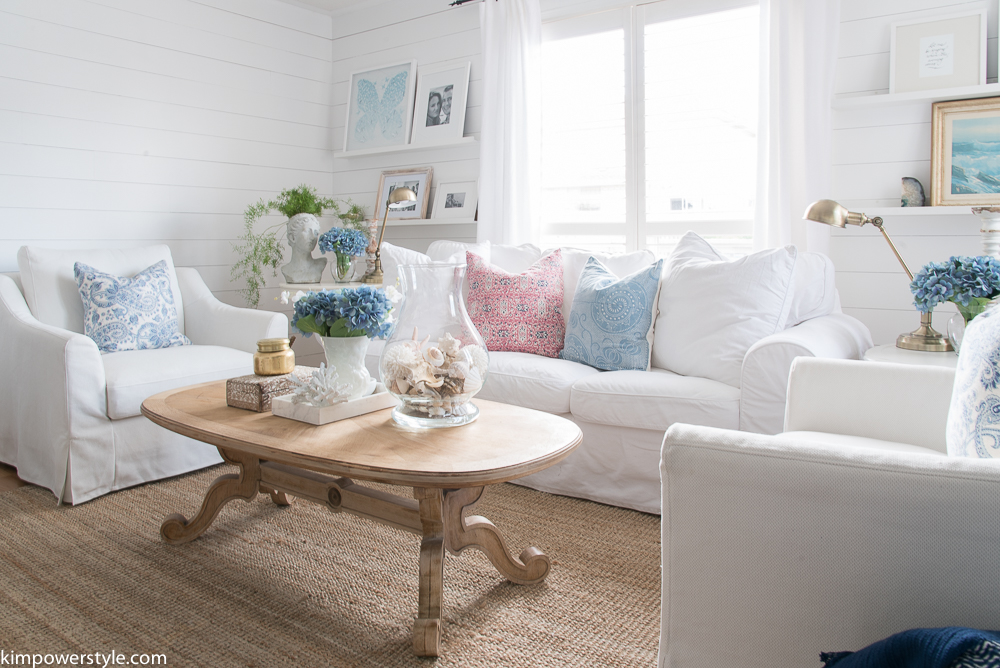
Here’s a picture from my summer tour. It looks so empty with just the TV and fireplace and really needed another element to make it look finished.

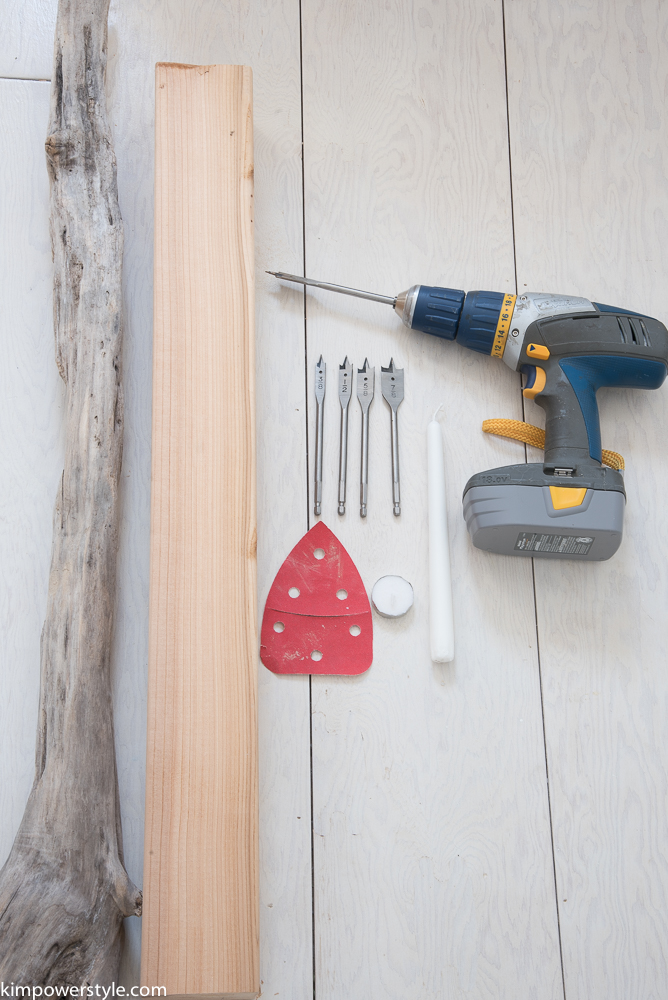
Below I’m sharing a bit of a tutorial on how I made the mantel. It’s not a complete tutorial because my camera fell and my lens broke! But you’ll get the gist of the how to. It’s pretty simple if you know how to use a saw and a nail gun.

DIY Mantel Decorated for Christmas

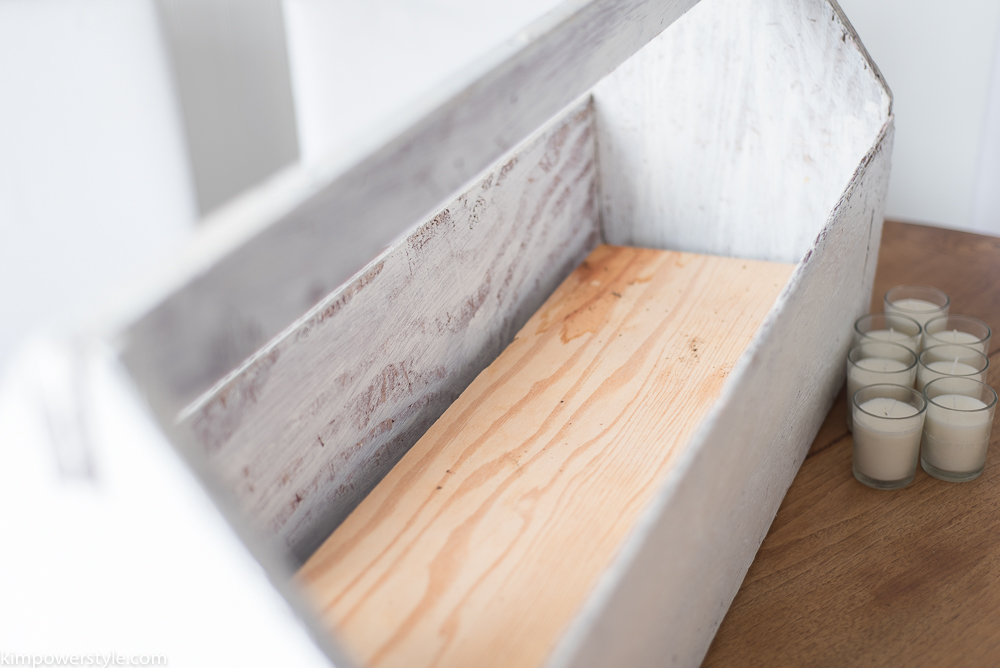
I started with 3 pieces of non-knotty pine in 1″x 8″x 5′. I had the home depot cut them for me to save time. Make sure you pick straight and non-warped pieces. You’ll need a little extra to apply to each end so one of my boards was a 1″x8″x8′. I also used a 2″x4″x8′ to use as brackets to sit my mantel on.

DIY Mantel Decorated for Christmas

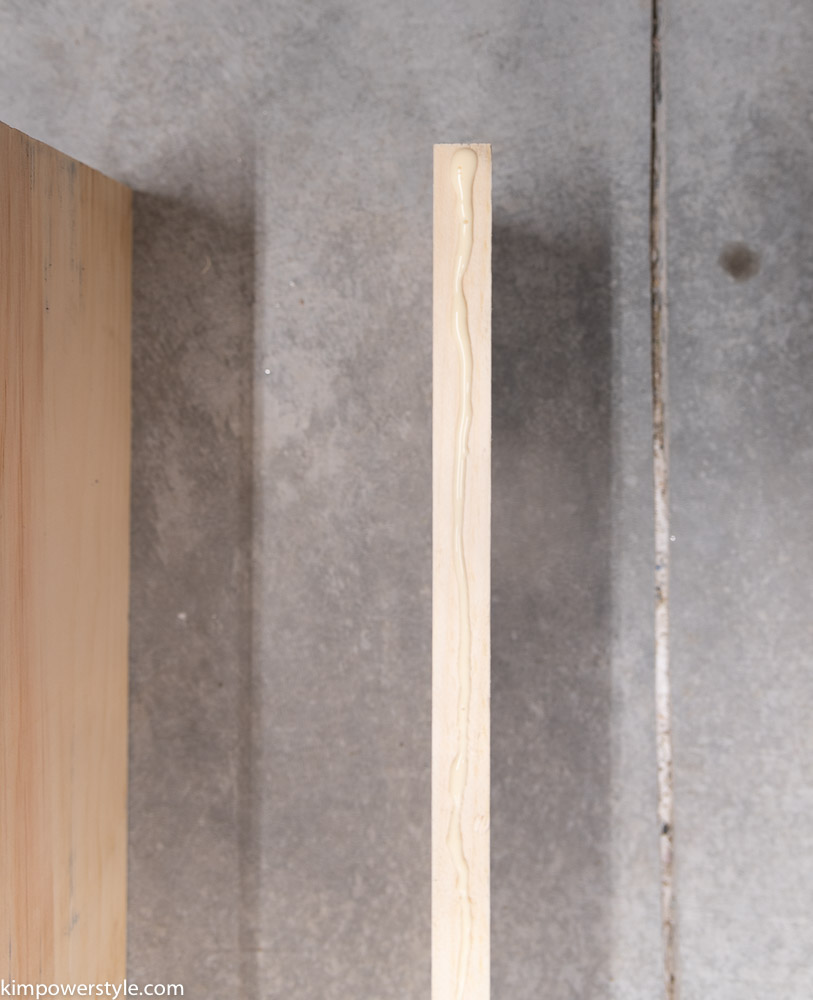
You simply apply glue on both sides of two boards lengthways.

DIY Mantel Decorated for Christmas

Place your third board on top
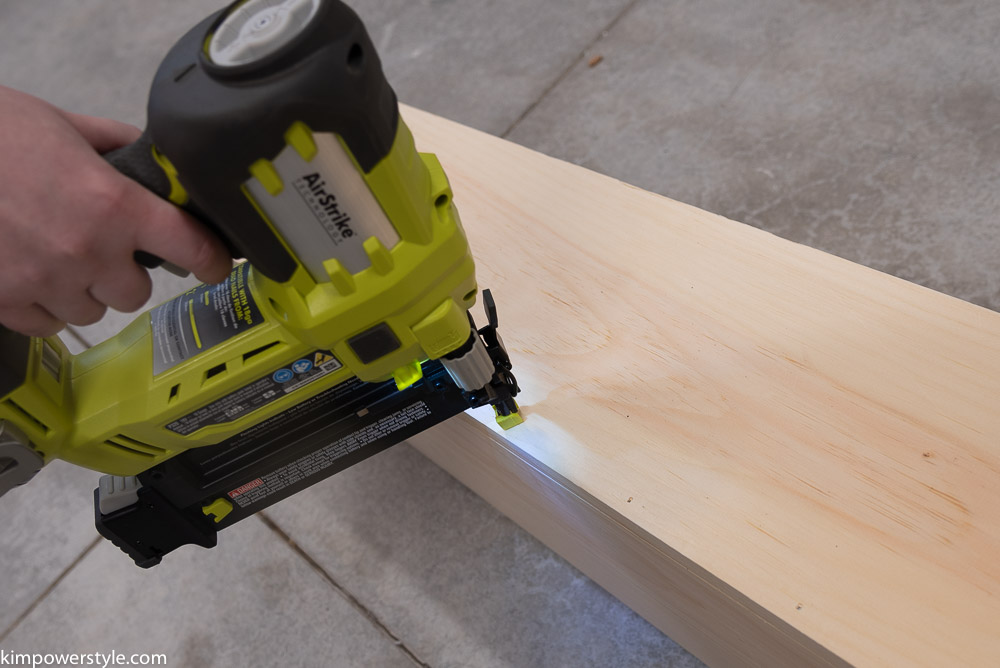
DIY Mantel Decorated for Christmas

Nail it.

DIY Mantel Decorated for Christmas

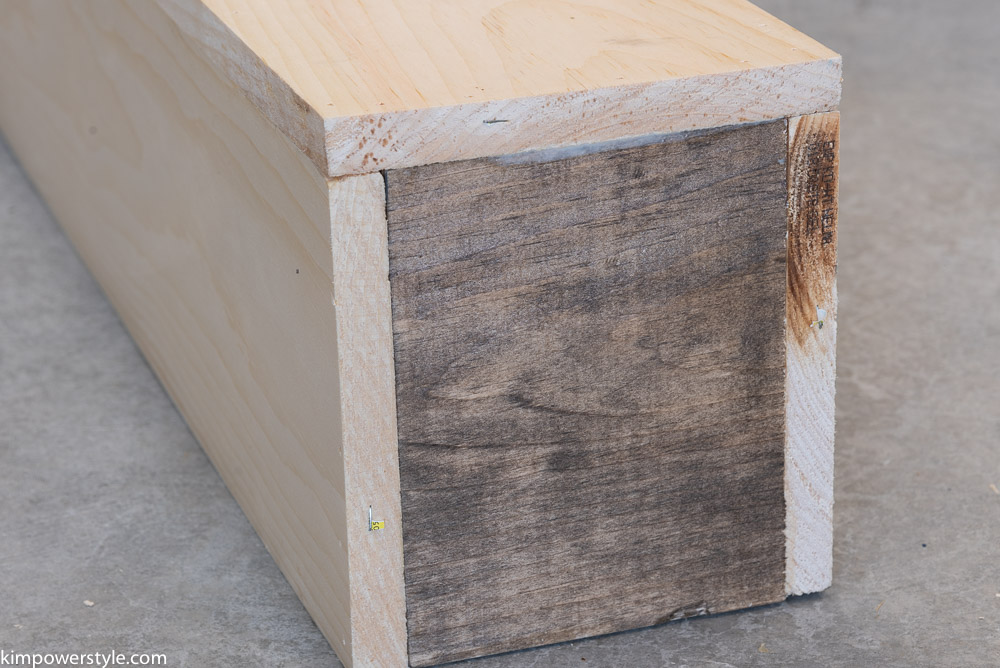
Measure your opening and cut a piece wood to fit in each end.

DIY Mantel Decorated for Christmas

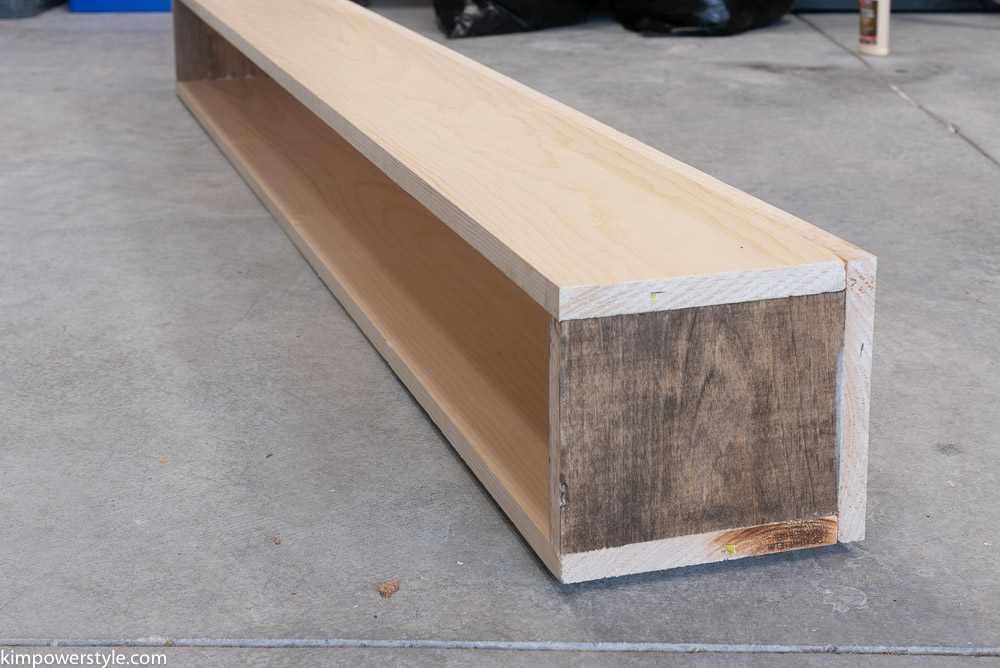
Glue and nail that piece in. (I used the ends to try out different colours of stains). You basically have a hollow box. The box will sit on brackets I made out of a 2″x4″ which are screwed into the studs. I simply sat the box/mantel on top of the brackets and nailed them in!

DIY Mantel Decorated for Christmas

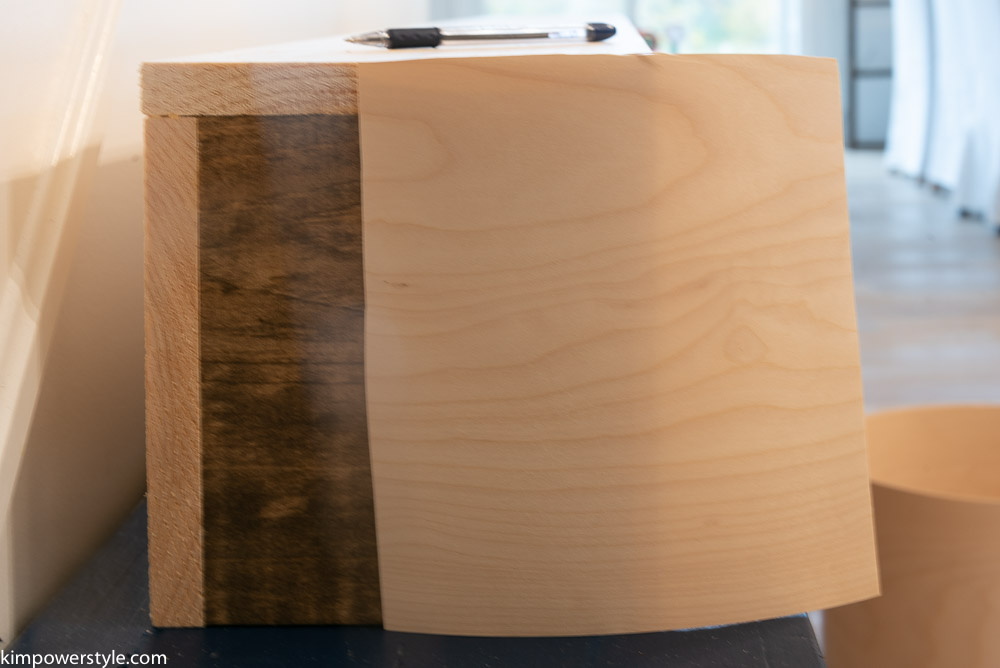
You don’t need to do this step but I wanted my mantel to look like one solid piece of wood so I glued on some veneer at each end. I let the glue/veneer dry overnight and then sanded down all the edges. I mixed together 2 different stains to achieve this custom colour you see below. It was actually a pretty easy project!

DIY Mantel Decorated for Christmas

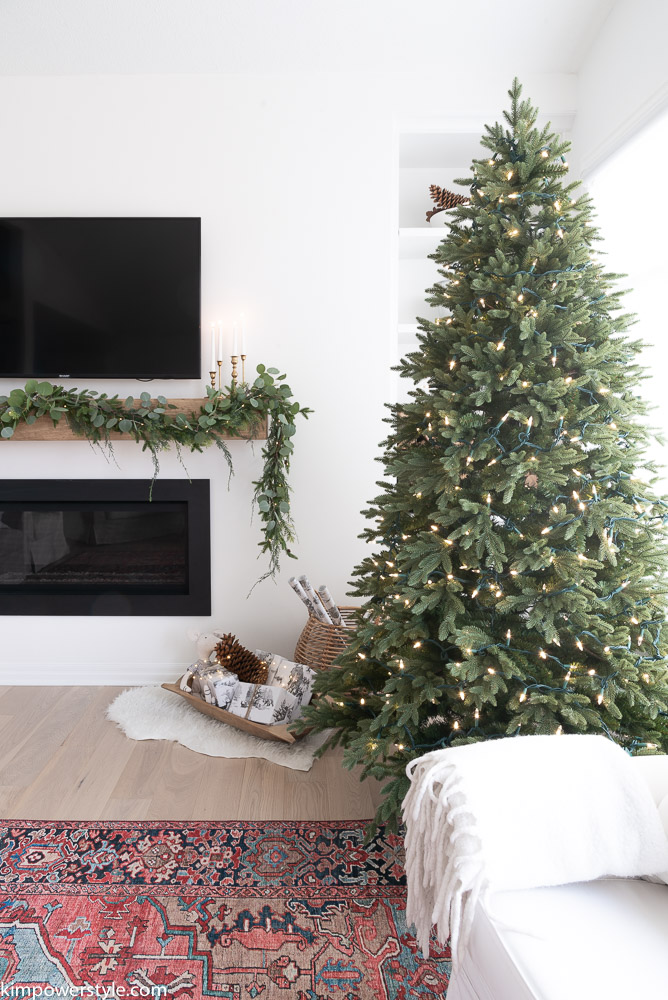
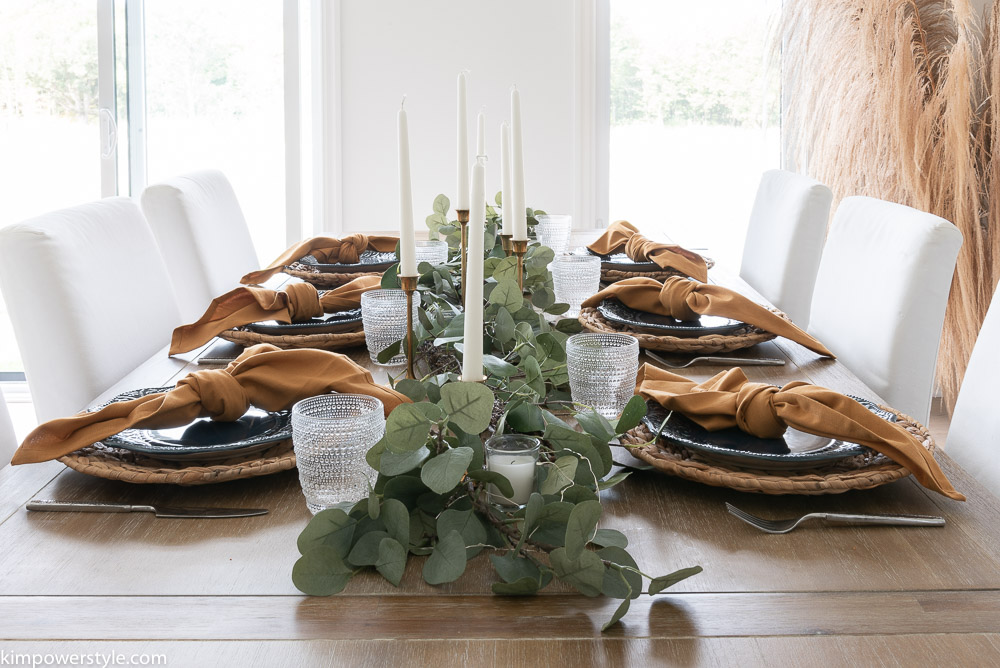
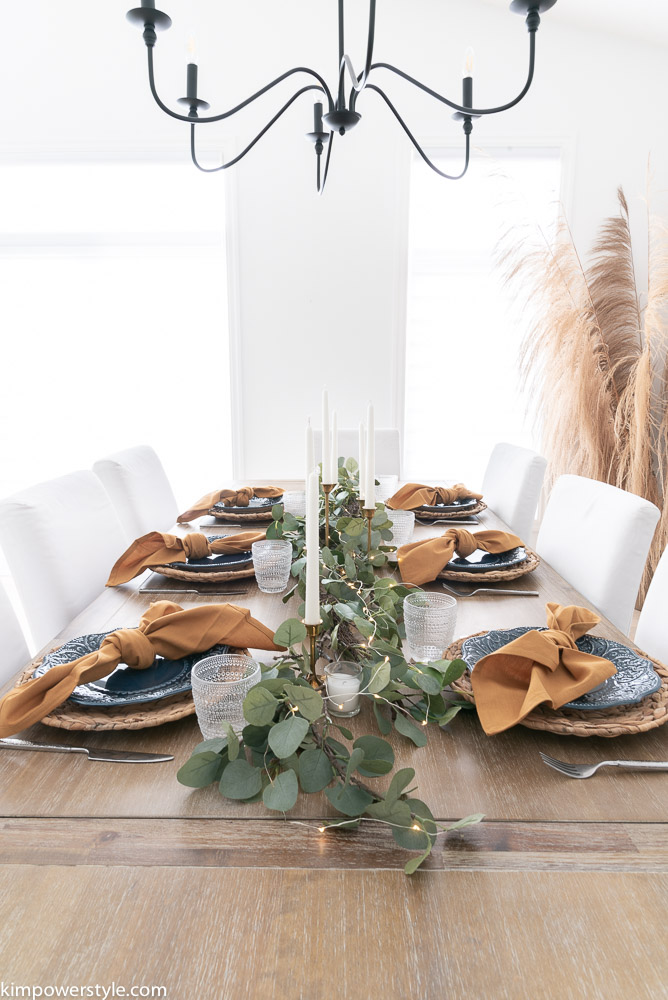
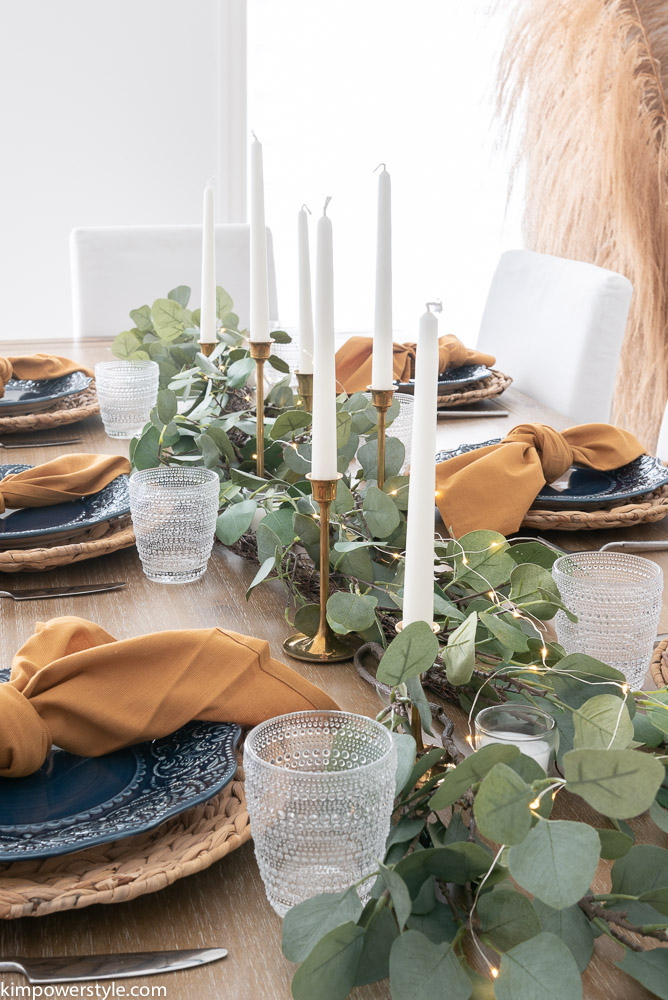
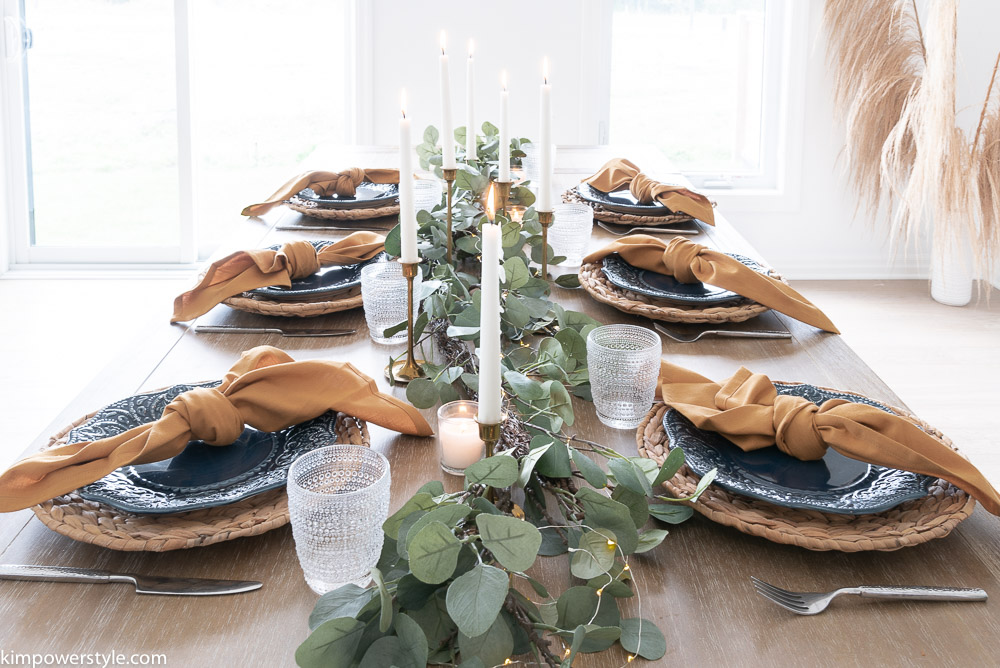
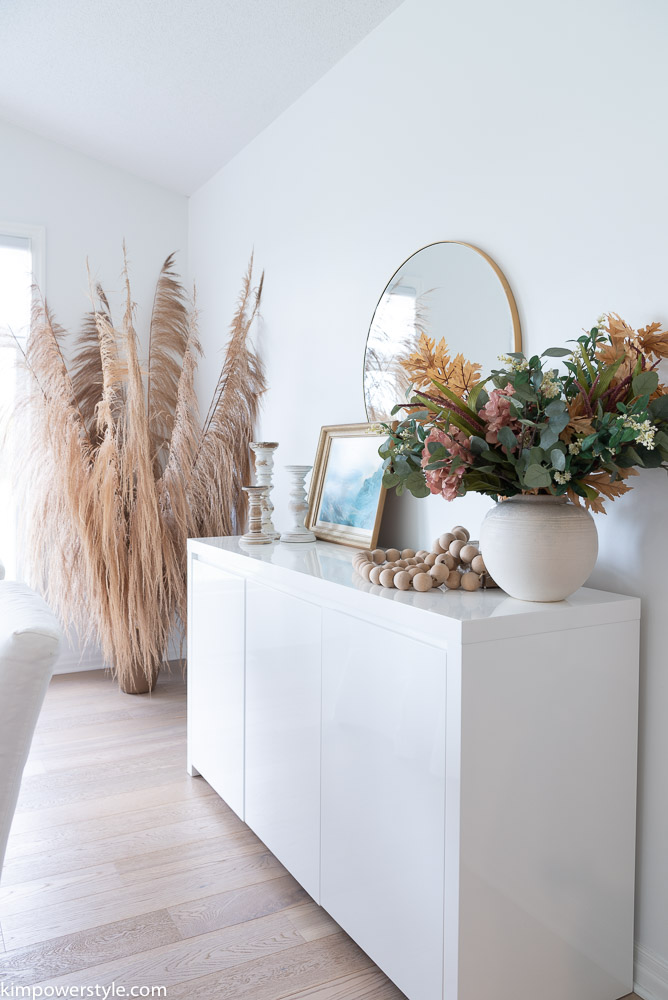
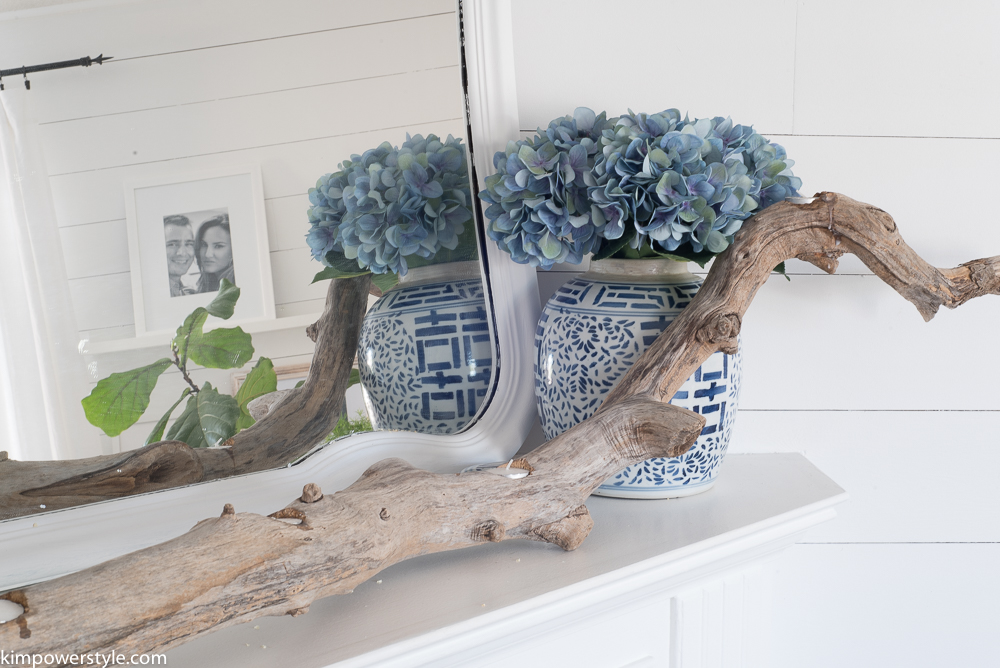
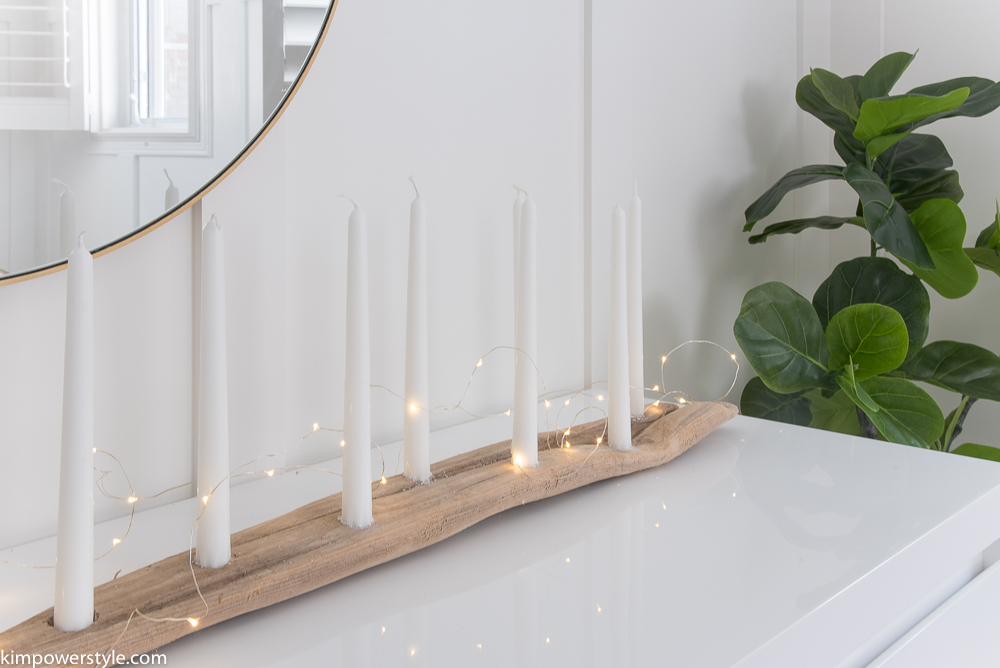
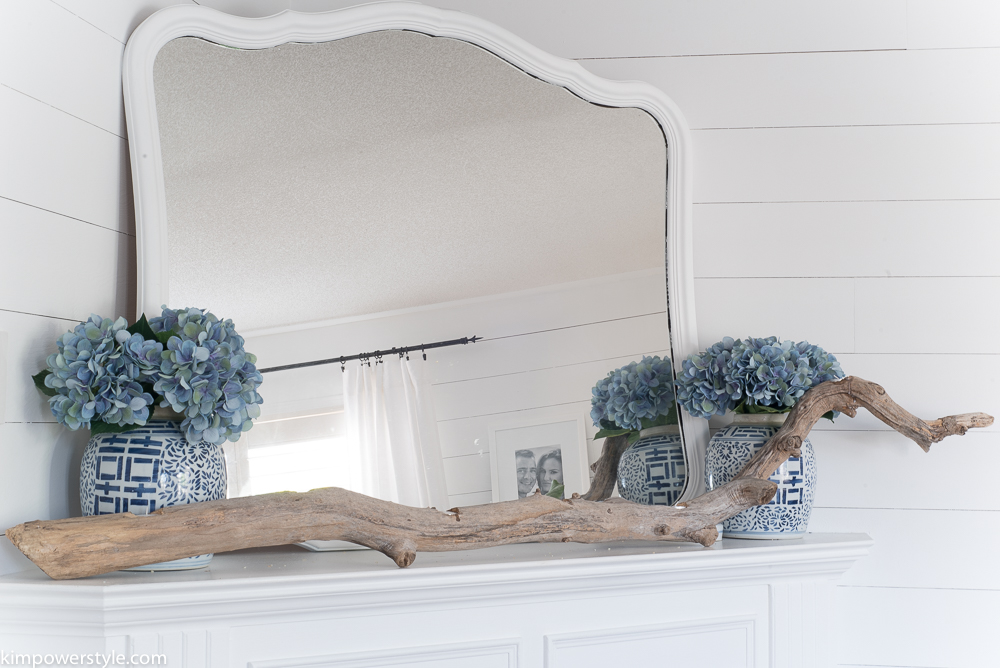
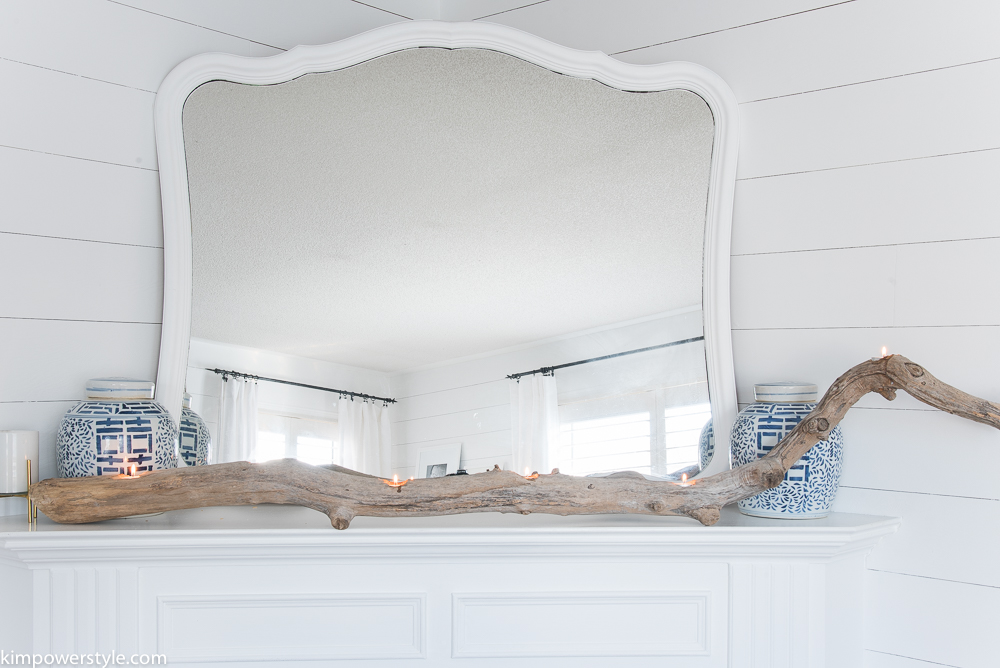
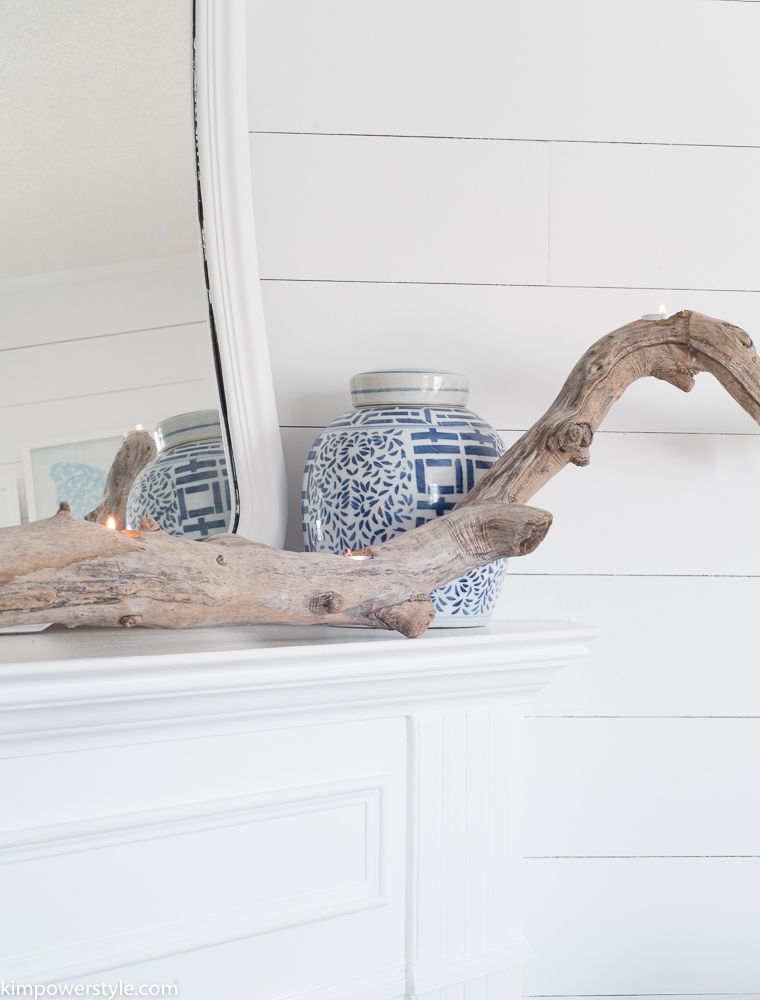
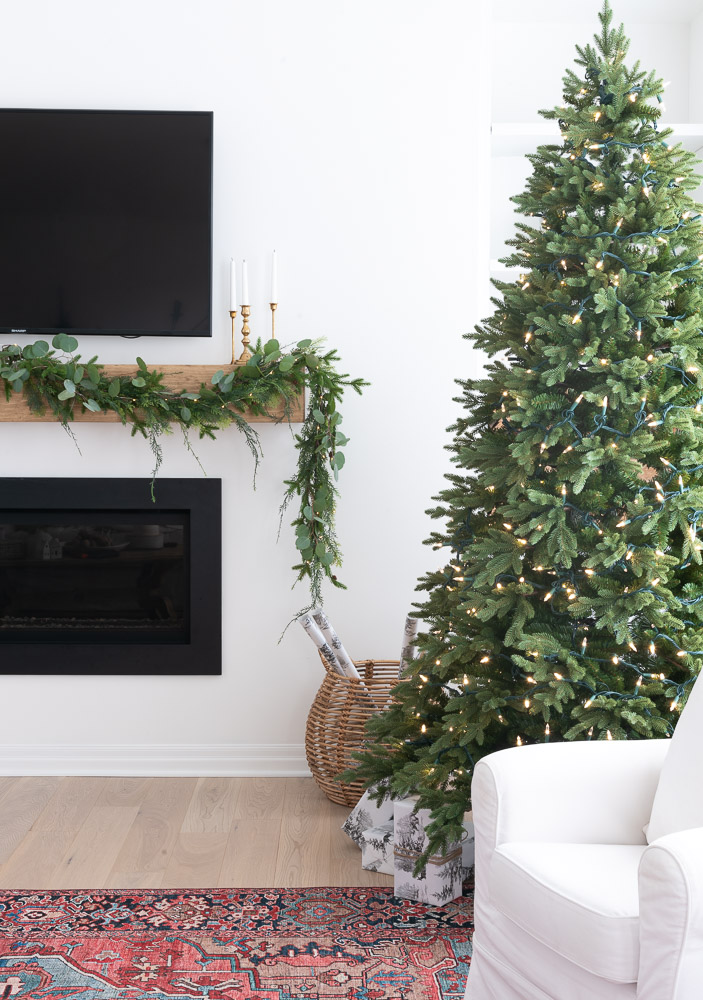
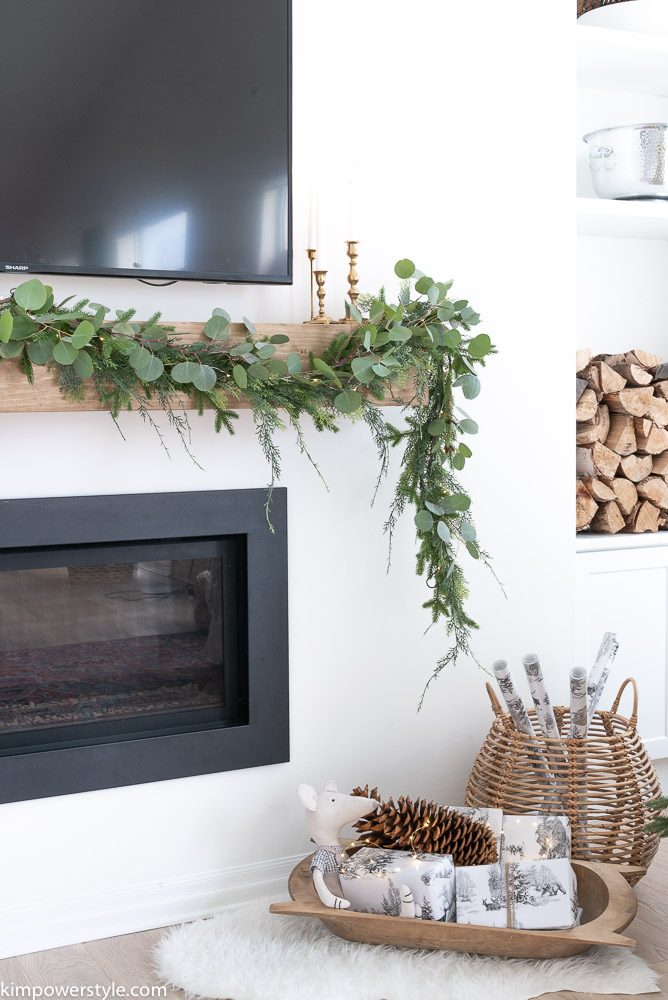
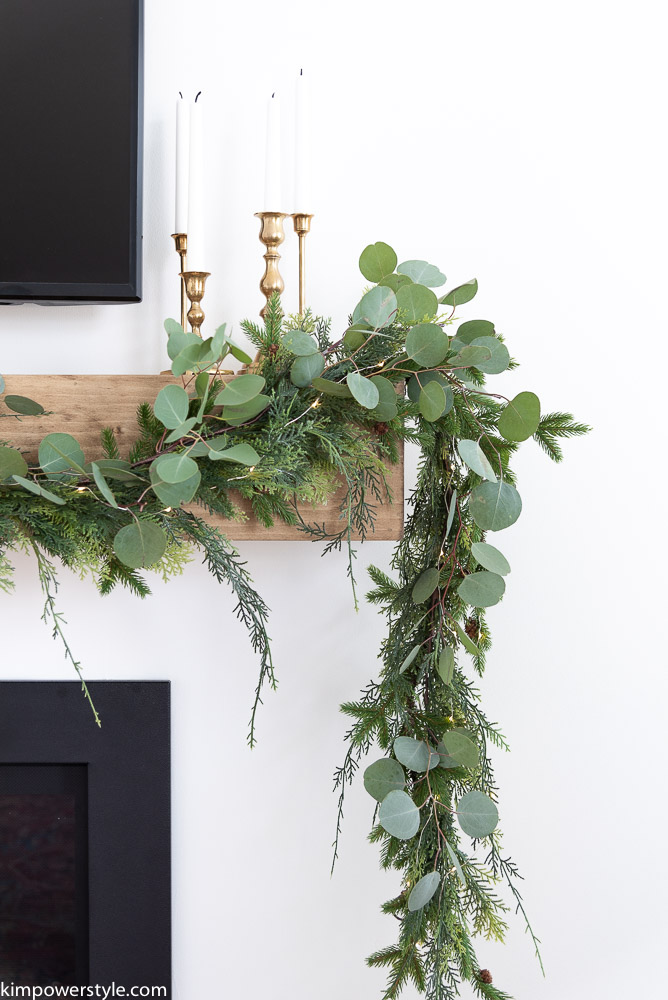
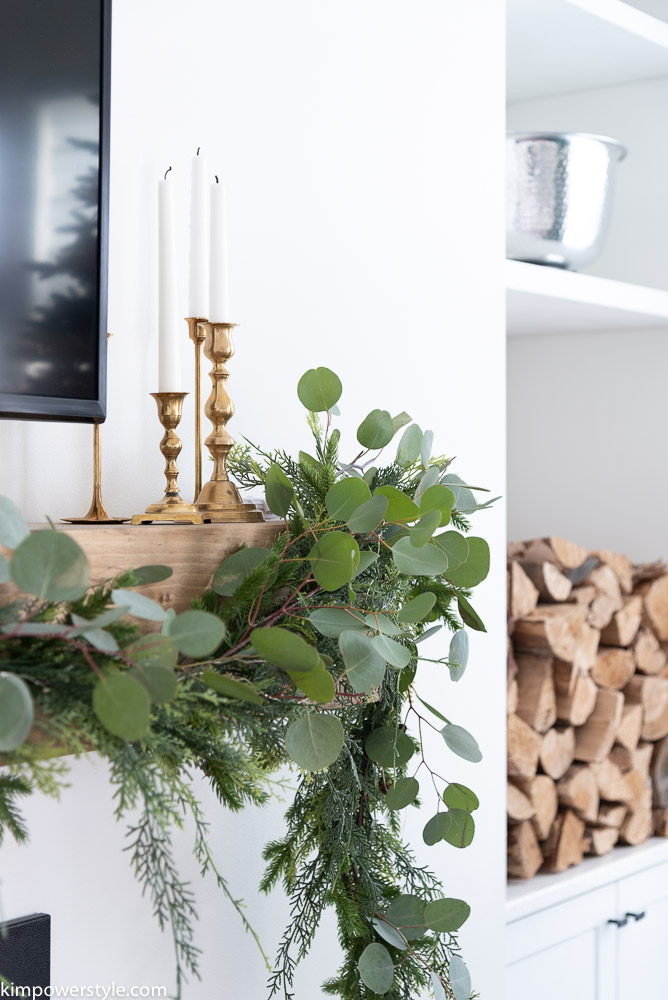
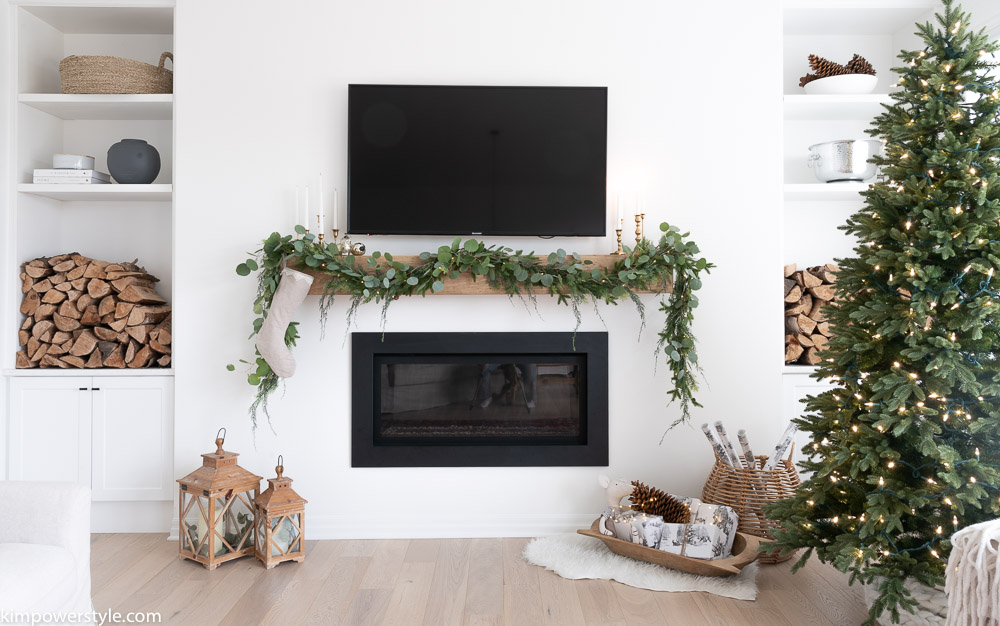
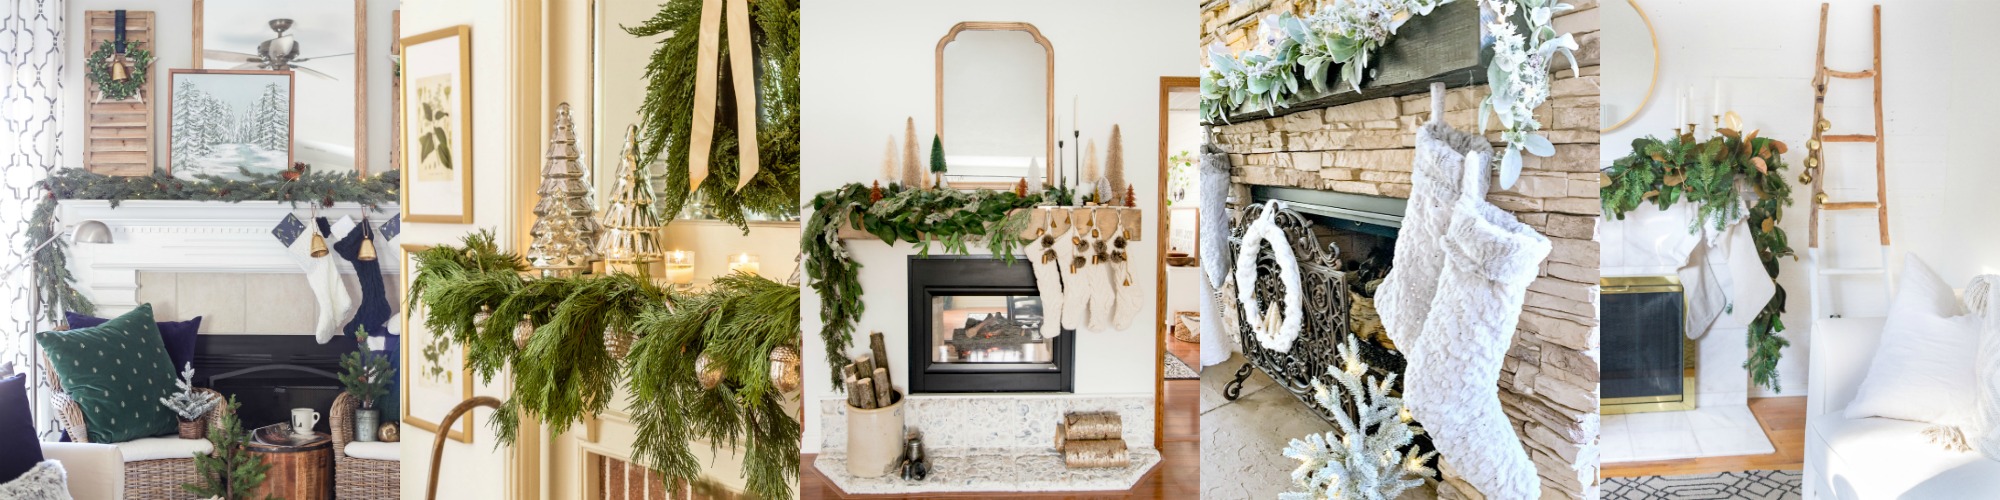
Even though there’s not a lot of space to use due to having the TV above, I was able to add some garland along with brass candlesticks. My motto lately is “Simple”.

DIY Mantel Decorated for Christmas

DIY Mantel Decorated for Christmas

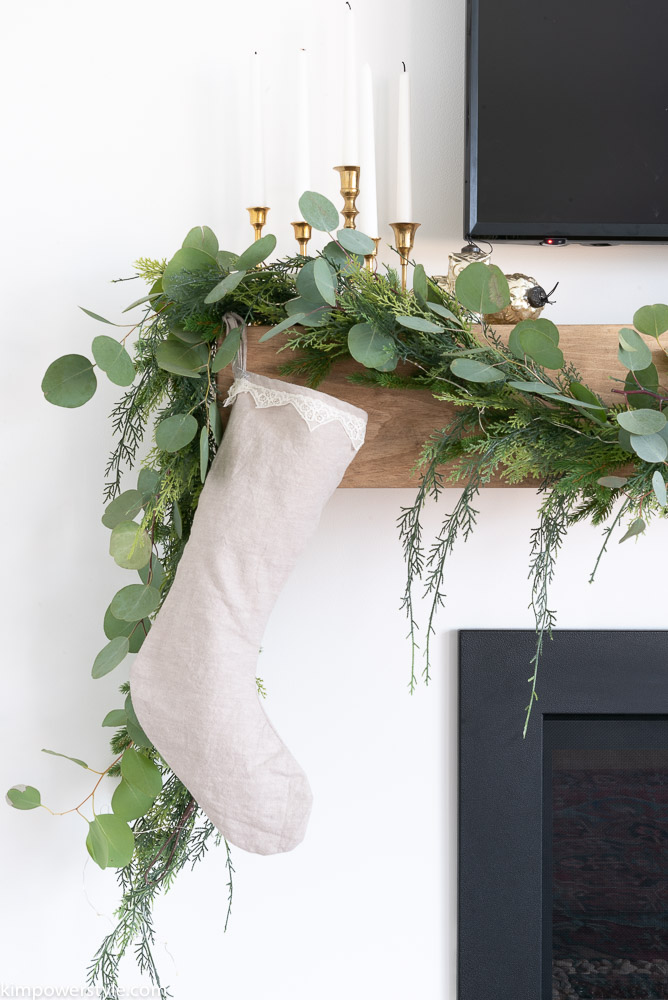
I used two different faux garlands here and just draped them over 3 little nails. I added a battery operated fairy light garland and then added some extra fresh eucalyptus picks. Once they dry out I have some faux ones that I’ll add to it. I love the light and airy look it gives!

DIY Mantel Decorated for Christmas

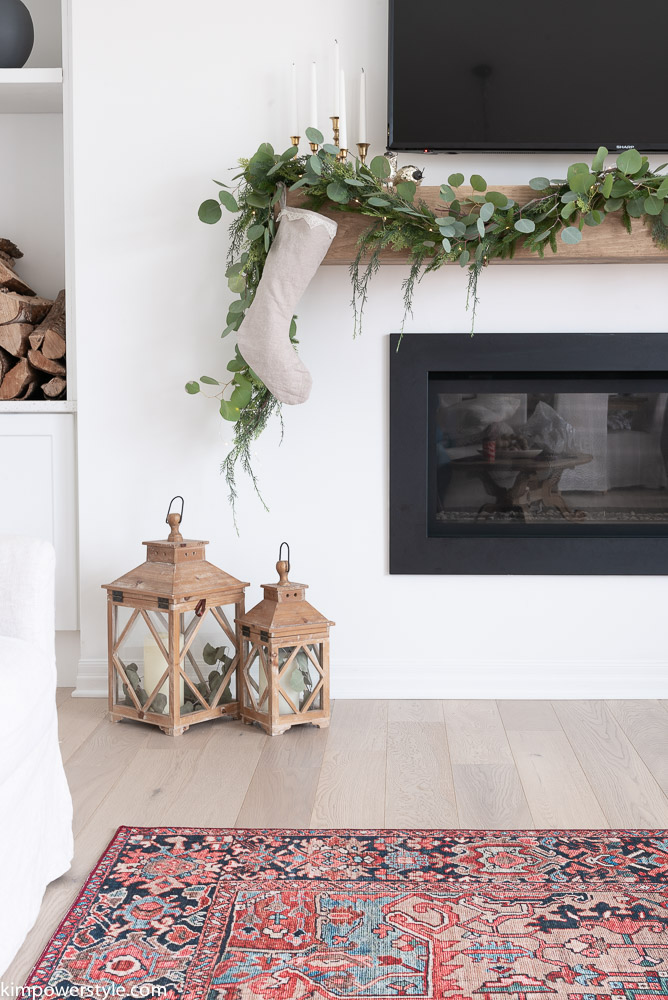
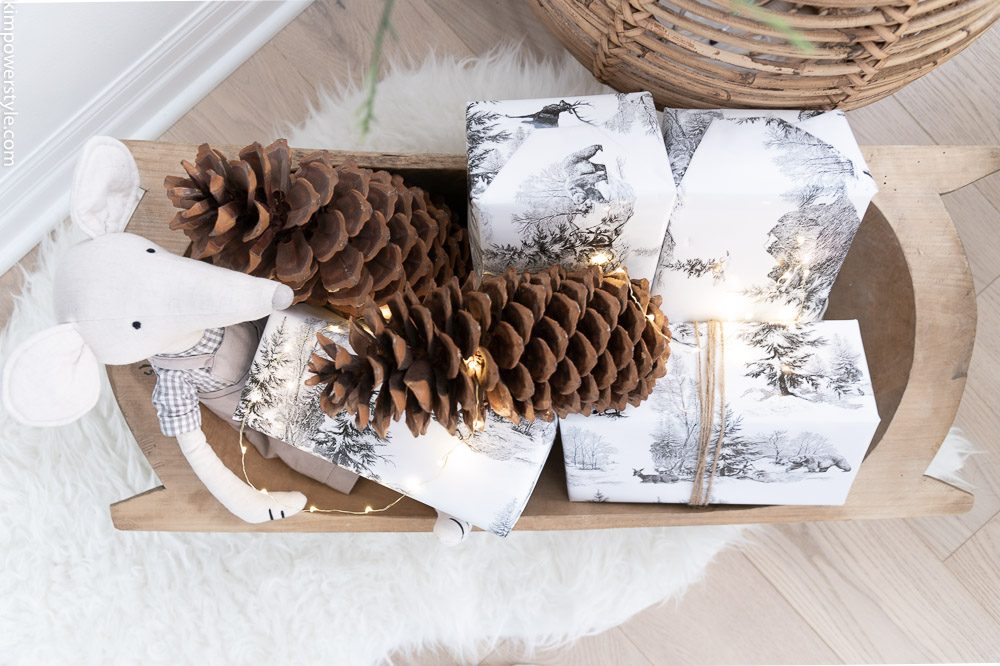
Since there are 10 of us this year, I decided to put up only one stocking for my Grandson. I didn’t want to fill the space full of stockings!

DIY Mantel Decorated for Christmas

DIY Mantel Decorated for Christmas

DIY Mantel Decorated for Christmas

DIY Mantel Decorated for Christmas

DIY Mantel Decorated for Christmas

[show_shopthepost_widget id=”3818599″]

DIY Mantel Decorated for Christmas

Thanks for popping in! There’s a lot more mantel inspiration from my friends below. Just click on the links.

Blessings,

Kim


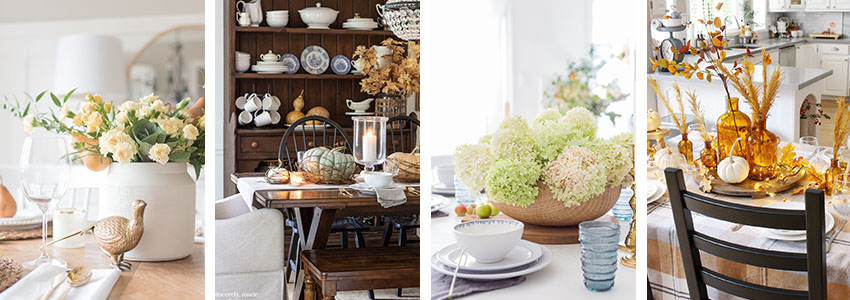
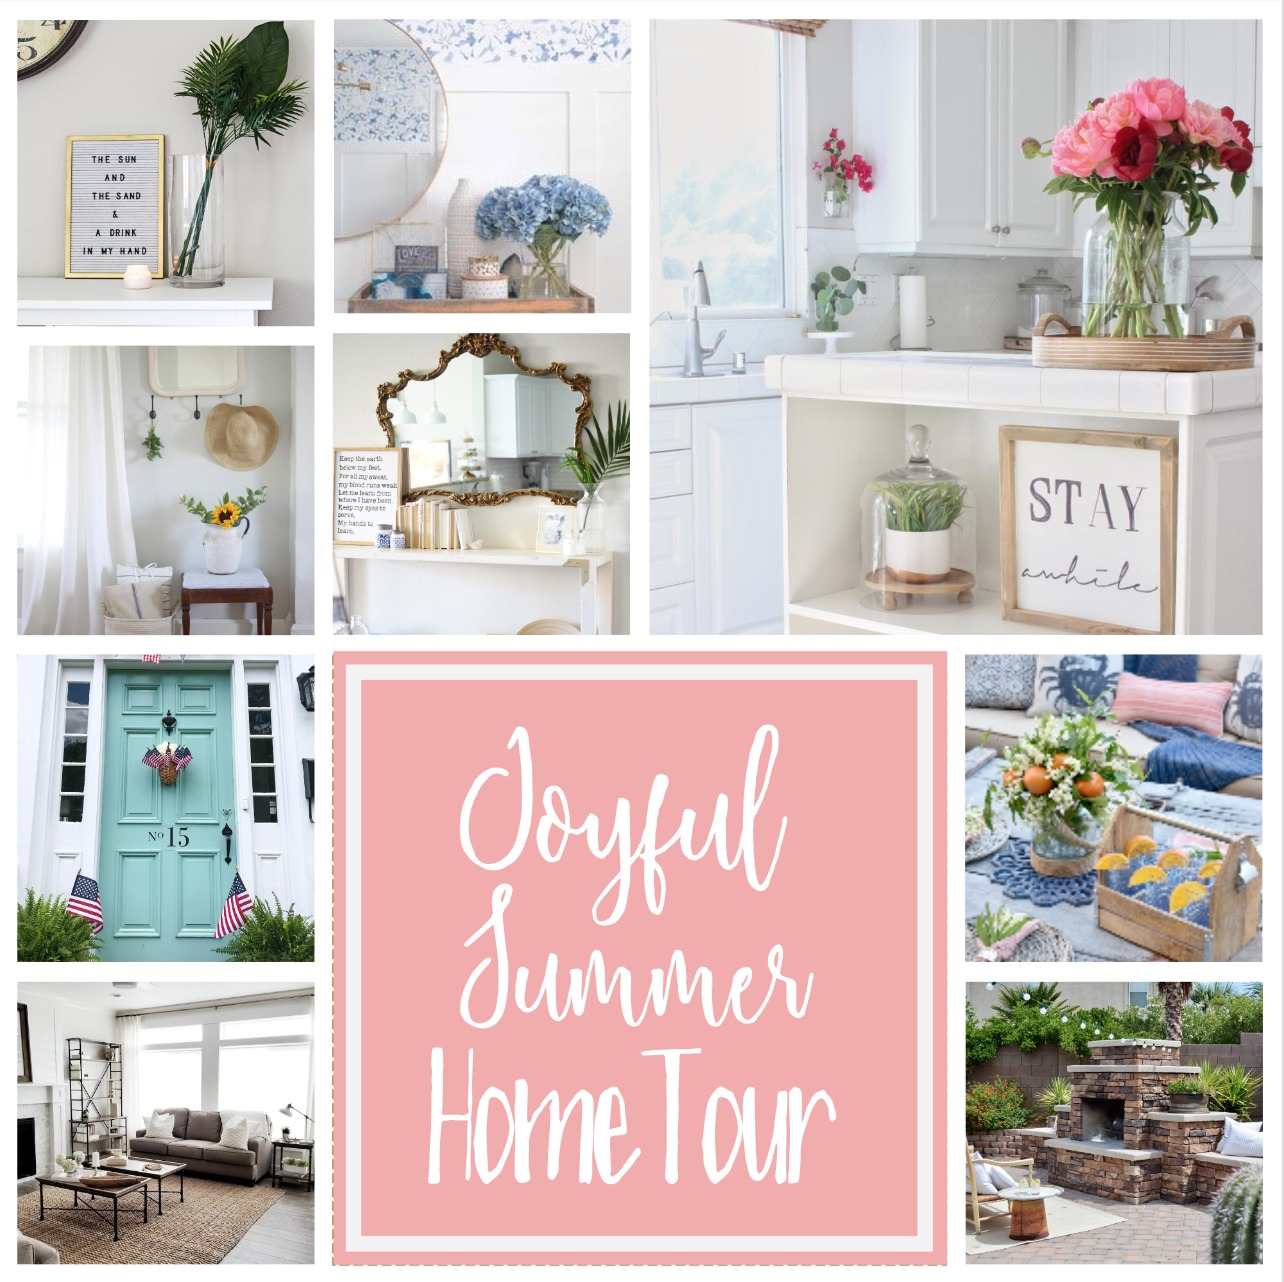
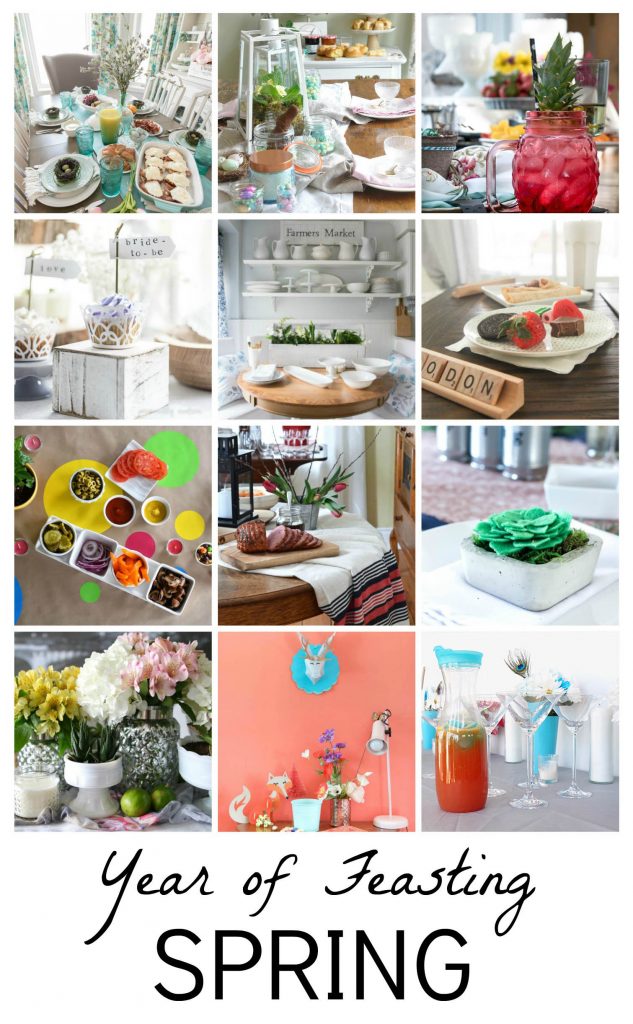
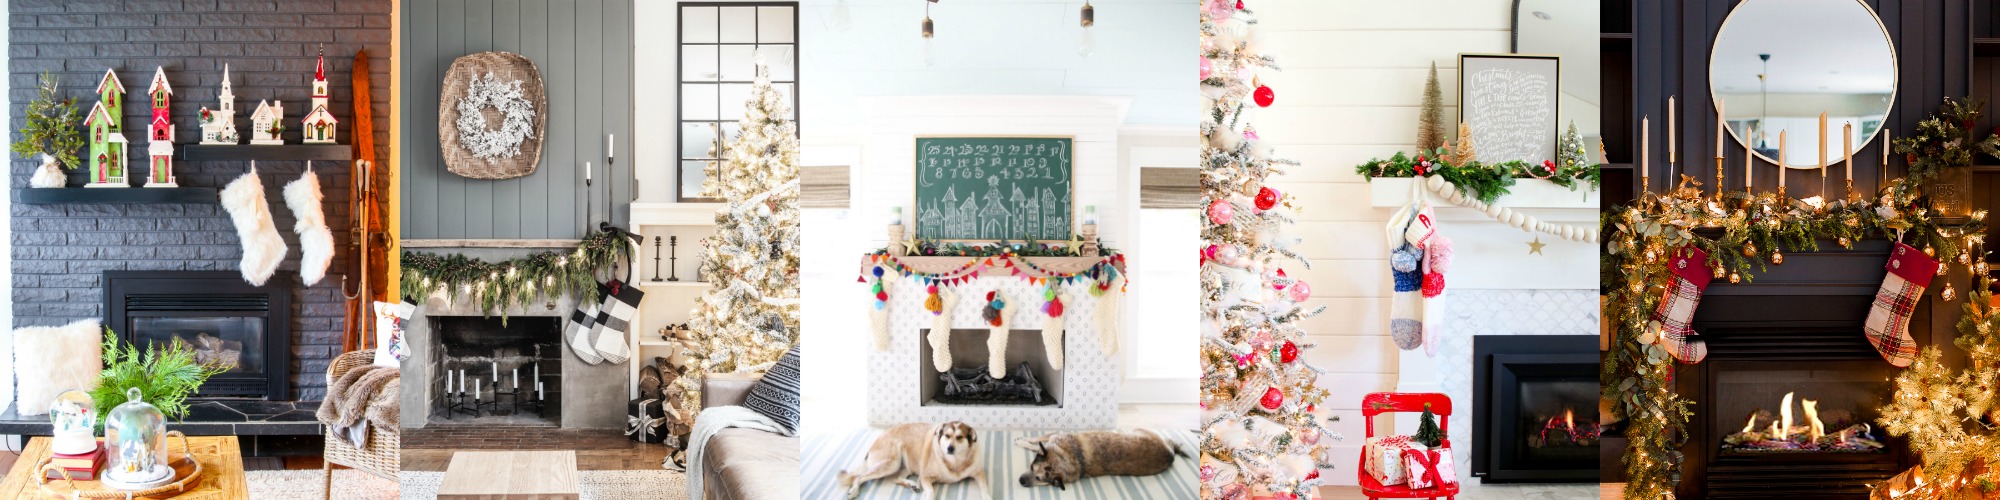
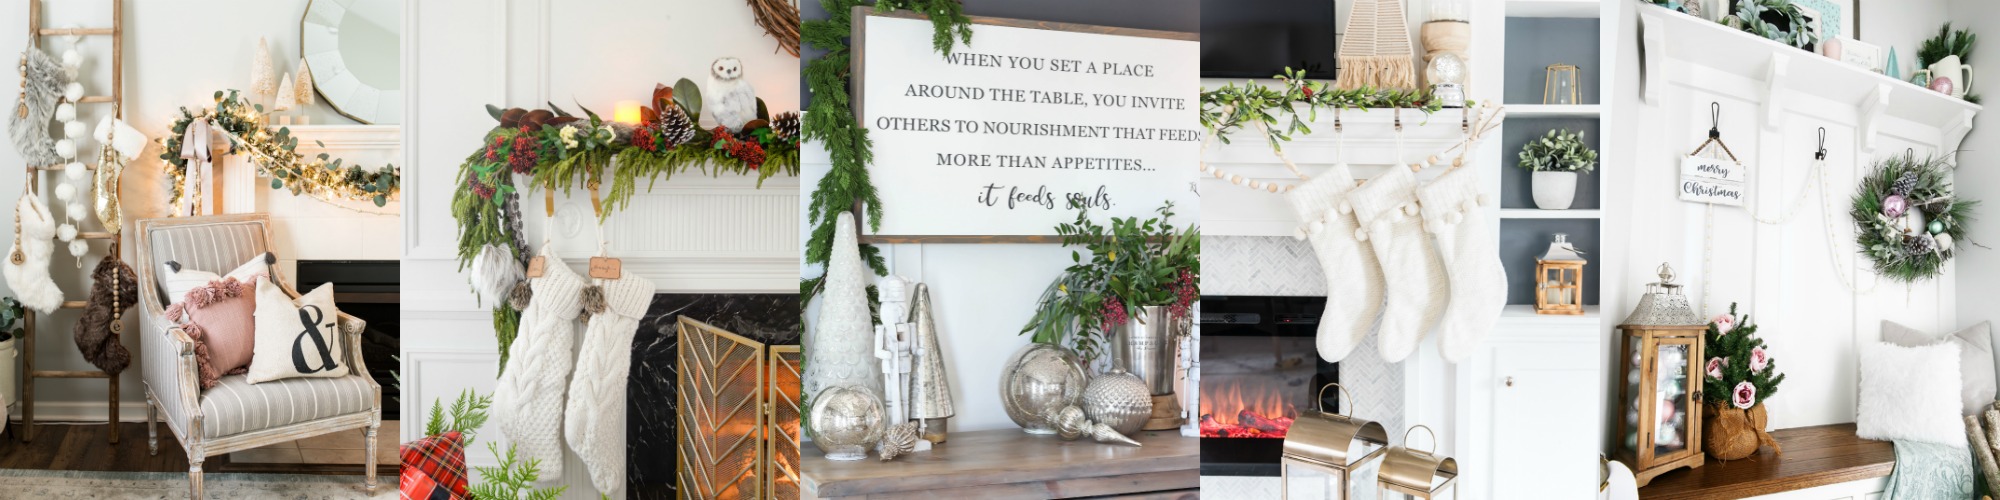
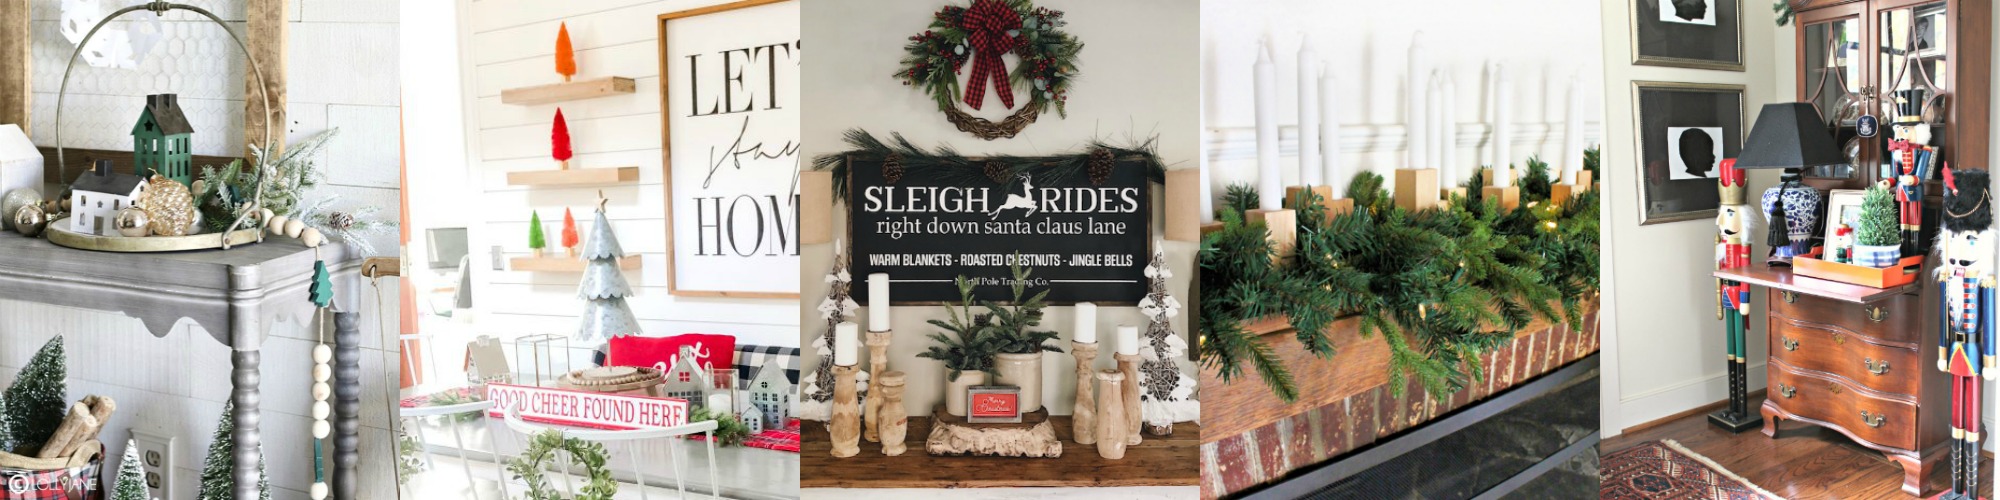
Welcome to the fourth week of the Seasonal Simplicity Christmas Series! Today a group of my blogging friends and I are sharing our Holiday Mantels and a few vignette decorating ideas, to help inspire you for the upcoming holidays. Click on the links below each image to be taken directly to the different posts.

The Happy Housie // Cherished Bliss // The Handmade Home
Modern Glam // Craftberry Bush

House by Hoff // Rambling Renovators // Rooms FOR Rent
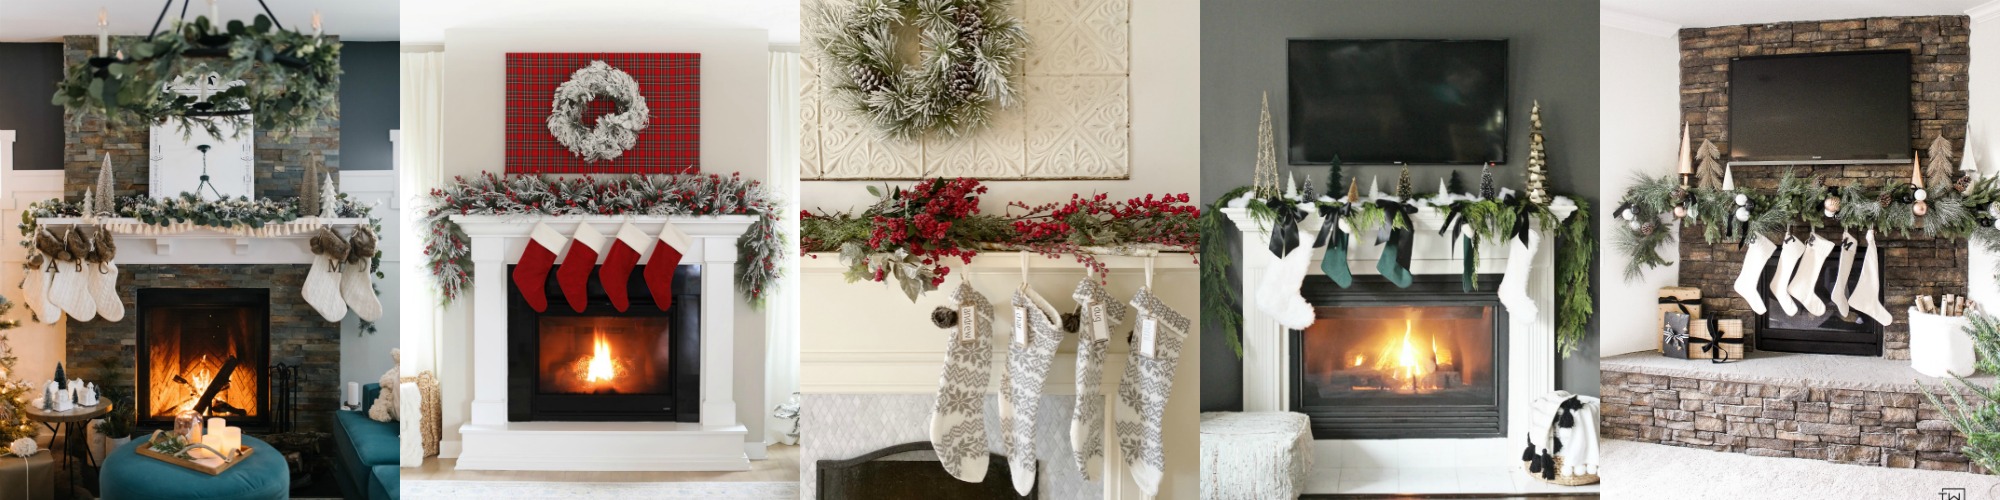
Jenna Kate at Home // Just a Girl and Her Blog

The Turquoise Home // Sincerely, Marie Designs // Grace In My Space
My Uncommon Slice of Suburbia // Zevy Joy

Lolly Jane // Tatertots and Jello // She Gave it a Go
Jamie Costiglio //Southern State of Mind

Place of My Taste // Summer Adams Designs // Life is a Party
We Are The Joneses // Kim Power Style

The DIY Mommy // Two Twenty One // My 100 Year Old Home
This is Our Bliss // Taryn Whiteaker Designs

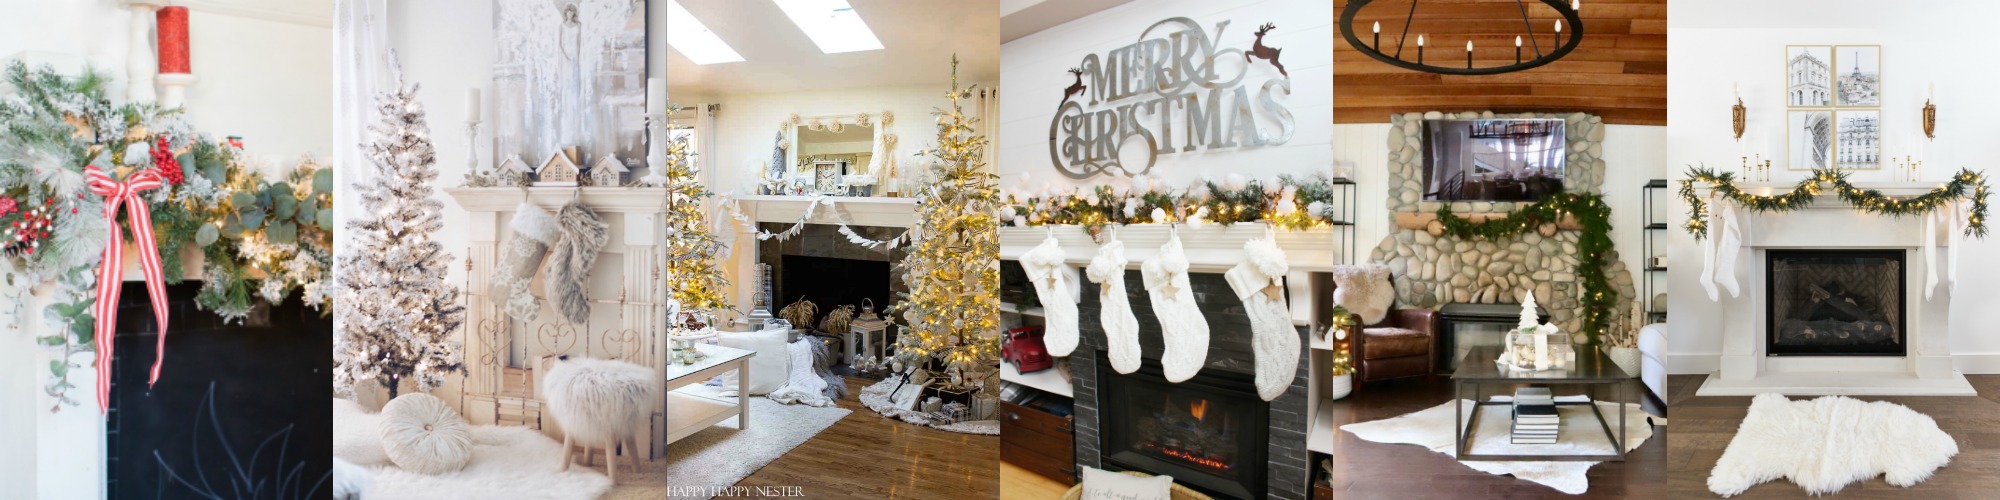
Amber Tysl // Styled With Lace // Happy Happy Nester
Clean and Scentsible // My Sweet Savannah // So Much Better With Age

Filed Under: Christmas, diy, Home decor, Seasonal tours, Uncategorised

Simple Fall Tablescape

5:00 am by kim 10 Comments

Happy Fall everyone! Today I’ll be sharing how I created my Simple Fall Tablescape and when I say simple I mean SIMPLE!  I’m also joining together with some fellow bloggers who’ll be sharing their Fall Tablescapes, so be sure to click on the links at the bottom of the post for more fall Inspiration!

Simple Fall Tablescape

This was a simple tablescape to do and I used for the most part, items that I already had on hand. I’m using a bit of  mustard yellow in my fall decorating this year so I carried that into the napkins. I left out the pumpkins to show you that you can use simple ingredients to create your tablescape no matter the season. You can see how I decorated a previous fall tablescape using the same elements here.

Simple Fall Tablescape

Simple Fall Tablescape

How I set my Table

  • Rattan chargers I used rattan  chargers to set and highlight my plates but you can use other chargers, placemats, or even table runners. Whatever you have on hand!
  • Blue Plates I love using white dinnerware because it’s simple and goes with everything (if you can only afford one set of dishes make sure they’re white!). Every now and then I like to throw a punch of colour in the mix and these plates go with the blue that I use in most of my home.
  • Cloth Napkins Cloth napkins are like the throw pillow of the living room and can add colour and pattern to your table. Even if all your dinnerware is white and you use simple greenery, napkins can add personality. They can be found at every home wear store as well as thrift stores. Instead of using napkin rings, I simply tied a knot and laid them over the plates.
  • Faux Eucalyptus I bought this faux eucalyptus a couple of years ago from Ikea and I use it all the time. I even used it as part of the floral arrangements for my daughter’s wedding last May! Any kind of greenery along the centre of the table, whether real or faux, adds a focal point and gives your table a festive look. You can use  pumpkins or fruit as a focal point and/or adding some fresh greenery/fall leaves from your garden works well too!
  • Tapered Candles, Votives and Fairy Lights Any kind of lighting elevates your table from the everyday to an event! They’re also budget friendly and easy to find. Even fairy lights can be found at the dollar store. I used these brass candle holders I found from the thrift store. They add height without blocking the view from across the table. The votives were budget friendly and I buy them in cases so that I’m ready for every occasion! I also have multiple fairy lights both plug in and battery operated..they add such sparkle to everything.
  • Bubble Glasses I call these everyday water glasses my “bubble” glasses! You can use any glasses you have on hand. Wine glasses look pretty and can be used for water too.

Simple Fall Tablescape

Adding all these elements to your table in any form can elevate an ordinary table setting to something special.  Even if you only have a few candles and some branches from your garden, you can make it look special! Use your imagination and what you have on hand. It doesn’t have to be difficult or expensive to make a lovely tablescape no matter the season.

Simple Fall Tablescape

I made this faux flower arrangement using some faux fall coloured flowers and leaves  from Michael’s, along with my faux eucalyptus. It’s a big arrangement, so I placed it on the sideboard instead of the centre of the table. Nothing is worse than trying to see above or around an arrangement to have a conversation across the table!

Simple Fall Tablescape

Simple Fall Tablescape

Along with the faux fall flowers, I added some tall dried pampas grass. It reminds me of all the  fall grasses you see growing by the side of the road this time of year. The fall colours, flowers and grasses combined together, add an elegant fall feel to our home. Now all I need is my favourite fall candle lit up and I’m ready to enjoy the season!

Simple Fall Tablescape

Thanks for popping by.  I hope you were able to find some useful information and inspiration today. I’ll be sharing my fall home tour next Wednesday so stay tuned for that.

Don’t forget to check out the links below, there’s so many talented ladies sharing!

Blessings,

Kim

Nick + Alicia | Sincerely, Marie Designs | Craftberry Bush | Clean and Scentsible

Home Made Lovely | The DIY Mommy | The Wood Grain Cottage | The Turquoise Home

Rooms FOR Rent Blog | Kim Power Style | The Wicker House | Caitlin Marie Design

Lolly Jane | The Learner Observer | Satori Design For Living | Summer Adams

Taryn Whiteaker Designs | This Is Simplicite

—

Filed Under: Fall, Home decor, Seasonal tours, Uncategorised

Bathroom Makeover | One Room Challenge | Week 6

11:38 pm by kim 12 Comments

Hi everyone and welcome  to Week 6 of the One Room Challenge! If you’re new here, I’m a guest participant in Linda’s from Calling it Home One Room Challenge. A biannual event where a group of designers and bloggers  chronicle a makeover of one room in their home in 6 weeks. We’re on week 6 right now but this year the challenge has been extended for another week. So next week will be the final reveal and I’m so excited to share our makeover with you all!

You can follow along with the previous weeks here:

Week 1 | Week 2 | Week 3 | Week 4 | Week 5 |

One Room Challenge Fall 2017

Bathroom Makeover One Room Challenge Week 6

This week’s progress:

This week we finally got the grout done on the floor tile. We used a charcoal coloured grout that fits right in with the charcoal of the tiles. We used a slow drying grout and had to stay off the floor for 72 hours. It was wonderful! We basically had the weekend off which was great because the hubby and I needed the break. Don’t those tiles look amazing?

Once the grout was dried and cured we were able to get back in there and put the baseboards on.

One Room Challenge Fall 2017 Week 6

We also got the vanity in after the hubby did some (a lot) of maneuvering with the pipes. Yahoo!

One Room Challenge Bathroom Makeover

Remember those nasty pipes that came up out of the floor that couldn’t be moved? Well the hubby used the Metrie baseboards to make a box around them. It’s hardly noticeable, unless you’re down on the floor where I was when I took this photo. Once I caulk the corners and fill in the nail holes it will look great.

One Room Challenge Fall 2017 Week 6

One Room Challenge Fall 2017 Week 6

I’m so glad the vanity fit! It looks great with the gorgeous shiplap and tiles. These pictures don’t do the room justice.

One Room Challenge Fall 2017 Week 6

Task list before the final reveal:

  • Add the mirror
  • Install the toilet
  • Caulk the baseboards, sink and tub
  • Install the tub/shower hardware.
  • Accessorize

Well that’s it for this week.  It’s such a small room that there’s only so much to show without revealing it all..and that’s for next week! You can subscribe to the blog to make sure you don’t miss out on any posts. They’ll come straight to your inbox.

Blessings,

Kim

Filed Under: diy, Fall, Makeovers, One Room Challenge™, Uncategorised

Driftwood Candle Holder Tutorial Redo

2:22 am by kim 6 Comments

 Driftwood Candle Holder Tutorial Redo

One of the first projects/tutorials I did when I first started my original blog “Restoration House”  was this Driftwood Candle Holder tutorial. That was seven years ago and I still have my original piece! This is such a simple and easy project to do and literally only takes minutes and makes a bit impact! I’ve also included a wooden post I had cut into 3 foot lengths to show you that you can use practically anything made out of wood and turn it into a candle holder. You can find the original tutorial here.

Simple & Easy Candle Holder Tutorial

Here is my original piece and my favourite, I love the organic shape of it. This one was made with a 1.5″ spade bit which is the perfect size for tea lights.

Driftwood-Candle-Holder-Tutorial

Driftwood-Candle-Holder-Tutorial

You’ll need:

  • A piece of driftwood or wood that is at least 1.5″ thick.
  • Drill
  • Spade bits. They come in many different sizes and are used according to the size of the candle you want to use.
  • Sandpaper to sand off any bits from around the holes.
  • The candle of your choice.

Driftwood-Candle-Holder-Tutorial

For my tapered candles I used a 3/4″ spade bit which was a little small but I was able to whittle the candle bottom to fit snuggly. The 7/8″ was a little too big and I want the candles to be snug so they don’t fall over.

Driftwood Candle Holder Tutorial

Because driftwood is an organic shape, you have to lay it down on the floor so it levels itself out. Every piece will lie differently.

Driftwood Candle Holder

Once it’s level, decide how many candles you’d like and how far apart  you’d like them to be. If you need to, you can get a measuring tape and mark your places. I just eye balled it.  You will drill straight down so that your candles will stand level. You can drill down to an inch depth or more if you’re using tapered candles. Tea lights should only go as deep as the candle itself to avoid fire hazards. (I would suggest using faux tea lights, they make such pretty ones now and it’s much safer!)

Driftwood Candle Holder

Driftwood Candle Holder

I drilled down about an inch. If you need to you can place some tape on your spade bit to mark how far your bit needs to go.

Driftwood Candle Holder Tutorial

You may need to sand around the edges for any jagged pieces. I found the harder the wood the more sanding was needed. You can see that the new wood piece needs more sanding.

driftwood candle holder tutorial

My holes were slightly smaller than my candles so I had to whittle down the ends so that candle ends fitted in really snuggly. You don’t want your candles wobbling around!

Driftwood Candle Holder Tutorial

Driftwood Candle Holder Tutorial

Driftwood Candle Holder Tutorial

Driftwood Candle Holder Tutorial

Driftwood Candle Holder Tutorial

I found a wooden post at my local HD and had it cut into 3 pieces. You can stain or paint your wood to suit your needs. I left mine natural. You can also use larger spade bits and make a pen/pencil holder. There’s no end to what you can create.

Driftwood Candle Holder Tutorial

Driftwood Candle Holder Tutorial

Driftwood Candle Holder Tutorial

Driftwood Candle Holder Tutorial

untitled-5646

Safety Precautions:

  • I have real tea lights in the candle holder above but I would suggest using the little faux ones. It really is much safer. Driftwood by nature is extremely dry and can ignite so quickly! I’ve heard from others how this has happened.
  • Make sure your tapered candles are in snuggly if you’re using real ones.
  • Never, ever leave candles burning unattended!

A Driftwood Candle Holder Tutorial

I’m hoping that you will give this a try, it really is quite easy and can be done in minutes!

Thanks so much for dropping by! If you haven’t already done so, subscribe so you don’t miss a post, they’ll go straight to your inbox!

Blessings,

Kim

Filed Under: diy, summer, Tutorials, Uncategorised

Joyful Summer Home Tour 2017

6:00 am by kim 44 Comments

Joyful Summer Home Tour 2017

Welcome to our Joyful Summer Home Tour! I’ve joined together with eight other amazing bloggers to share our homes all dressed for summer! You can follow along with all the other tours by clicking on the links at the bottom of this post. Now grab a drink, sit back and enjoy!

 Joyful Summer home tour

We love the coastal feel in our home. My parents were born on an Island, so I guess its in my blood. We also live in a lakeside community which all naturally lends itself to a coastal vibe in our decor. I’m drawn to the soft colours of watery blues and sandy neutrals. I just find it all very calm and soothing, much like being on the shore with the waves coming in.

(Some products have been sponsored, all thoughts, opinions and photography are my own)

Summer Home Tour 2017

If you’ve followed me for a while, you’ll know that I love blues and hydrangeas. So it’s not a far reach to go coastal! I simply added some seashells in a large vase, coral, some blue ginger jars and my driftwood candle holder on the mantel.

Summer Home Tour 2017

I got these gorgeous “Cordoba” pink  and “Chinese Batik” blue pillows on the sofa from Danielle Oakey Shop. I simply adore all her beautiful pillow covers and they’re so well made too.

Summer Home Tour 2017

Summer Home Tour 2017

Summer Home Tour 2017

Summer Home Tour 2017

Summer Home Tour 2017

I picked up that little picture of Peggy’s Cove in Nova Scotia, from a thrift store. It goes so well in the room.

Summer Home Tour 2017

Summer Home Tour 2017

Summer Home Tour 2017

The driftwood candle holder was one of the very first projects I did when I first started blogging seven years ago. I love the quirky shape and how I managed to get tea lights all along  it.

Summer Home Tour 2017

Summer Home Tour 2017

Summer Home Tour 2017

Summer Home Tour 2017

Summer Home Tour 2017

The last shot of this room and the boys have already been all over the cushions and couldn’t wait to take a nap!

Shop the Living Room/Get the Look

[show_shopthepost_widget id=”2714341″]

Summer Home Tour 2017

From our cozy living room we go into the breakfast nook. I love these little hooks and they’re the greatest for hanging decor and a aprons etc.

Summer Home Tour 2017

When I’m preparing a meal or having people over, I prefer to do a buffet. I find it so much easier and relaxed  and less stressful than setting a table.

Summer Home Tour 2017

I already had the hydrangeas and picked some wildflowers in the park on my way home from the shop. It made for a lovely bouquet.

Summer Home Tour 2017

I set the table and used a linen curtain panel for a table runner. Use whatever you have on hand.

Summer Home Tour 2017

I love these blue floral pillows! They are such a classic pattern and they fit well with my salad plates too!

Summer Home Tour 2017

Shop the Nook/Get the Look

[show_shopthepost_widget id=”2714360″]Sources:

Pillows on Sofa, Danielle Oakey Shop

Sofa and Chairs, IKEA

Basket, Paisley Pillows, Throw, Homesense

Dining Chairs, IKEA

Table,Thrift find

Blue Floral Pillows, Market Bag,  Penney & Co.

Dinner Plates, Placemats, Wine glasses, IKEA

Salad Plates,Gold Cutlery, Pier 1

Water glasses, Urban Barn

I hope you enjoyed the tour! I’ll be sharing Part two soon so be sure to subscribe and don’t miss a post! Don’t forget to check out my friends and their tours for some amazing summer decor, the links are below.

Blessings,

Kim

Wednesday, May 31st
Kate – White Lane Decor
Lisa- Farmhouse On Boone
Natalie- My Vintage Porch 
Thursday, June 1st
 
Laura- Meaningful Spaces
Stephanie- Belle Amour Blog
Marci- Lemons to Lovelys
Friday, June 2nd
Hayley- A House With Books
Jordon- Jordecor
Kim- Kim Powers Style 

Filed Under: Home decor, Seasonal tours, summer, Uncategorised

One Room Challenge™ | Spring 2017 | Week 6 The Reveal

5:04 pm by kim 44 Comments

The One Room Challenge Final Reveal

Well the day has finally arrived for the One Room Challenge™  final reveal! It’s been a long, crazy  and busy six weeks for so many of us and now for the pay off! I’ve been working on making over an unused and dysfunctional office/workroom space into a  Modern Coastal Farmhouse inspired room that’s both functional and pretty. It’s been so much fun following the designers and other participants as they make over rooms in their homes all in six weeks! If you would like to see where we started  from and how we got to the final reveal,  you can follow along with our previous weeks here:

Week 1 | Week 2 | Week 3 | Week 4 | Week 5

And to give you a little reminder of what we started with:

Before:

ORC Before Pic

ORC Before Pic

ORC before

After:

One Room Challenge Spring 2017 Final Reveal

I love it! This space will function as both an office and a workroom for me. It’s a small 9’x12′ room so I wanted it to be very functional without appearing cluttered. I removed the shelving units because I knew from past history that they can become a “catch all” for me. I replaced it with this gorgeous modern sideboard from Structube that is clean and sleek and contains so much storage space. The sideboard will hold everything to do with the “office” portion of the room. Everything is neatly hidden away and no clutter means no stress for me!

And did you see that awesome light fixture? I fell for this fixture as soon as I saw it in the Westelm showroom this spring. I love the modern look of it mixed in with some of the wooden pieces in the room. It adds the right amount of tension for my modern coastal farmhouse vibe I was going for.

ORC 2017 The Final Reveal

The top of the sideboard allows me a surface to add some pretty accessories that will change with the seasons. All the lovely accessories here and on my desk (except for the wooden tray and anthropologie candles) are from Homesense!

ORC 2017 The Final Reveal

If you follow me on Instagram, you know how much I love decorating with flowers and these faux hydrangeas from Afloral look so real! They’ll definitely see a lot of use.

One Room Challenge 2017 The Final Reveal

ORC 2017 The Final Reveal

One Room Challenge Spring 2017 Final Reveal

I already had this brass mirror hanging in my dining room but I knew it had to come into this room to play off the light fixture and other brassy accents. It really goes so well in here!

One Room Challenge Spring 2017 Final Reveal

Every room needs some texture and something to hold extra pillows and throws and these baskets from Canadian Tire’s CANVAS collection do the job wonderfully!

The pillow in the back is a diy pillow I made from a scatter rug, you can find the tutorial for that here.

One Room Challenge 2017 The Final Reveal

One Room Challenge 2017 The Final Reveal

One Room Challenge 2017 The Final Reveal

One Room Challenge 2017 The Final Reveal

We added this barn door because previously there was so much “junk” in our little walk-in closet that there was no room to close the door! I’ve always wanted a barn door and this was the perfect place for one. It really does help with allowing more usable floor space in the closet. The closet will hold  everything to do with the “workroom” function of the space, such as my sewing machine, fabric, craft supplies etc.

One Room Challenge Spring 2017 Final Reveal

We still hadn’t figured out what to do for wall treatments until the first week of the challenge! We then decided on board and batten and it was the best decision. I knew I wanted something to go above it to add some colour and pattern. For budget’s sake we decided on this gorgeous stencil called the Floral Fireworks Allover Stencil by Royal Design Studio. I stencilled it using “liberty blue” by Fusion Mineral Paint and it turned out beautifully, you can find the stencilling tutorial here.

One Room Challenge Spring 2017 Final Reveal

We had originally picked another chair for this space but it just wasn’t the right colour and not the most comfy for sitting on for any length of time. I had wanted an office chair with wheels, but couldn’t find one that was both pretty and comfortable. We decided on one we already had and it’s suitable for now until I find that elusive “perfect desk chair” someday.

one room challenge final reveal

One Room Challenge 2017 The Final Reveal

ORC 2017 The Final Reveal

This rug from Rugs USA, is one of my favourite pieces in the room. It is so pretty and soft to walk on and goes so well with my coastal theme too.  I think I want one for my bedroom now!

You’ll also notice that I switched out the above dark indigo cushion for a lighter one. The indigo one was made by yours truly!

One Room Challenge 2017 The Final Reveal

Modern Coastal Farmhouse Office Reveal

I’m so happy with my new office/workroom! It ‘s such a bright, airy and functional space now. I know I’ll get so much use out of it, it’s too pretty not to want to sit in there! Stay tuned for a post on what’s in that sideboard and how I organized the closet coming later. Thanks so much for joining me on my first One Room Challenge journey and don’t forget to catch up on all the other reveals!

Thanks to Linda of Calling it home for creating and hosting this biannual design challenge. It was a great first time experience for us and you know I’m already deciding which room to do over in October. 😉

And a huge thank you to all our amazing  Sponsors who made this project possible! I felt honoured to partner with each of these great brands and businesses and share their wonderful products.

(This post was sponsored by the following sponsors. All product given, was chosen by me and all photographs, thoughts and opinions are my own.)

ORC Sponsors

Source List

  • Light Fixture: “Mobile Chandelier” in Antique Brass, West Elm
  • Rug: “Aerial Decorative Plumes” in blue 5×8 Rugs USA
  • Desk: Homesense
  • Sideboard: “Moby” in white, Structube
  • Mirror: Homesense
  • All Decorative Accessories on Sideboard and desk: Homesense
  • Large Baskets: “Nola” Canvas at Canadian Tire
  • Chair: Henriksdal, Ikea
  • Hydrangeas: Faux Hydrangea, Afloral.com
  • Fiddle leaf fig: Faux, Homesense
  • Turqoise Vase: Homesense
  • Stencil: “Floral Fireworks Allover Stencil 21″x23” by Royal Design Studios Stencil
  • Paint for Stencil: Fusion Mineral Paint in “Liberty Blue”
  • Cushions: The grey neutral one in the basket and the paisley one on chair: Homesense
  • Cushions: Dark blue indigo and the one in the back of the basket: KimPowerStyle
  • Gold file holder: Homesense

Filed Under: diy, Home decor, Makeovers, One Room Challenge™, spring, Uncategorised

Wall Stencilling How-To | Week 3 | One Room Challenge Spring 2017

2:31 pm by kim 58 Comments

Wall Stencilling How-To

How to stencil a wall. One Room Challenge

One Room Challenge

Well it’s week 3 of the One Room Challenge and oh how the weeks have flown by! This week I’ve added some colour and pattern above the board and batten by using a stencil. I’ll share a little wall stencilling how-to but first let’s look at where we’re going. If you’re just tuning in now you can follow the progress by reading week 1 and week 2.

Here is the mood/inspiration board for the room:

Mood board for ORC 2017

If you notice, the board and batten as well as my stencil treatment above it aren’t on my mood board. I still hadn’t decided at the time what kind of a treatment to add. I knew that I wanted a modern coastal farmhouse look thats much in keeping with the rest of my home right now. Once I decided on the board and batten I knew I wanted to do something above it. Wallpaper can be pretty pricey even for a relatively small space so I decided on stencilling. There are so many gorgeous patterns out there now and when you add the colour factor, the possibilities are endless! I decided to go with Royal Design Studios Stencils for my stencil and chose the Floral Fireworks allover stencil 21″x 23″. I had the paint colour already and had been waiting for a chance to use it. I used the Fusion Mineral Paint in “Liberty Blue”.

How to Stencil a Wall to look like Wallpaper

How to stencil a wall. One Room Challenge

I have to say that I love the way it turned out! I’m still deciding on wether or not to finish the very top as I’m kind of liking the somewhat scalloped looking edge. I guess you’ll find out on the final reveal! 😉

Wall Stencilling How-To

Let’s start with what you’ll need:

How to stencil a wall. One Room Challenge

  • You’ll need a stencil of your choice
  • A small roller and/or a stencilling brush
  • Good quality painter’s tape
  • Lot’s of paper towel
  • A small paint tray or a styrofoam plate will do
  • A level
  • Measuring tape
  • Spray on adhesive for the back of your stencil (optional)

How to stencil a wall. One Room Challenge

1.Using your measuring tape, find the centre of the wall. Affix your stencil to the top and centre of your wall. Check to make sure that your stencil is level.

How to stencil a wall. One Room Challenge

2. Load up your roller/brush with paint , enough to cover the entire thing evenly.

3. Remove most of the paint by off loading it onto some paper towel. This is important as you don’t want excess paint to bleed underneath the stencil. Less is better when it comes to stencilling!

How to stencil a wall. One Room Challenge

4. Begin to roll out over your stencil. You can lift up the corner of the stencil to make sure you’re not applying too  much paint and bleeding through.

5. Move your stencil over to the the next position. Your stencil will have registration marks that will guide you to the correct placement. I found that the paint was dry enough to move onto the next placement without disturbing the previous paint.

How to stencil a wall. One Room Challenge

6. Once you come to a corner or edge. Apply your painters tape to protect the edge and the adjacent corner.

How to stencil a wall. One Room Challenge

7. Place the tape on the side of your stencil that you will be stencilling. In this case the left of the corner. Don’t tape the right side down as this will need to be flexible. (In the above pic. The right side is taped just to hold the stencil up while I photographed the pic, otherwise that side should not be taped)  Using your roller to paint into the corner by pressing into it.

How to stencil a wall. One Room Challenge

8. When doing edges and corners, you can use your roller to press into the corner/edge and  then use your fingers to press your stencil down into the corner/edge. You can continue to roll at this point or use a little stencil brush to get right into the edge. I just continued on with my roller.

How to stencil a wall. One Room Challenge

9. Continue to go around the room until you have finished. You may have to stop and clean the excess paint buildup from your stencil. I did this once and placed it in my bathtub to clean.

Royal Designs Studio has some great how-to videos and instructions on their site that I would encourage you to watch if you’re thinking of trying this out.

If you look at my walls there are lighter and darker areas. I actually love this as it gives the appearance of water colour. I also found that in places near the corners and edges where It seemed that I made some major “out of the lines” mistakes, the pattern was very forgiving. If there are areas that you feel you need to address, you can simply get a little brush and use the base colour to help clean up the lines. I thought I was going to have to do a lot of cleaning up of the lines but it seems to blend in and has just become part of the pattern.

How to stencil a wall. One Room Challenge

So here is a little peek into my Modern Coastal Farmhouse Office/Workroom. If you look to the right of the photo, you’ll see a peek of something else we’ve been working on! 🙂 Thanks so much for joining me on my first journey with the One Room Challenge and stay tuned for more projects on the way! You can follow along with others on their journey as well right here!

(This post was done in collaboration with Royal Design Studio Stencils, all photography, thoughts and opinions are my own.)


Filed Under: diy, Home decor, Makeovers, spring, Tutorials, Uncategorised

Three Simple Steps to a Spring Brunch Buffet

6:00 am by kim 8 Comments

Three Simple Steps to a Spring Brunch Buffet

Welcome everyone! This week I’m joining eleven other bloggers for our “Year of Feasting” blog hop. This is our first season to share together and  I’m showing an easy, three simple steps to a brunch buffet. Special thanks to Giant Tiger for sponsoring this post!

Now that my daughters are older and all out on their own, its rare to have us all together at the same time unless it’s a holiday.  Their schedules aligned this last weekend and they were all able to come home for a visit! Celebrations like this rare event usually centre around food! We almost always have a brunch buffet. Everyone helps out by cooking and or cleaning and its a great time to feast on foods that we don’t normally have everyday. The only difficult part of putting on a buffet is food preparation. But if you’ve got friends and/or family, it’s great if everyone pitches in by helping to cook or by bringing a dish. Here are three simple steps to prepare a brunch buffet.

Three simple steps to a Spring brunch buffet

Step 1

Prepare a centerpiece

I love a buffet because it’s so casual and less formal than a sit down meal. I don’t feel like I have to be as spot on with my tablescaping, aka lazy! I still like to have a centerpiece of some sort and I will use whatever I have on hand. This old vintage toolbox was in the garage and I pulled it out because I thought it would look great packed with little spring plant pots I found at Giant Tiger. To simplify, you could place a vase with fresh or faux flowers, branches from outside, etc.

Three simple steps to a Spring brunch buffet

Because the box is so deep I added some little cups to bring up the height.

Three simple steps to a Spring brunch buffet

Then I just laid a piece of plywood over the cups so that my plant pots would be higher and make more of an impact.

Three simple steps to a Spring brunch buffet

I filled up my toolbox and added a couple of white faux flowers I had too. It filled out beautifully and the bulbs will continue to grow and blossom. Such a simple and beautiful spring centrepiece.

Spring Brunch

Step 2

Lay out your dishes.

I love white dishes and have them in abundance. I find it makes table arranging so much easier too. You don’t have to worry about  piecing different dishes together, everything just automatically fits. I pulled out a piece for each food item. I like finding dishes of different shapes and heights as this adds some visual interest…I later used my “open hands” ceramic piece as a dish for the berries! Some lovely gold coloured silverware in a an old milk glass vase, some plates and white napkins,  a few candles and you’re done. To make things easier you can always use disposable dish ware if  you really want to simplify things.

Three simple steps to a Spring brunch buffet

I found these pretty little cushions at Giant Tiger and they go well with all the blue and white I have going on. They make the nook feel even more inviting.

Spring Brunch

Spring Brunch Buffet

Step 3

Fill up those dishes with food

This is the exciting part! You already have your dishes ready for each corresponding type of food so just fill and display! I loved this cake stand for our banana protein pancakes along with the little jug for syrup.

Spring Brunch

Spring Brunch

The  crock pot on the counter is the perfect thing for keeping baked beans warming!

Spring brunch buffet

This is also the hard part as everyone waits around for you to take some photos of the food! Lol. Which they didn’t wait for long!

Spring Brunch

Spring Brunch

Spring Brunch

Spring Brunch Buffet

I hope you enjoyed this post, thanks so much for stopping by. Please continue on and see what my friends have cooked up too!

Blessings,

Kim

year-of-feasting-spring-collage

THE DIY MOMMY – LIFE IS A PARTY – VINYETE ETC.

PERSONALLY ANDREA – KIM POWER STYLE – THE LEARNER OBSERVER

WOMAN IN REAL LIFE – FLOURISH AND KNOT – LOVE CREATE CELEBRATE

AMIDST THE CHAOS – PMQ FOR TWO – THE DREAM HOUSE PROJECT


Filed Under: Uncategorised

A Simple Valentine’s Day Dessert Table

2:05 am by kim Leave a Comment

Hi everyone! If you’ve read my previous post you’ll know that Valentine’s Day is my wedding anniversary. While it’s a great time to celebrate, it’s not one of those “holidays” that I necessarily decorate for. However, if we happen to be home, and not escaped to some tropical local, I may set a bit of a dessert table. Notice I didn’t say dinner table! Because we better be going out for that!

Valentine's Day dessert table

So I thought I’d share a little simple dessert table I put together. I did go ahead and make my favourite banana bread, simply because we had rotten bananas and it’s brown…which to my hubby reads..healthy..er! I also made some little vanilla cupcakes (from a box..I know!) with cream cheese frosting and sprinkled with some little candied hearts. I even managed to make some pom poms from dollar store tissue paper. I went all out for this!

Valentines Day dessert table

While I’m a creative at heart, I like to make things as simply and easily (aka, lazy) as possible so buffet style is the way to go. Laying down some dessert plates, cutlery and napkins for everyone to serve themselves works for me. I already had the little teacup candles made and adding some extra little fairy lights makes everything look more festive. Can I just say that the tulips were taking a nap while I was photographing this. The next day they were standing up straight!

Valentines Day dessert table

This was so simple to do. If you wanted to make it even easier, you could go to the bakery (which is what I tend to do)  and pick up a few of your favourite desserts,  put them on a pedestal or pretty plate and voila!

Valentines Day dessert table

I hope you got something out of this post, even if it was only permission to go to the bakery and buy your dessert…it is Valentine’s Day after all, who the heck wants to spend the day baking?  Thanks for dropping by my friends.

Filed Under: Uncategorised

A Tea Towel Bedskirt-Week 3 of the Guest Room Makeover

6:00 am by kim 6 Comments

A Tea Towel Bedskirt For an Ikea Bed- Week 3 of the Guest Room Makeover

Hello everyone! In week three of my guest room makeover I’ve made a bedskirt for my Ikea bed. The Ikea bed has slats and a normal bedskirt doesn’t fit properly so I came up with a way to get around that. Linen was my  fabric of choice but  not something the budget allowed. I’d been looking for a project to use this tea towel fabric with and it fit in with the decor and the budget. It was 50% off!

A tea towel bedskirt for an Ikea bed

Tea towel fabric for a bedskirt

The tea towel fabric comes in a 20″ width which made it easy to work with, I simply had to cut off 6″ along one side. It also comes with a hem on either side of the length which meant I only had one hem to do.

Bedskirt fabric with gathering tape.

I applied gathering tape to the raw edge which I folded under and then sewed it on.  Once the tape is sewn on there are two strings that you pull and it gathers the fabric for you. I used double the length of fabric so it would gather nicely. I sewed together three separate pieces for the three sides of the bed that are seen.

Velcro tape under the bed

I meant to use the velcro with a taped side but totally forgot. That’s when my old trusty glue gun came in! I applied the velcro under the side of the bed using glue from the glue gun.

Bedskirt with velcro

The gathering tape attaches nicely to the velcro.

Tea towel fabric bedskirt on an Ikea bed

A tea towel fabric bedskirt

Tea towel bedskirt fabric

Both my boys Jack and Bubs have joined in for this post. They usually follow me around wherever I go and there is no moving them out of the way! I’m sure you’ll see them in many of my posts.

A tea towel fabric bedskirt

Thank you again for joining me in the guest room saga! I’m so pleased with how it turned out. Stay tuned for the reveal next week and please subscribe if you’d like to see more of these posts!

-Kim

Filed Under: diy, Makeovers, Tutorials, Uncategorised

  • Go to page 1
  • Go to page 2
  • Go to page 3
  • Interim pages omitted …
  • Go to page 11
  • Go to Next Page »

Primary Sidebar

Hi, I'm Kim Read More…

Instagram

Follow along on Instagram

Sign up and don't miss a post!

Recent Posts

  • Festive Bacon Wrapped Chestnut Holiday Appetizer
  • DIY Mantel Decorated for Christmas
  • Simple and Cozy Fall Home Tour
  • Simple Fall Tablescape

Archives

Footer

Copyright © 2025 · Foodie Pro Theme by Shay Bocks · Built on the Genesis Framework · Powered by WordPress