• Skip to primary navigation
  • Skip to main content
  • Skip to primary sidebar
  • Skip to footer

Kim Power Style

  • Home
  • Contact
  • About
  • Tutorials

summer

Coastal Farmhouse Summer Home Tour

5:00 am by kim 24 Comments

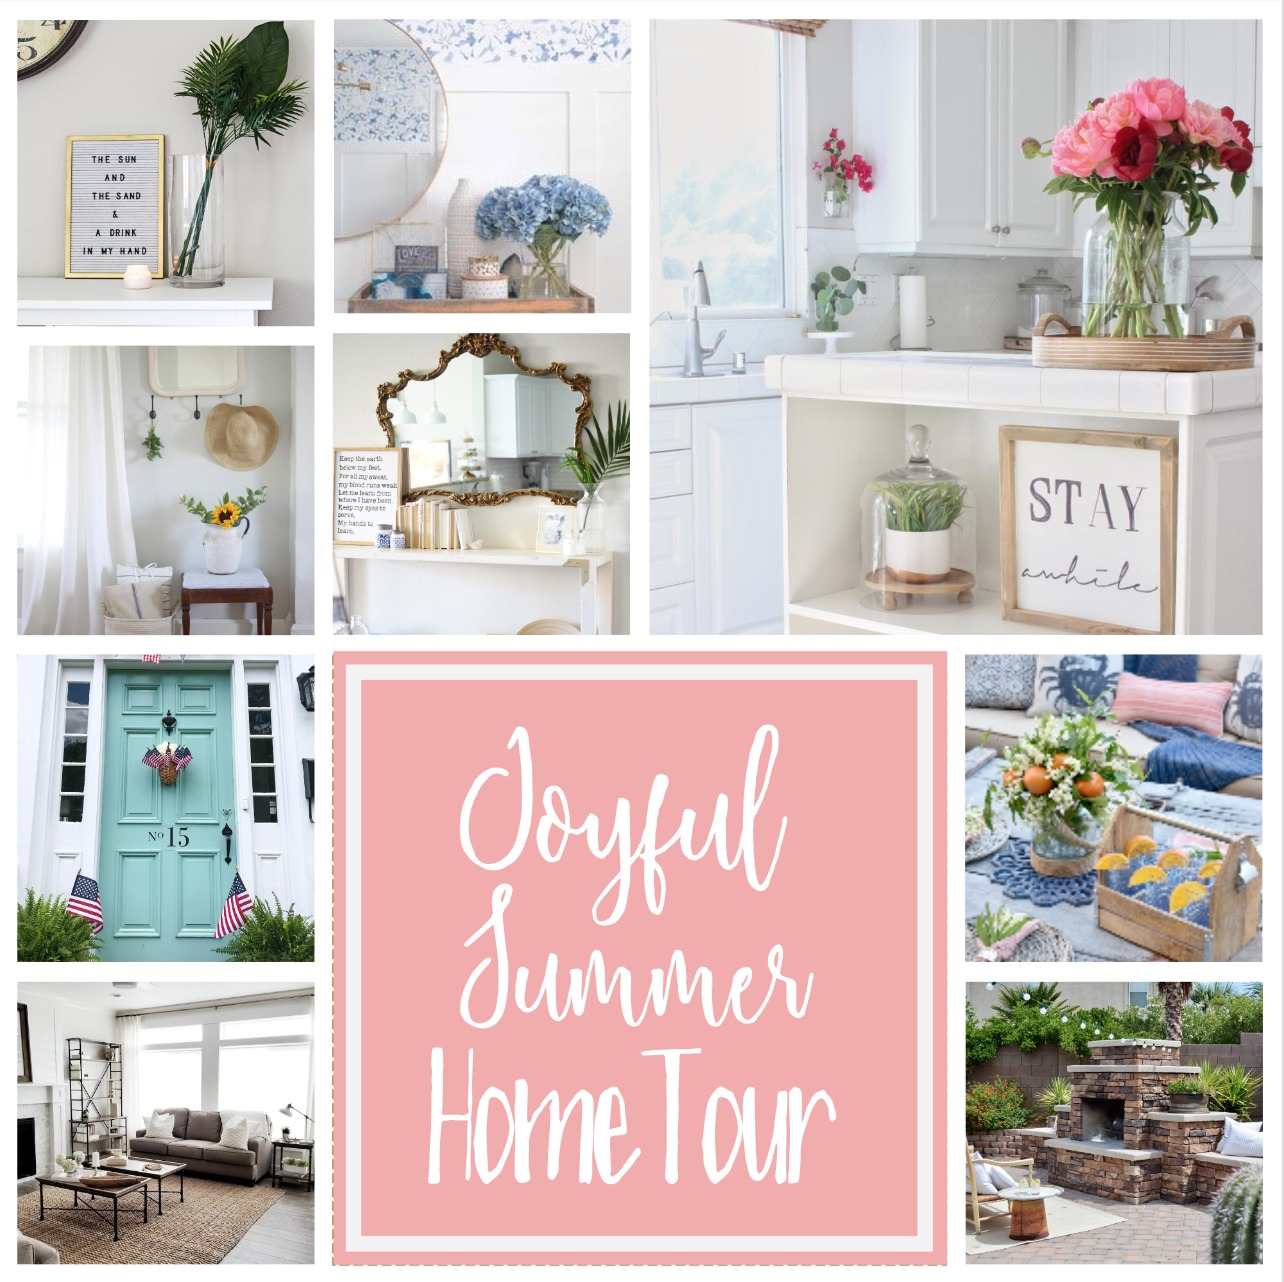
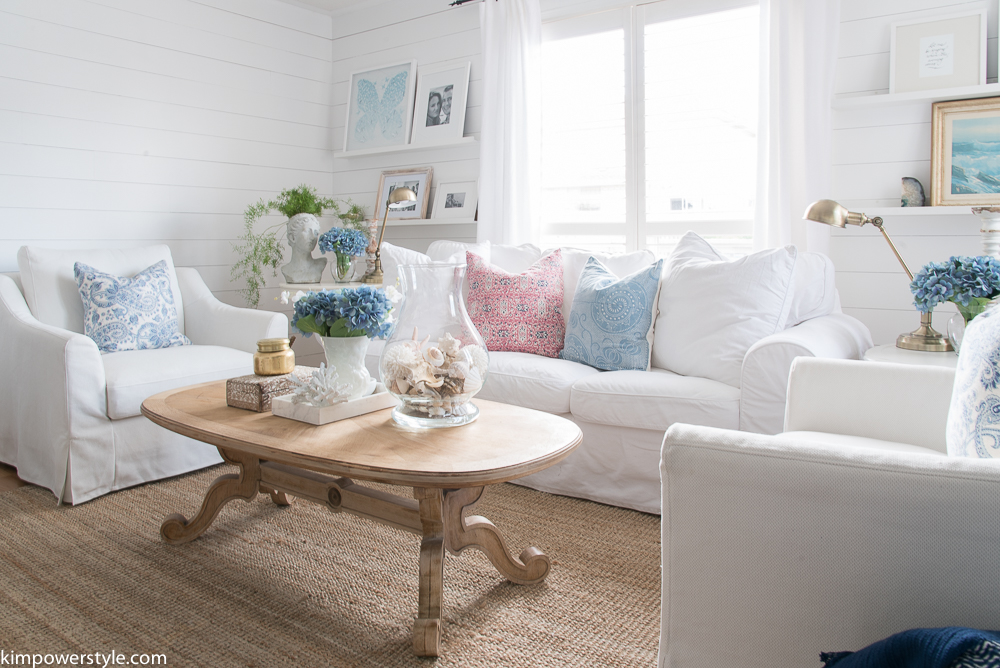
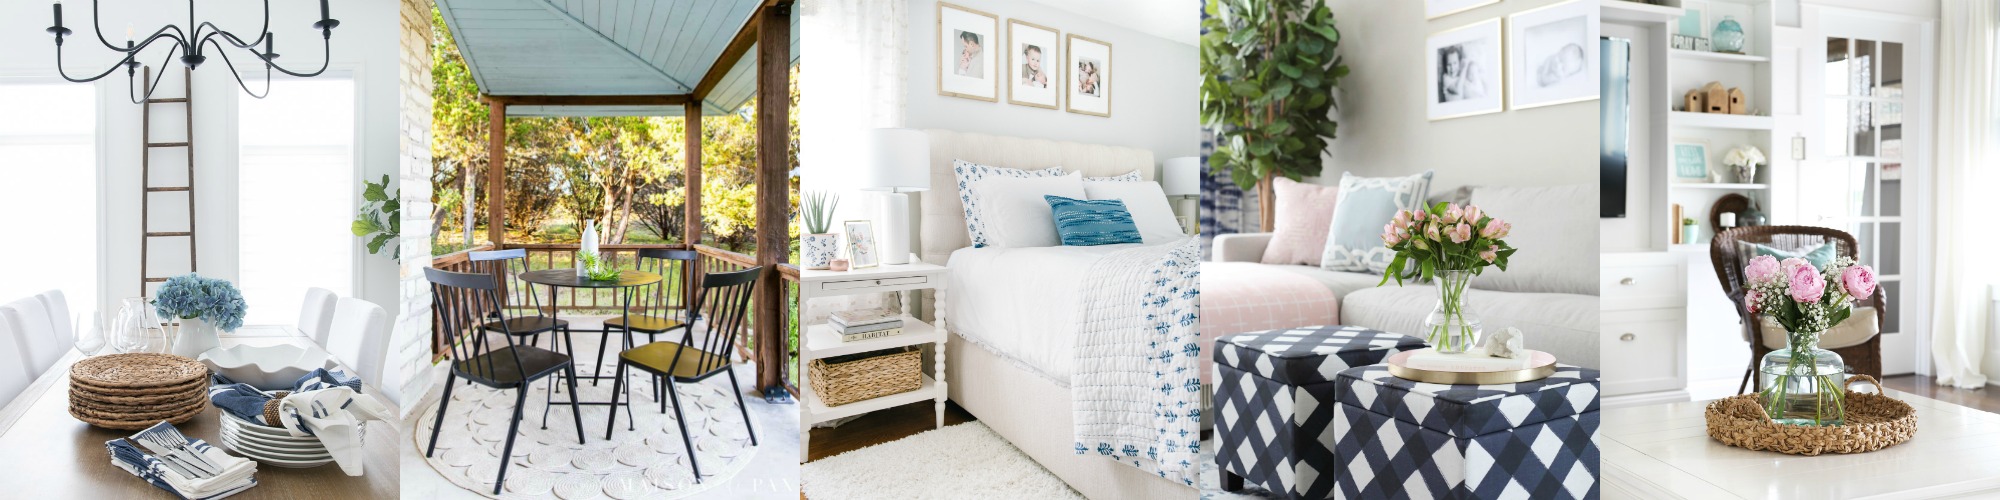
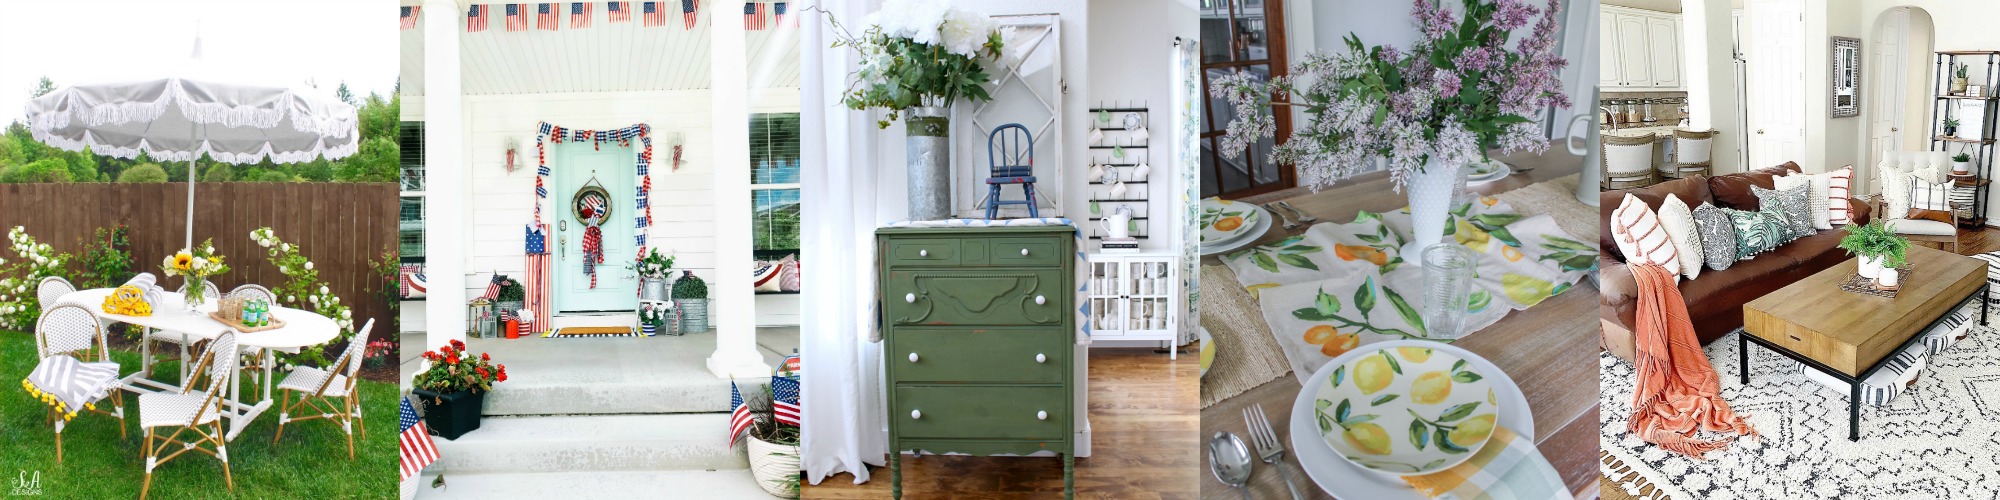
Hello friends and welcome to our first Coastal Farmhouse Summer Tour in our new home! If you know me, you’ll know I’ve included my summer go-to blues, comfy white slipcovers along with some natural elements to create a cozy, simple and summery Coastal Farmhouse look.

This week I’m joining along with nearly 40 bloggers who are opening up our homes as part of the Seasonal Simplicity Summer Series hosted by Krista from the Happy Housie. If you’re visiting here from Amber Tysl, welcome, I’m glad you dropped by! Stay tuned for more links below to continue on the tour… You’re in store for so much summer decor inspiration you’ll want to grab some sunscreen and a beach towel!

Coastal Farmhouse Summer Home Tour

It’s the first summer in our new home and we’re still adding things here and there. I love having more of an eclectic look and mixing old pieces with new. I want our home to look like something that’s been curated over time in a thoughtful way and have been fighting the urge to have everything now! We’ve yet to add any art or hang pictures as we’re still trying to figure out how we want each room to look and feel. We still need to get a fireplace mantel and I think that will be next on our priority list. You’ll notice that practically all the summer decor items we’ve used are things we’ve already had and I’ve used before. Transitioning your seasonal decor doesn’t have to be difficult or costly! Use what you have and look to the outdoors to bring in some of nature. Simple and easy is my motto!

Coastal Farmhouse Summer Home Tour

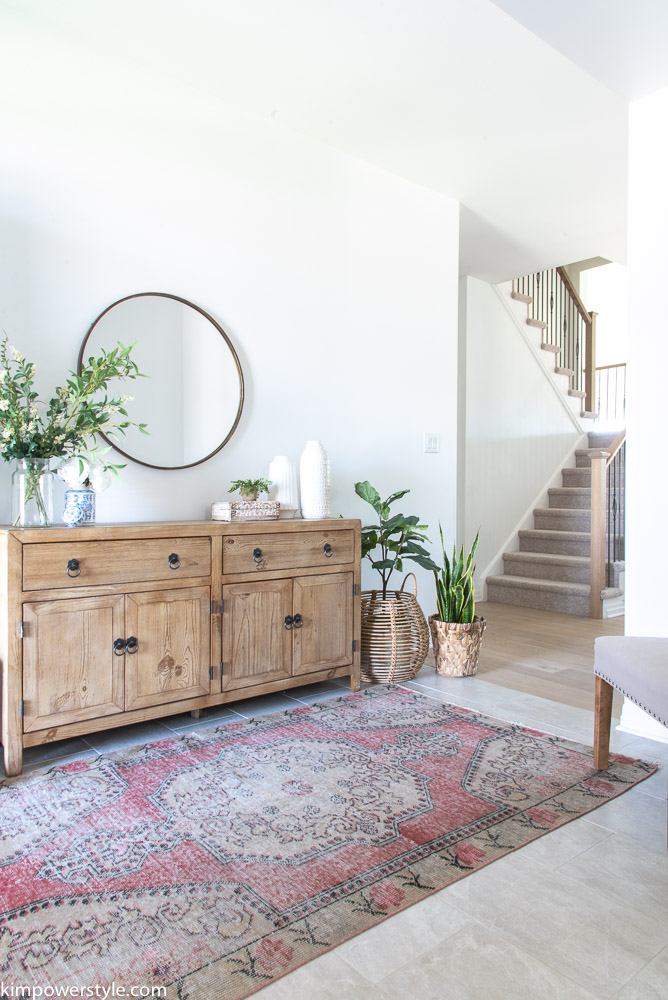
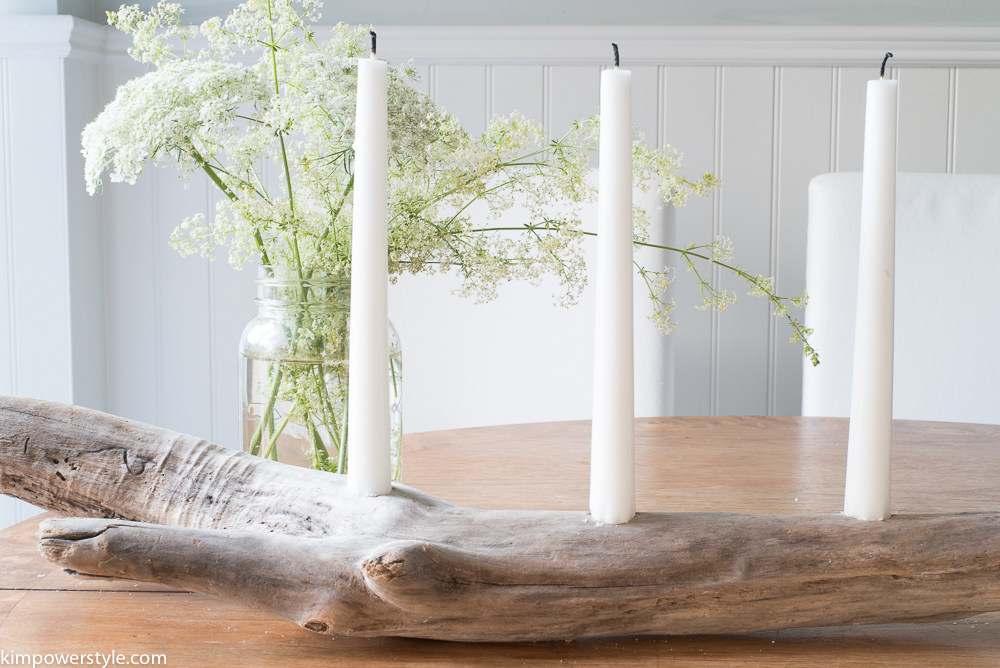
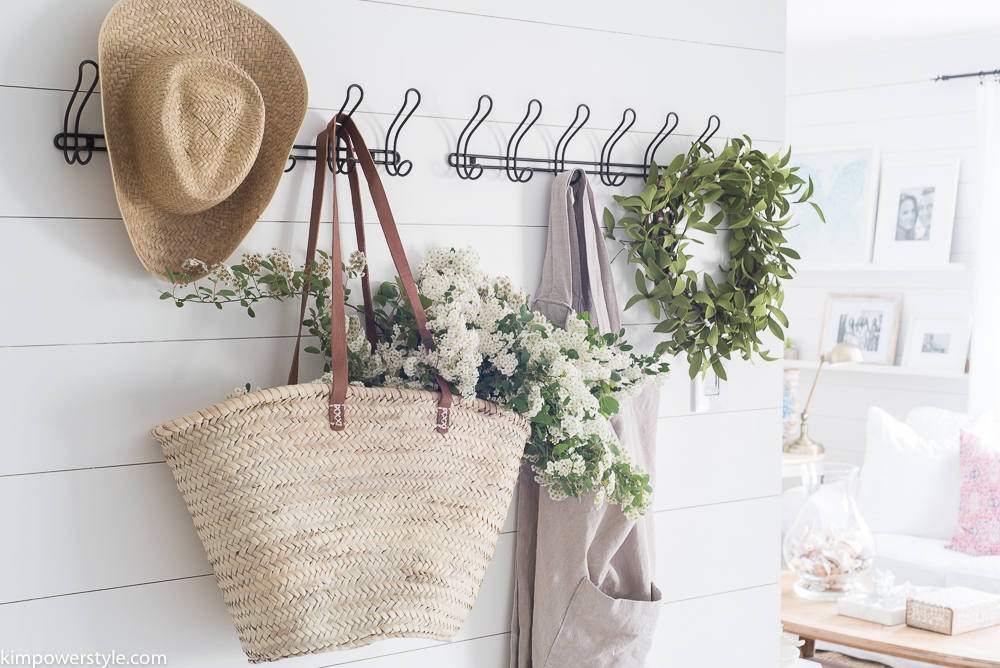
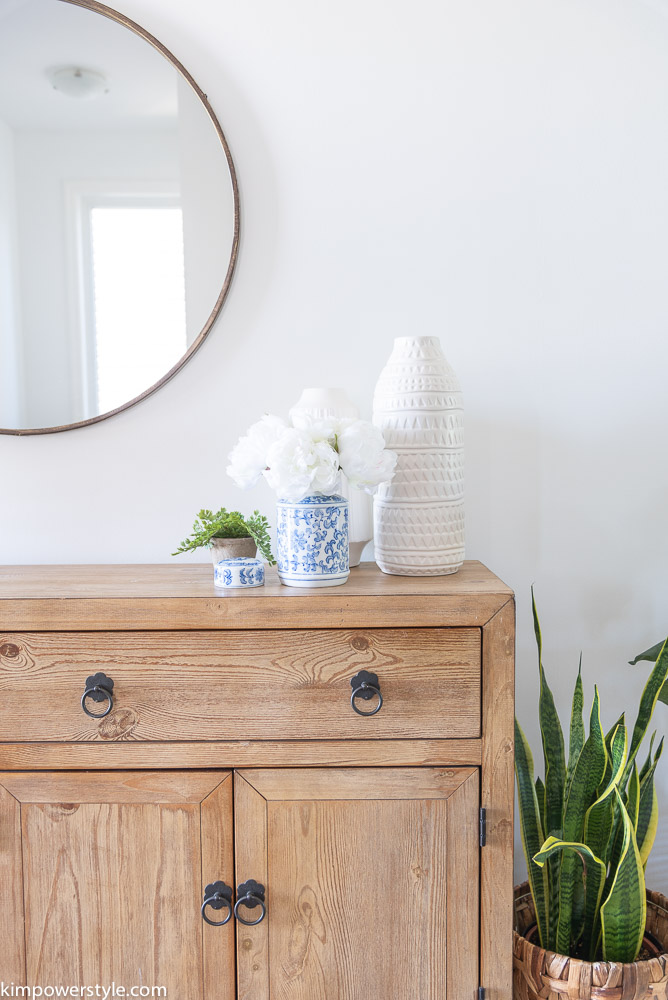
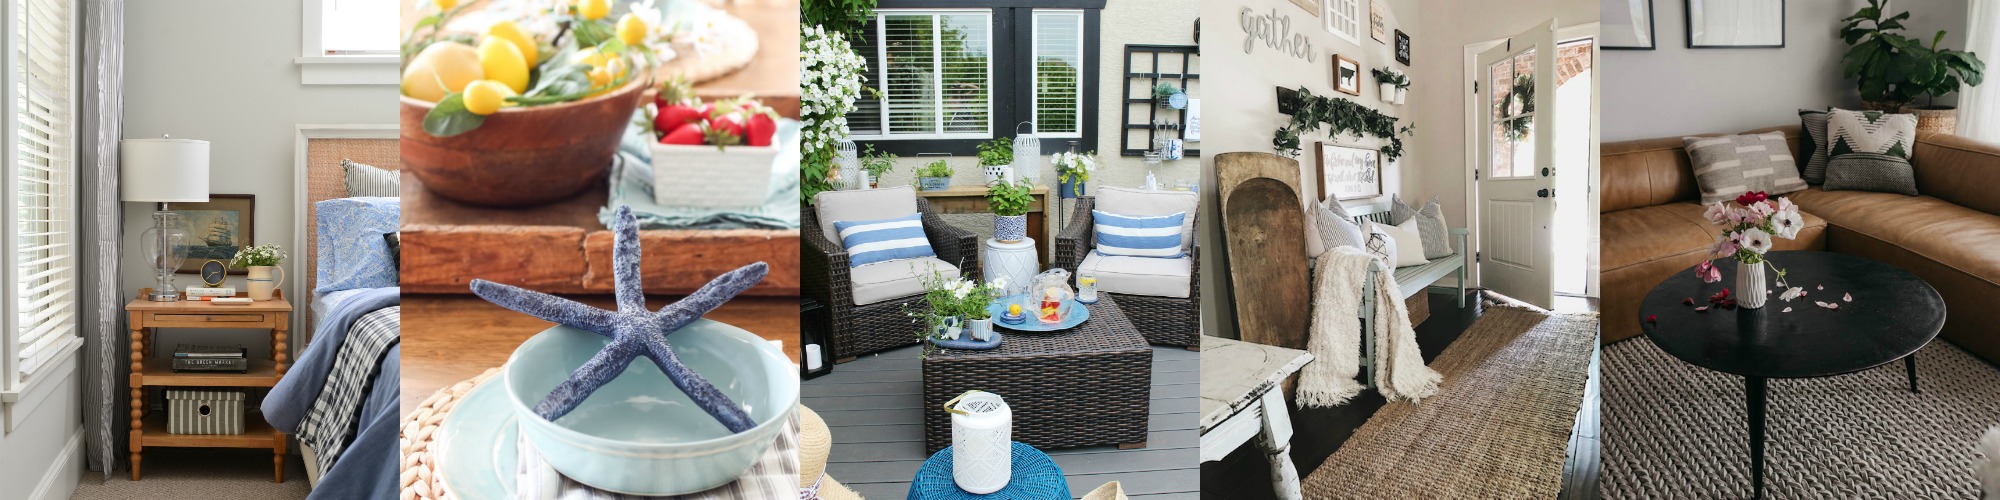
In our entryway we have this awesome pink and tan vintage rug that welcomes you inside. The side table is a great rustic wood piece to store all the stuff that you need coming and going. Some greens (via faux branches,  fresh yard clippings and/or plants) with blue, white and wood, really add to the summery feel in here.

Coastal Farmhouse Summer Home Tour

Coastal Farmhouse Summer Home Tour

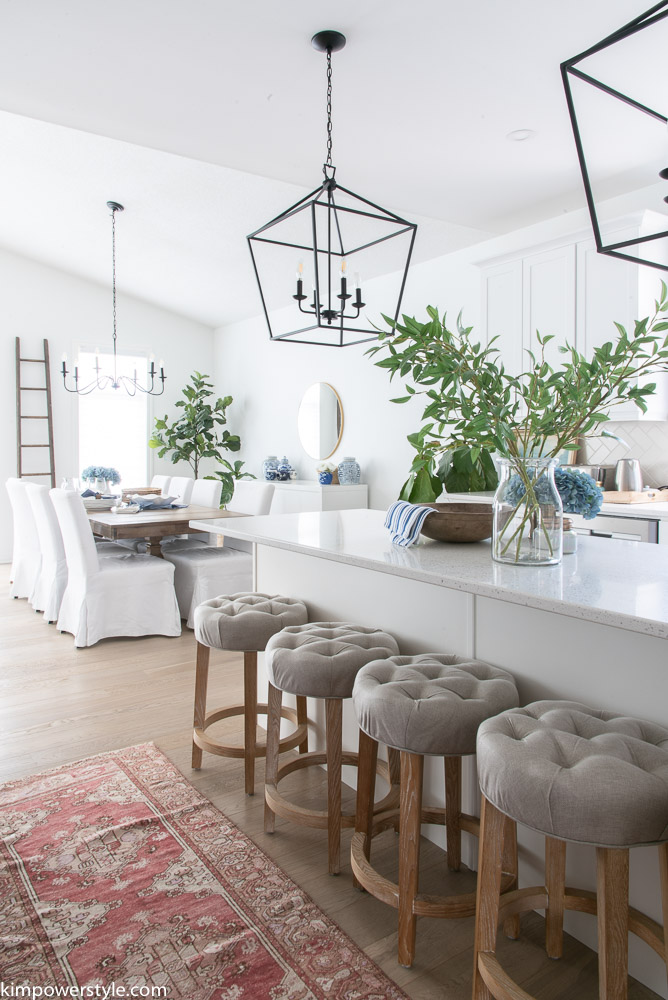
You’ll find a few vintage rugs interspersed in soft summery pinks and blues. They add such history, character and texture to a space.

Coastal Farmhouse Summer Home Tour

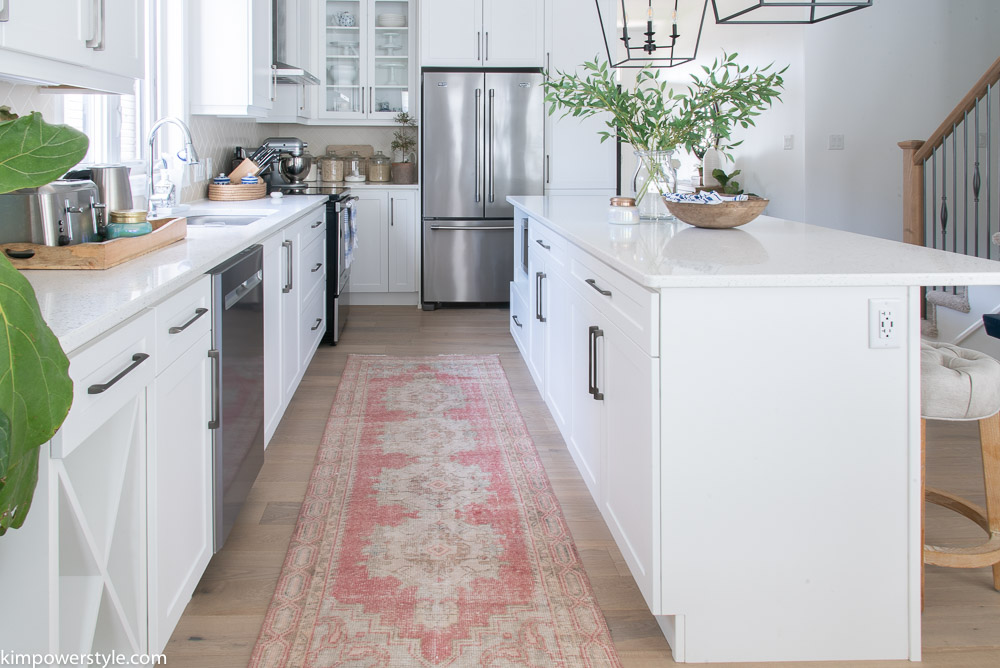
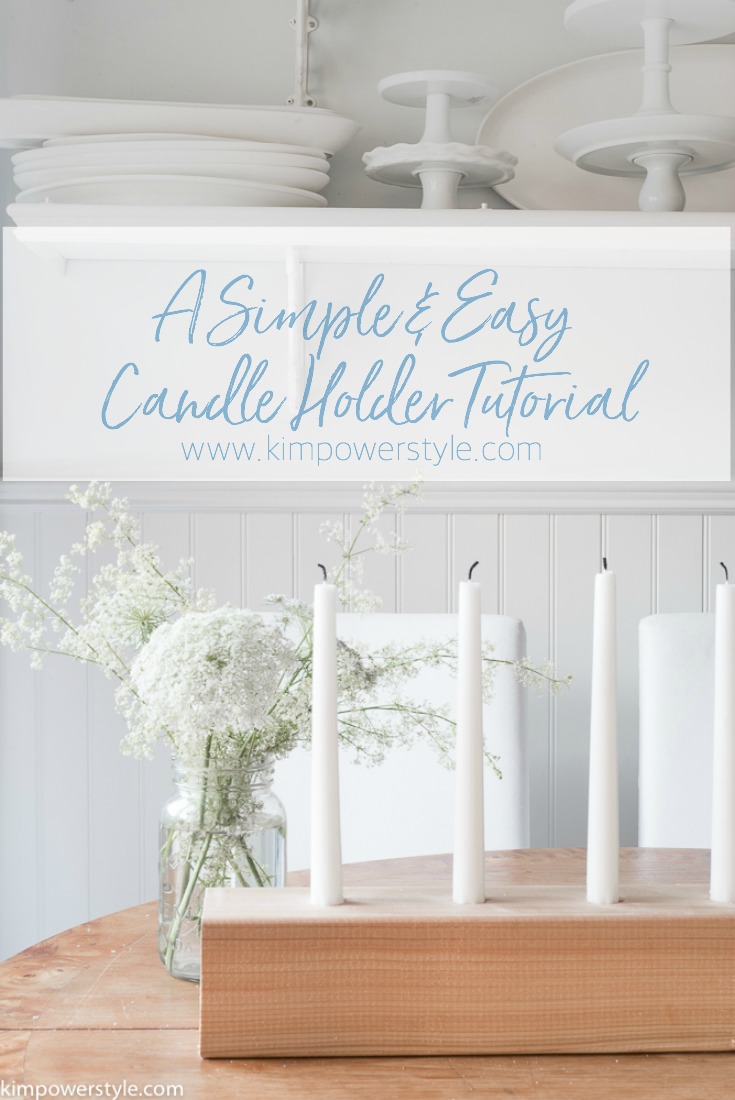
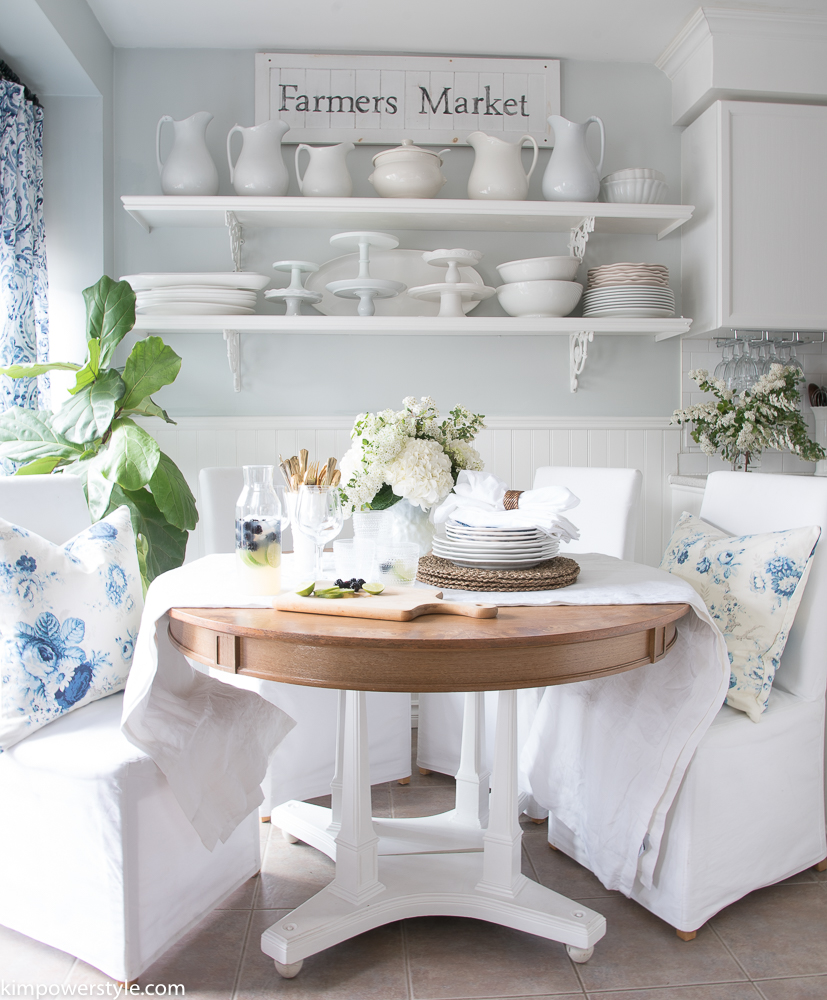
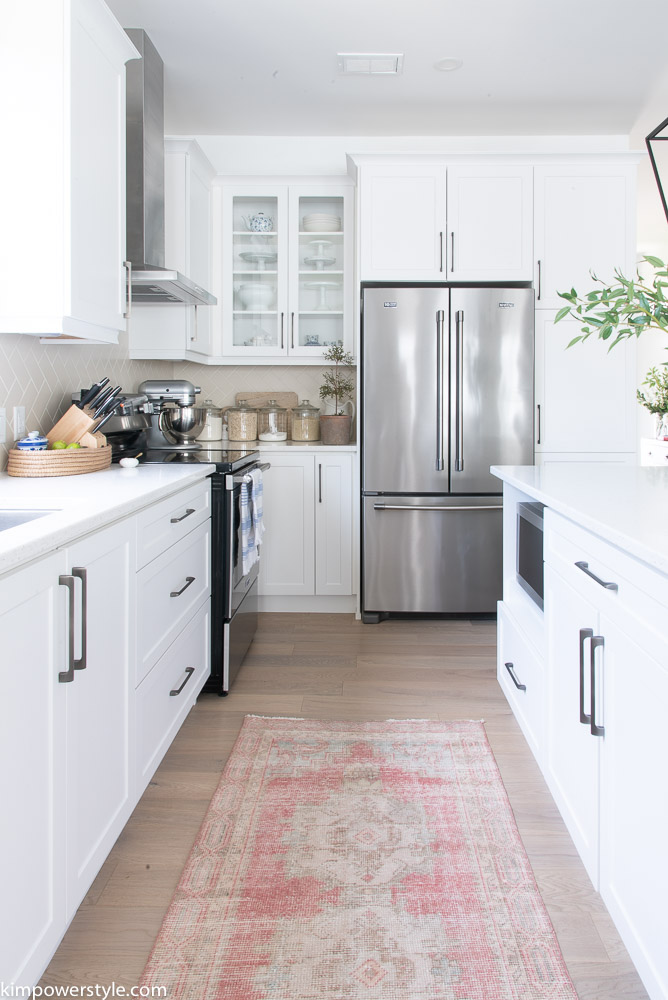
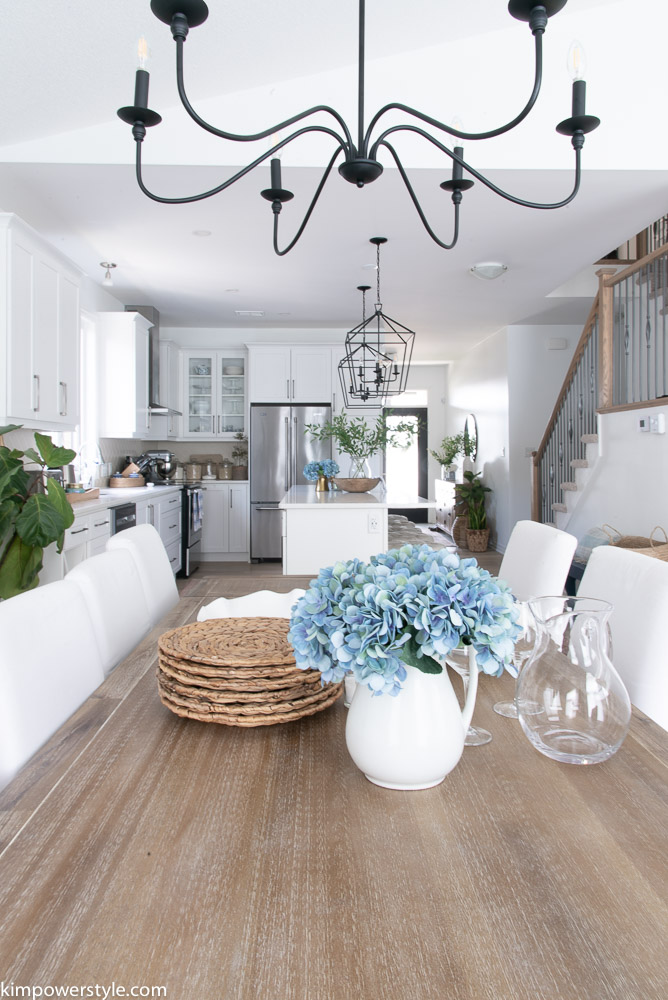
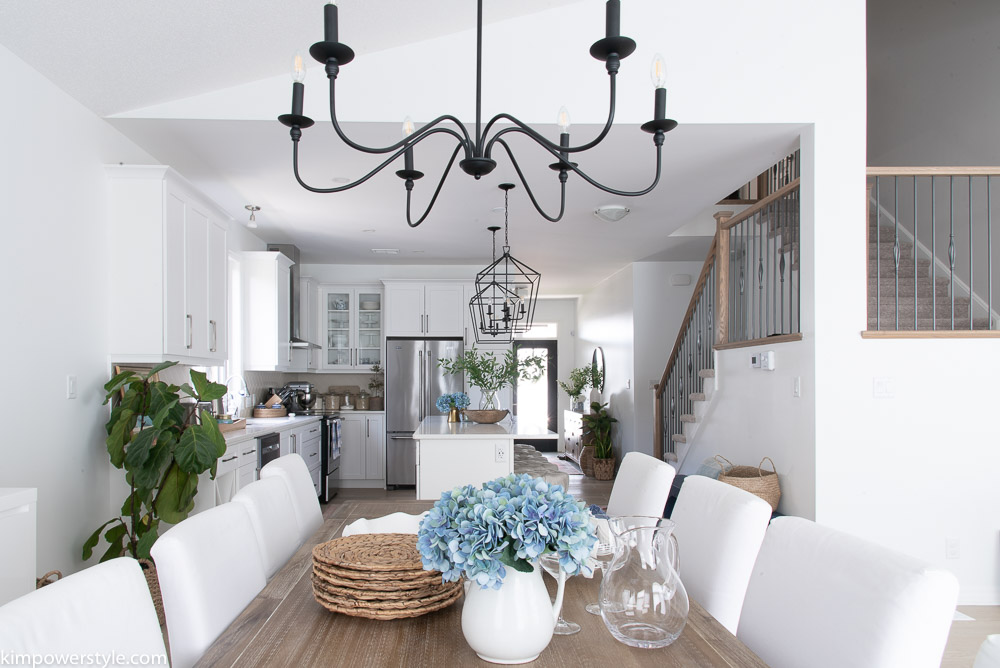
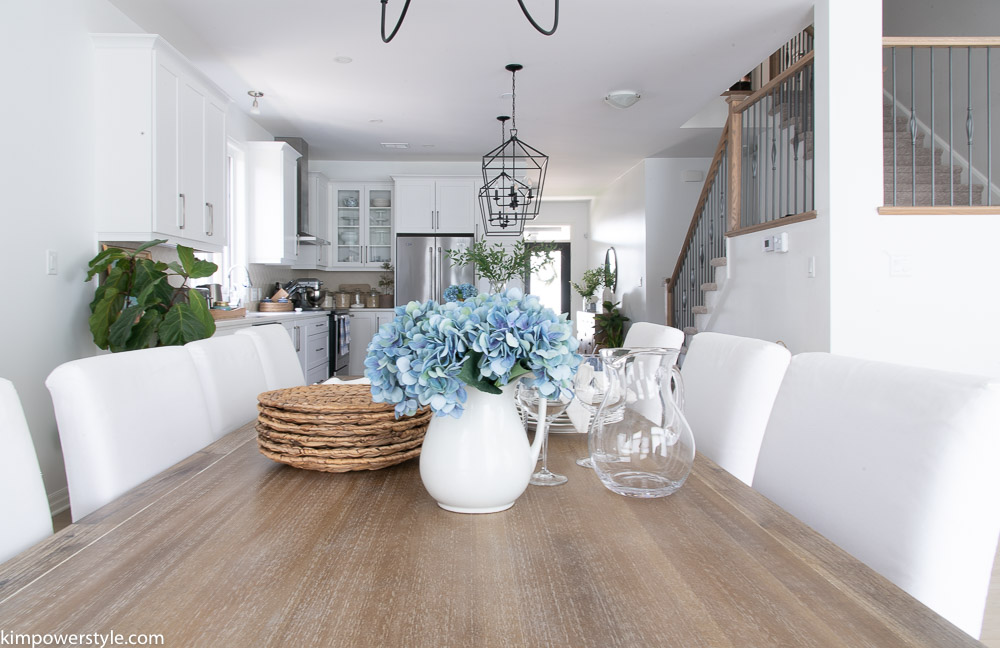
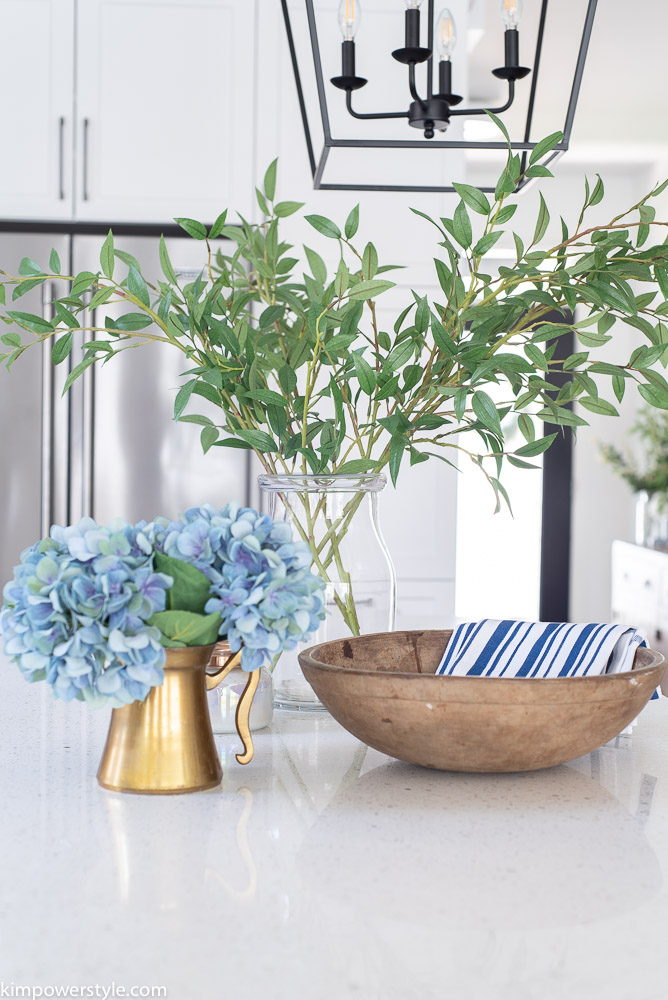
The kitchen stayed pretty much the same as our spring tour minus a few tulips. I’ve had these faux greens  along with our old vintage dough bowl out for a few weeks and they add so much life and texture amidst all the white. Simple and easy.

Coastal Farmhouse Summer Home Tour

Coastal Farmhouse Summer Home Tour

Most of my ironstone collections is still packed away in boxes until I can make some shelving to hold it all. It’s too pretty not to be on display. I’ve taken out a few pieces here and there along with some of the vintage pitchers. They’r great for holding flower arrangements.

Coastal Farmhouse Summer Home Tour

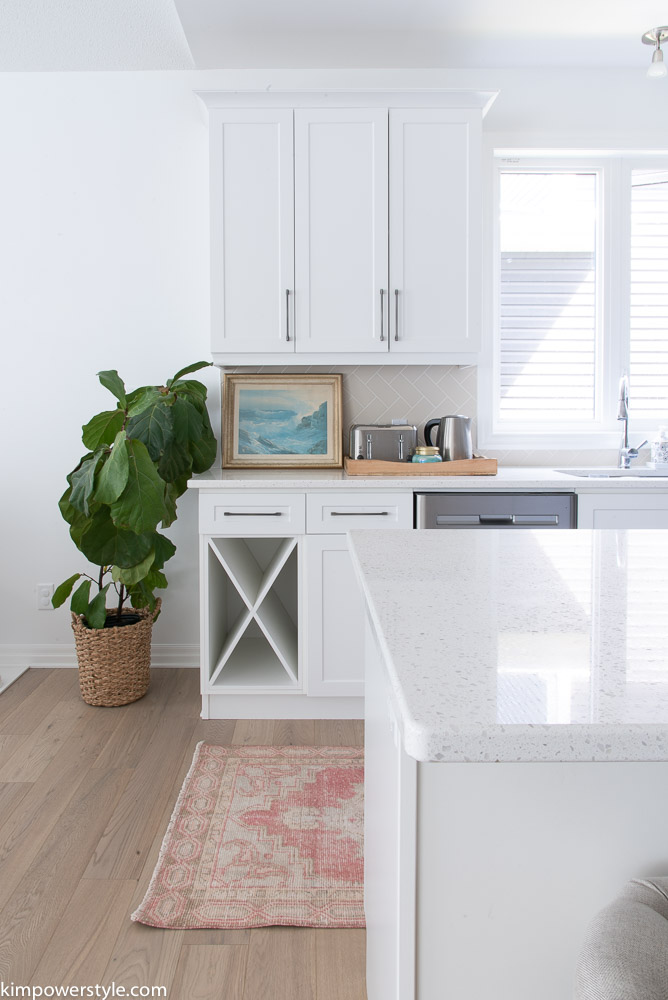
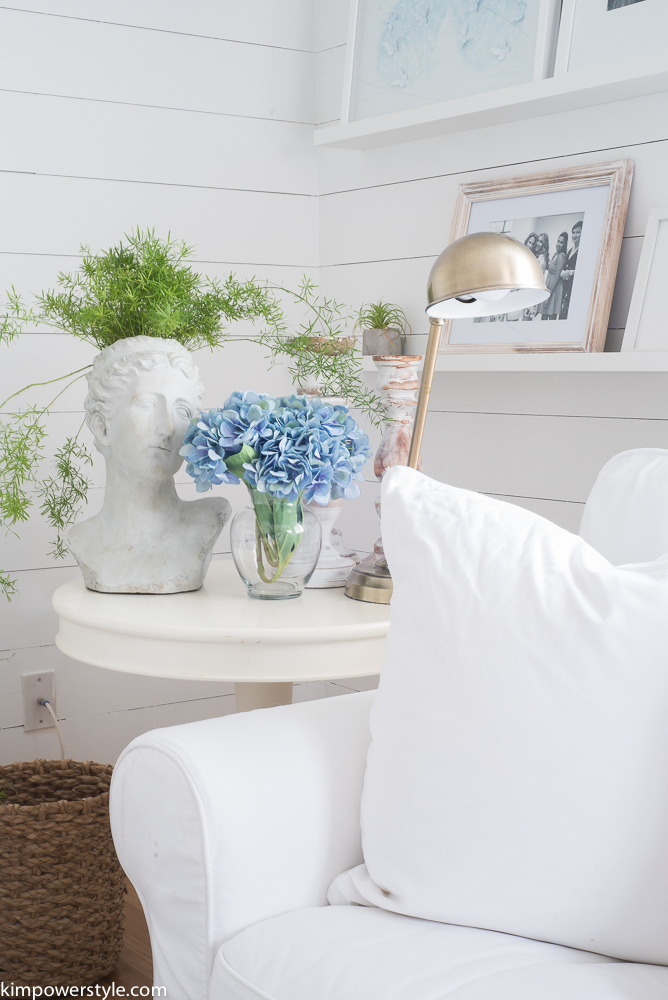
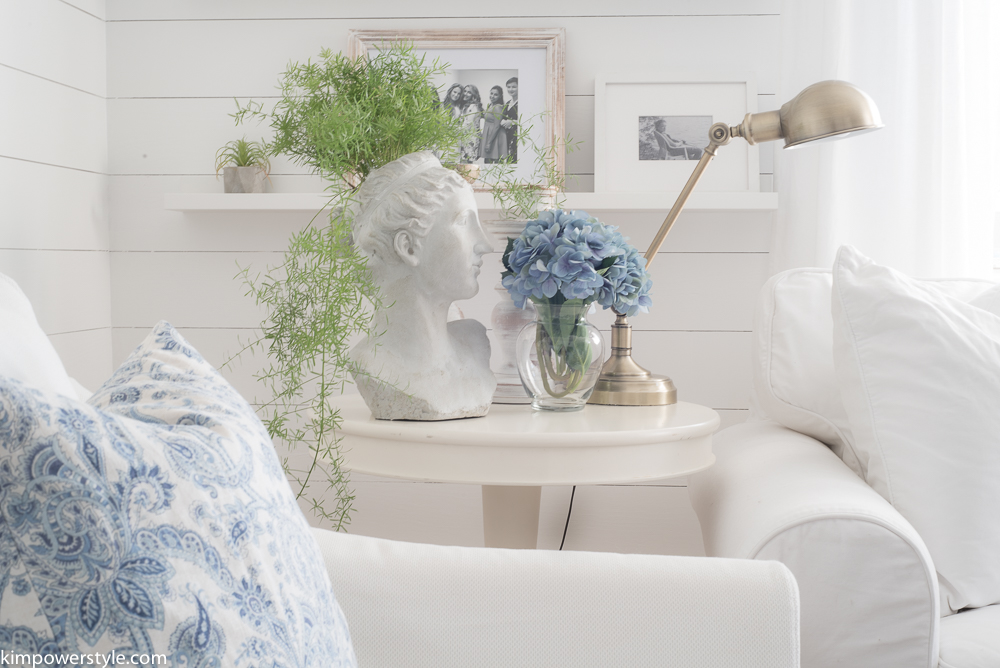
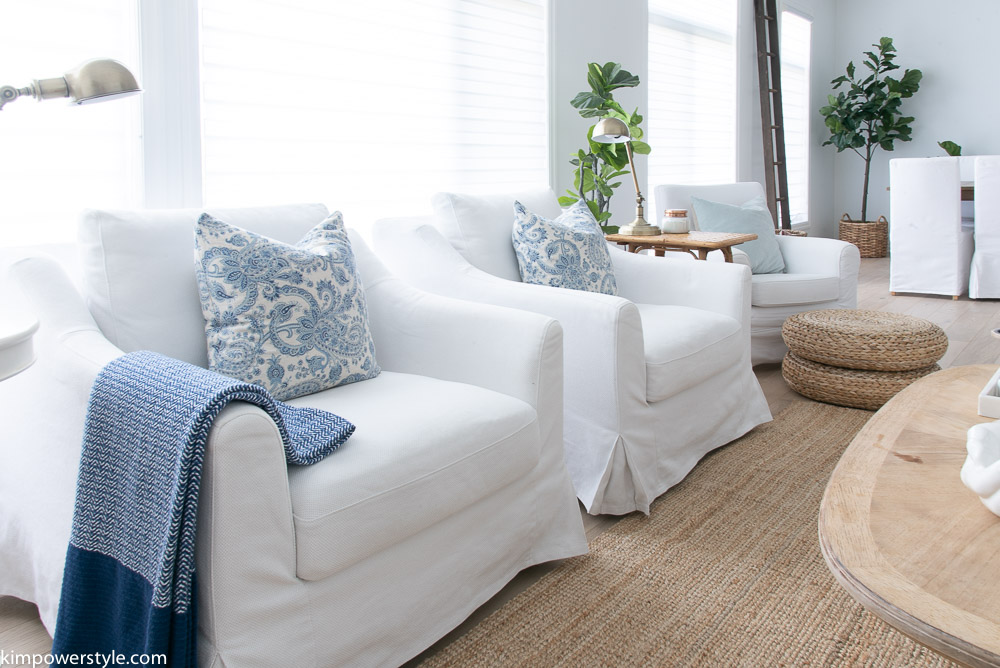
My fiddle leaf fig is looking a little sad in this pic! I have to say that they really have had a difficult time with the move. They don’t like to be moved around or be in direct sunlight ..which we get tons of here.. so I’m trying  to keep them happy and nurse them back to life. Adding greenery whether fresh or faux lends itself to a pretty summery vibe. I simply love this vintage painting of Peggy’s Cove. The colours in it are amazing and it reminds me so much of PEI where my parent’s are from.

Coastal Farmhouse Summer Home Tour

Coastal Farmhouse Summer Tour

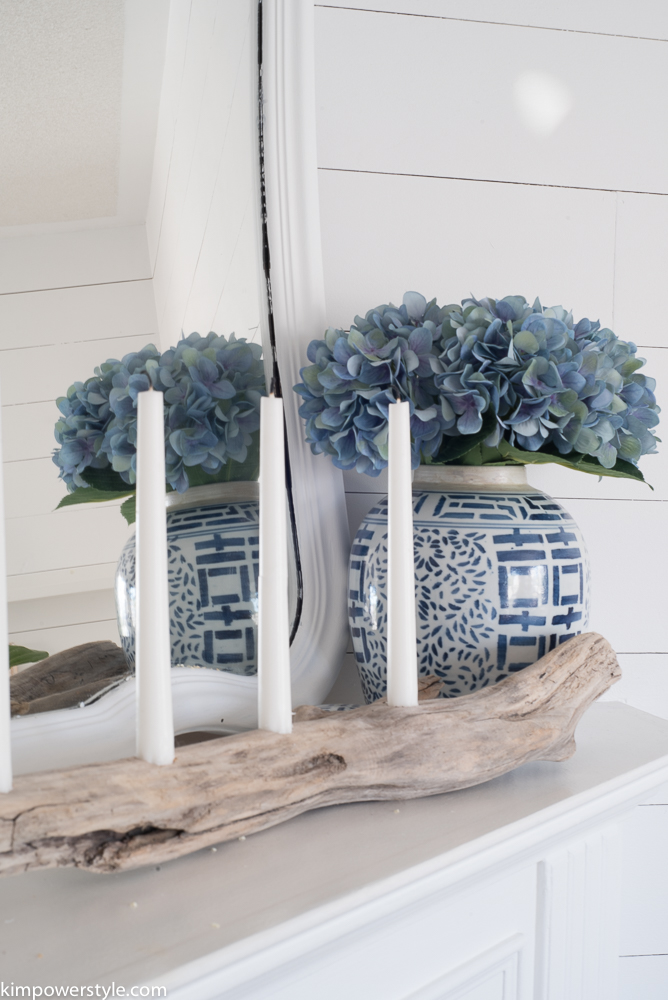
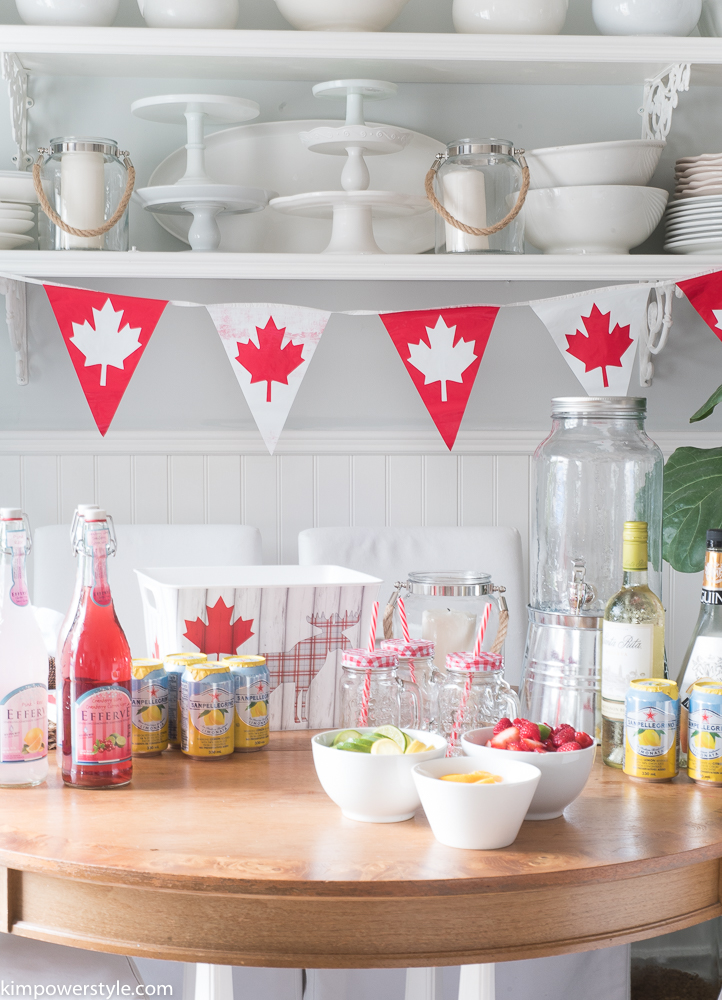
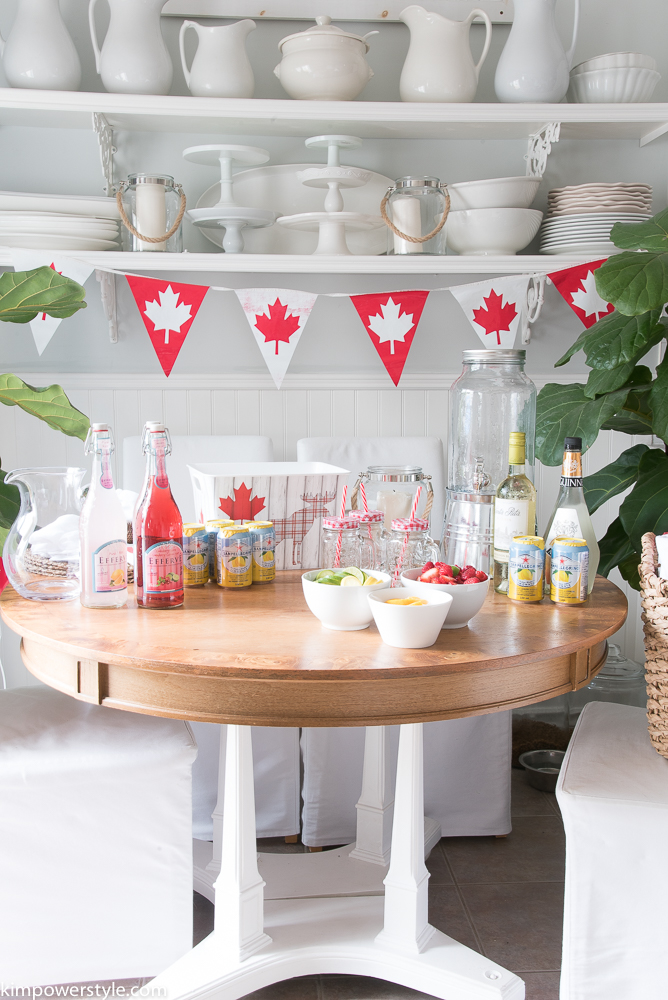
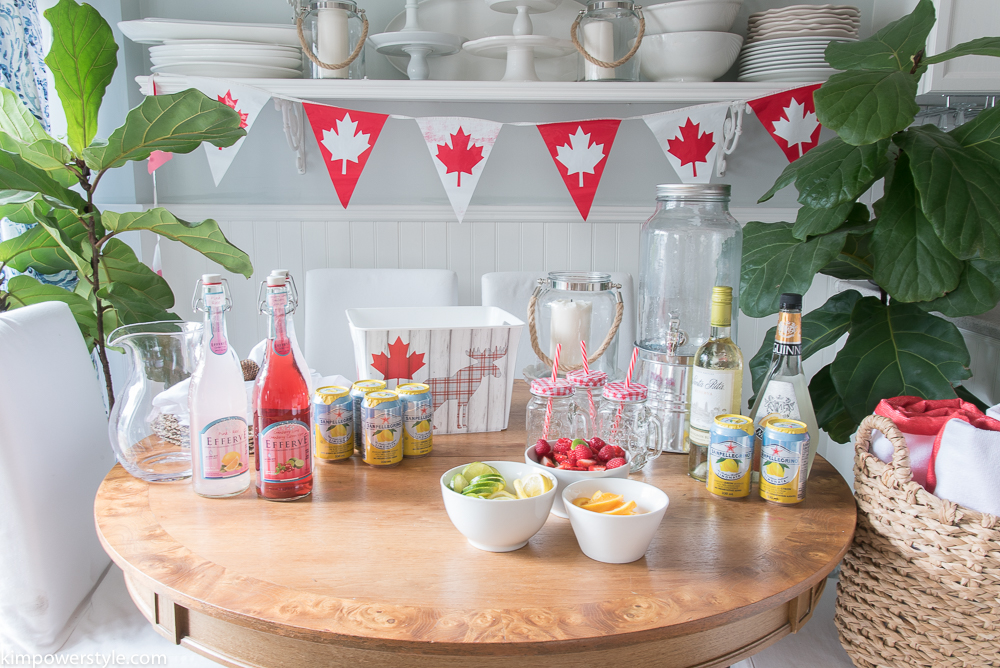
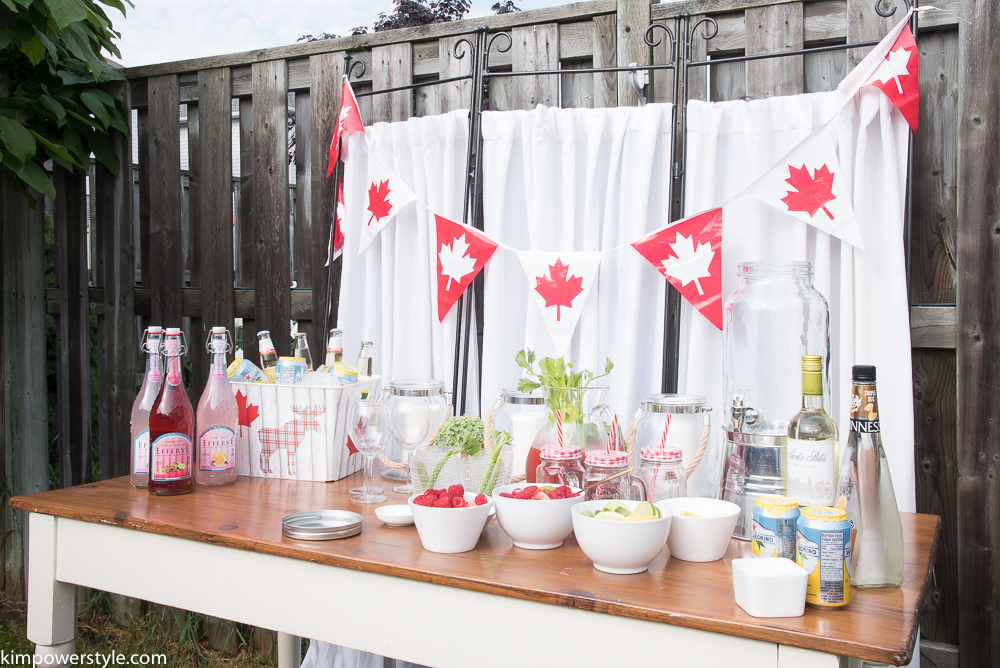
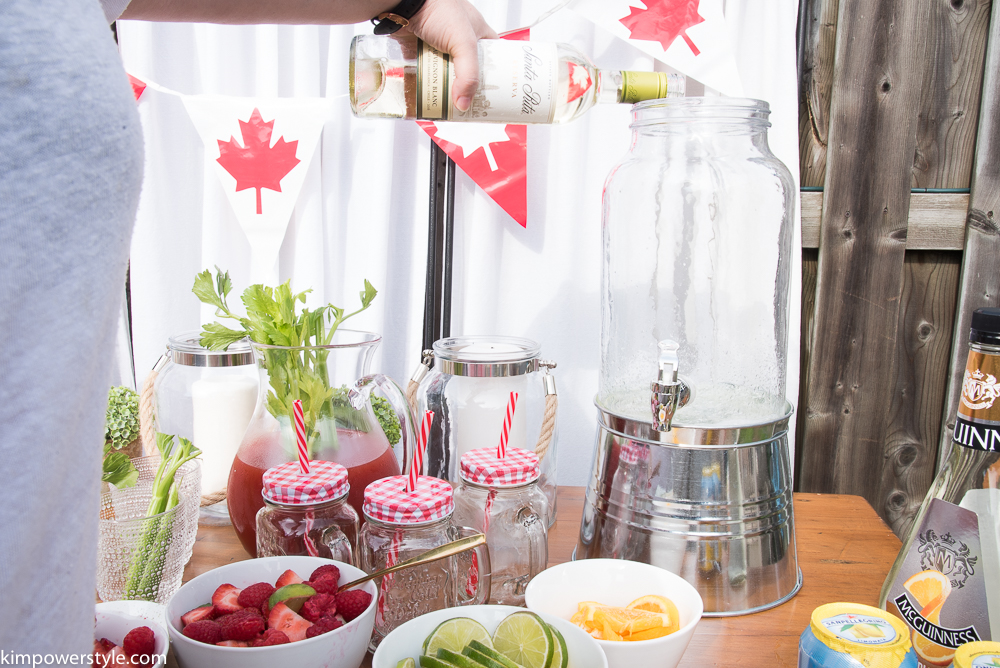
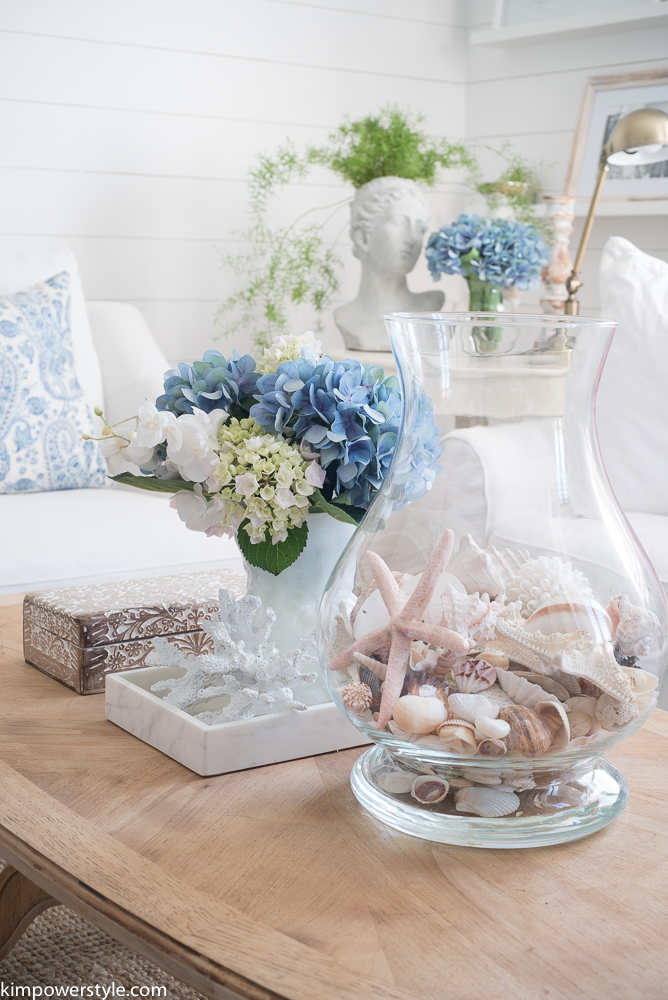
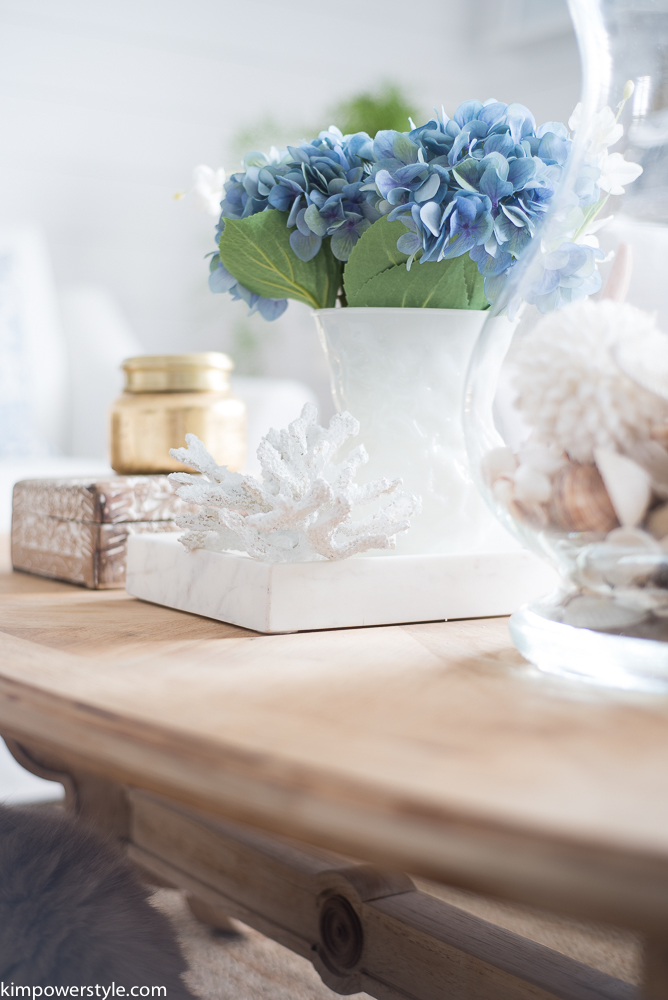
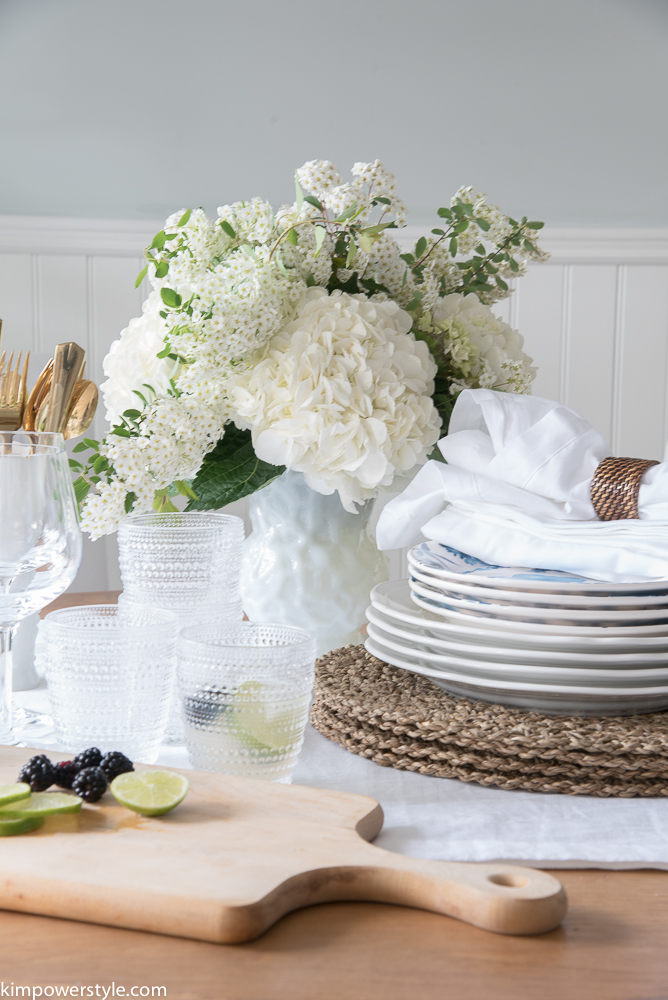
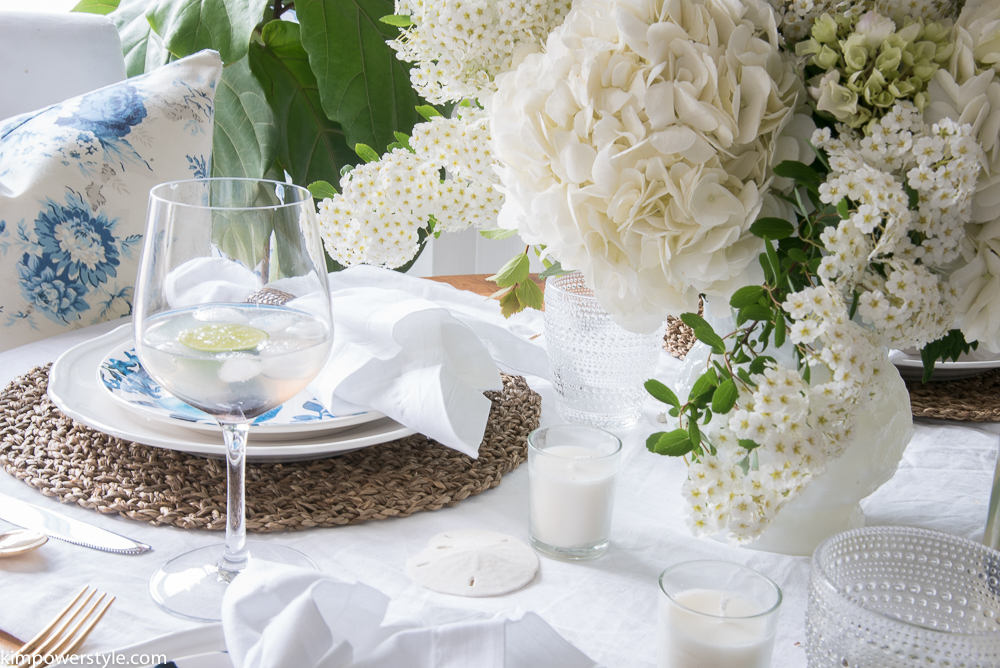
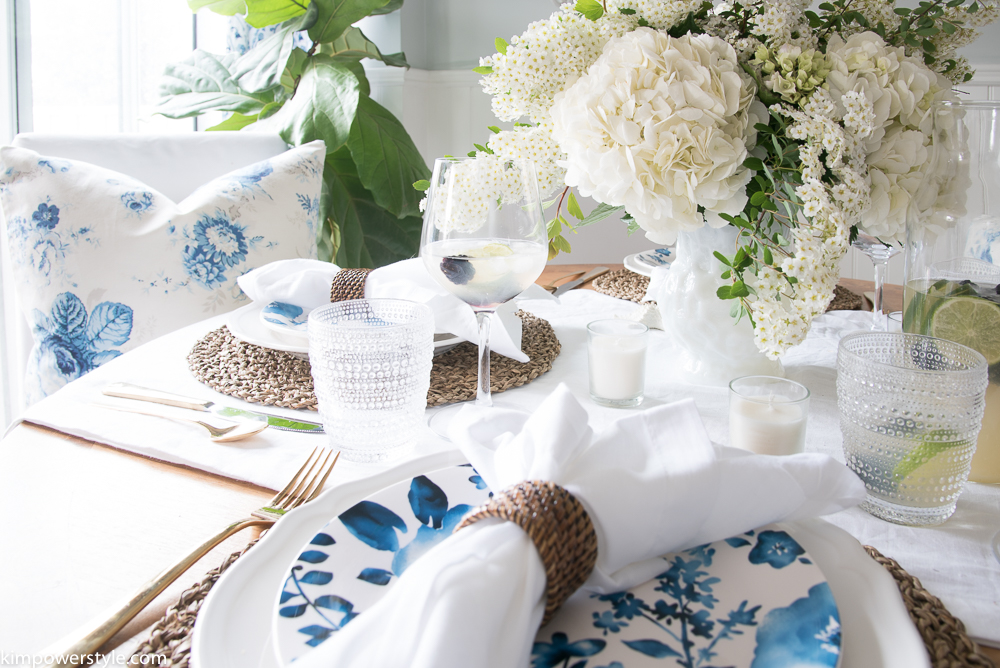
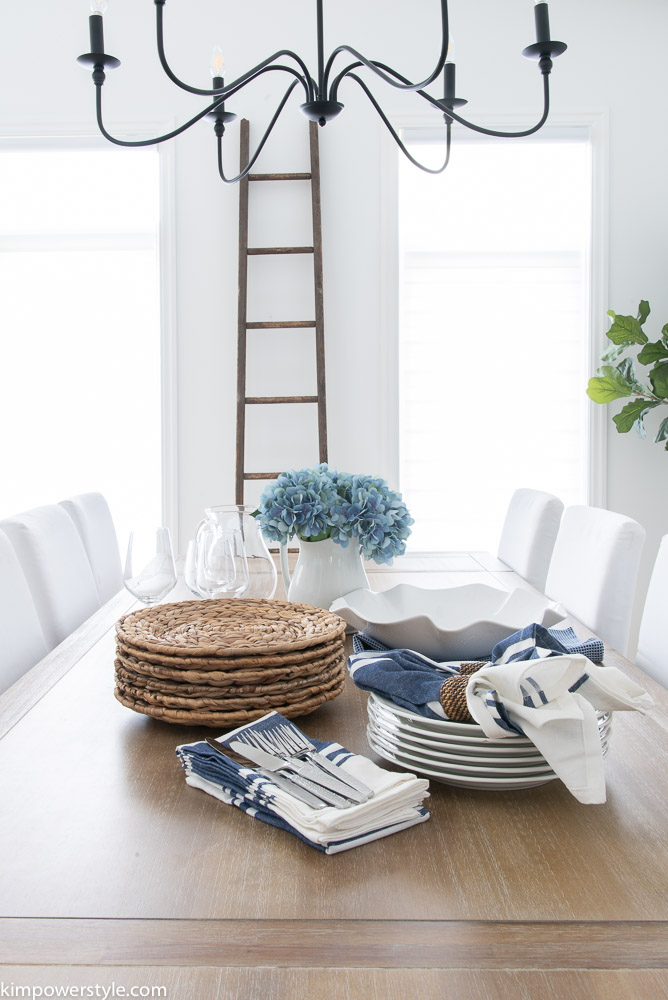
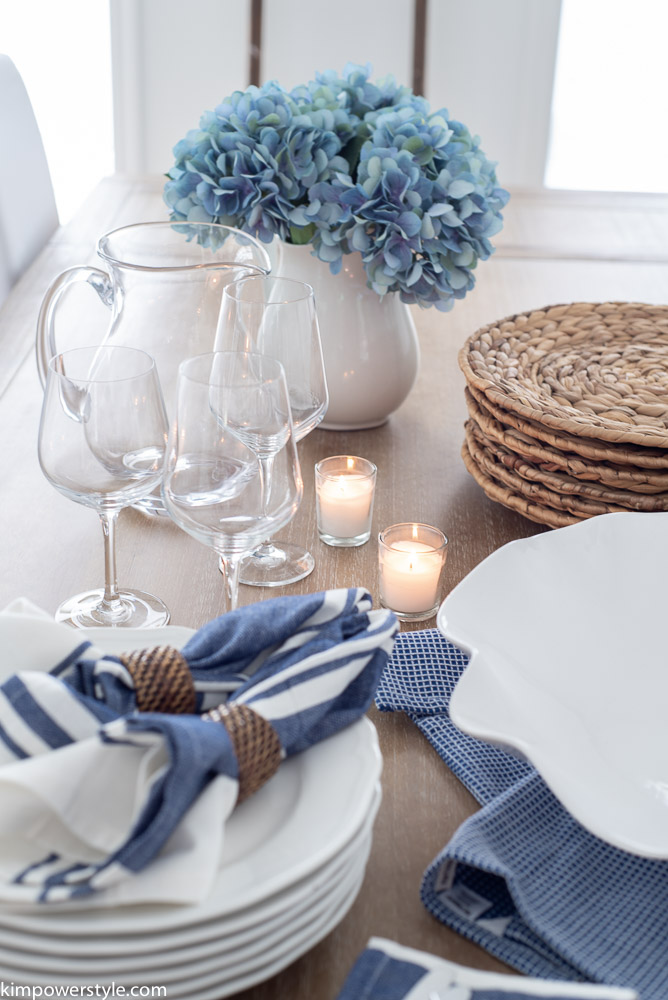
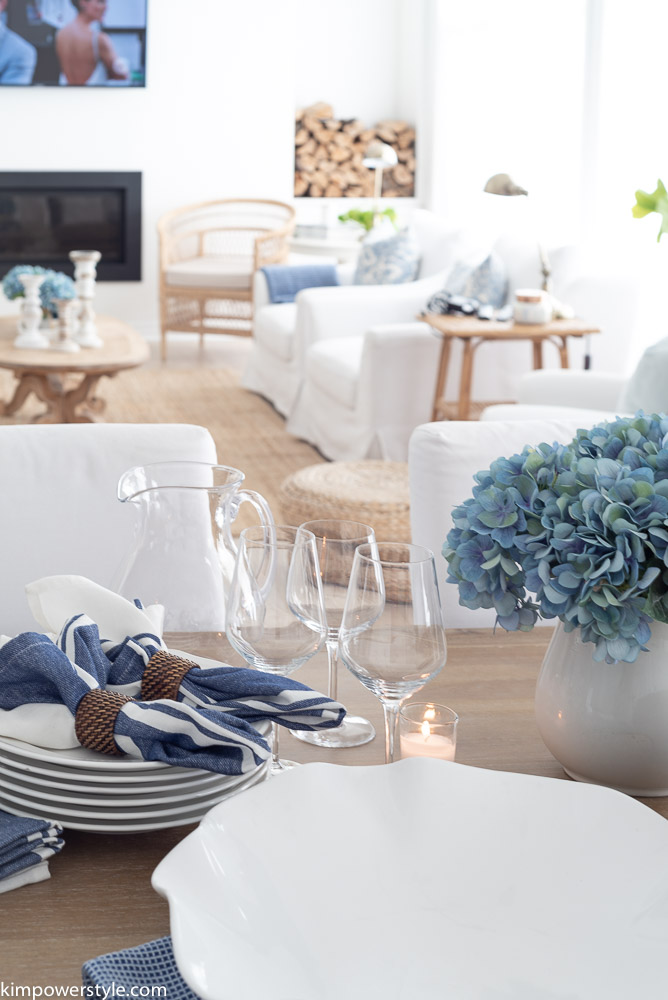
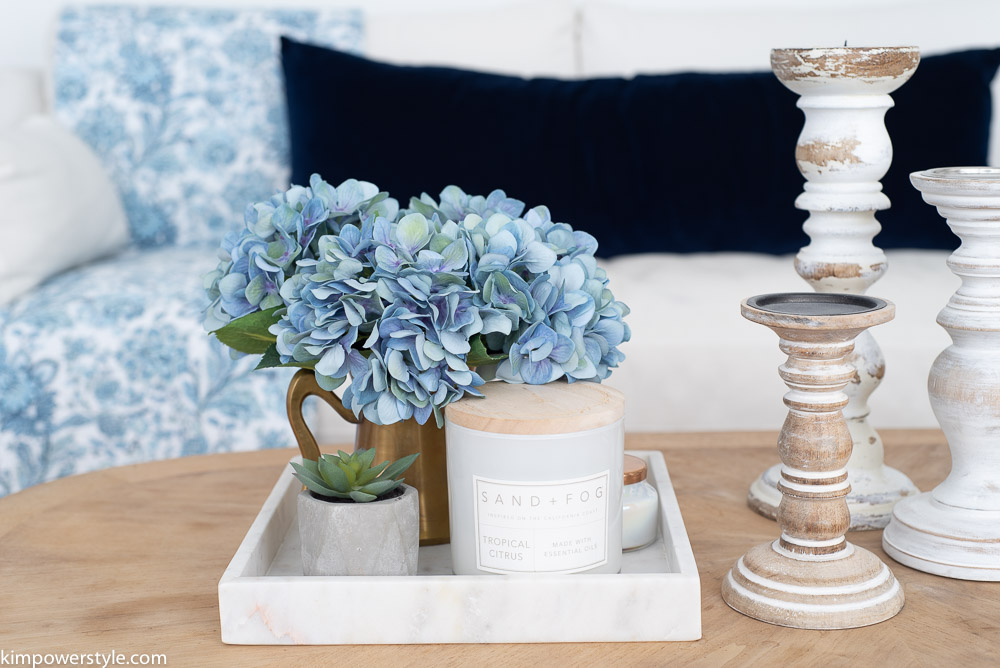
I love setting a pretty coastal buffet tablescape. Simple, natural elements such as the seagrass chargers with white dishes along with blue hydrangeas are my staples in the summer. It’s a simple and classic coastal farmhouse look.

Coastal Farmhouse Summer Home Tour

Coastal Farmhouse Summer Home Tour

Coastal Farmhouse Summer Home Tour

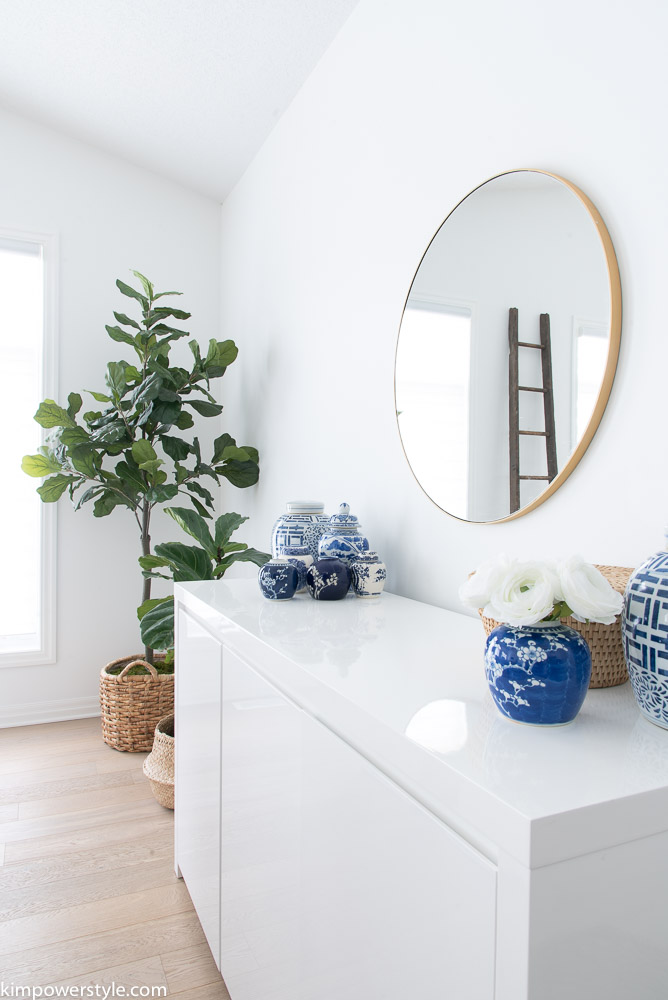
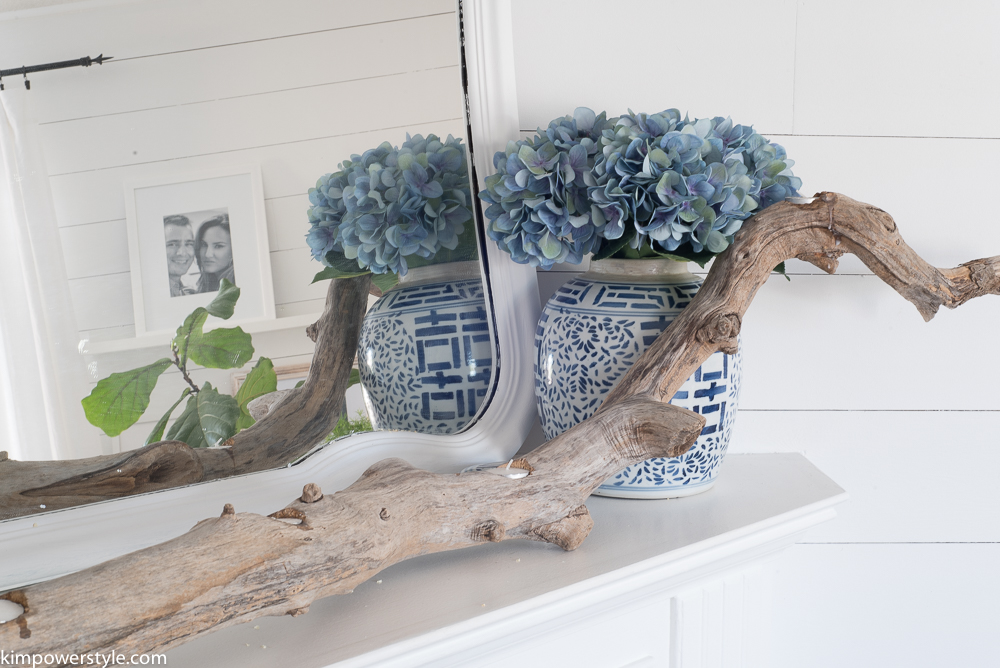
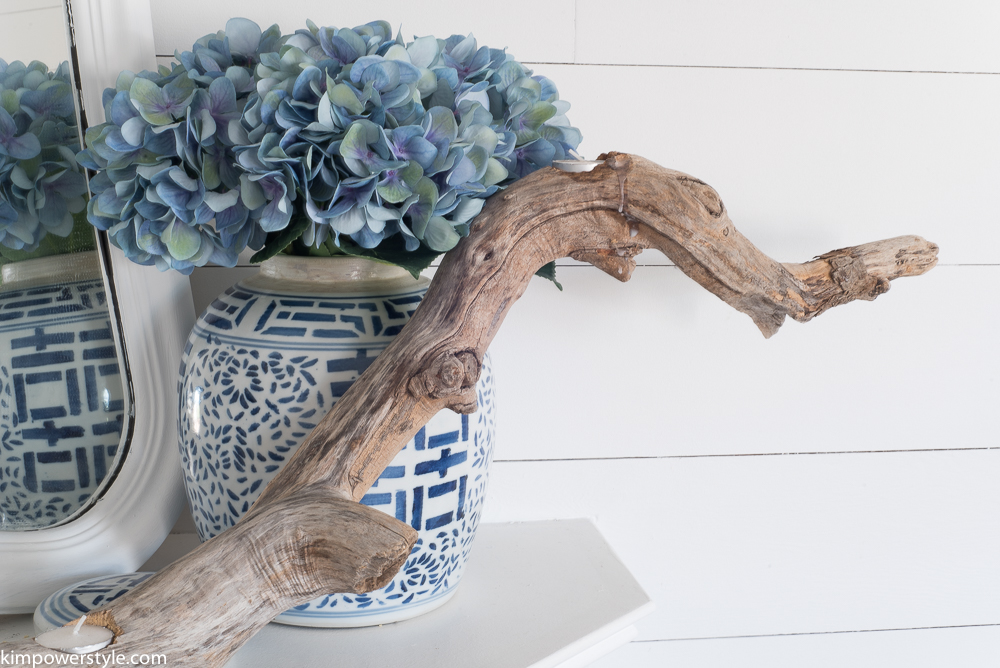
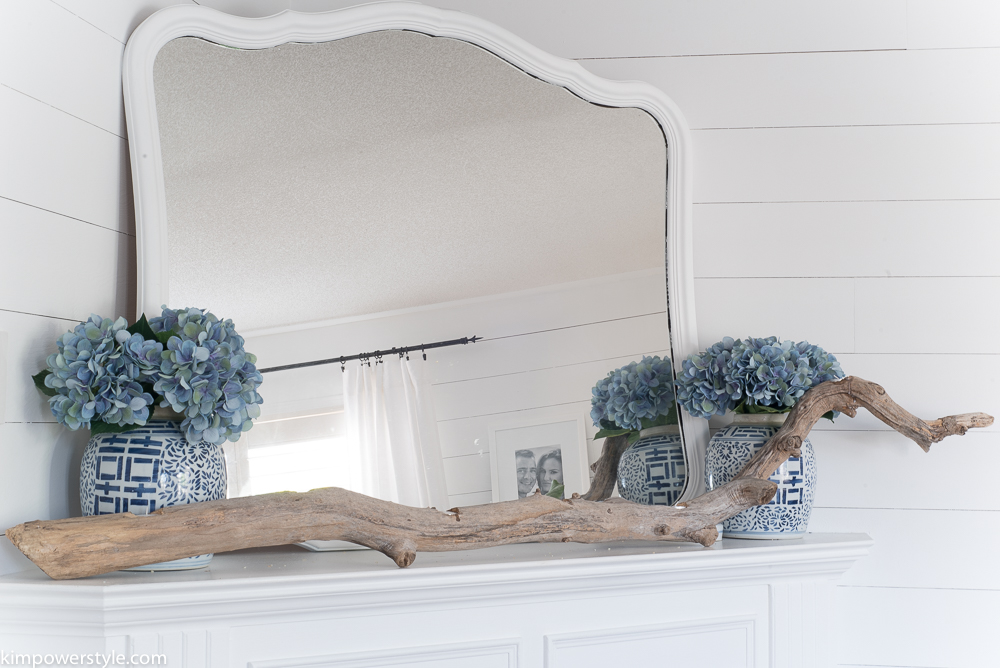
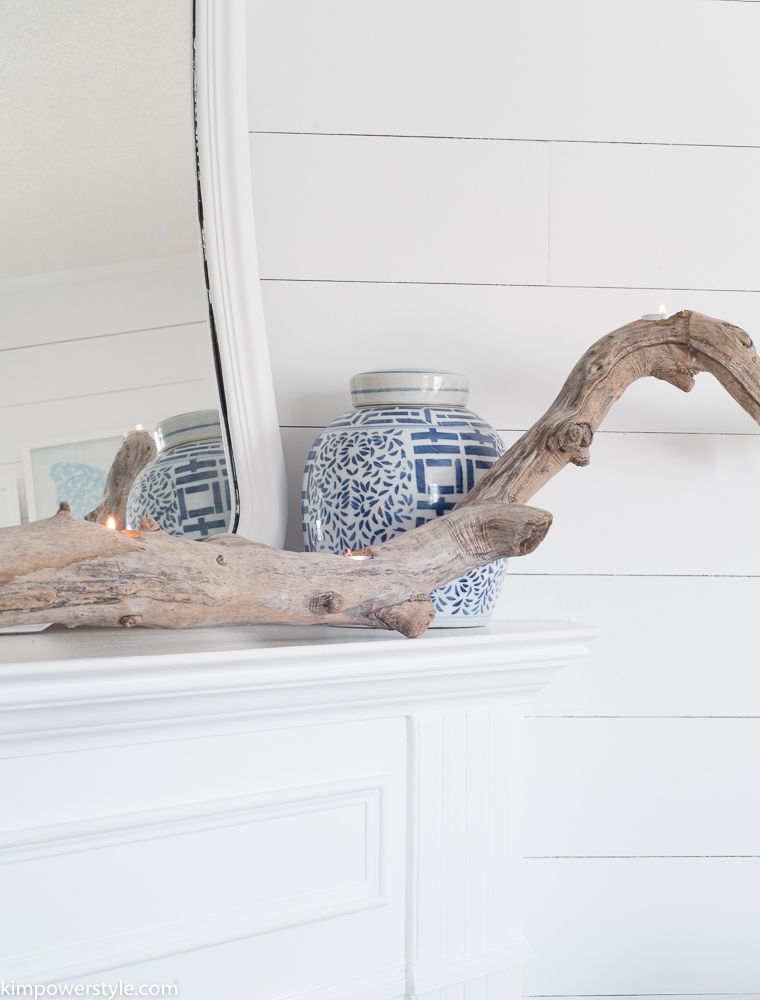
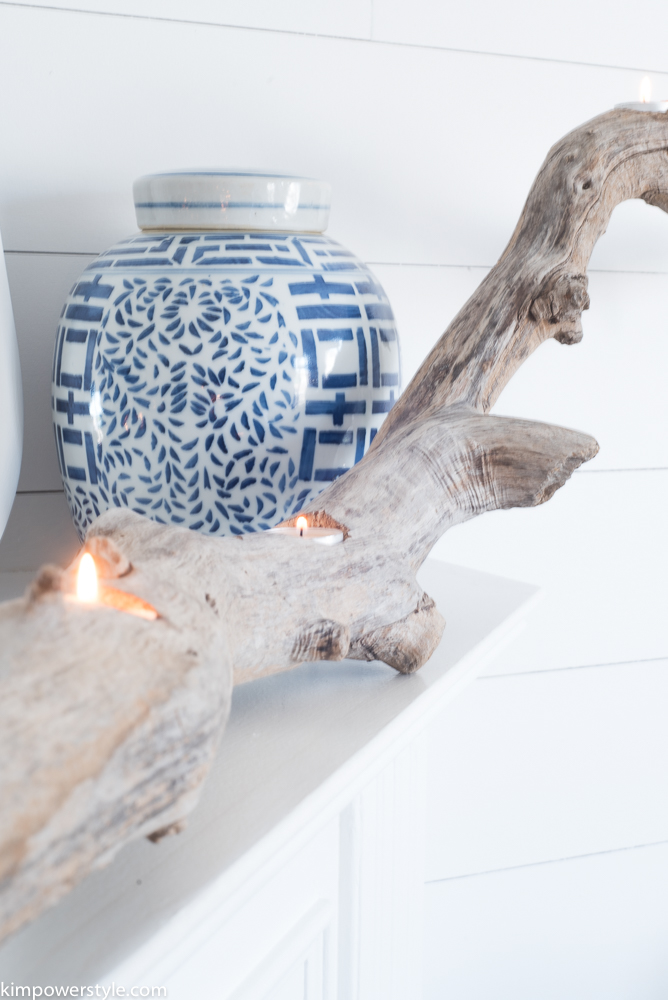
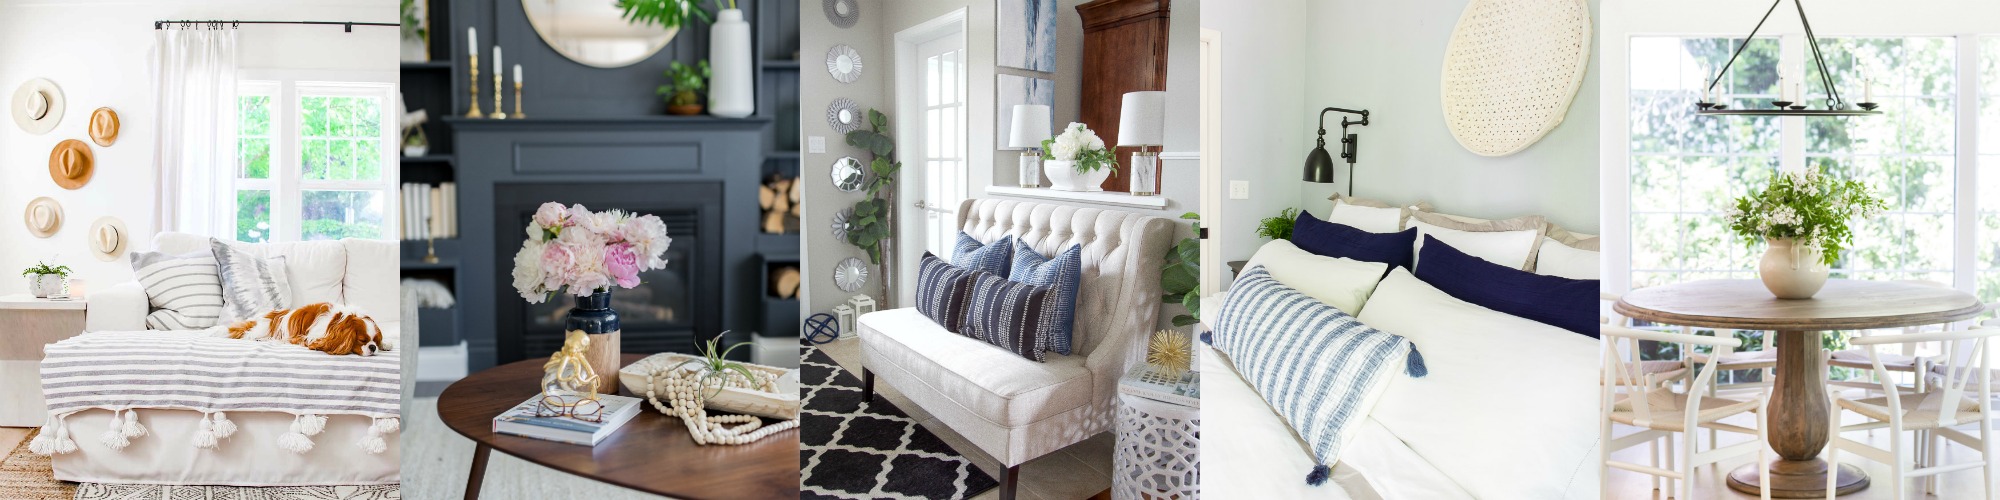
I found these large ginger jars years ago at a garage sale and use them every summer in my decor. We have a few more blue and white pieces that we’ve collected along the way.

Coastal Farmhouse Summer Home Tour

Coastal Farmhouse Summer Home Tour

Coastal Farmhouse Summer Home Tour

I just noticed that the TV is on in the background in this photo. My battery died while I was photographing for the tour and I sat down while it was charging and got hooked into a Hallmark movie. It fits right in though because it’s about June brides and summer weddings! Lol.

Coastal Farmhouse Summer Home Tour

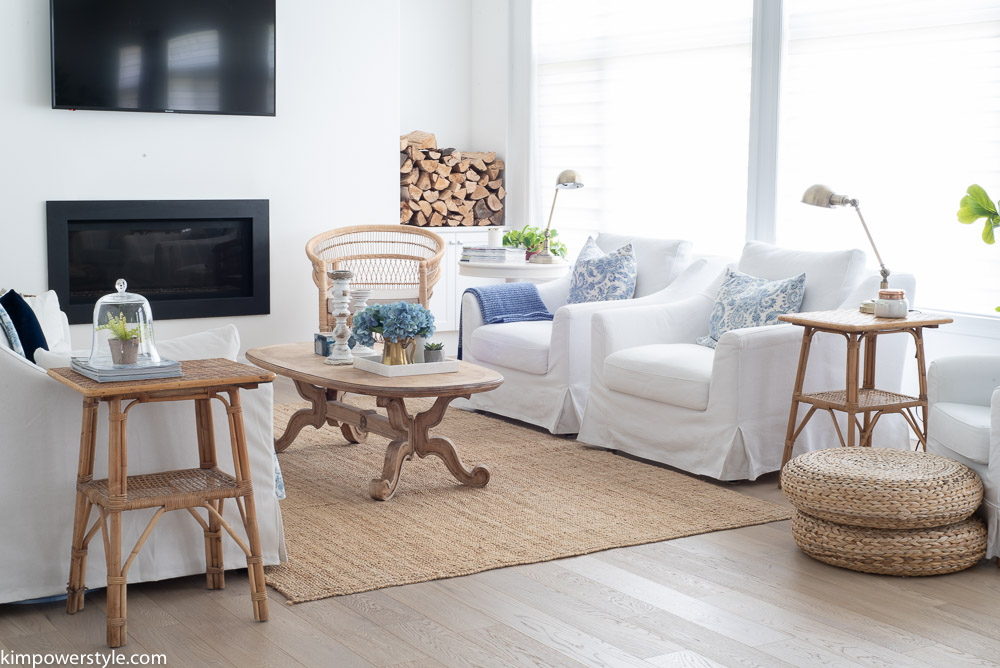
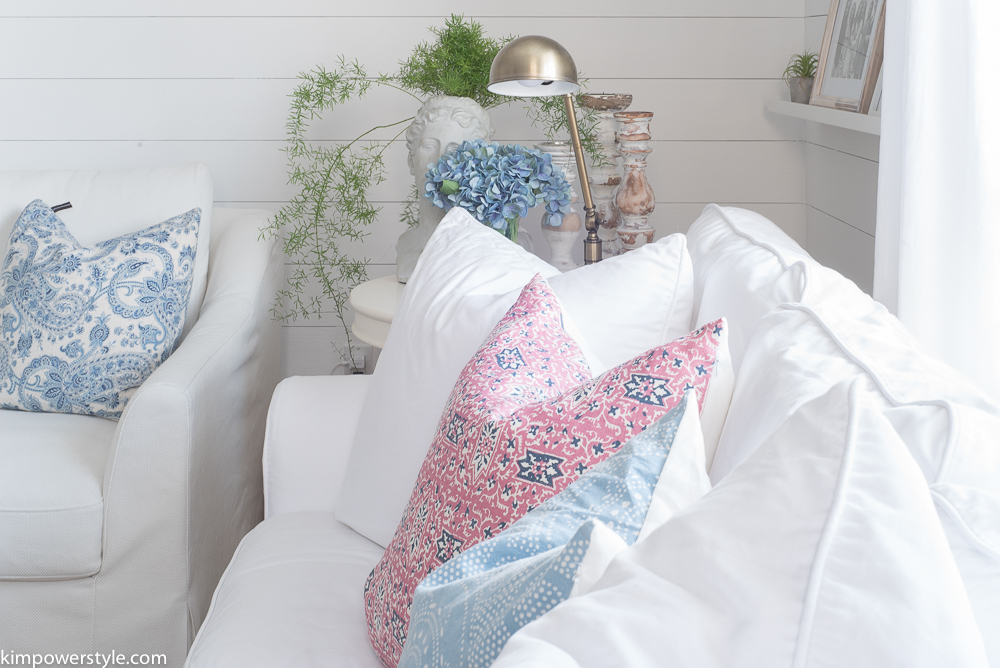
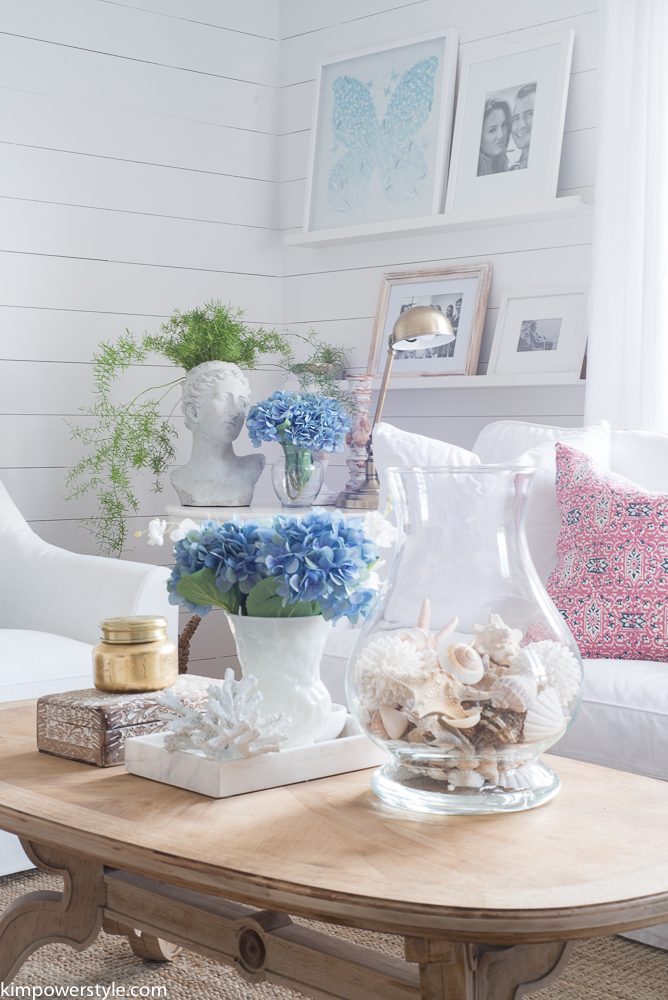
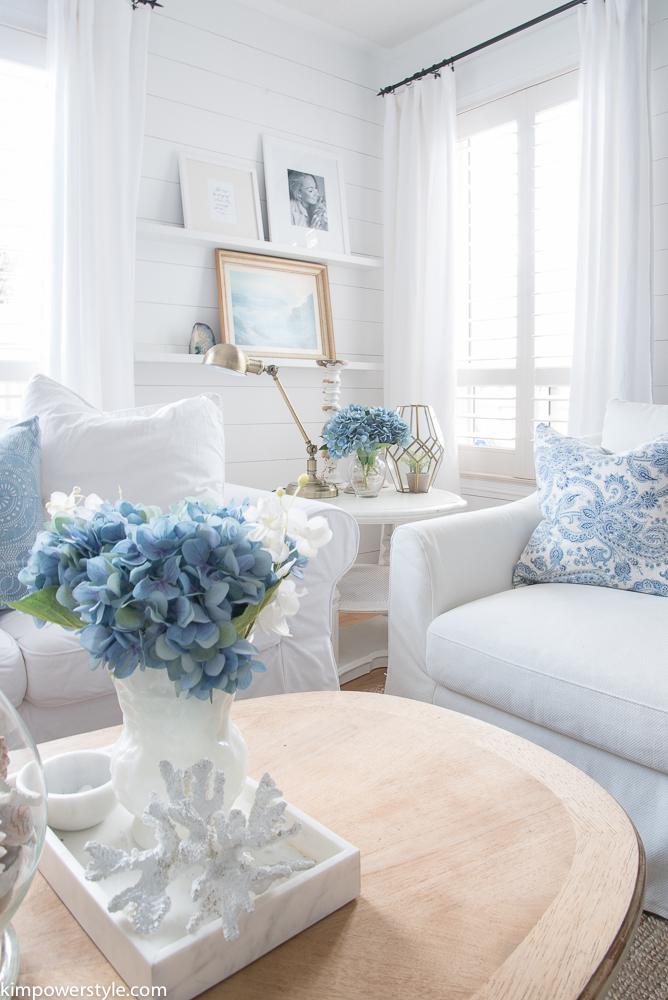
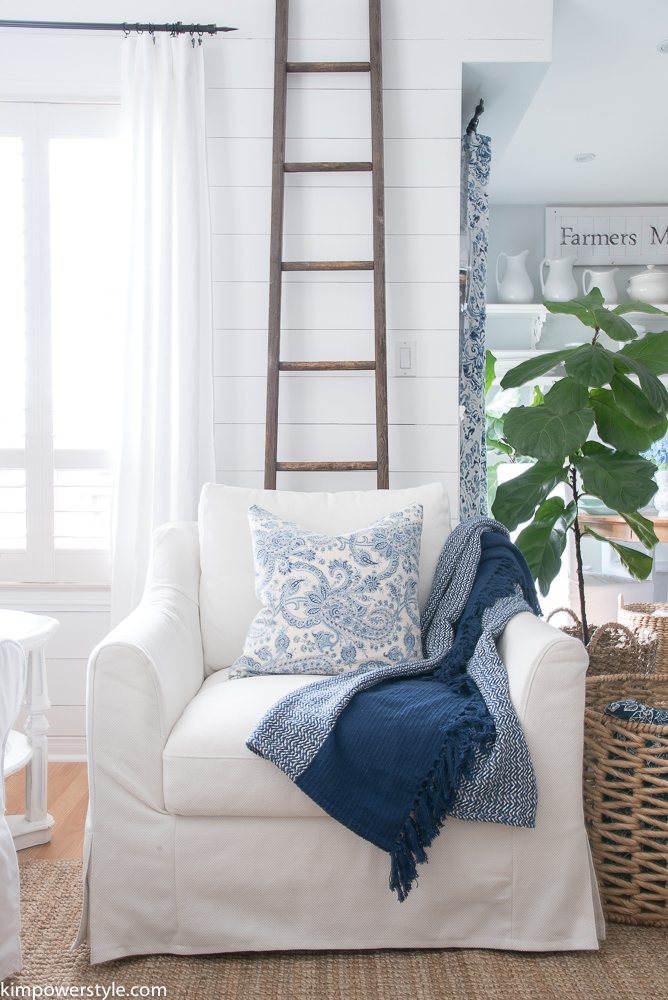
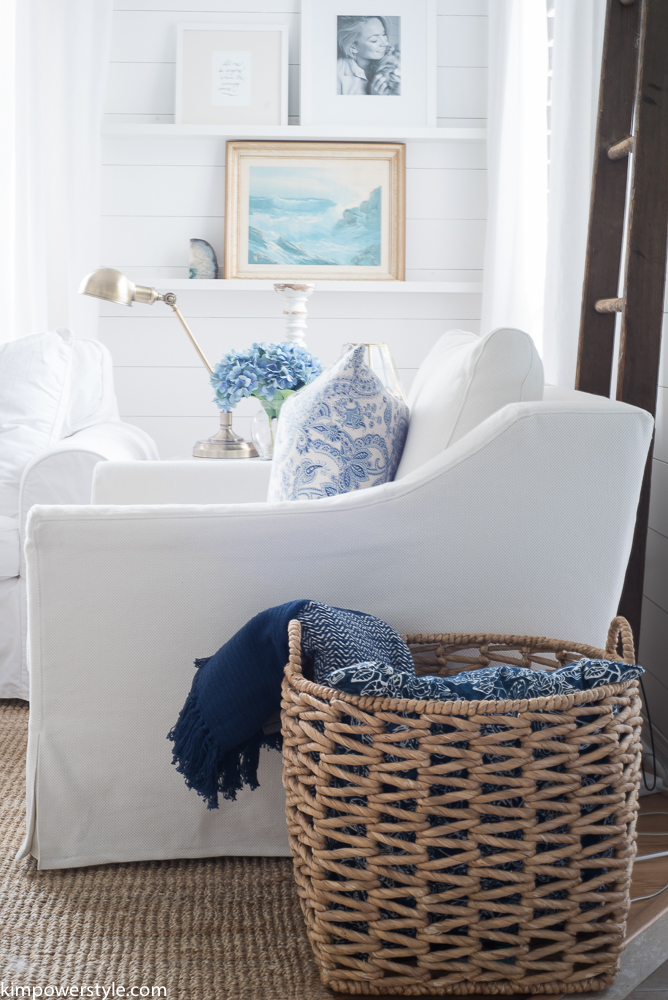
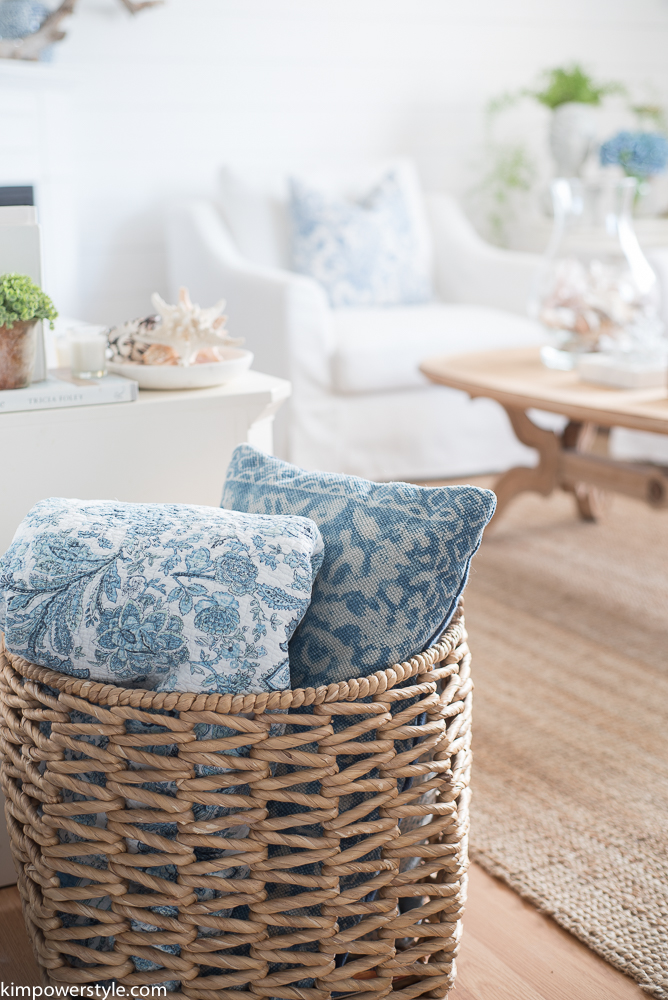
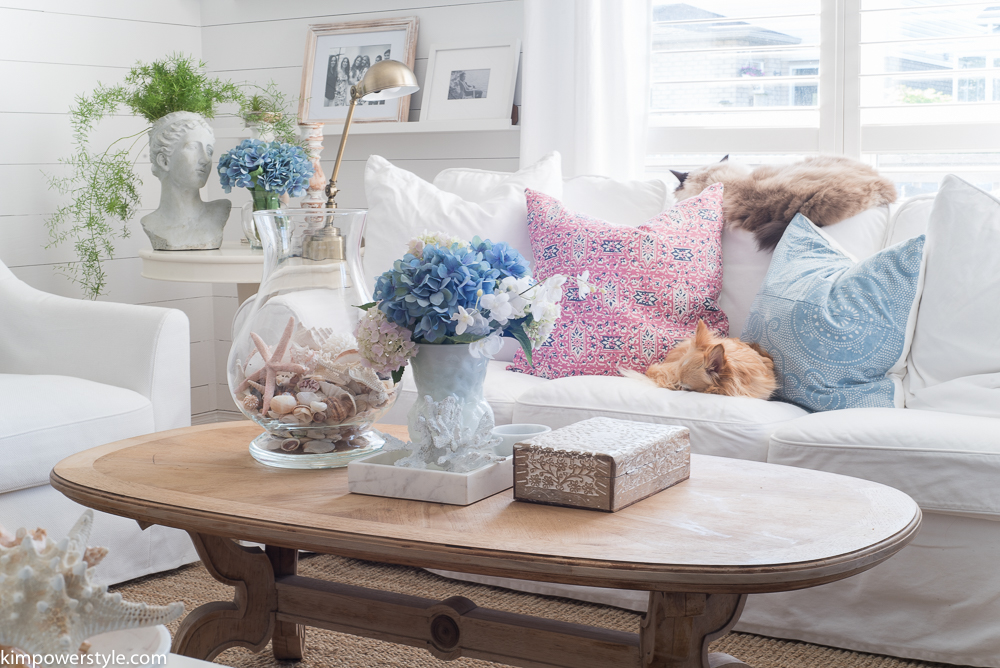
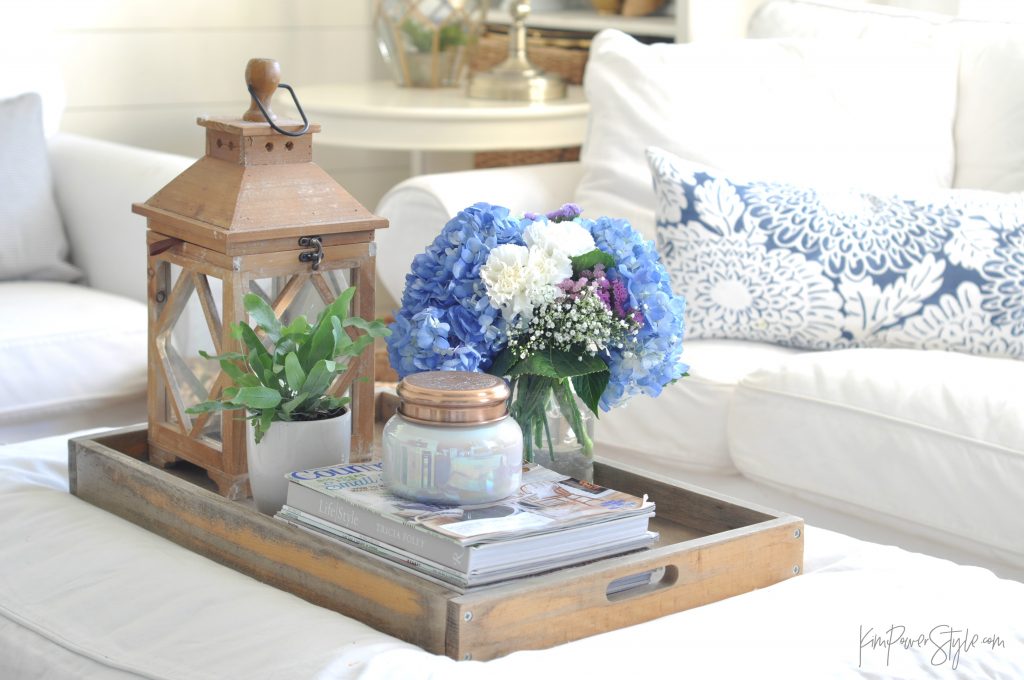
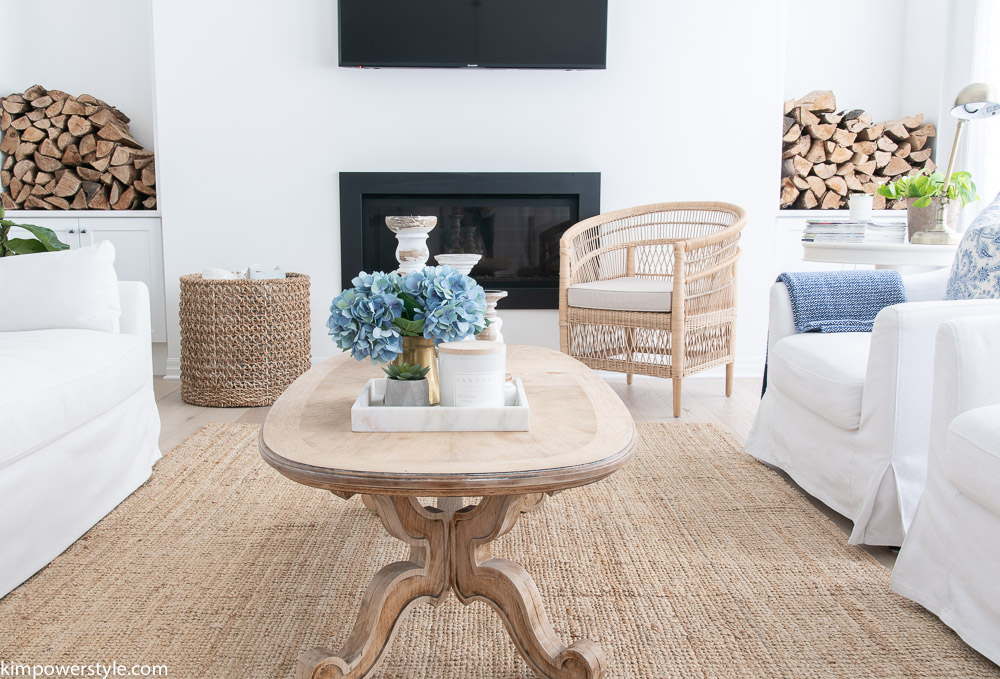
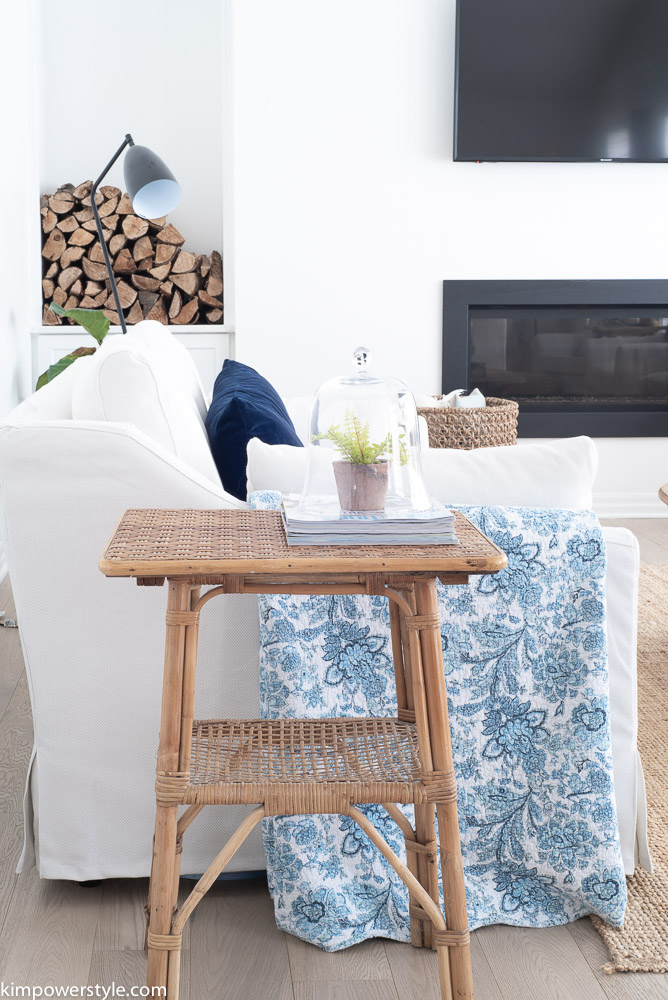
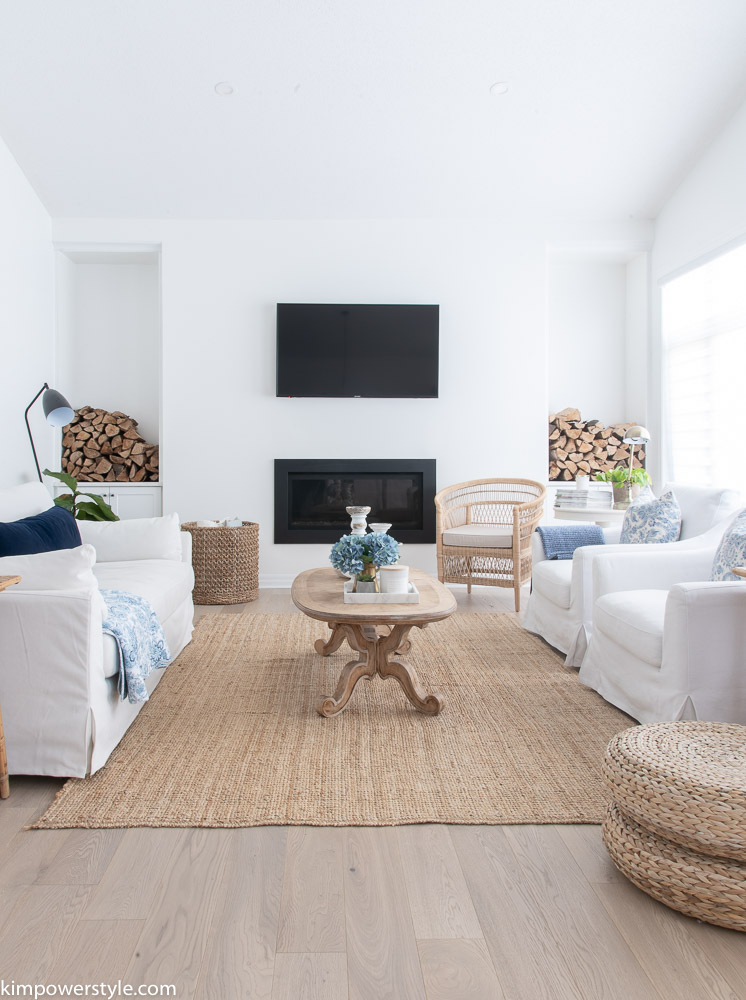
In the living room I added my signature blues in the fabrics, blue hydrangeas and tons of texture with all the jute, rattan and seagrass.

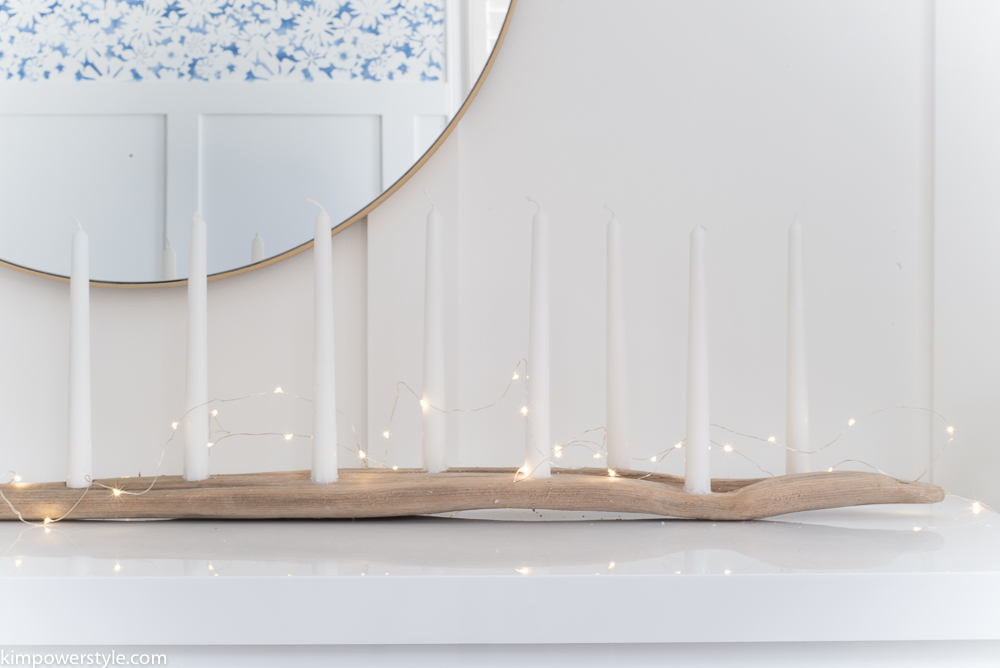
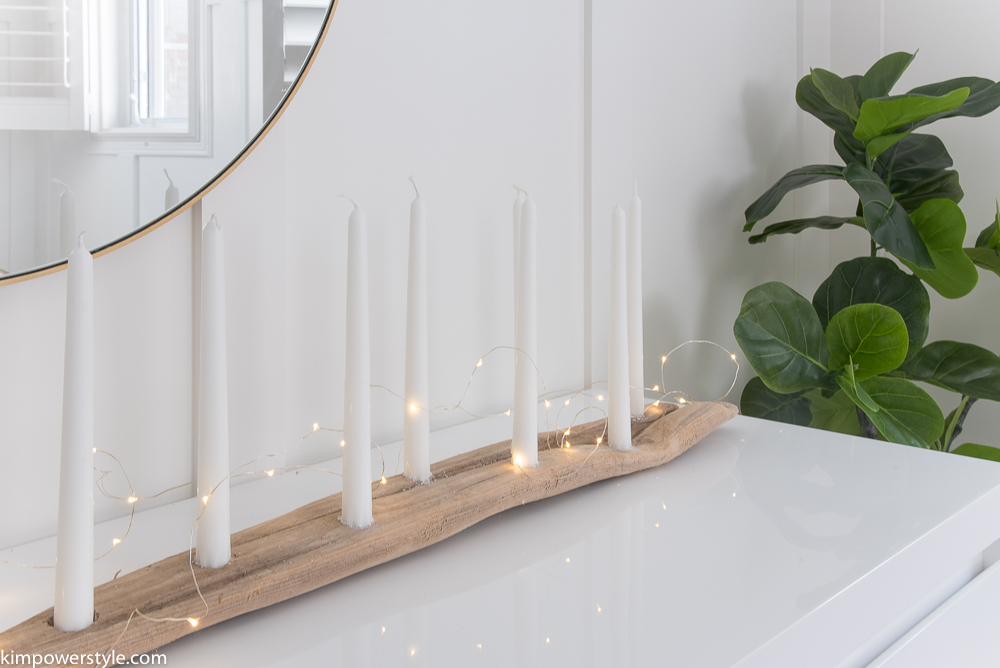
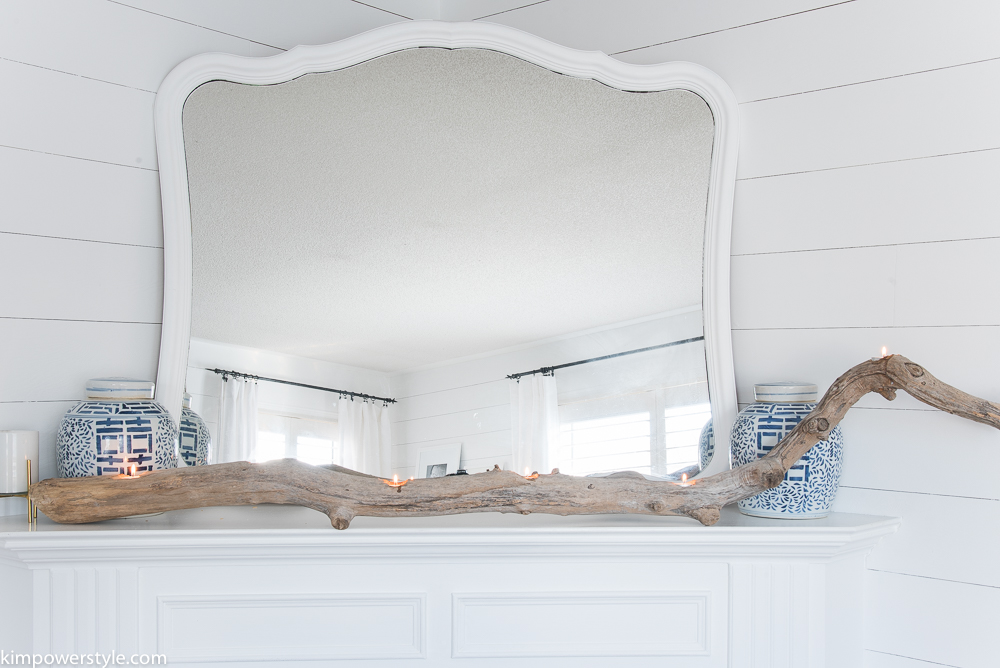
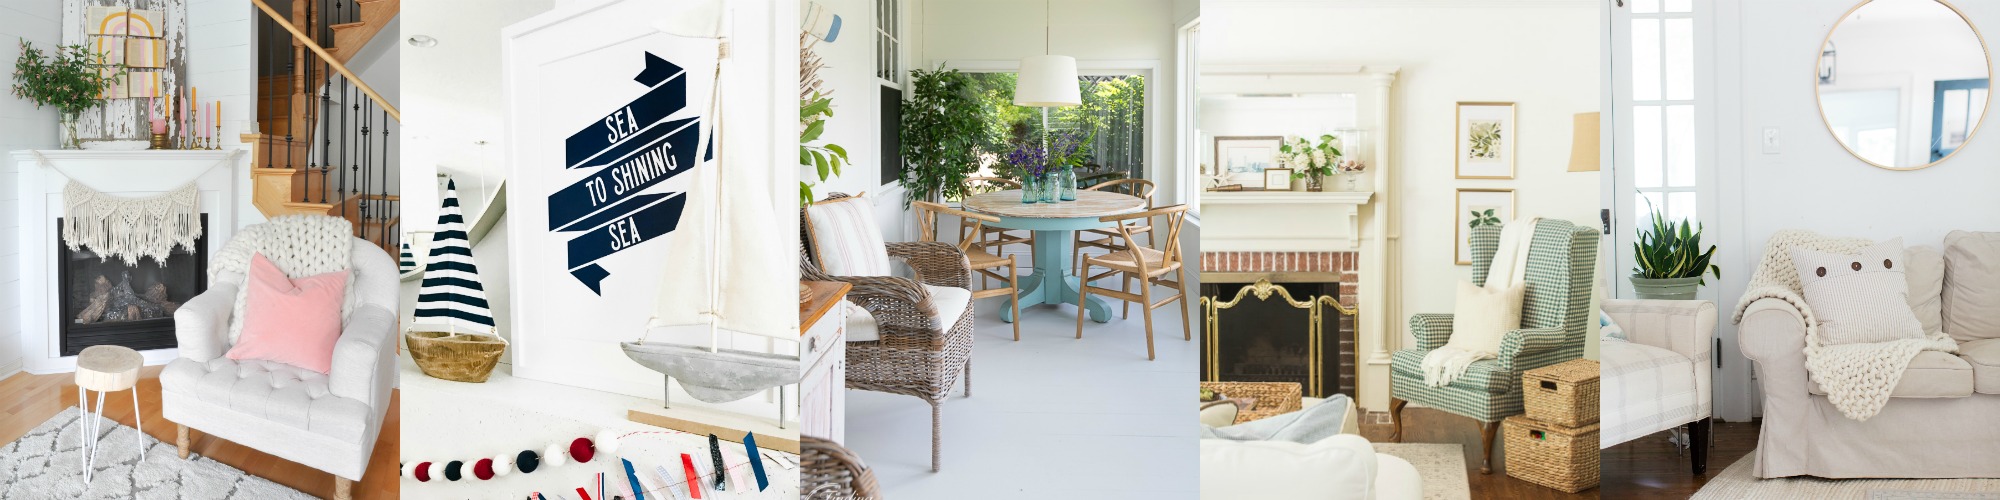
You may have noticed that we removed the glass shelving on either sides of the fireplace. I was either going to put in wood shelving or add some firewood. The firewood was easiest to do and I love the look of it! I may still put some wooden shelves in up above the firewood but this works for now.


Coastal Farmhouse Summer Home Tour

Coastal Farmhouse Summer Home Tour

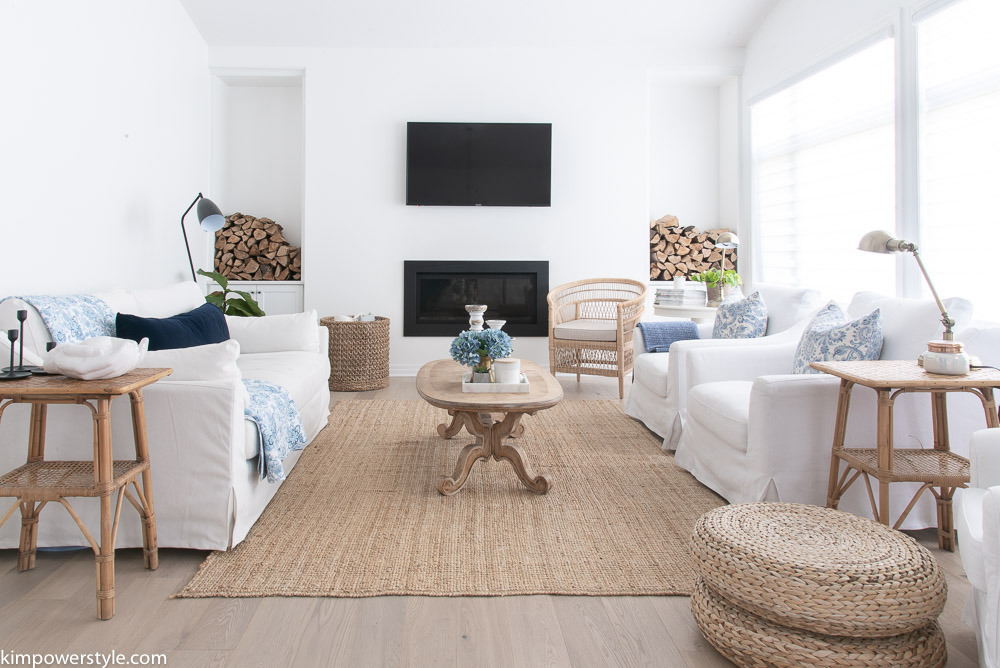
I still need to put up a mantelpiece! I’ve been trying to decide between making my own or getting an old barn beam. My only concern with the barn beam is the weight, so stay tuned to see what I decide on. I know it will really help finish this room off.

Coastal Farmhouse Summer Home Tour

Coastal Farmhouse Summer Home Tour

Nothing says coastal farmhouse to me more than inky seaside blues, crisp whites and some rustic wood! If you’re looking  to achieve a coastal farmhouse look, I’ve written a post on the basics that you can find here.

Coastal Farmhouse Summer Home Tour

Coastal Farmhouse Summer Home Tour

Coastal Farmhouse Summer Home Tour

I hope you’ve enjoyed our tour and thanks so much for joining us today. For more summer decor inspiration, you can check out all the other amazing bloggers and their summer homes below. Next up on today’s tour is the lovely and talented Rachel from Maison de Pax

Blessings,

Kim

Nearly 40 bloggers are sharing their summer home tours this week! Sharing with me today are…

Thursday

Kim Power Style // Maison de Pax // Jenna Kate at Home // Two Twenty One // Just a Girl and Her Blog

Summer Adams // tatertots and jello // The Tattered Pew // Aratari at Home // Crisp Collective

And sharing the rest of the week…

Monday

The Happy Housie // Rooms FOR Rent // Shabbyfufu // Maison de Cinq // My 100 Year Old Home

Southern State of Mind // All Things with Purpose // Grace in My Space // Love Create Celebrate

Tuesday

Town and Country Living // Taryn Whiteaker Designs // Designthusiasm
// This is Our Bliss // My Sweet Savannah

Rambling Renovators // The Turquoise Home // Clean and Scentsible
// She Gave it a Go //Lemon Thistle

Wednesday

Modern Glam // Craftberry Bush // Setting for Four // Inspiration for Moms // Zevy Joy

Life is a Party // Tauni Everett // Finding Silver Pennies // Sincerely, Marie Designs // Amber Tysl

Filed Under: Home decor, Seasonal tours, summer

Driftwood Candle Holder Tutorial Redo

2:22 am by kim 6 Comments

 Driftwood Candle Holder Tutorial Redo

One of the first projects/tutorials I did when I first started my original blog “Restoration House”  was this Driftwood Candle Holder tutorial. That was seven years ago and I still have my original piece! This is such a simple and easy project to do and literally only takes minutes and makes a bit impact! I’ve also included a wooden post I had cut into 3 foot lengths to show you that you can use practically anything made out of wood and turn it into a candle holder. You can find the original tutorial here.

Simple & Easy Candle Holder Tutorial

Here is my original piece and my favourite, I love the organic shape of it. This one was made with a 1.5″ spade bit which is the perfect size for tea lights.

Driftwood-Candle-Holder-Tutorial

Driftwood-Candle-Holder-Tutorial

You’ll need:

  • A piece of driftwood or wood that is at least 1.5″ thick.
  • Drill
  • Spade bits. They come in many different sizes and are used according to the size of the candle you want to use.
  • Sandpaper to sand off any bits from around the holes.
  • The candle of your choice.

Driftwood-Candle-Holder-Tutorial

For my tapered candles I used a 3/4″ spade bit which was a little small but I was able to whittle the candle bottom to fit snuggly. The 7/8″ was a little too big and I want the candles to be snug so they don’t fall over.

Driftwood Candle Holder Tutorial

Because driftwood is an organic shape, you have to lay it down on the floor so it levels itself out. Every piece will lie differently.

Driftwood Candle Holder

Once it’s level, decide how many candles you’d like and how far apart  you’d like them to be. If you need to, you can get a measuring tape and mark your places. I just eye balled it.  You will drill straight down so that your candles will stand level. You can drill down to an inch depth or more if you’re using tapered candles. Tea lights should only go as deep as the candle itself to avoid fire hazards. (I would suggest using faux tea lights, they make such pretty ones now and it’s much safer!)

Driftwood Candle Holder

Driftwood Candle Holder

I drilled down about an inch. If you need to you can place some tape on your spade bit to mark how far your bit needs to go.

Driftwood Candle Holder Tutorial

You may need to sand around the edges for any jagged pieces. I found the harder the wood the more sanding was needed. You can see that the new wood piece needs more sanding.

driftwood candle holder tutorial

My holes were slightly smaller than my candles so I had to whittle down the ends so that candle ends fitted in really snuggly. You don’t want your candles wobbling around!

Driftwood Candle Holder Tutorial

Driftwood Candle Holder Tutorial

Driftwood Candle Holder Tutorial

Driftwood Candle Holder Tutorial

Driftwood Candle Holder Tutorial

I found a wooden post at my local HD and had it cut into 3 pieces. You can stain or paint your wood to suit your needs. I left mine natural. You can also use larger spade bits and make a pen/pencil holder. There’s no end to what you can create.

Driftwood Candle Holder Tutorial

Driftwood Candle Holder Tutorial

Driftwood Candle Holder Tutorial

Driftwood Candle Holder Tutorial

untitled-5646

Safety Precautions:

  • I have real tea lights in the candle holder above but I would suggest using the little faux ones. It really is much safer. Driftwood by nature is extremely dry and can ignite so quickly! I’ve heard from others how this has happened.
  • Make sure your tapered candles are in snuggly if you’re using real ones.
  • Never, ever leave candles burning unattended!

A Driftwood Candle Holder Tutorial

I’m hoping that you will give this a try, it really is quite easy and can be done in minutes!

Thanks so much for dropping by! If you haven’t already done so, subscribe so you don’t miss a post, they’ll go straight to your inbox!

Blessings,

Kim

Filed Under: diy, summer, Tutorials, Uncategorised

Canada Day Celebrations and a Simple Summer Sangria!

6:00 am by kim 8 Comments

Canada Day Celebrations and a Simple Summer Sangria!

Canada Day Celebration and a Simple Summer Sangria

Canada-Day-Celebration-and-a-Simple-Summer-Sagria

On July 1st, we Canadians will be celebrating Canada’s 15oth birthday! So that means lots of Canada Day family and friend get togethers to celebrate this amazing country that we live in. There will definitely be a sense of national community happening across the nation. My little shore community already has flags outside our homes and some of the streets will be lined with tiny little maple leaf flags and lots of parties going on. You can check out my previous Canada Day Post here.  This fits right in with our #YearofFeasting as I, along with 5 other bloggers get intentional about opening up our hearts and homes and inviting others to feast together with us no matter the occasion.

Canada Day Celebrations and a simple summer sangria

I love pot-luck get togethers where everyone pitches in and brings their share of the food. It takes a huge burden off of the host and other people’s food always taste better, (probably because I didn’t have to make it;) ) This year I’m in charge of the drinks, so I’ve set everything up and will mix it all together before everyone arrives. I’ll have a tasty simple Summer Sangria, pre-made jug of Ceasars, Cold beer, and a mix of different lemonades. I’ve set up the table in the nook where people can grab their drink and a  beach towel and head on outside. I found these Canadian flag beach towels at Giant Tiger. I rolled them up and placed them in a basket, which makes it convenient for everyone to grab and run.

Canada Day Celebration and a Simple Summer Sangria

Before I mixed the drinks I brought everything outside to make it more convenient and accessible for guests to go back and forth for fill ups! To decorate I  used some Canada flag bunting and strung it up along this room divider. I found some glass lanterns with rope handles at Giant Tiger and filled them with candles. I also found these sweet little mason jar cups complete with straws along with a Canadiana plastic tub that I  filled with ice to keep beverages chilled. My favourite find was this great glass jar to mix my sangria in where everyone can help themselves. The bottom can be removed and used as an ice bucket, but I liked having the spout a little higher so you can place your glass under it. Giant Tiger is a great go-to shop for budget friendly decor and food!

Simple Summer Sangria:

  • White Wine 750ml.
  • Orange liqeur 25oml.
  • 2 Limes sliced
  • 2 Lemons sliced
  • 1 Orange sliced
  • 1 cup Strawberries
  • 1 cup Raspberries
  • 1/4 cup of Sugar (optional)
  • 4 cans of San Pellegrino Limonata

Canada-Day-Celebration-and-a-Simple-Summer-Sangria

First add your white wine. I chose my favourite Chilean wine.

Canada-Day-Celebration-and-a-Simple-Summer-Sangria

Next add your orange liqueur, I chose triple sec.

Canada-Day-Celebration-and-a-Simple-Summer-Sangria

Next add all your fruit and berries. You can add any fruit or berries that you like here. I just find that a citrus base is always light and refreshing. At this point if you wanted to make this ahead of time, you can add the sugar and then chill it in the fridge until you’re ready to serve.

Canada-Day-Celebration-and-a-Simple-Summer-Sangria

Lastly, you add your lemon drink. You can add any sweet bubbly/carbonated drink of your choice here. Including, soda water, ginger ale, fresca etc. This step should be done right before you serve so that your bubbles don’t go flat. Sangria is so tasty and just screams summer to me!

Canada-Day-Celebration-and-a-Simple-Summer-Sangria

I also cut up a bowl of the fresh fruit and berries so guests can add more to their individual drinks. As you can see, it was hot out and I already started partaking of this tasty refreshing drink! 😉

CaCanada-Day-and-a-Simple-Summer-Sangria

I also had lots of refreshing lemonades for people who wanted a non-alcohol alternative.

Canada Day and a Simple Summer Sangria

Making a spicy jug of Caesars (or Bloody Marys) is an easy way to make everything ready and available so  your guests have lots of refreshing and tasty options to try.

Canada-Day-and-a-Simple-Summer-Sangria

I hope you all get the chance to join with friends and family to celebrate Canada Day or The Fourth of July for my American friends! Whatever excuse you need to celebrate and feast on life together, do it!                 Be sure to check out my friends below for more Canada Day inspiration as they join in on the Canada Day  #YearofFeasting fun.

Blessings,

Kim

Disclosure: This post was sponsored by Giant Tiger. All thoughts, opinions, photography and fun are my own! Thanks for supporting the brands that make KimPowerStyle possible!


Life is Party

Personally Andrea

Flourish and Knot

Learner Observer

Kim Power Style

Woman In Real Life

Canada Day Celebration

Filed Under: recipes, summer

An Easy Stamp DIY for Canada Day

4:29 pm by kim 4 Comments

An Easy Stamp DIY for Canada Day

Hi everyone! Today I’m sharing the eeaassiest DIY that you can do by yourself or with your kids. It literally took me ten minutes! It’s an easy stamp DIY for Canada Day.

This July 1st we will be celebrating Canada’s 150th birthday, so it’s a pretty big day for those of us up North! I thought I would share a little DIY anybody can do to help with our holiday decorating. There are so many great celebrations going on and our neighbourhood is very big on showing our Canadian pride so most porches/verandas will be decked out. I always have some pillows on my muskoka chairs on the porch so I thought I’d get festive with some Canadiana ones.

Canada Day DIY

I picked up some plain white cushion covers from IKEA for $4.99 each. I found some fabric paint at Michael’s Craft Store and I had a potato. I cut my potato in half and then cut out my rendition of a maple leaf. Next you grab some cardboard to put inside your cushion cover to prevent the paint from leaking through and to give you a nice flat surface to stamp on.  I put some fabric paint on a foam plate and dipped my potato into it. It really is that easy. I just freehanded where to place my leaves.

Canada Day DIY

Canada Day DIY

Canada Day DIY

The beauty of this DIY is that it doesn’t have to perfect…Right up my alley! The fact that your leaves all have the same shape gives it a uniformity that makes it look cohesive and put together. Great for anyone to try. The possibilities of what you can stamp on your pillow are endless.

Canada Day DIY

Canada Day DIY

Pretty easy to do right? I’m coming up with all kinds of things I could stamp on fabric now! 😉

Special thanks to Lucy at Craftberry Bush for hosting this blog hop. Now you can check out some more of my favourite bloggers below and see all of their wonderful Canadian Celebration Ideas!

An InLinkz Link-up


Filed Under: diy, summer, Tutorials

Joyful Summer Home Tour 2017

6:00 am by kim 44 Comments

Joyful Summer Home Tour 2017

Welcome to our Joyful Summer Home Tour! I’ve joined together with eight other amazing bloggers to share our homes all dressed for summer! You can follow along with all the other tours by clicking on the links at the bottom of this post. Now grab a drink, sit back and enjoy!

 Joyful Summer home tour

We love the coastal feel in our home. My parents were born on an Island, so I guess its in my blood. We also live in a lakeside community which all naturally lends itself to a coastal vibe in our decor. I’m drawn to the soft colours of watery blues and sandy neutrals. I just find it all very calm and soothing, much like being on the shore with the waves coming in.

(Some products have been sponsored, all thoughts, opinions and photography are my own)

Summer Home Tour 2017

If you’ve followed me for a while, you’ll know that I love blues and hydrangeas. So it’s not a far reach to go coastal! I simply added some seashells in a large vase, coral, some blue ginger jars and my driftwood candle holder on the mantel.

Summer Home Tour 2017

I got these gorgeous “Cordoba” pink  and “Chinese Batik” blue pillows on the sofa from Danielle Oakey Shop. I simply adore all her beautiful pillow covers and they’re so well made too.

Summer Home Tour 2017

Summer Home Tour 2017

Summer Home Tour 2017

Summer Home Tour 2017

Summer Home Tour 2017

I picked up that little picture of Peggy’s Cove in Nova Scotia, from a thrift store. It goes so well in the room.

Summer Home Tour 2017

Summer Home Tour 2017

Summer Home Tour 2017

The driftwood candle holder was one of the very first projects I did when I first started blogging seven years ago. I love the quirky shape and how I managed to get tea lights all along  it.

Summer Home Tour 2017

Summer Home Tour 2017

Summer Home Tour 2017

Summer Home Tour 2017

Summer Home Tour 2017

The last shot of this room and the boys have already been all over the cushions and couldn’t wait to take a nap!

Shop the Living Room/Get the Look

[show_shopthepost_widget id=”2714341″]

Summer Home Tour 2017

From our cozy living room we go into the breakfast nook. I love these little hooks and they’re the greatest for hanging decor and a aprons etc.

Summer Home Tour 2017

When I’m preparing a meal or having people over, I prefer to do a buffet. I find it so much easier and relaxed  and less stressful than setting a table.

Summer Home Tour 2017

I already had the hydrangeas and picked some wildflowers in the park on my way home from the shop. It made for a lovely bouquet.

Summer Home Tour 2017

I set the table and used a linen curtain panel for a table runner. Use whatever you have on hand.

Summer Home Tour 2017

I love these blue floral pillows! They are such a classic pattern and they fit well with my salad plates too!

Summer Home Tour 2017

Shop the Nook/Get the Look

[show_shopthepost_widget id=”2714360″]Sources:

Pillows on Sofa, Danielle Oakey Shop

Sofa and Chairs, IKEA

Basket, Paisley Pillows, Throw, Homesense

Dining Chairs, IKEA

Table,Thrift find

Blue Floral Pillows, Market Bag,  Penney & Co.

Dinner Plates, Placemats, Wine glasses, IKEA

Salad Plates,Gold Cutlery, Pier 1

Water glasses, Urban Barn

I hope you enjoyed the tour! I’ll be sharing Part two soon so be sure to subscribe and don’t miss a post! Don’t forget to check out my friends and their tours for some amazing summer decor, the links are below.

Blessings,

Kim

Wednesday, May 31st
Kate – White Lane Decor
Lisa- Farmhouse On Boone
Natalie- My Vintage Porch 
Thursday, June 1st
 
Laura- Meaningful Spaces
Stephanie- Belle Amour Blog
Marci- Lemons to Lovelys
Friday, June 2nd
Hayley- A House With Books
Jordon- Jordecor
Kim- Kim Powers Style 

Filed Under: Home decor, Seasonal tours, summer, Uncategorised

Flowers on Fridays

5:51 pm by kim 2 Comments

Fridays are pretty special around here!
As a nurse in my previous life Fridays were usually a work day or night for me and while most people were kicking off their shoes, sharing a bottle of wine or whatever else, I was on my way to work! After twenty five years of working weekends and holidays my hubby can usually get weekends off now too, so we truly do look forward to Fridays and celebrate!
However, my celebration consists of sitting back and enjoying my home! Possibly opening that bottle of wine and visiting the odd thrift store
…not all that exciting and not necessarily in that order!
flowers
One of the things I love to do to help usher in the weekend and to make this day a little different form the rest is to buy flowers. Nothing fancy, just your average bunch from the grocery store. 
I usually buy the three bunches for $20 You can pick and choose
from an assortment and  I usually pick my favourites: hydrangeas and roses.
You have to get there early Friday mornings to get the best selection though! I was only able to get 1 bunch of hydrangeas yesterday. I spotted a lady in the line in front of me with hydrangeas and roses and wanted to wrestle her for them but restrained myself 😉 You snooze your lose as the saying goes.

…

Read More »

Filed Under: cottage, diy, flowers, Home decor, summer, weekends Tagged With: flowers, tray vignettes

Hello again and sharing my summer home

5:03 pm by kim 4 Comments

Well It’s been a long time I know.
If there is still anybody out there and you can hear me…
I’m coming back!
I’ve decided to start blogging again.
I’ll share more of the details in another post but for now… I’ll share a little bit of my summer home with you all.
Better late than never.
There have been so many changes made in my little home over the last while that I can’t wait to share with you! If you follow me on Instagram you will have seen some of them but not all.
In the master bedroom I’ve changed my floors, headboard and wall colour,  I’ll share more of that in some upcoming posts so stayed tuned!

Lovely coastal summer bedroom.

…

Read More »

Filed Under: cottage, diy, flowers, Home decor, pillows, shiplap, summer Tagged With: flowers

Primary Sidebar

Hi, I'm Kim Read More…

Instagram

Follow along on Instagram

Sign up and don't miss a post!

Recent Posts

  • Festive Bacon Wrapped Chestnut Holiday Appetizer
  • DIY Mantel Decorated for Christmas
  • Simple and Cozy Fall Home Tour
  • Simple Fall Tablescape

Archives

Footer

Copyright © 2025 · Foodie Pro Theme by Shay Bocks · Built on the Genesis Framework · Powered by WordPress