• Skip to primary navigation
  • Skip to main content
  • Skip to primary sidebar
  • Skip to footer

Kim Power Style

  • Home
  • Contact
  • About
  • Tutorials

spring

Spring Tour in Our New Home

5:00 am by kim 28 Comments

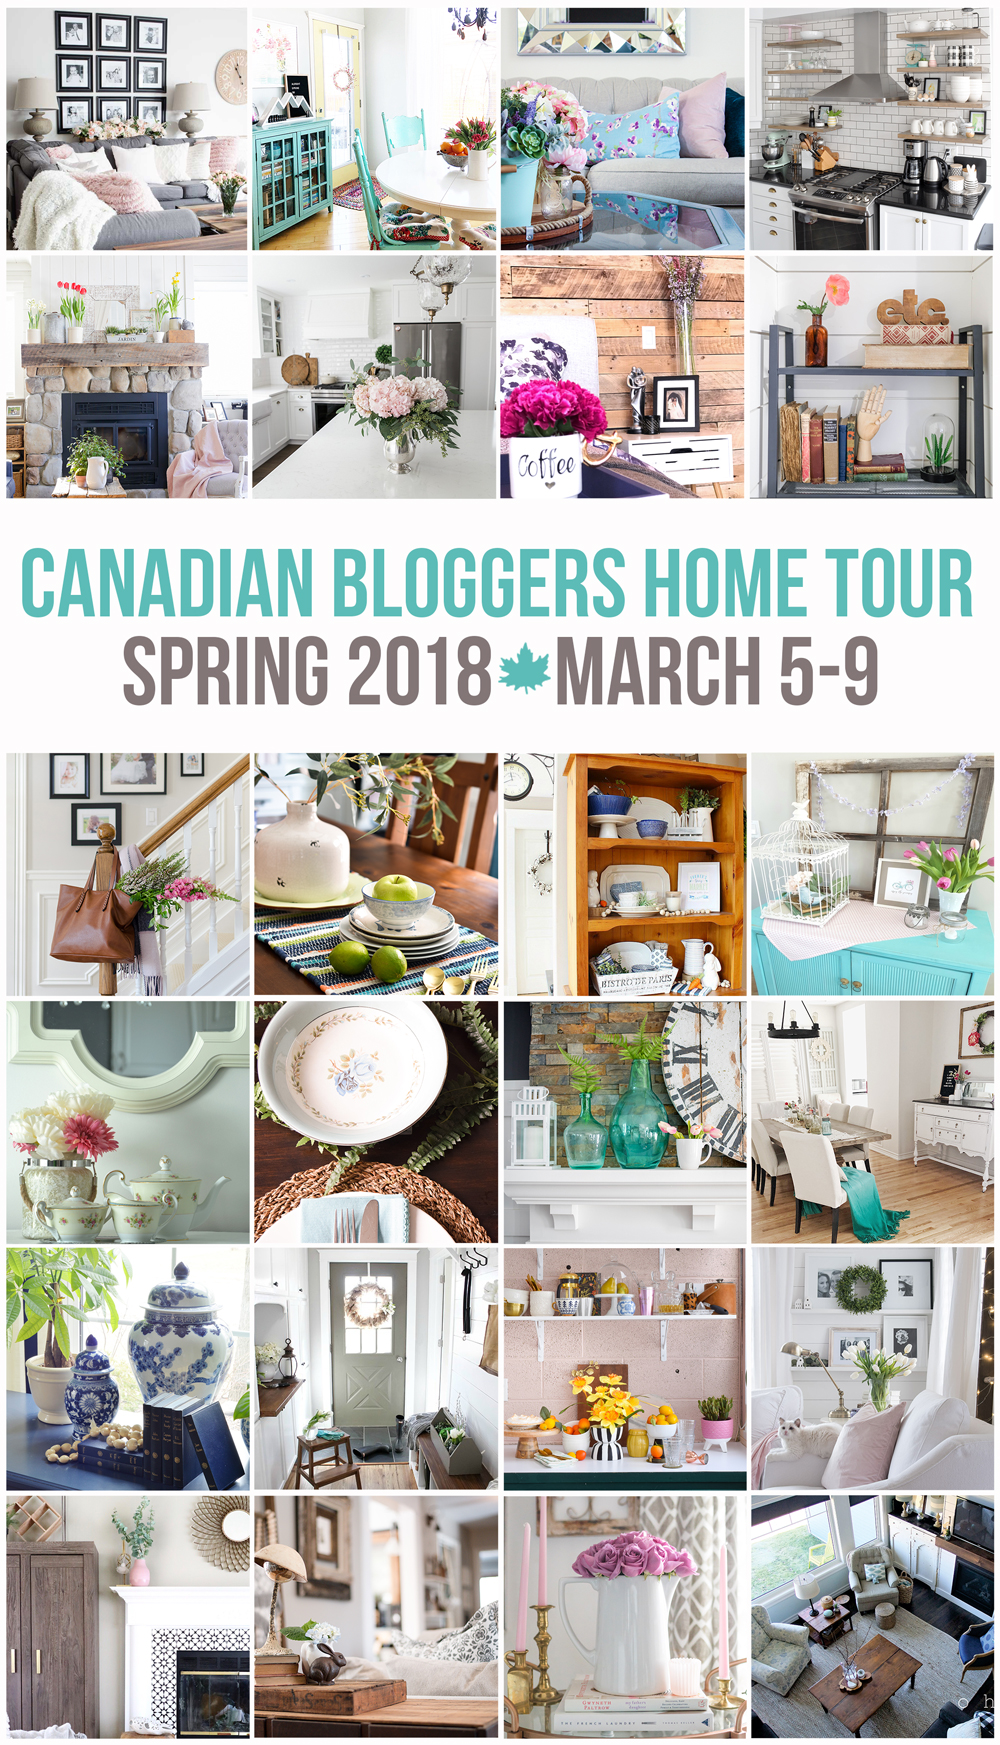
Happy Spring everyone and thanks for joining in on the first Spring Tour in Our New Home as part of the Seasonal Simplicity Spring Home Tour Series!

I’ve gotten together with some of my all-time favourite bloggers to open our homes and share some spring, decor inspiration with you all. Special thanks to Krista from The Happy Housie for hosting! There will be links at the bottom of the post from the tours that have been going on all week..you won’t want to miss any of them. So if you’ve just popped in or have come from Leslie at Deeply Southern Home-Welcome! I’m so happy you’re here and hope that you enjoy this stop on the tour.


Spring home Tour #bohofarmhouse #vintagerugs  #coastalfarmhouse #springdecor

For those of you who follow me on Instagram, you’ll know that after my husband’s brain hemmhorage and subsequent brain surgery last year we had to sell our home. We ended up moving to another city to be closer to our youngest daughter and her little family. We both were looking to buy new homes and decided to pool our resources and buy one together! It’s a much larger home than we were used to and we’ve been loving all the extra room. We’re also in the midst of  finishing our basement which will give us an extra thousand square feet of space, I’ll definitely be sharing more of that as it progresses!

Spring Tour in the New Home

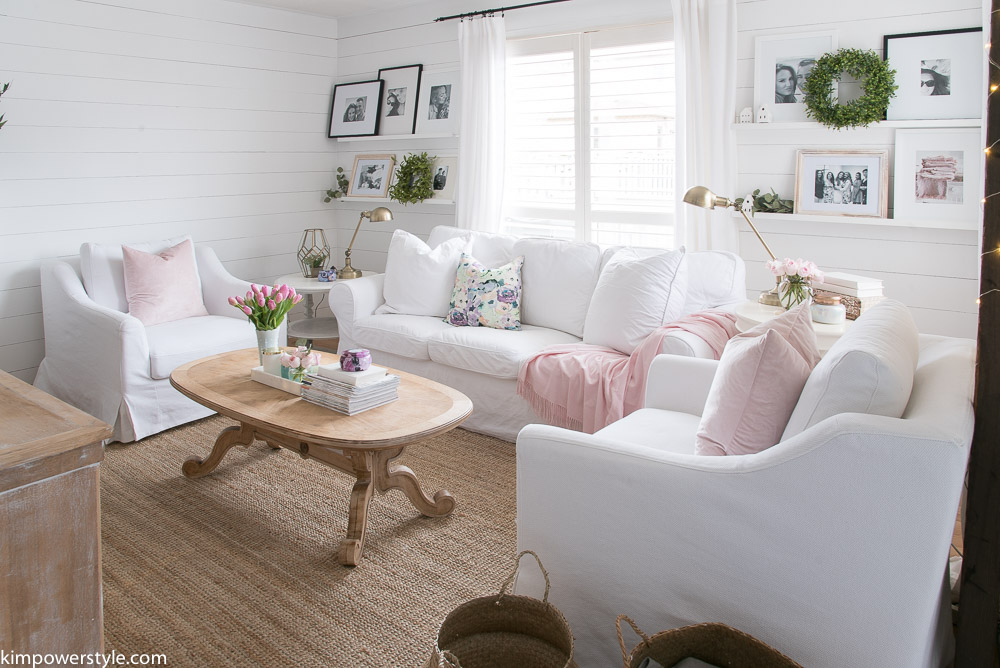
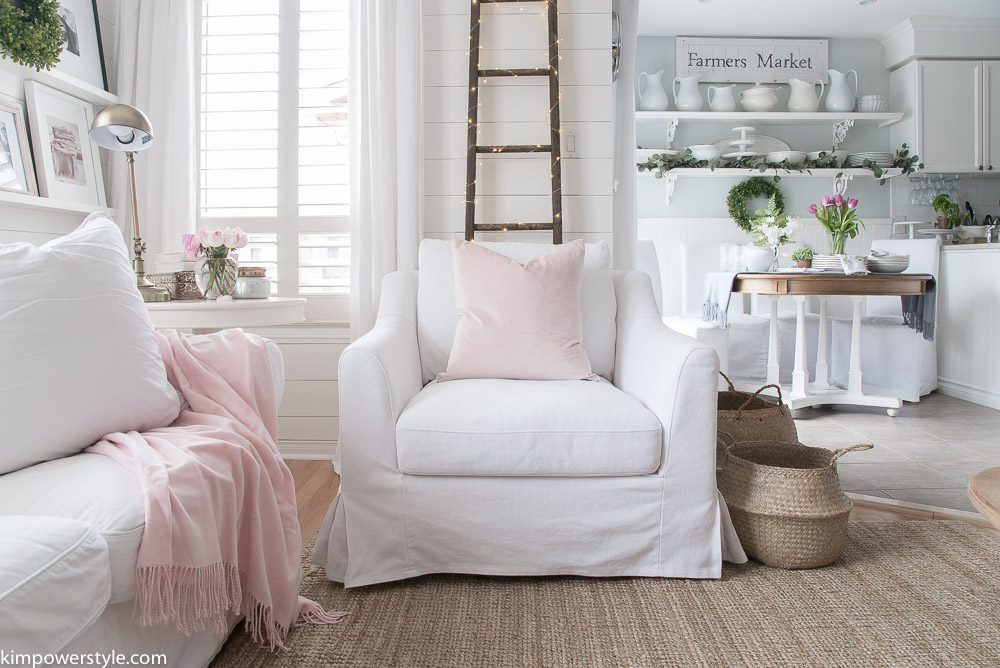
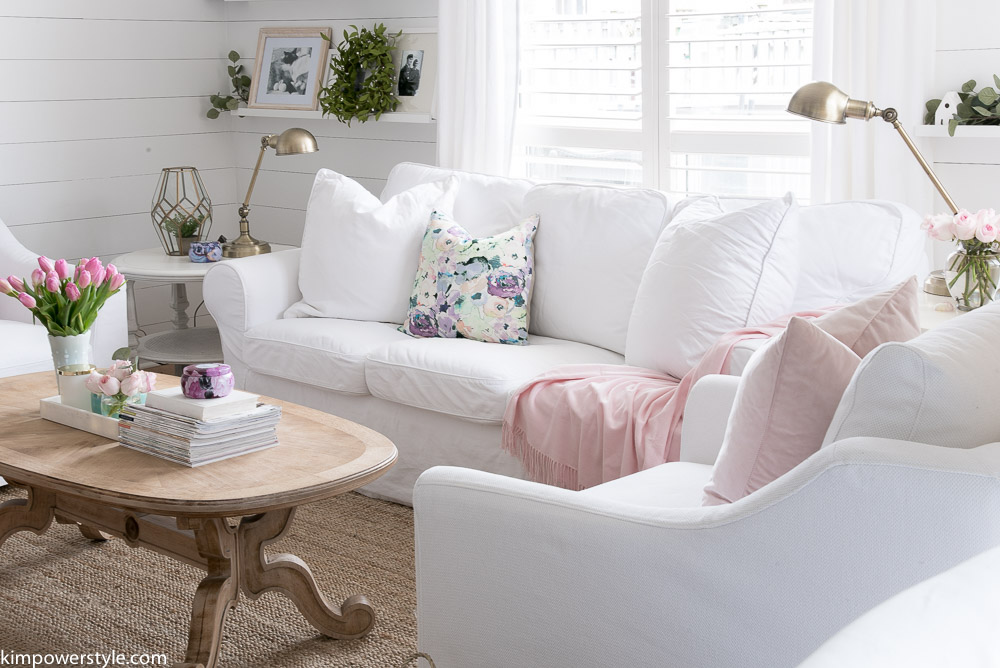
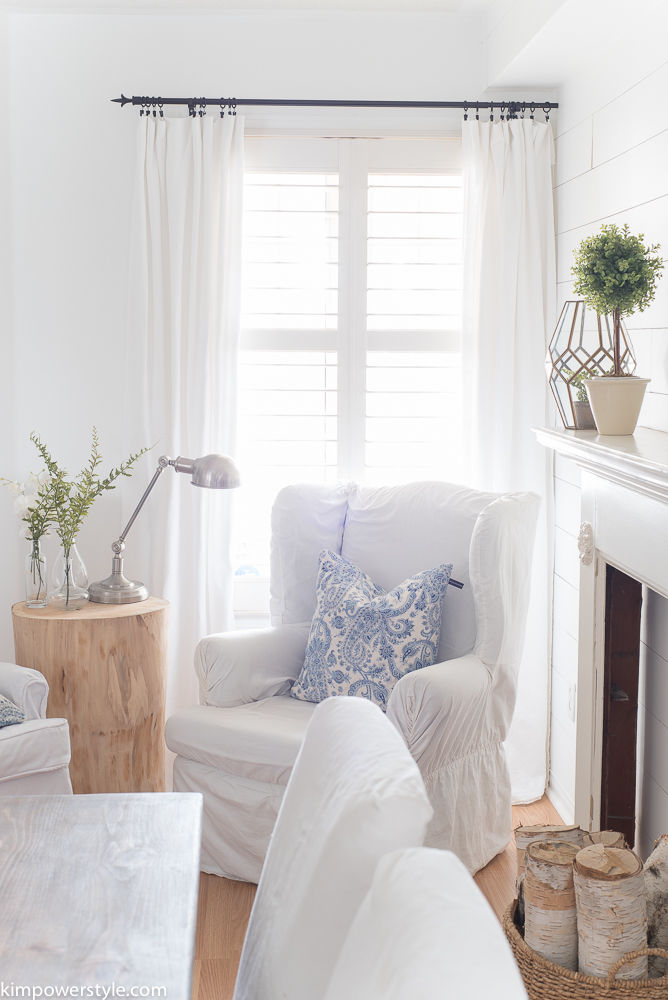
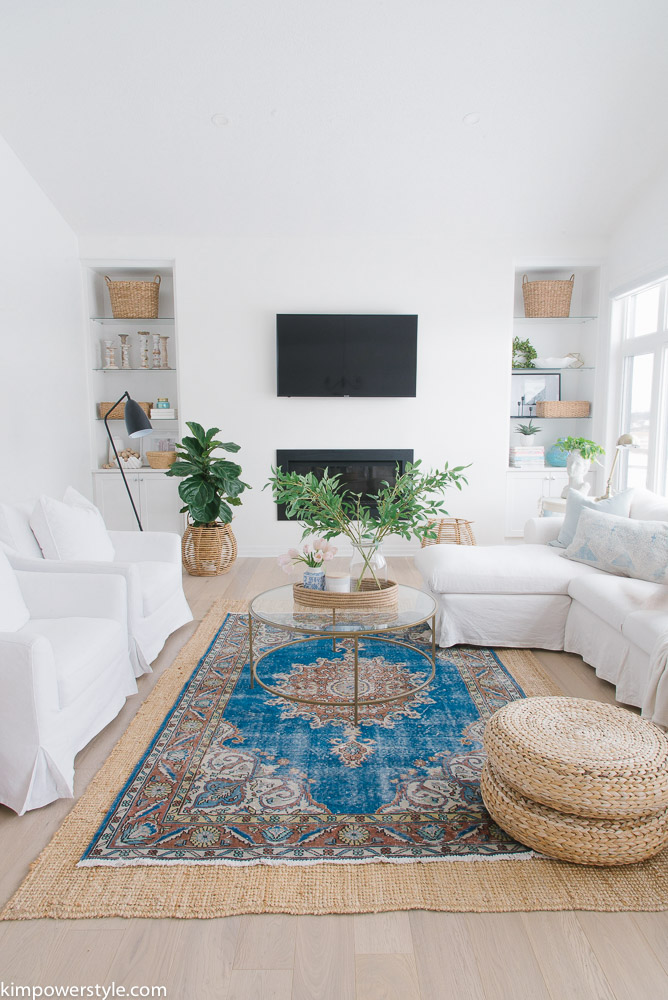
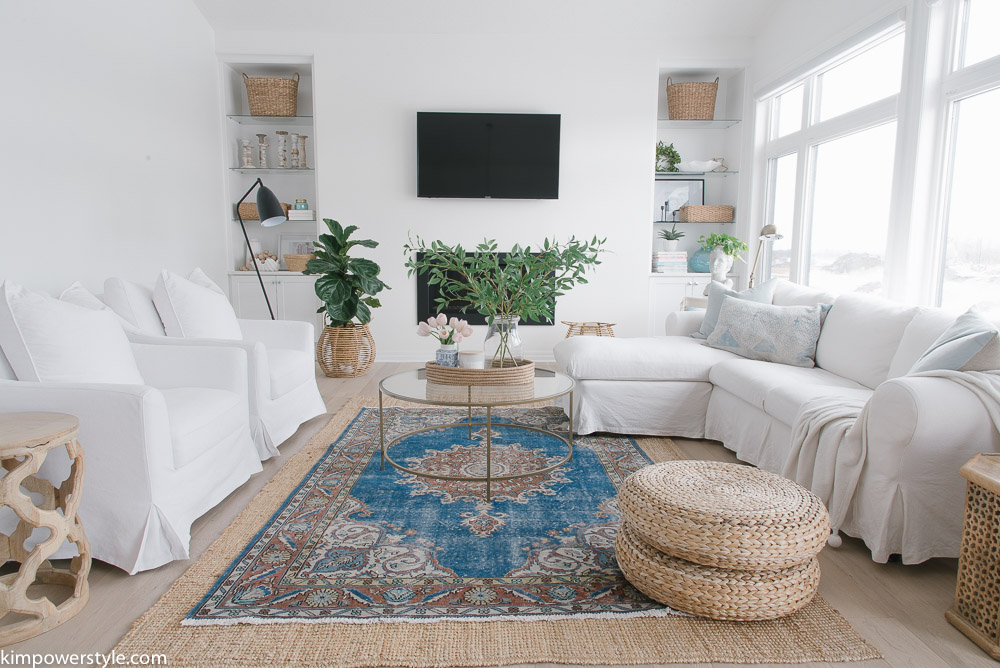
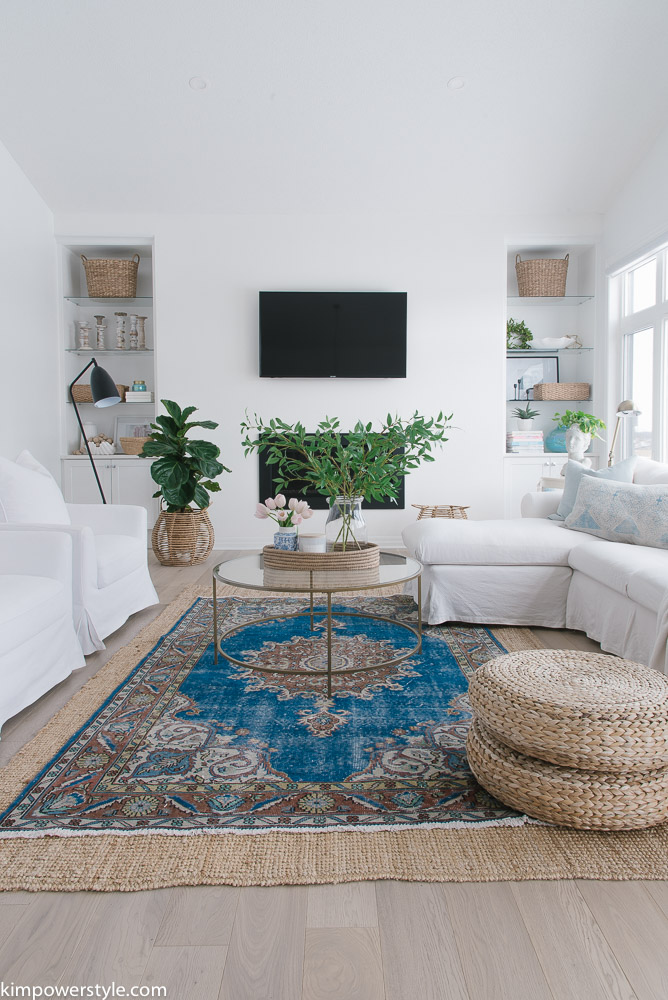
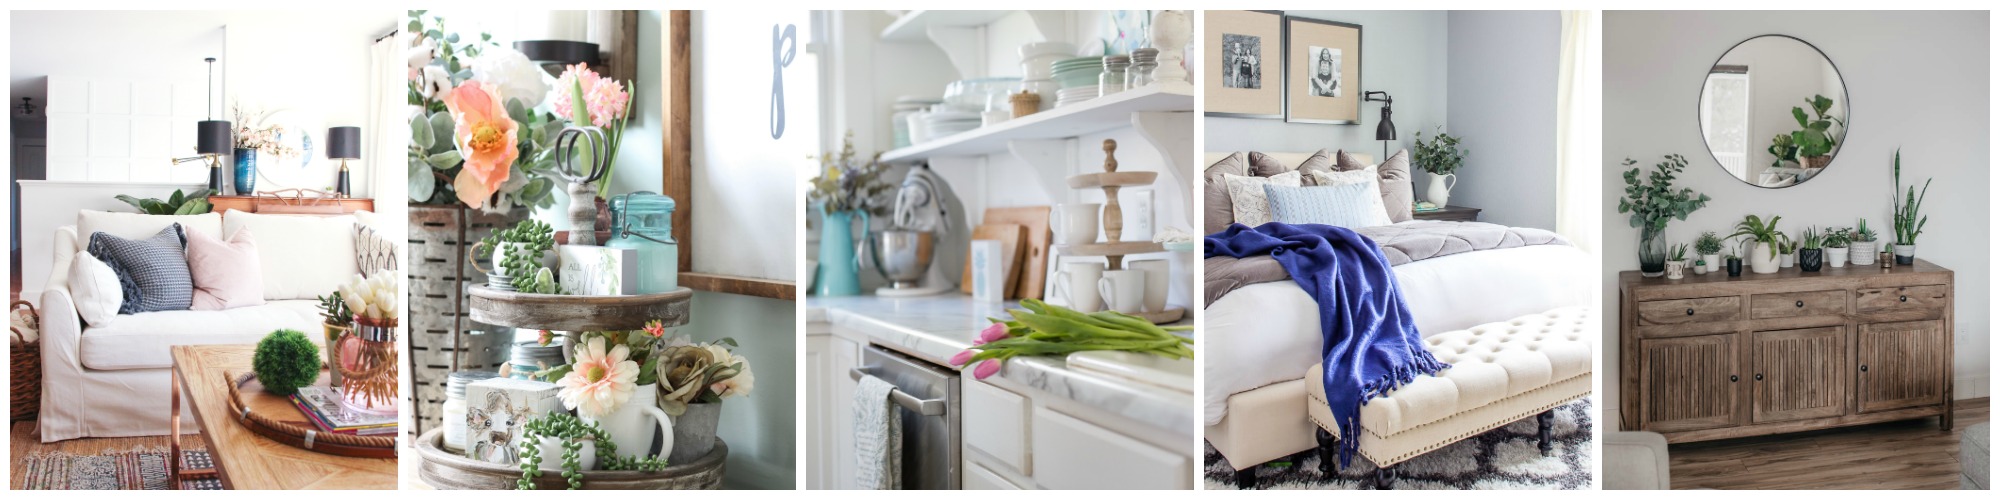
Our spring tour in our new home starts in the living room.  The living room, dining room and kitchen are an “L” shape open space. There are windows and sliding doors to the backyard all along the back wall and there is so much light in here! We live near the water which is just behind the trees you see in the window back there. Unfortunately, there will be some houses built behind us in a year or so, but for now we’ve got an amazing view. We’ll have some awesome trails along the water to explore when they’re done.

Spring Tour in the New Home

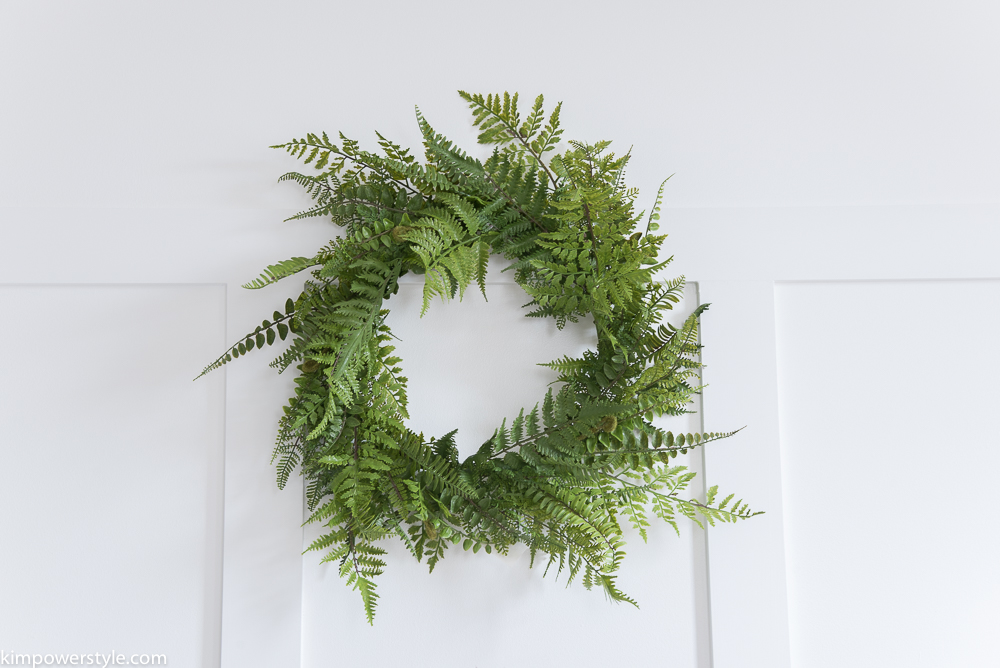
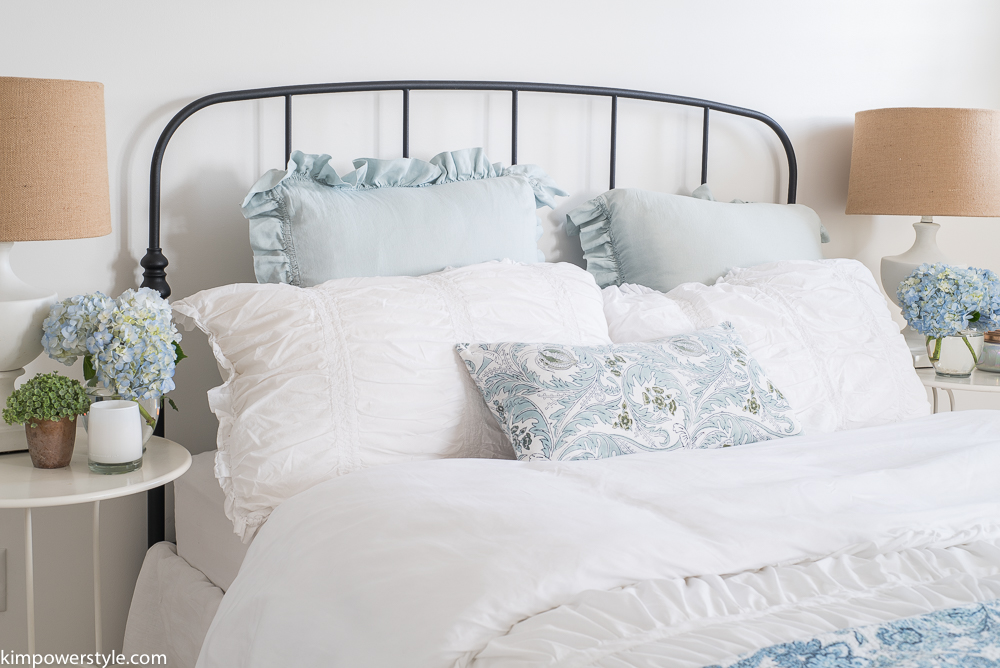
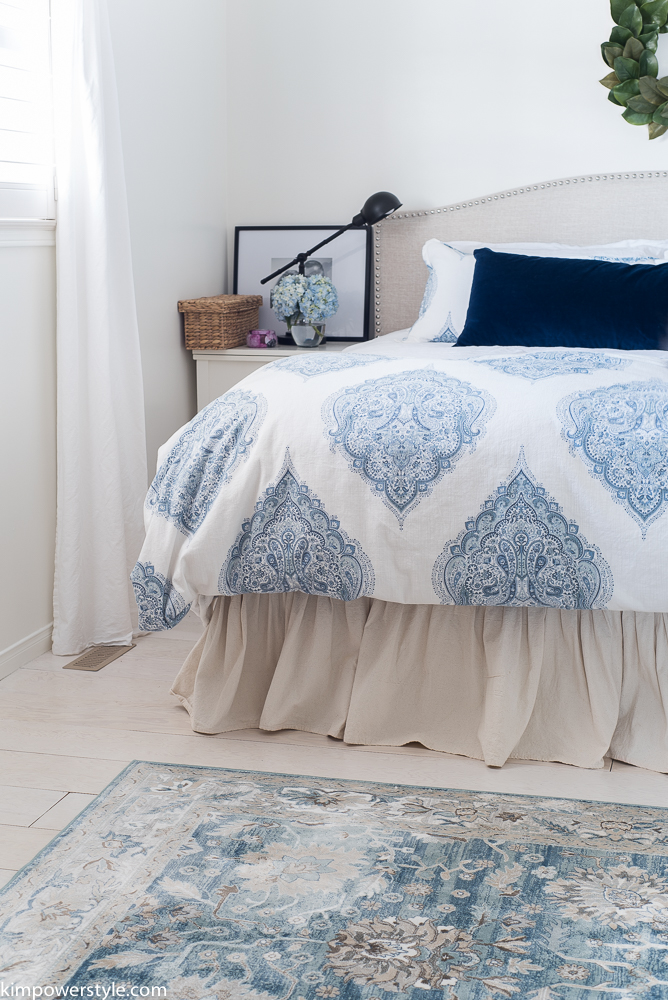
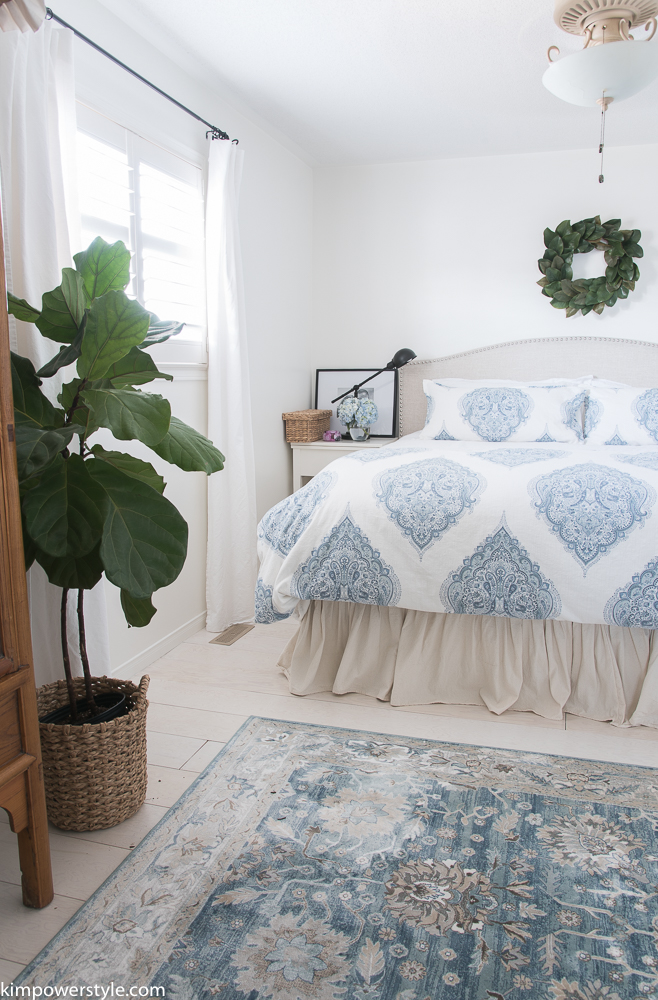
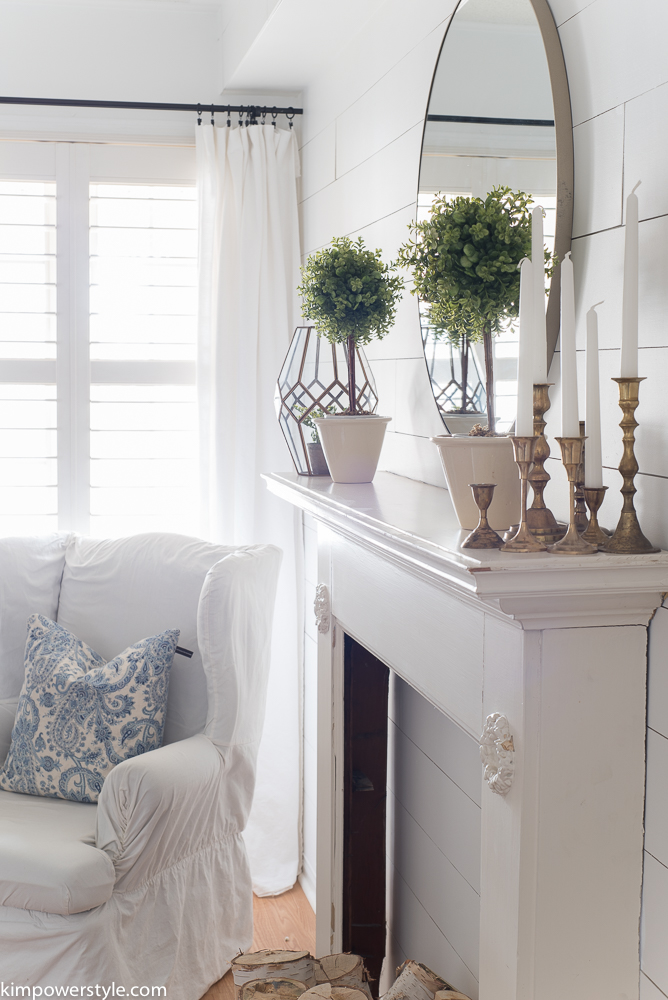
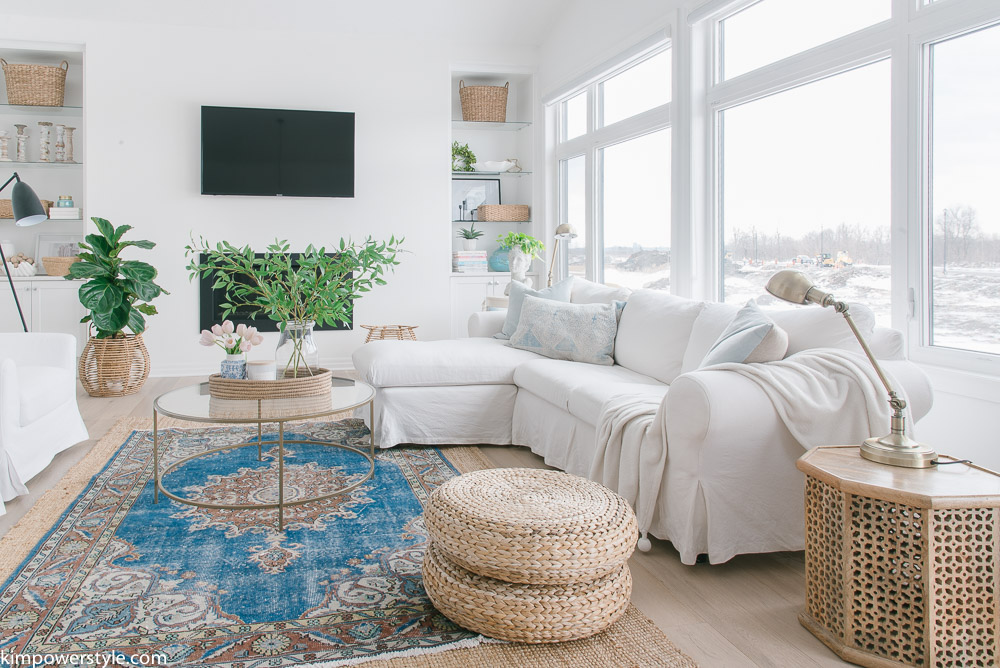
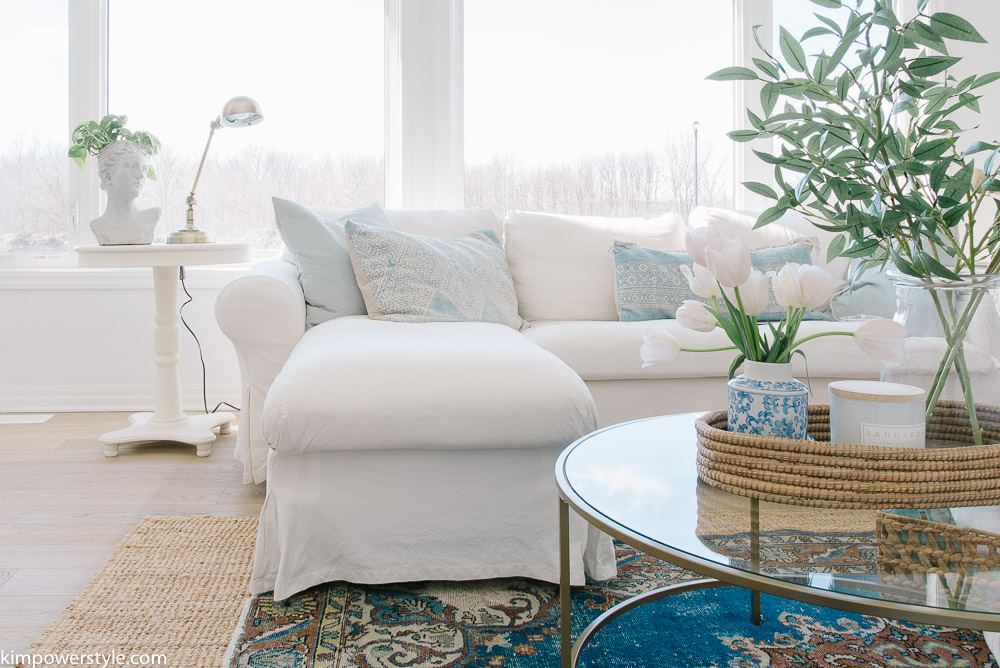
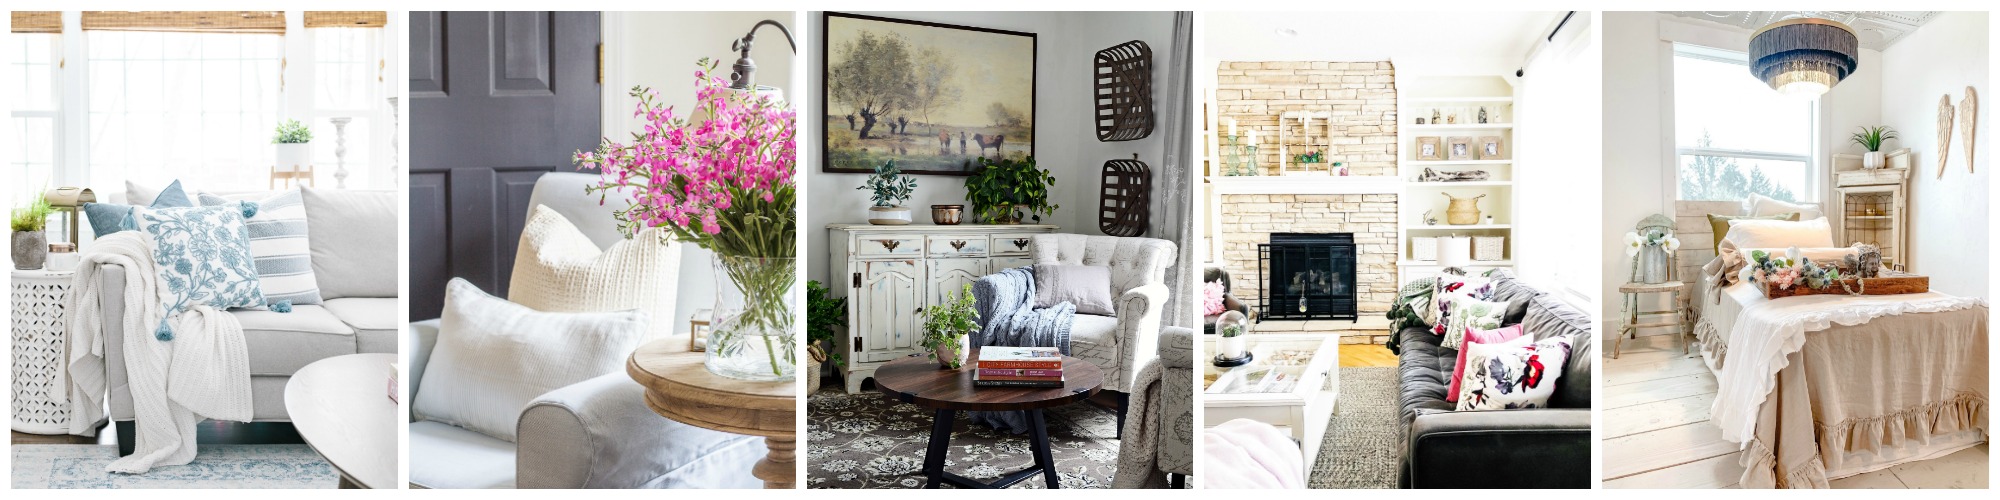
No season excites me more than spring. You can literally smell it in the air and it invokes so many sweet memories. I like to keep things simple and usually start with a good spring cleaning. Getting rid of all the excess of the previous season and storing it all away makes things feel light and bright. I love adding some greenery whether real or faux it doesn’t matter. Spring has taken it’s time in coming this year so we’ve had to add some faux branches and flowers. The fiddle leaf figs are all real though and seem to be loving their new, bright home! We’ve been here for six weeks now and were able to do all our decluttering before we moved in. I love any excuse to change up the pillows and throws and usually use blue and/or pastel colours for spring. My vintage rug “Bea” adds a great shot of blue and is definitely dressed for spring! You can find my previous spring tour here and see how I used Pink!

Spring Tour in our New Home

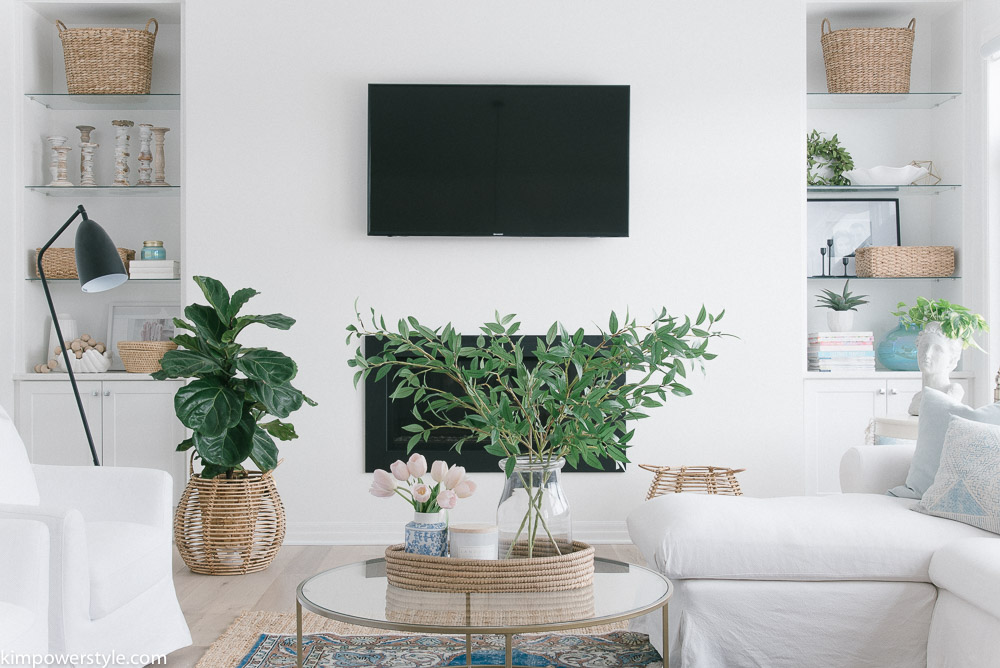
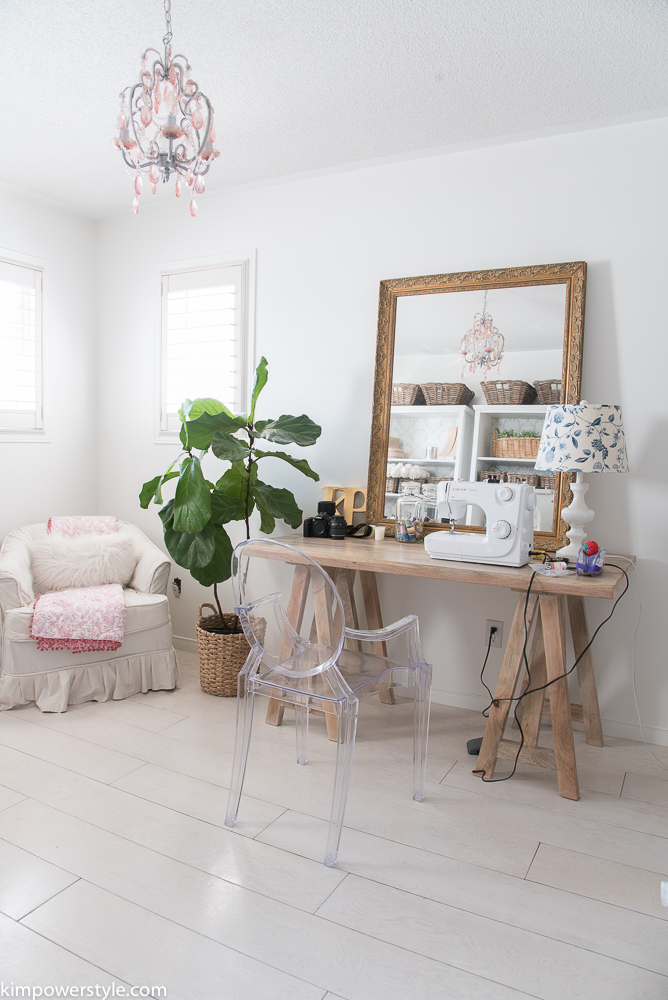
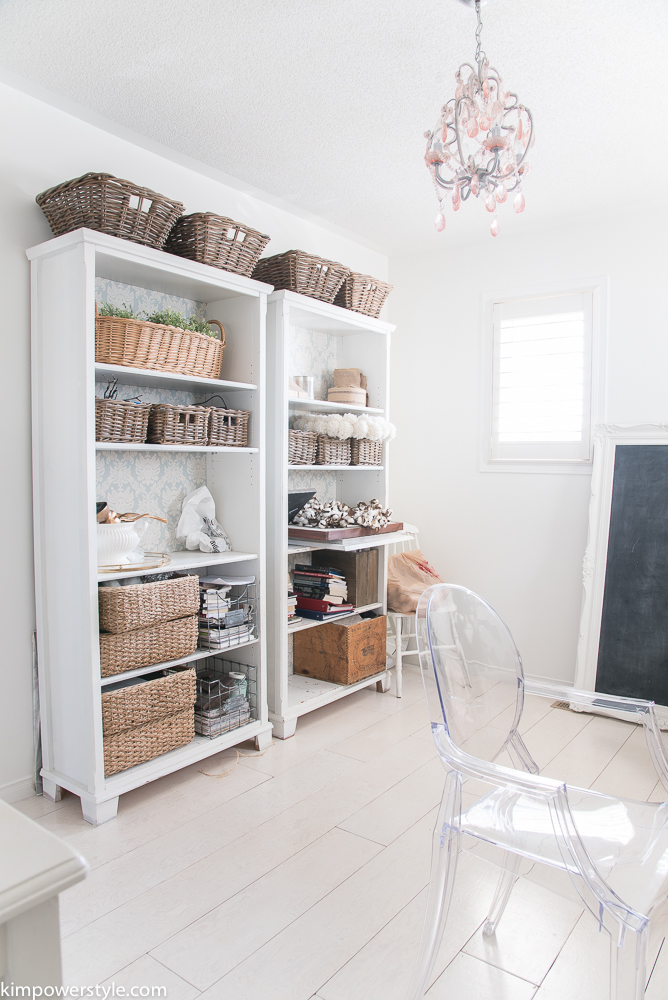
We’ve been waiting for the basement renovation to be finished so that I can finally empty out the storage unit. I’ve emptied out a few of my things but most of it is still locked away in boxes including my tools that I need to build the mantel that will fit just under the TV.  I’m also planning on swapping out those glass shelves for wooden ones. So many plans to make this place feel a little more done!

Spring Tour in our New Home

untitled-0463

Spring Tour in our New Home

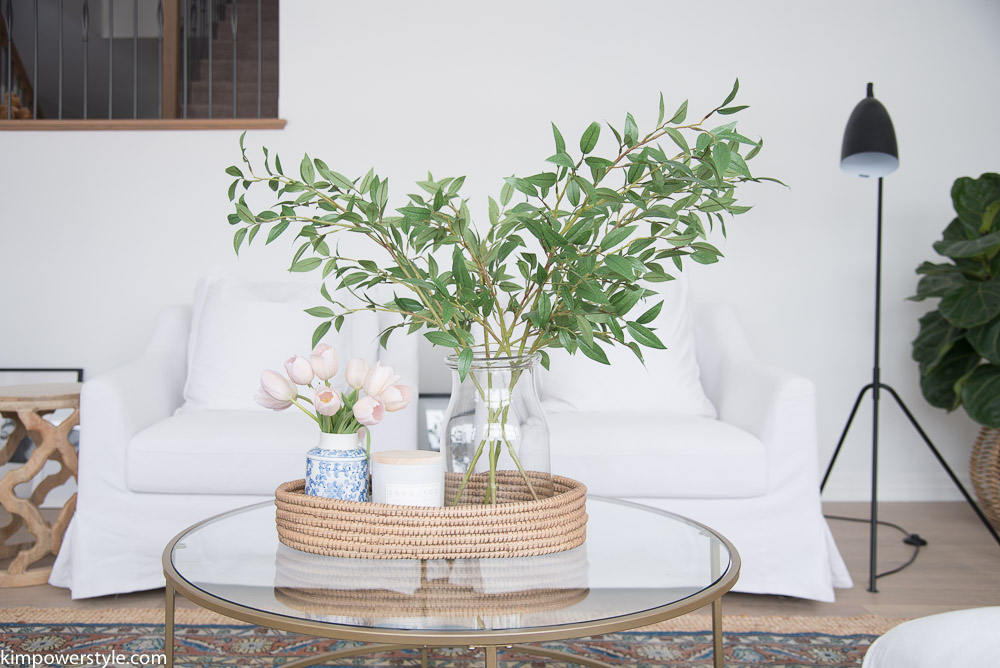
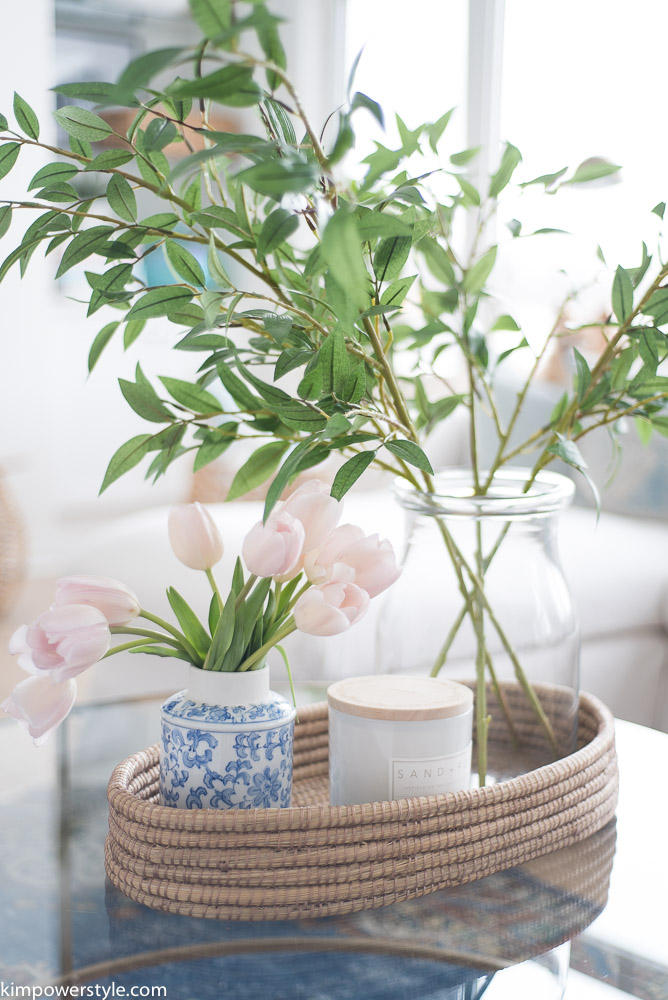
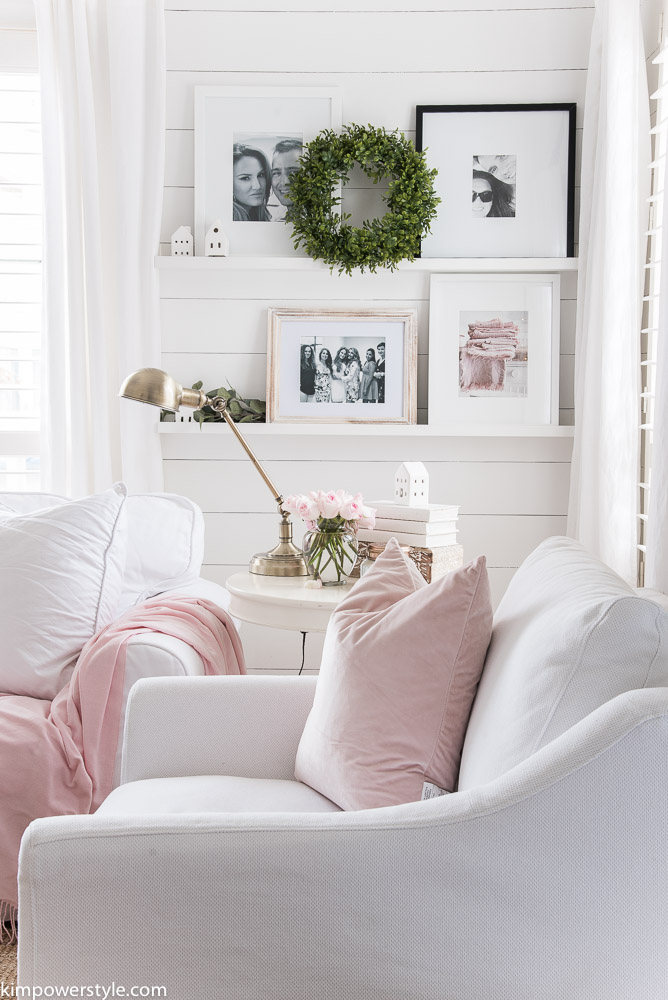
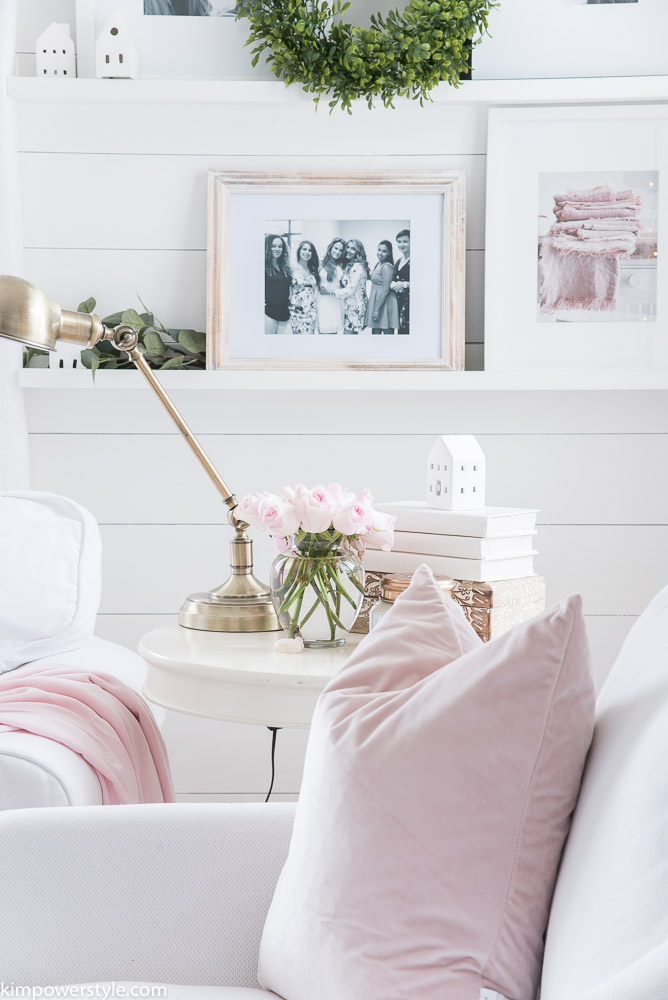
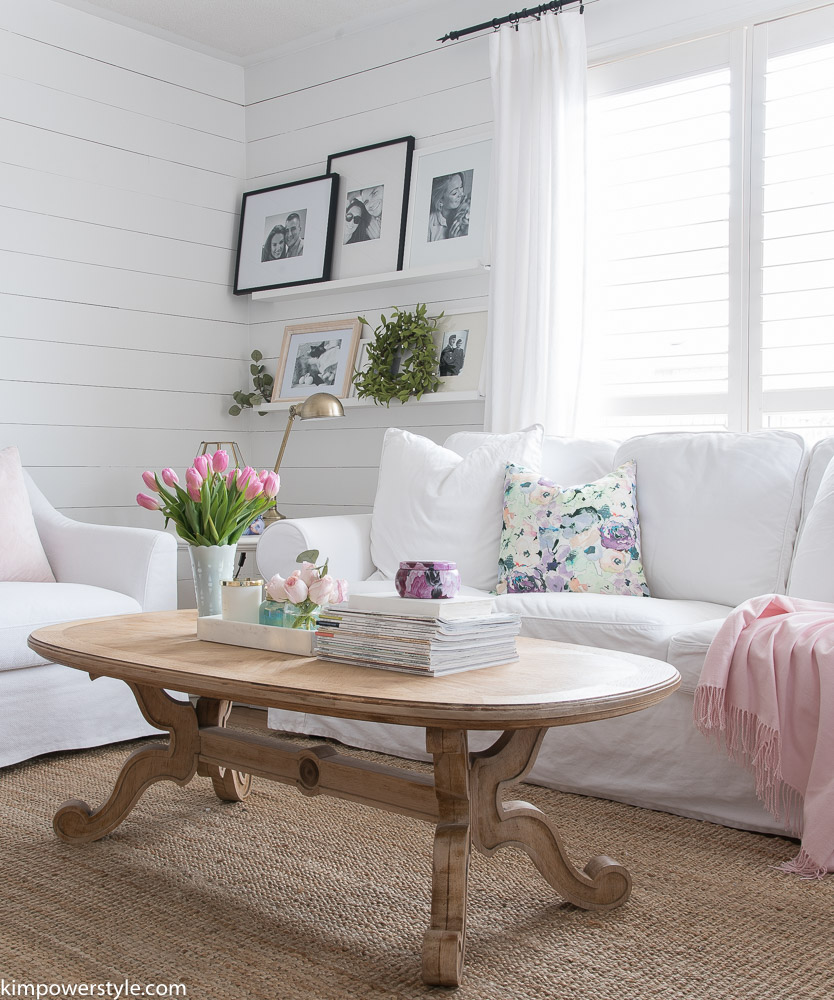
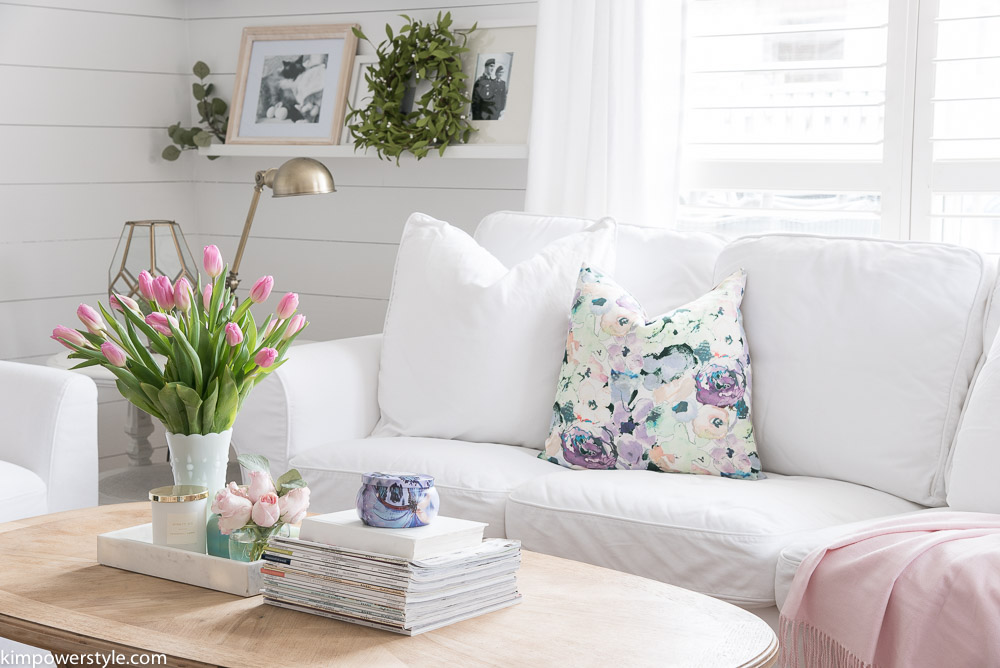
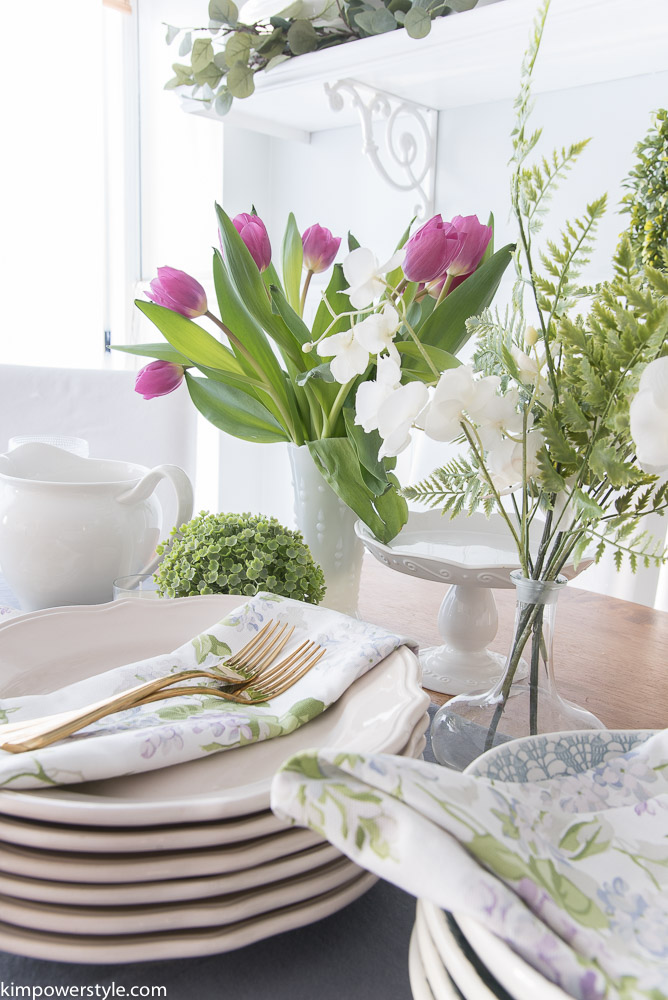
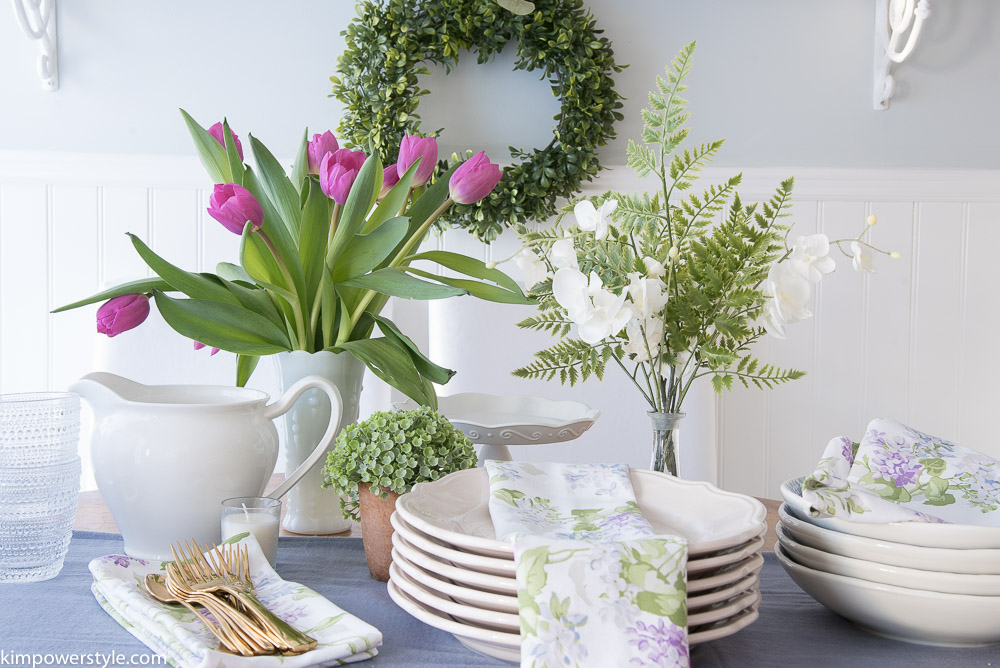
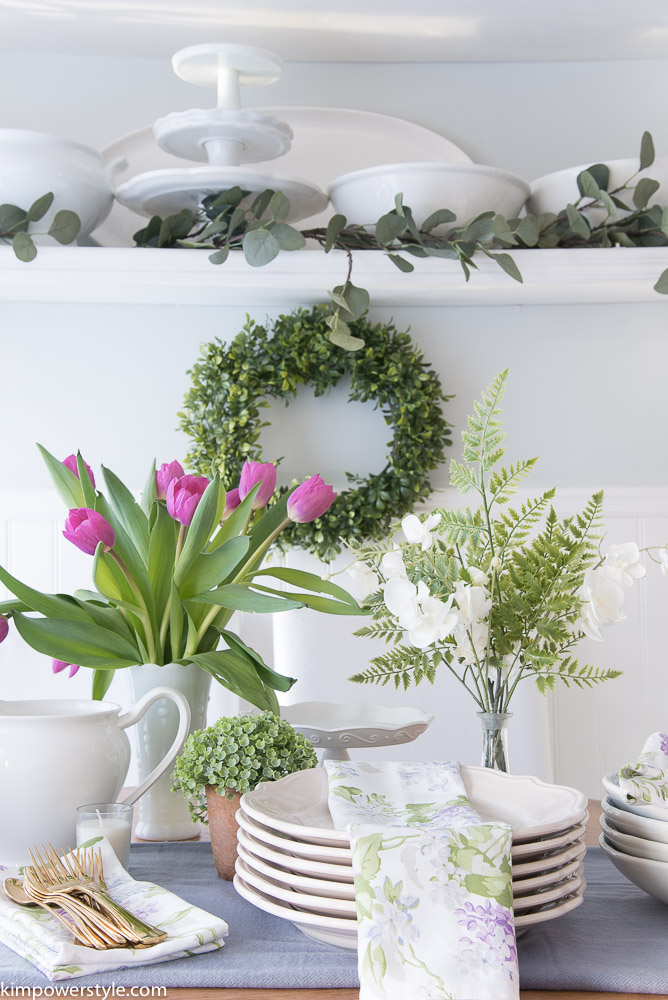
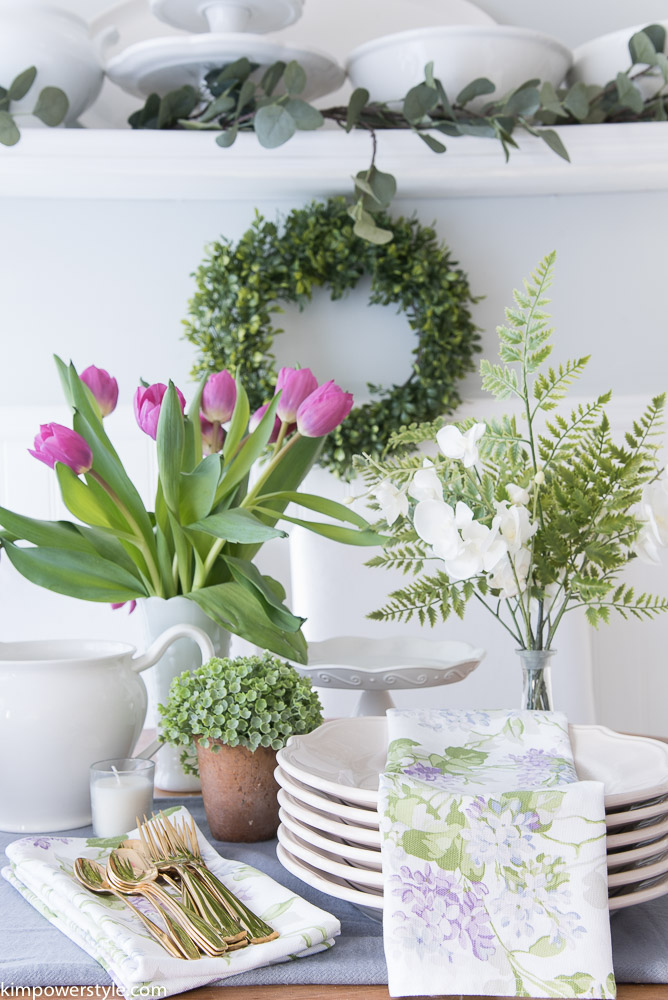
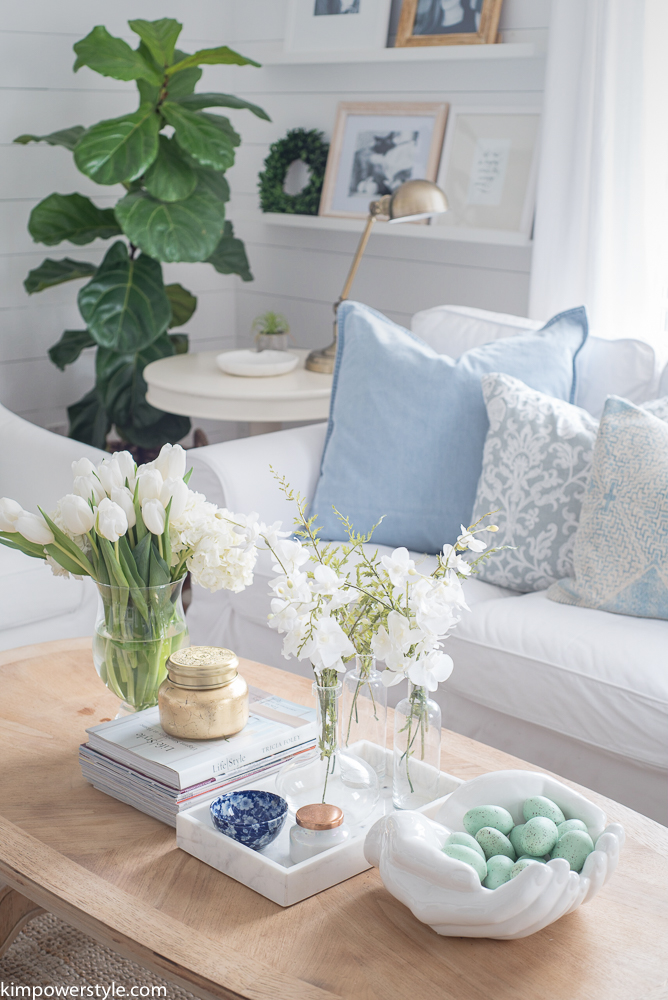
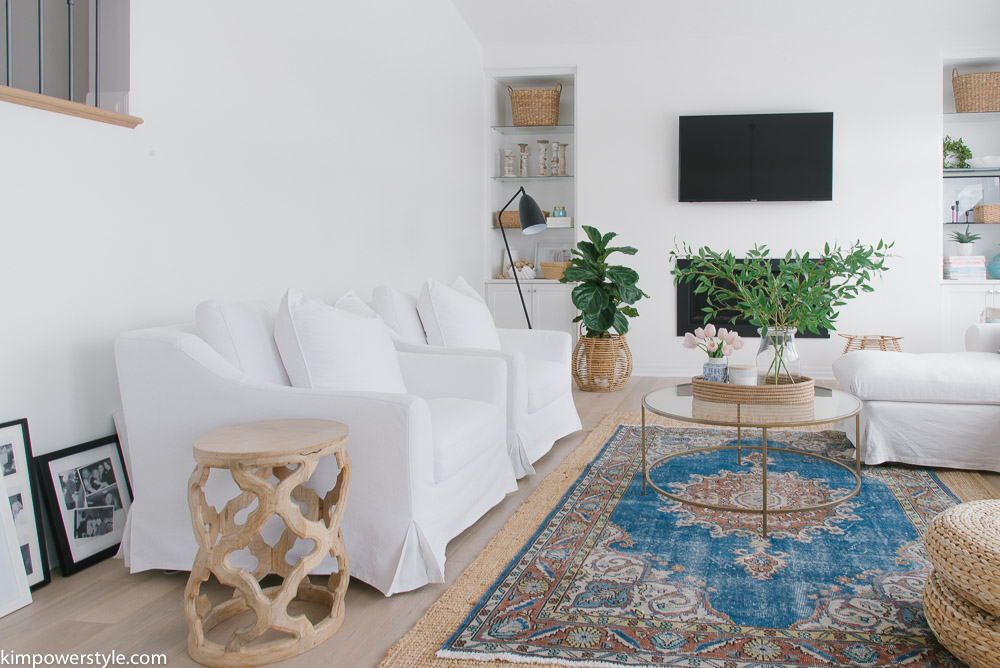
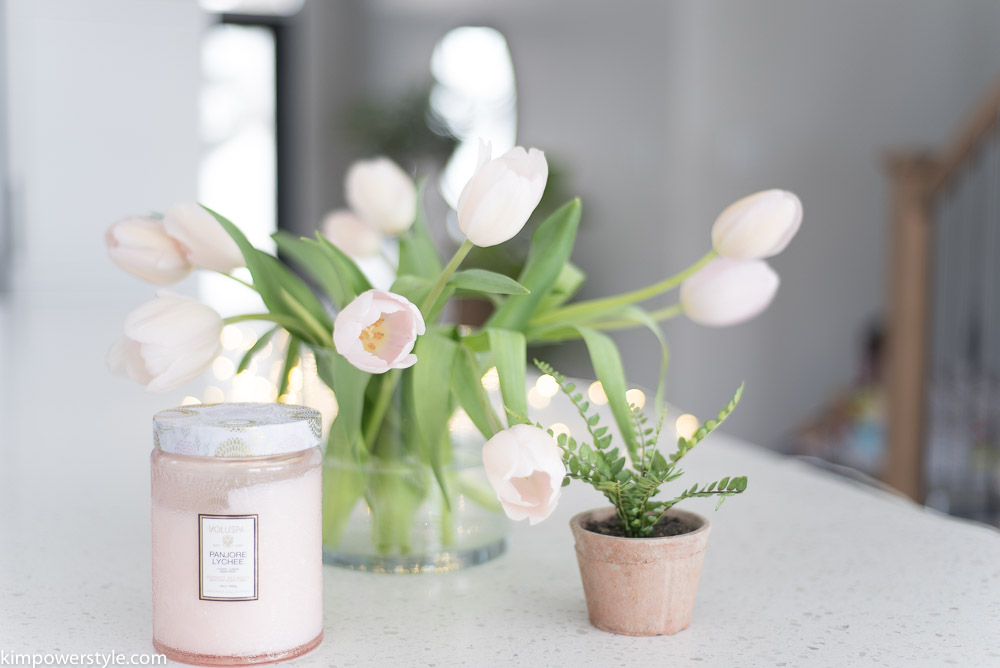
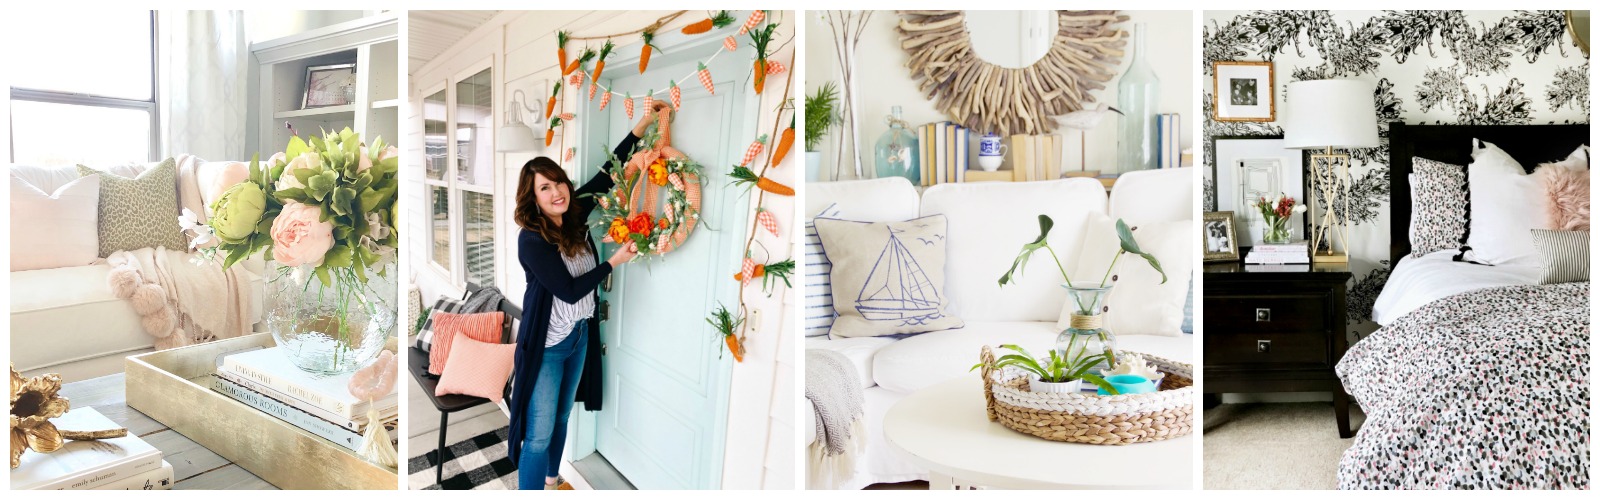
Nothing screams spring more than tulips and I got a couple of pale pink bunches to help bring in the spring vibe.

Spring Tour in our New Home

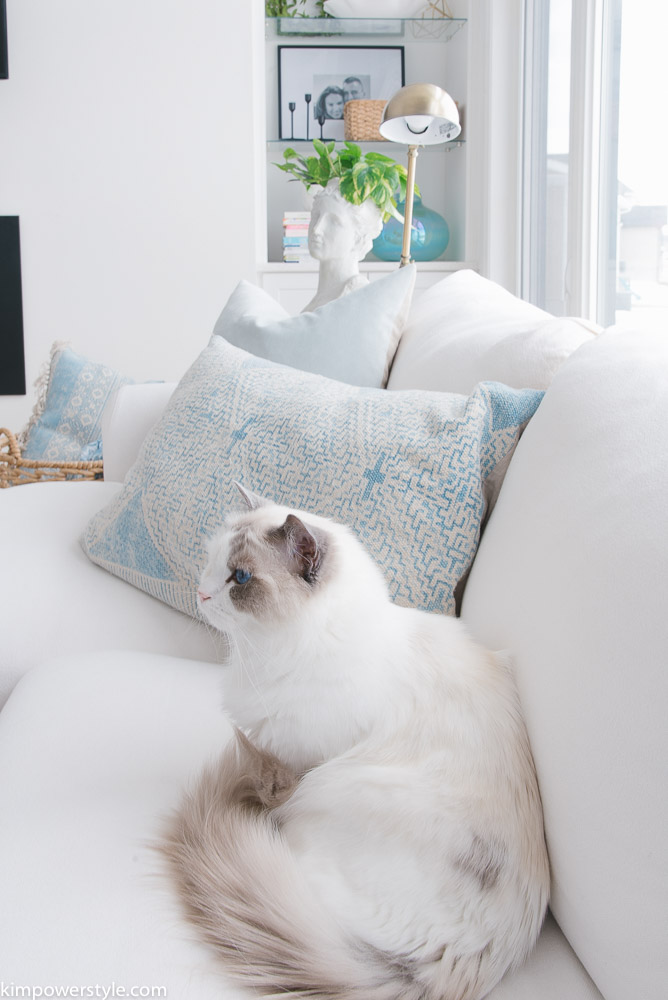
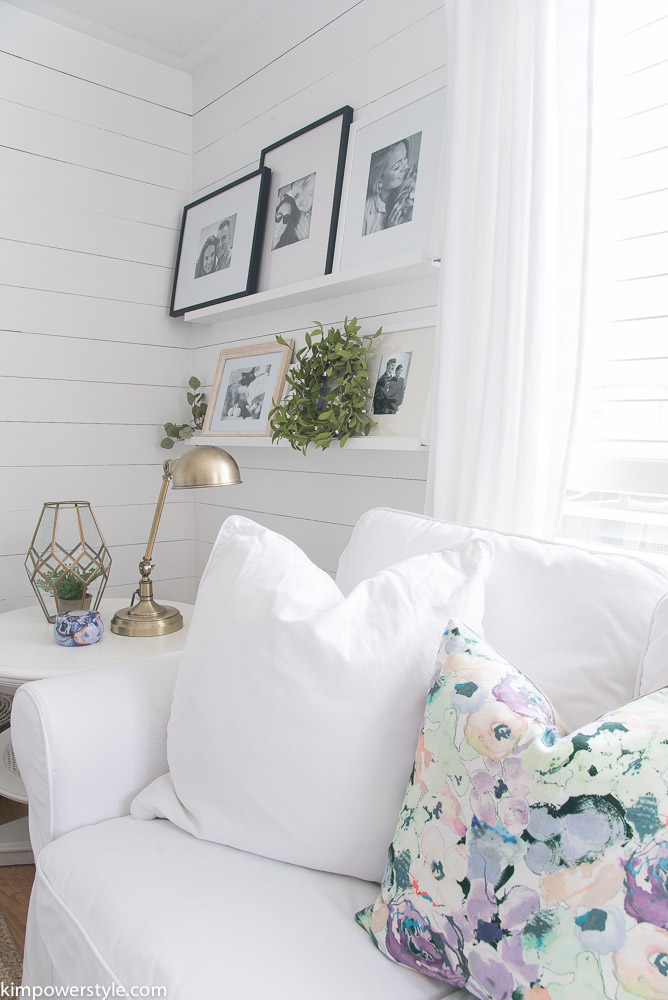
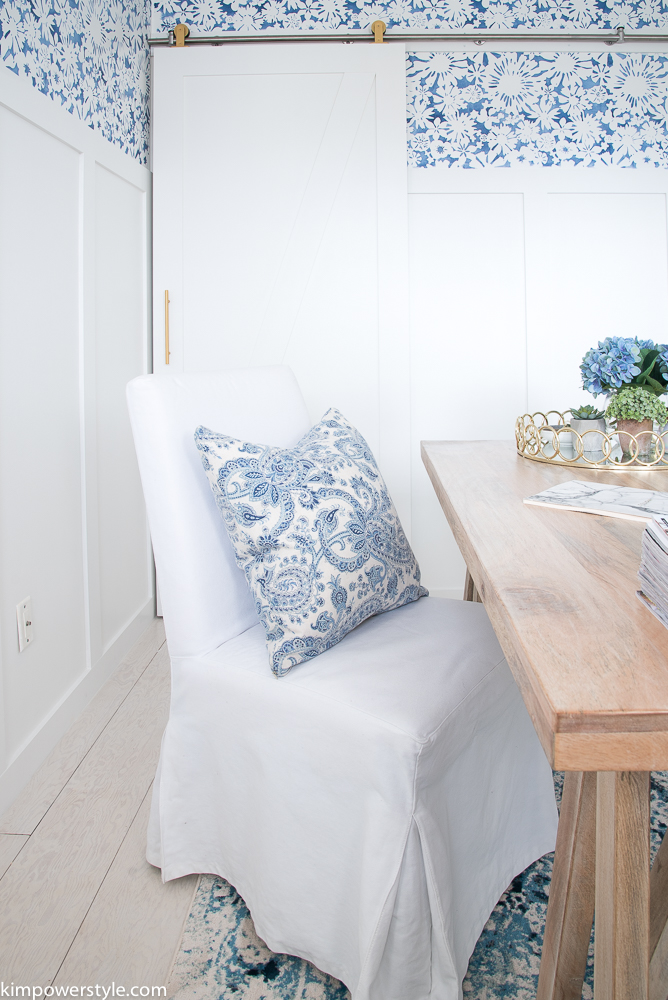
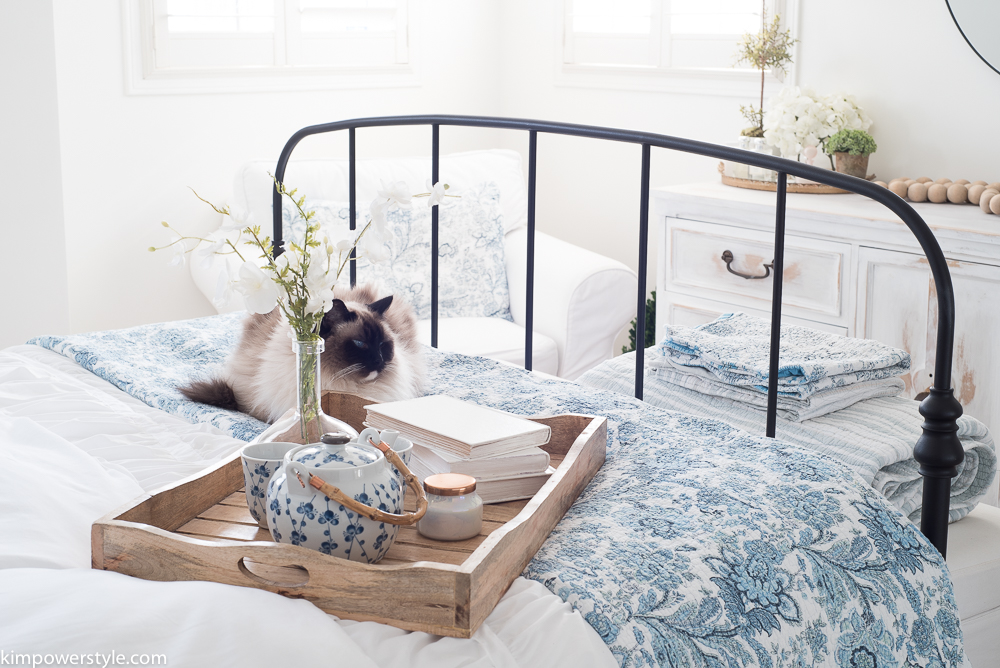
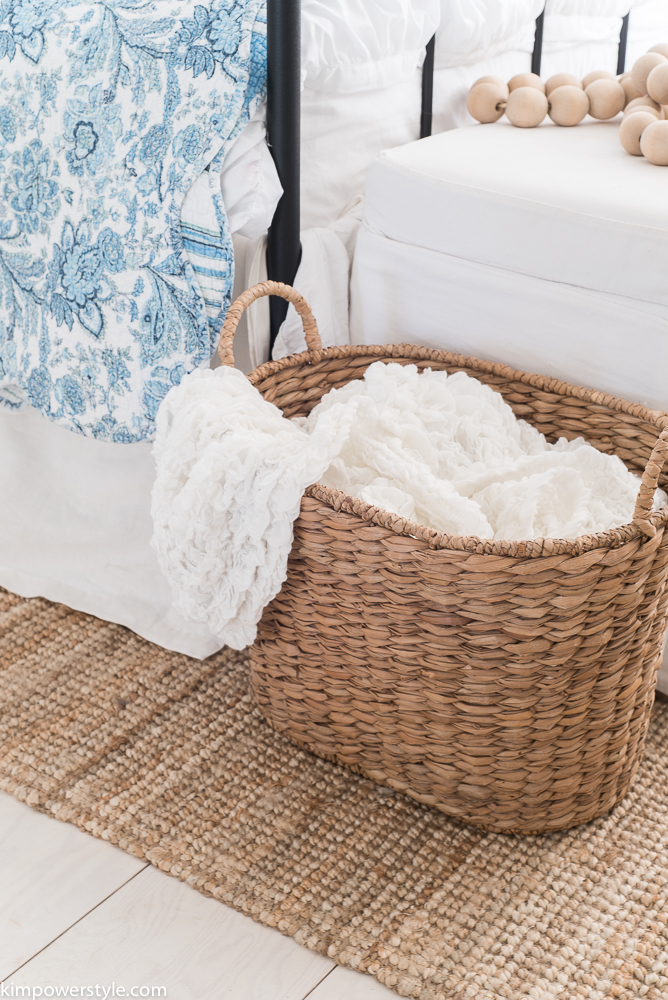
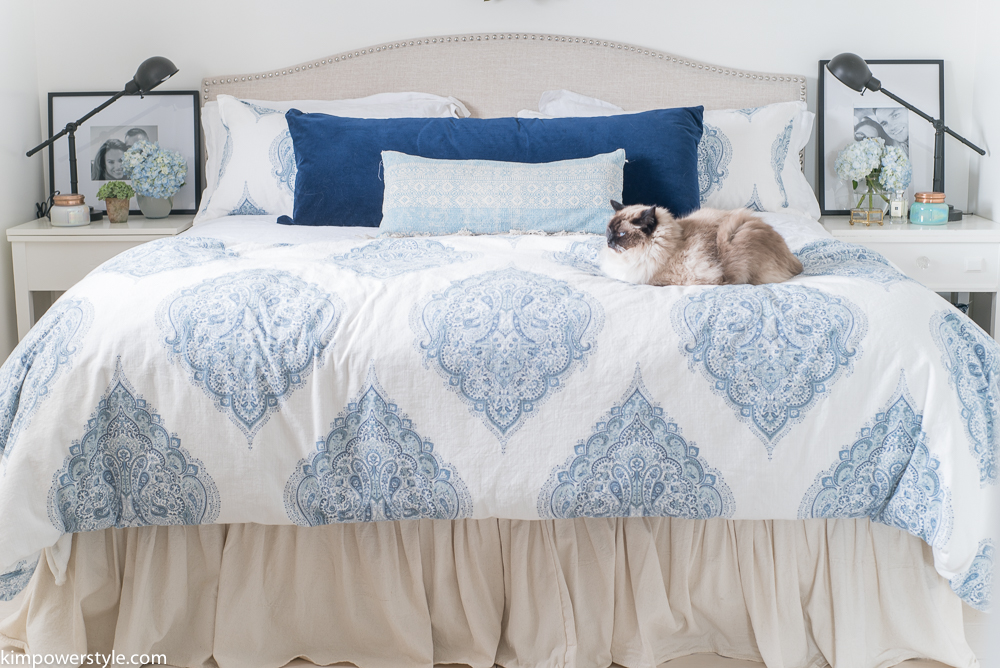
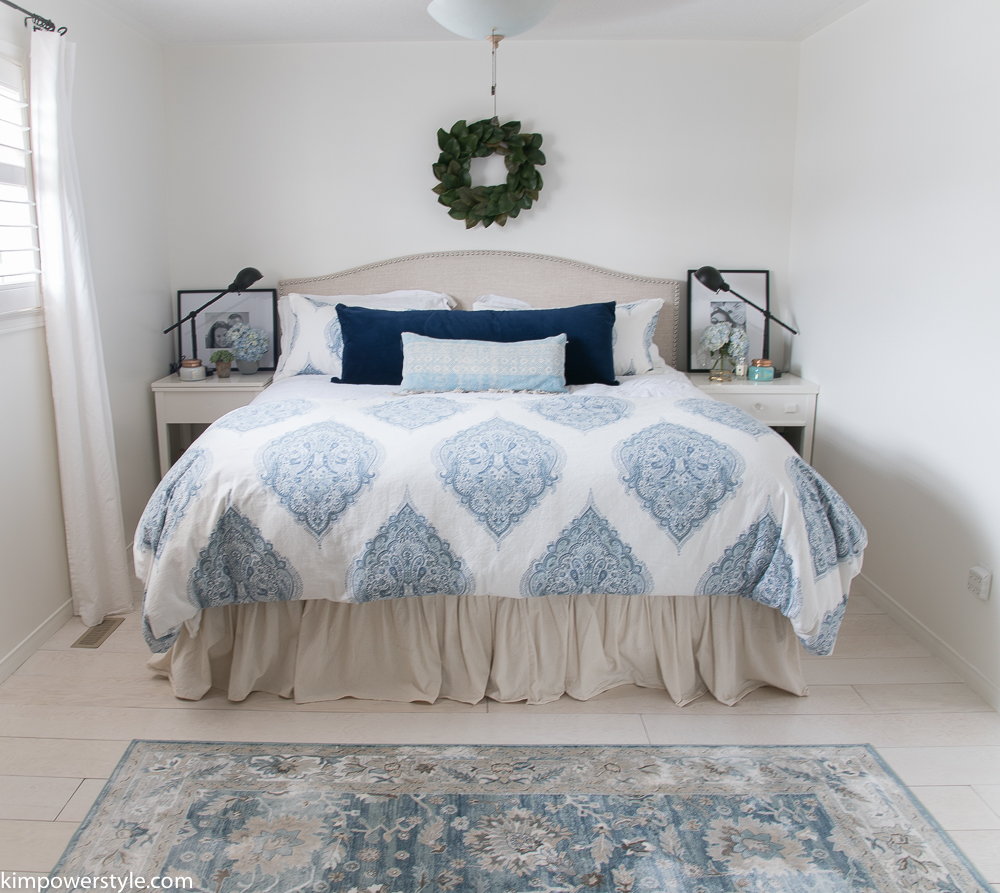
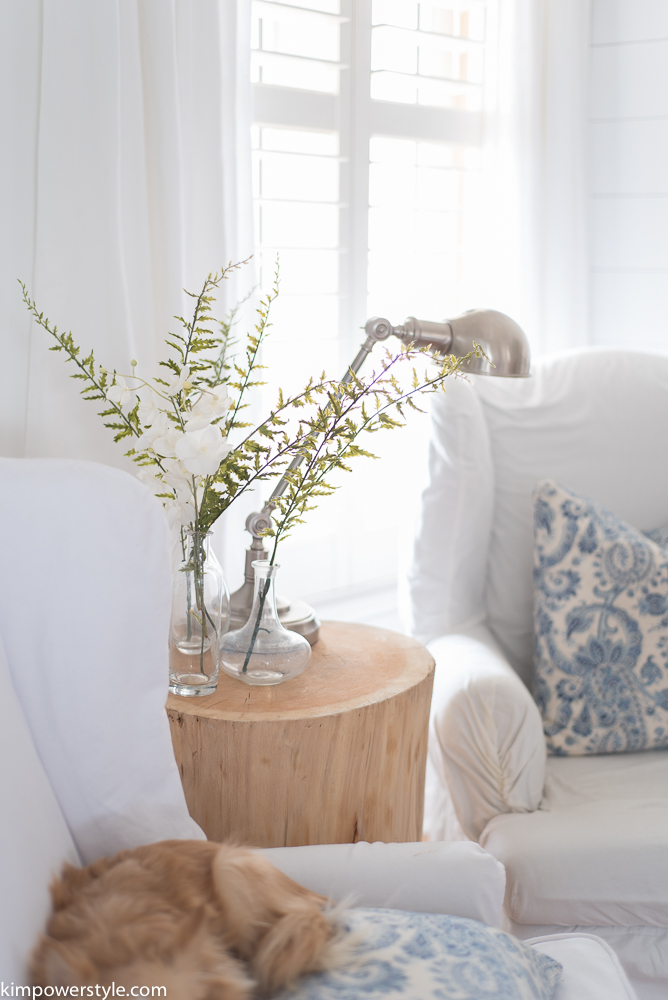
For spring I enjoy using fresh pastel colours on the pillows and throws, blue is always a hit with me. I made these throw pillows from some rugs that I found and I wrote a tutorial on how to make them here.        Baloo loves to be wherever I am and you may notice him here and there thoughout the tour.

Spring Tour in our New Home

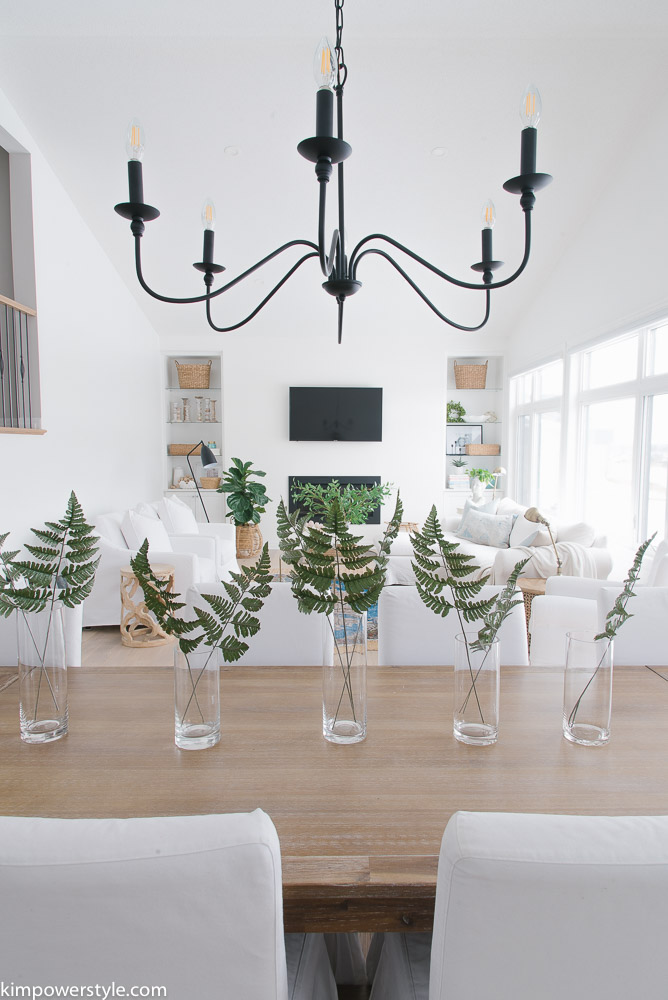
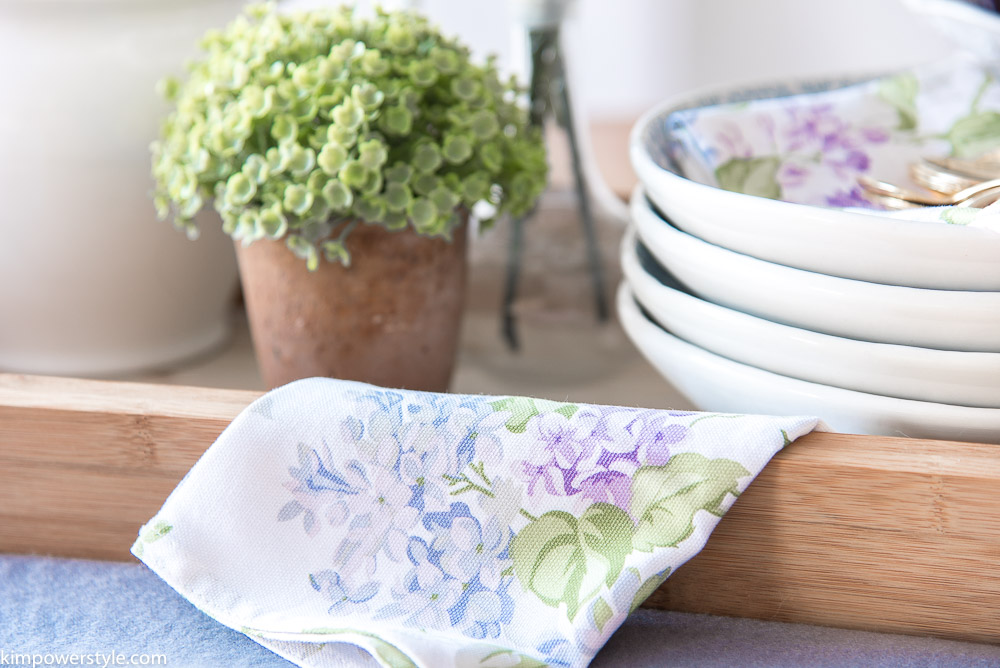
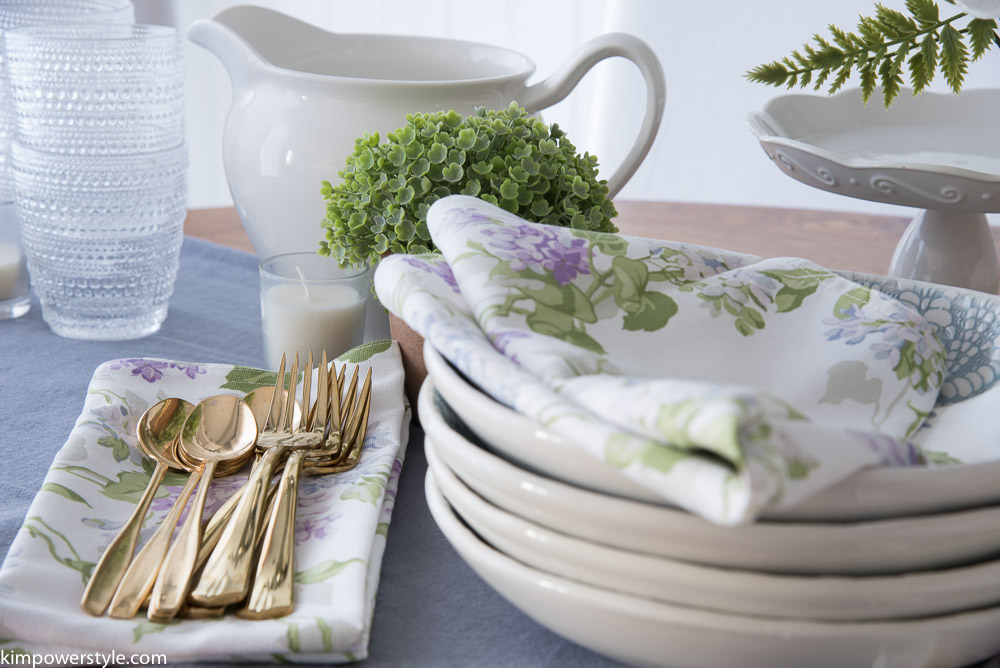
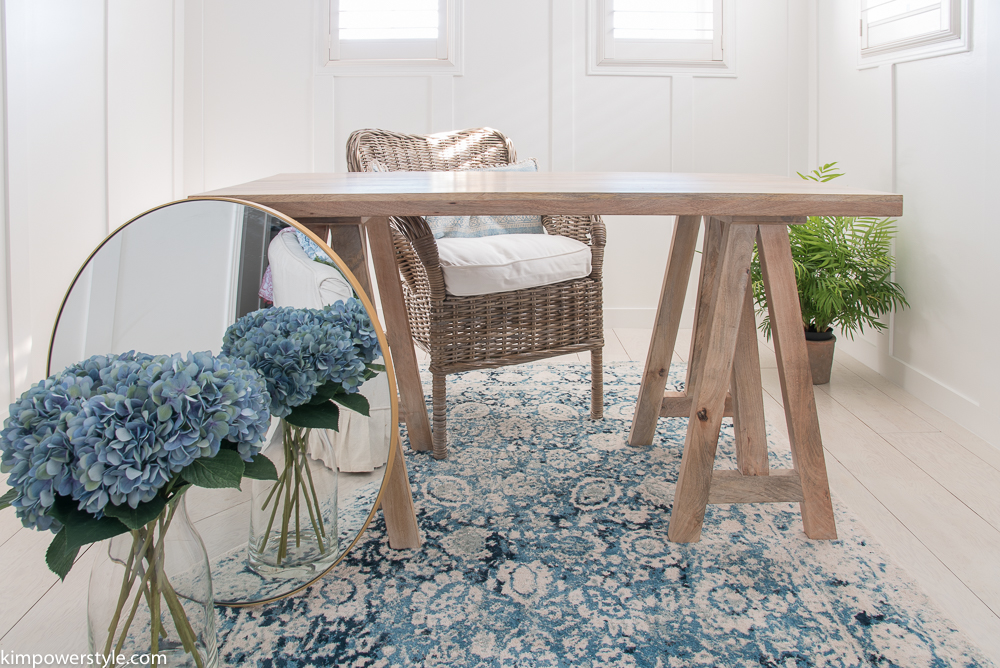
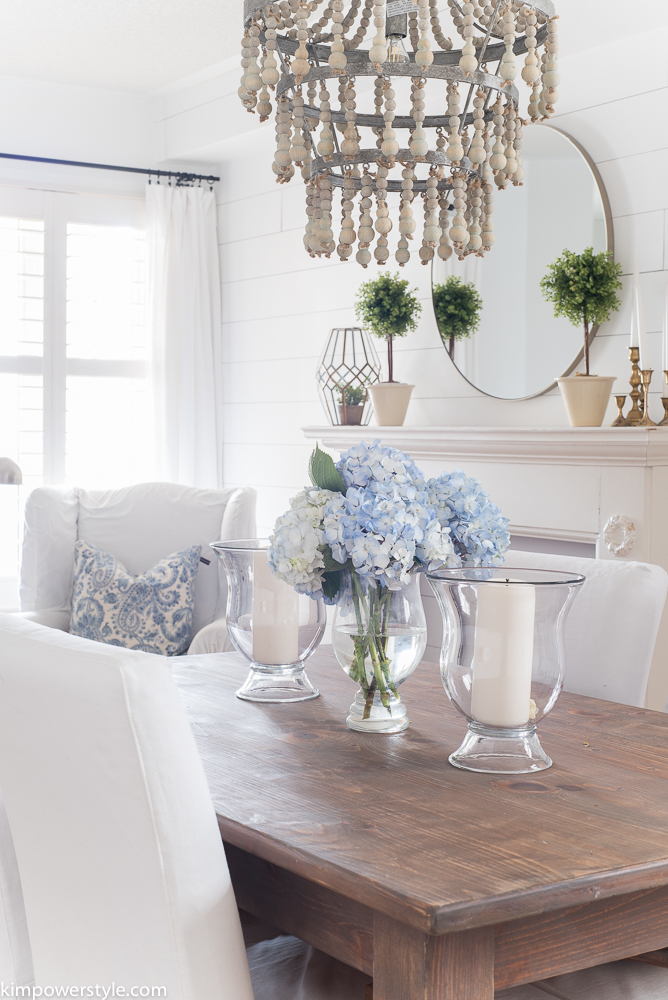
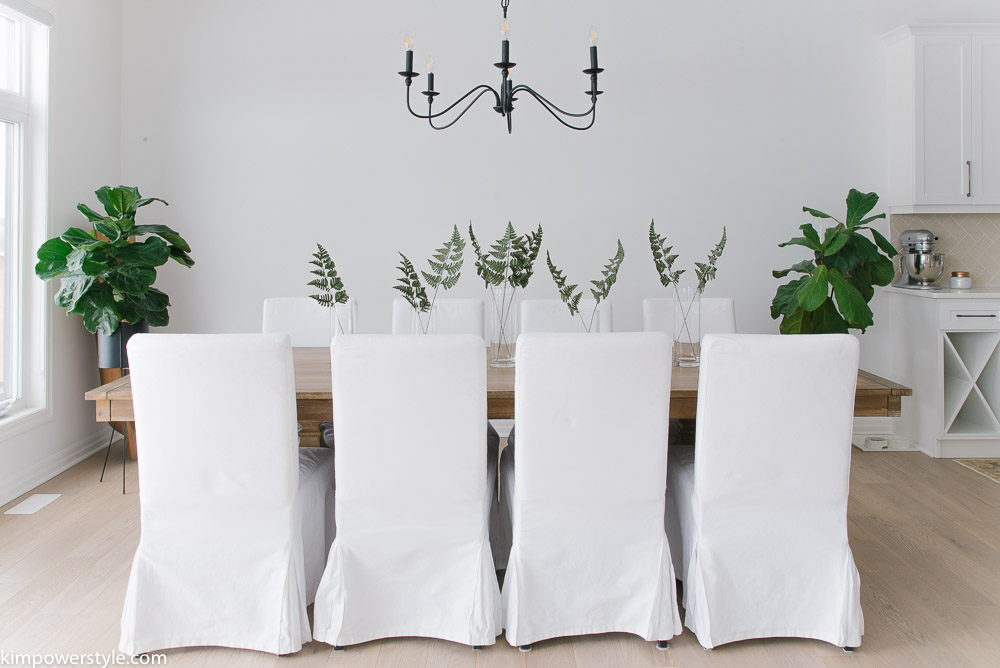
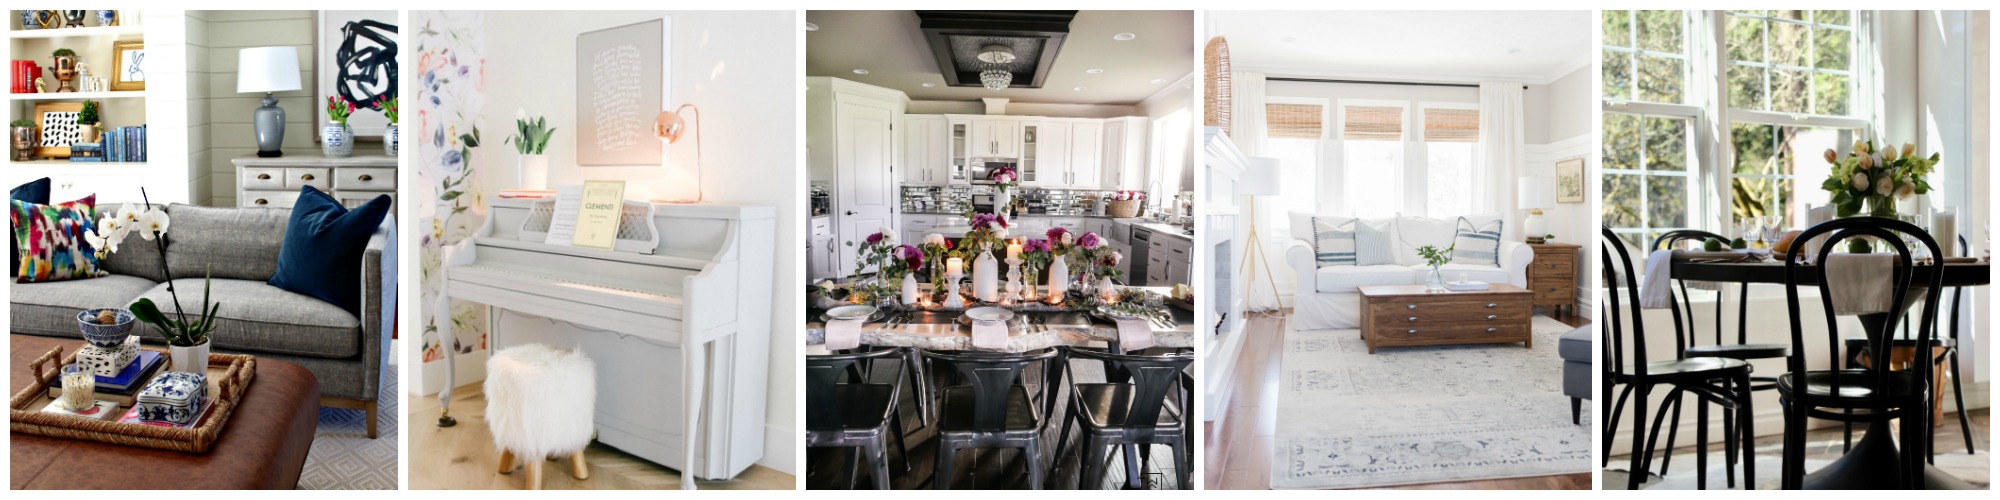
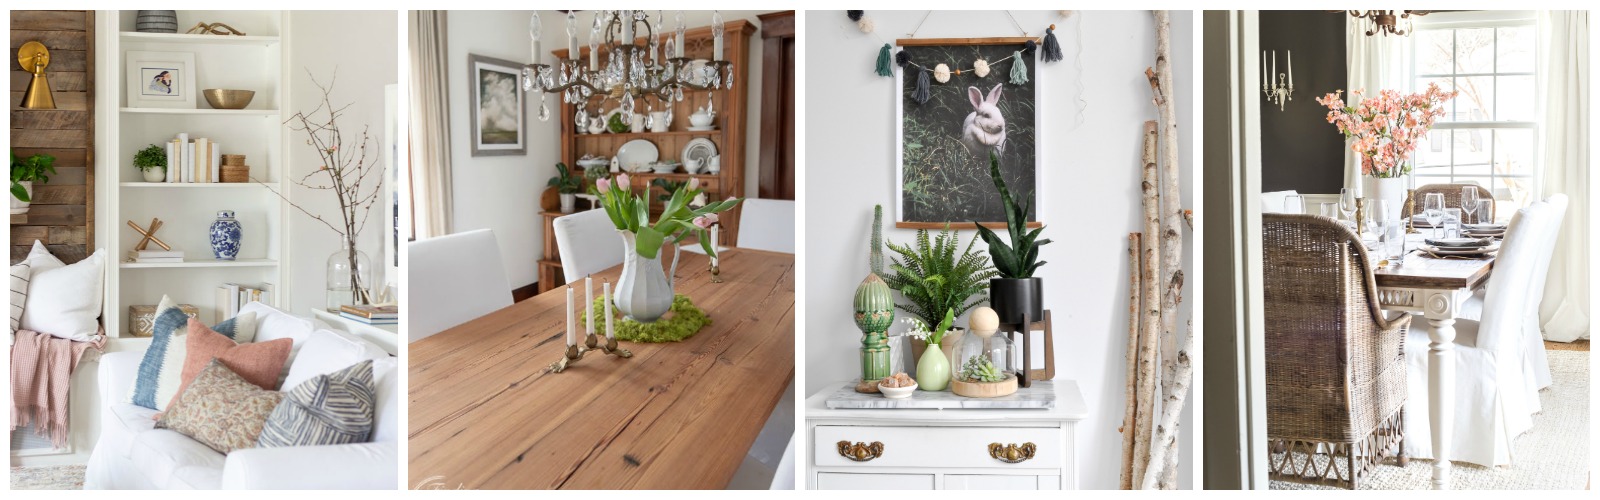
For a table arrangement I added some faux ferns in these plain glass vases to add another hit of greenery.

Spring Tour in our New Home

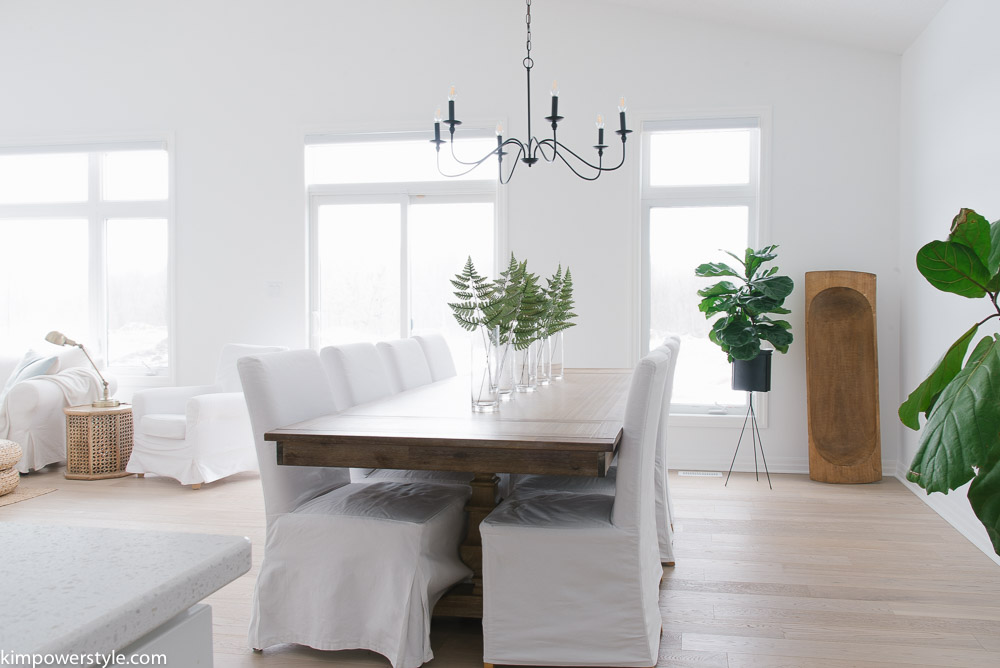
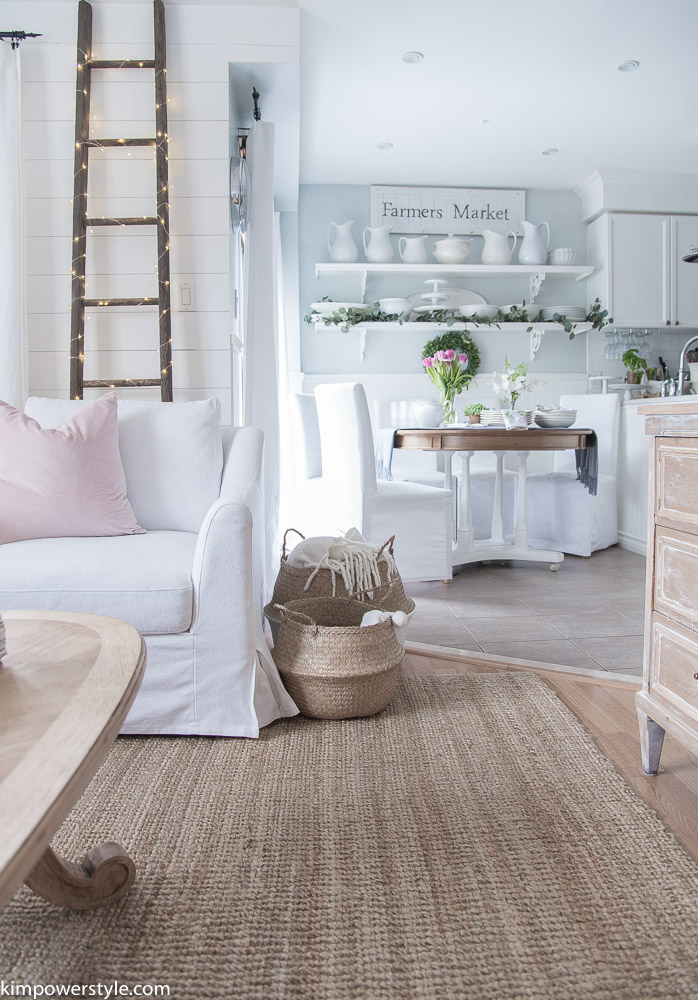
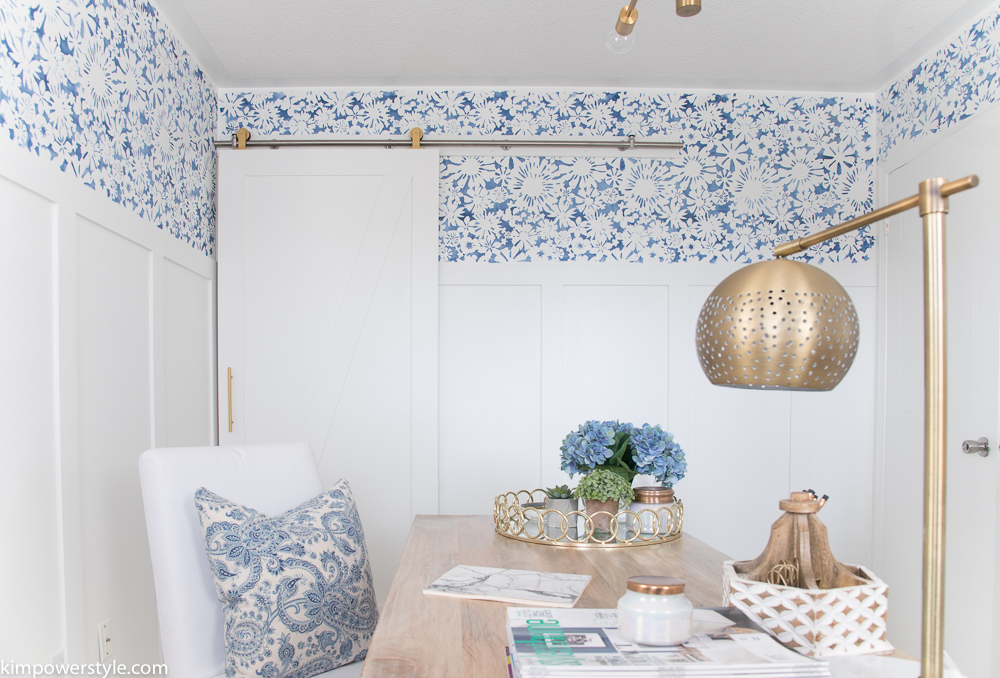
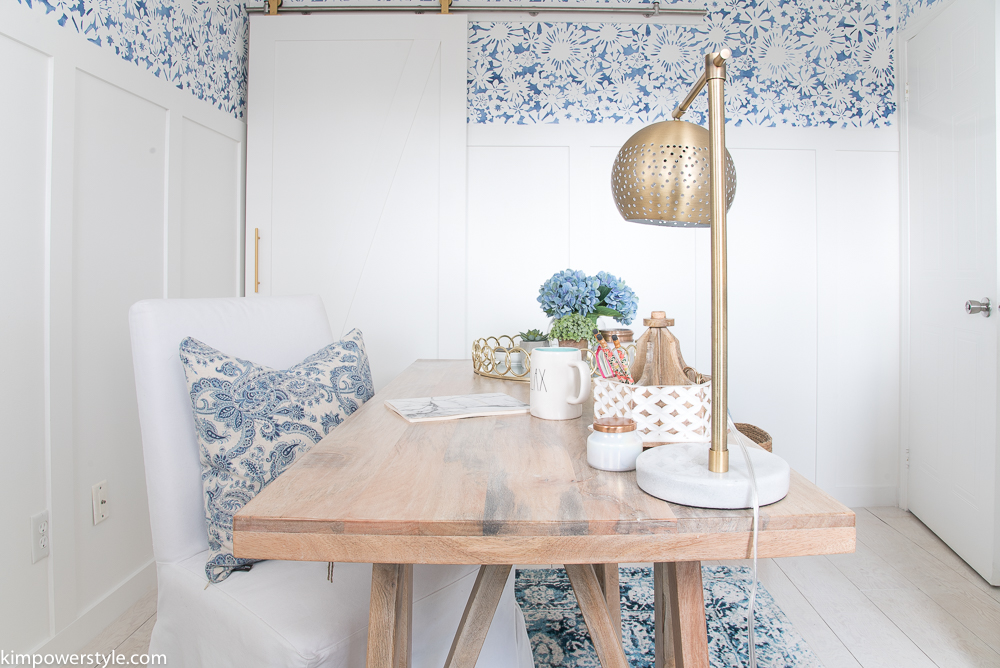
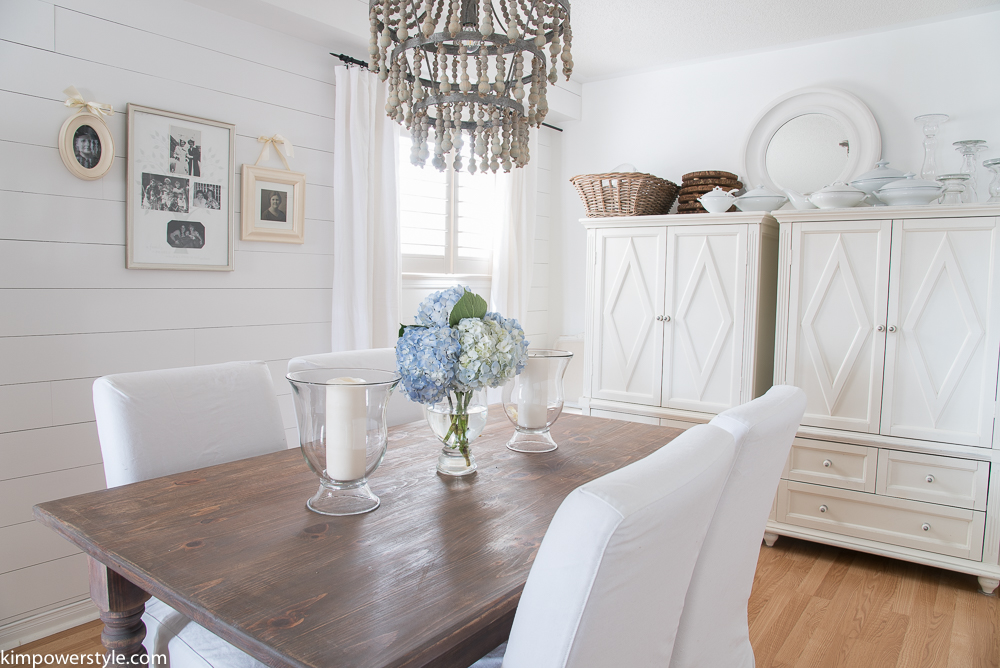
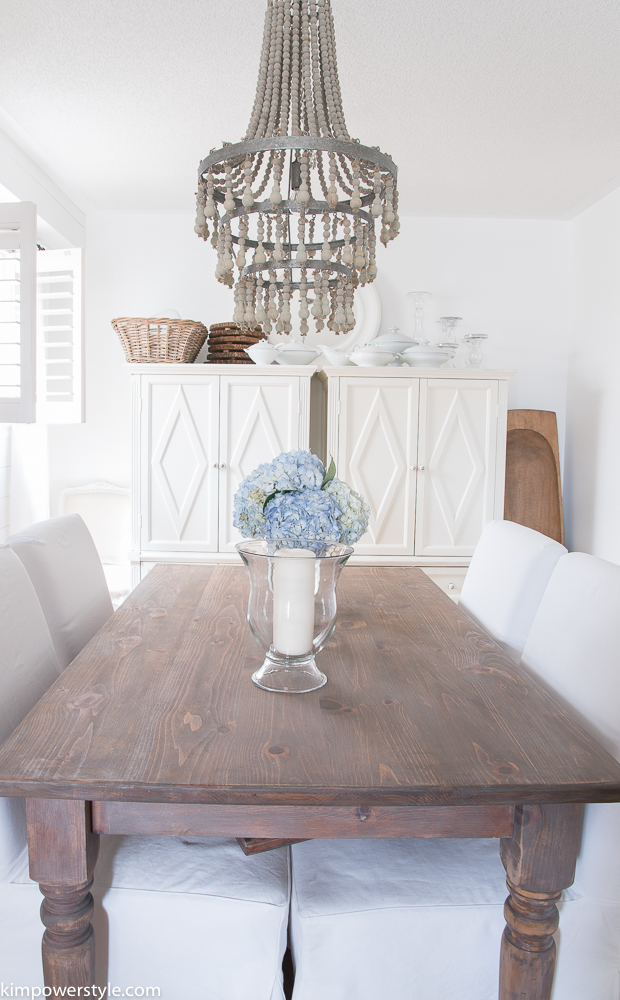
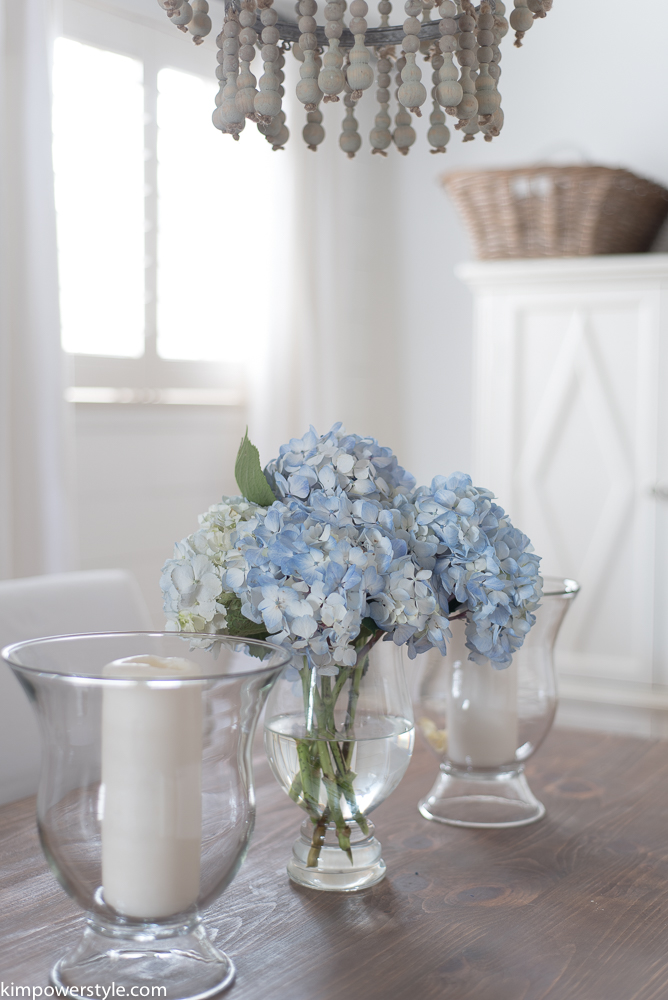
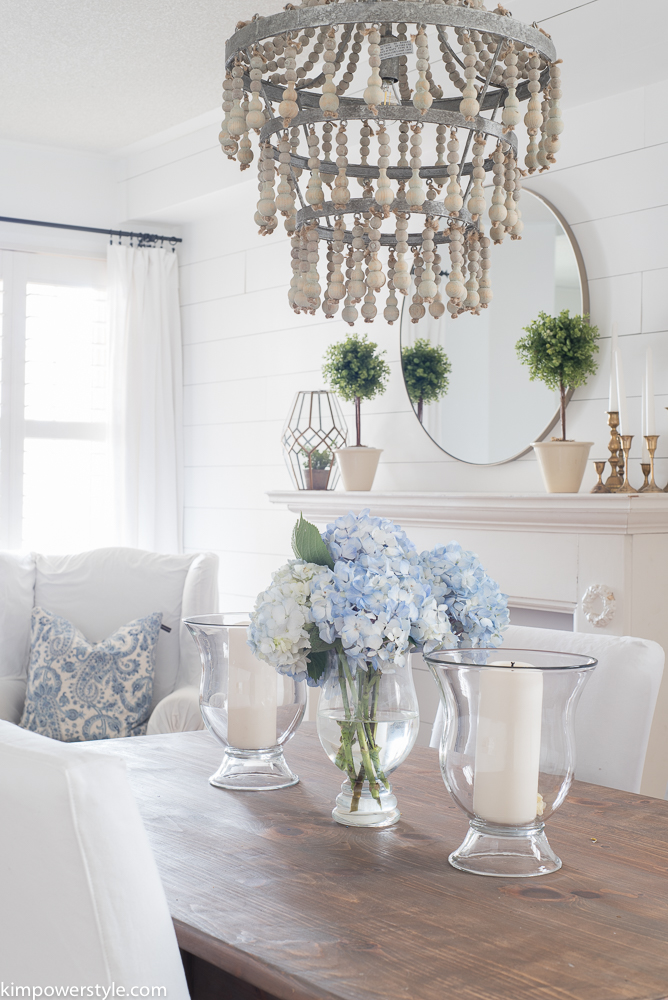
Our dining room is looking a little sparse while we wait to get my furniture out of storage but I’m not minding the minimalist look too badly! Oh and this light, It was the very first thing that I changed out once we moved in and I love it! The one that came with the home was so tiny you could hardly notice it but this one delineates and fills the space so nicely.

Spring Tour in our New Home

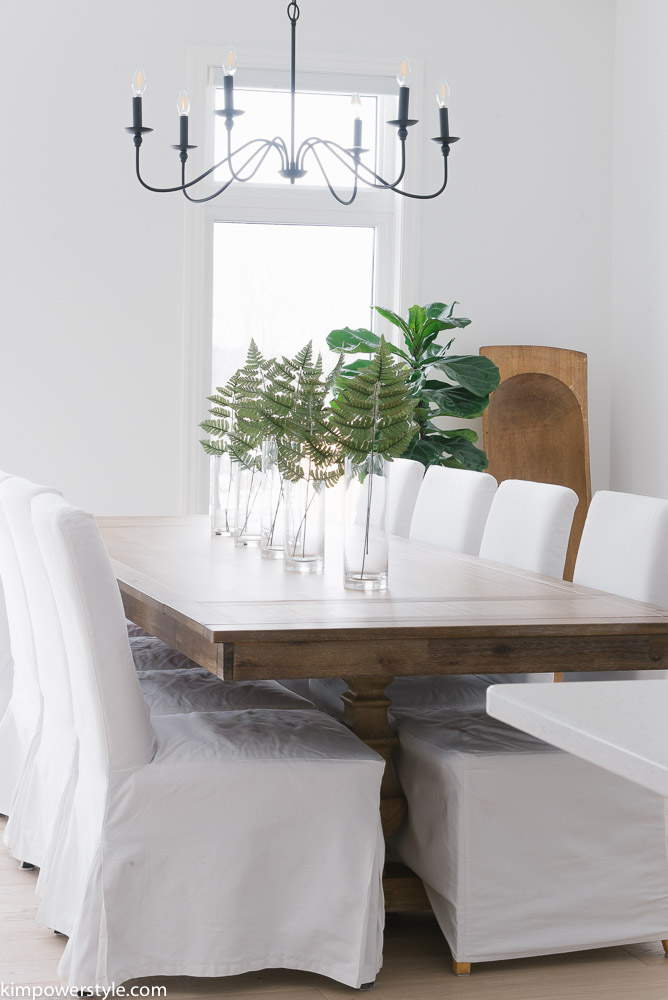
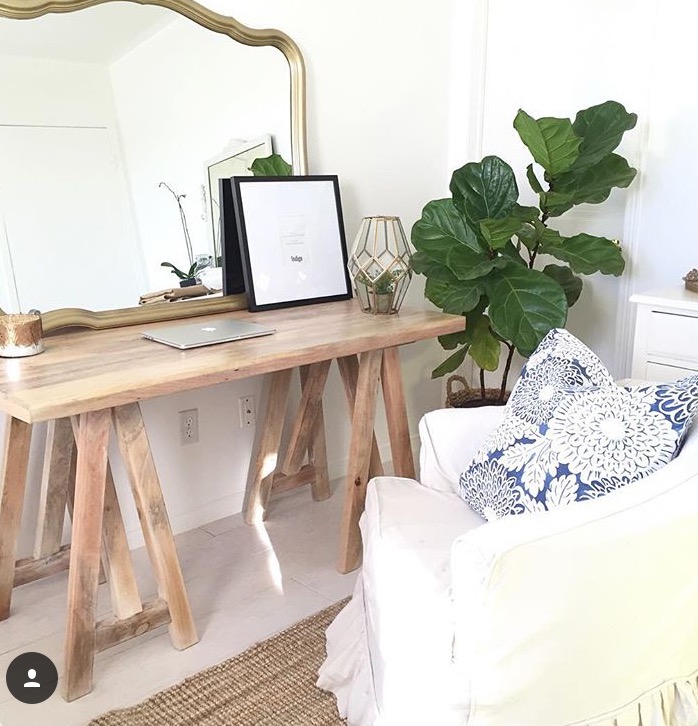
The second thing I did when we moved in was to get this large harvest table. I wanted a place where all my daughters could come with their husbands and have some great family dinners at. It totally fits the bill!

Spring Tour in our New Home

Spring Tour in our New Home

Spring Tour in our New Home

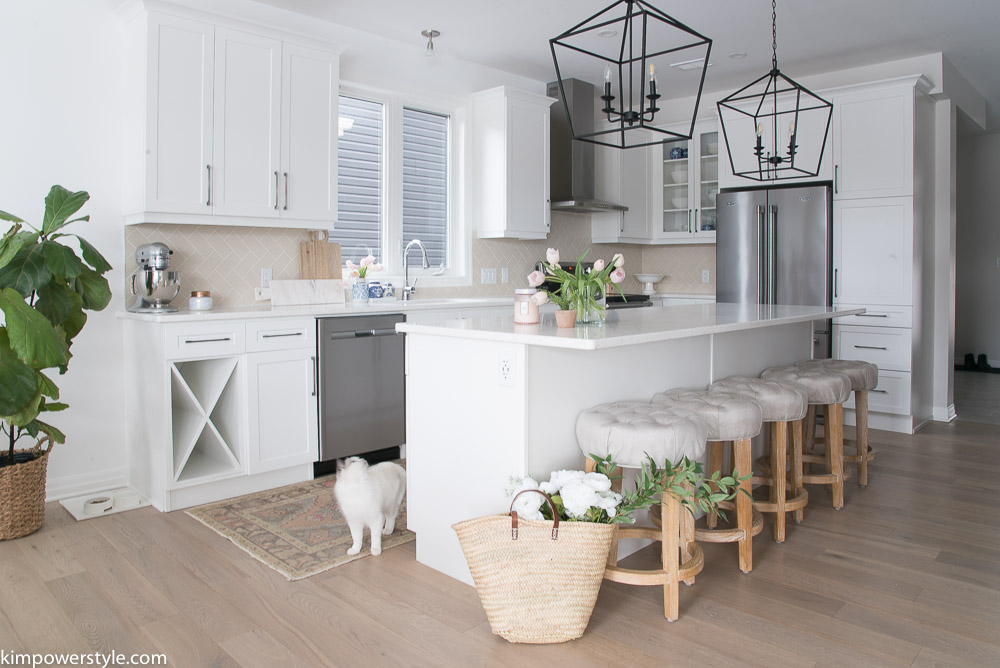
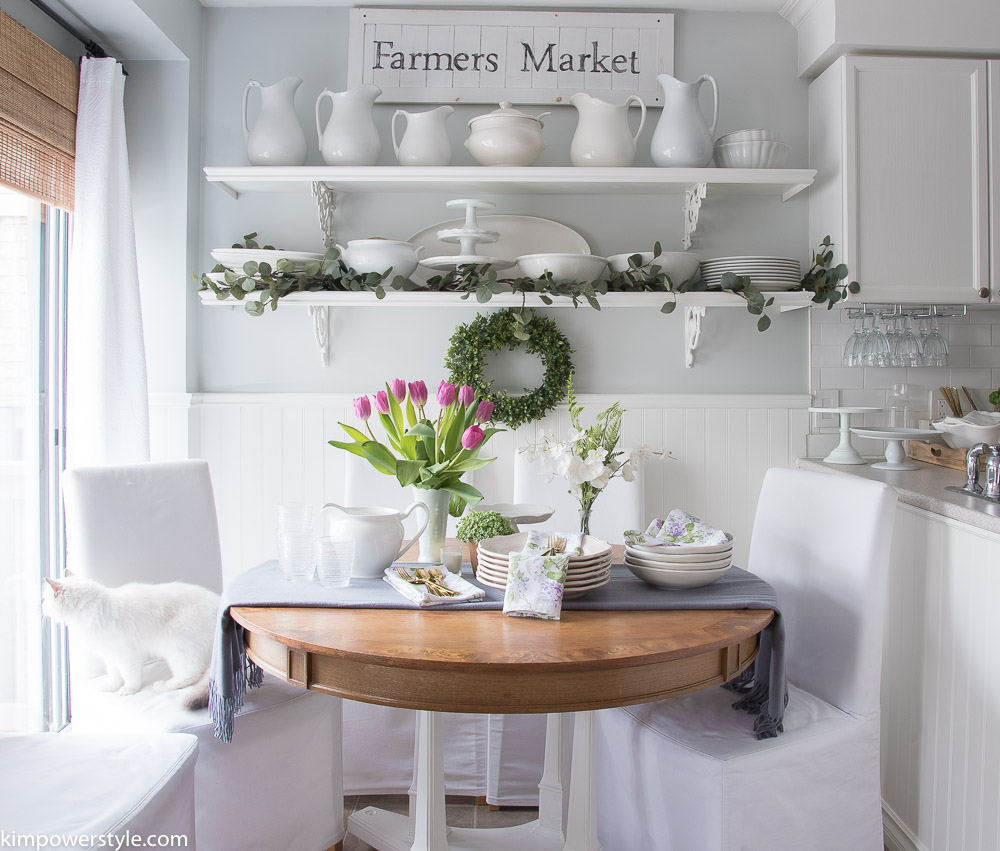
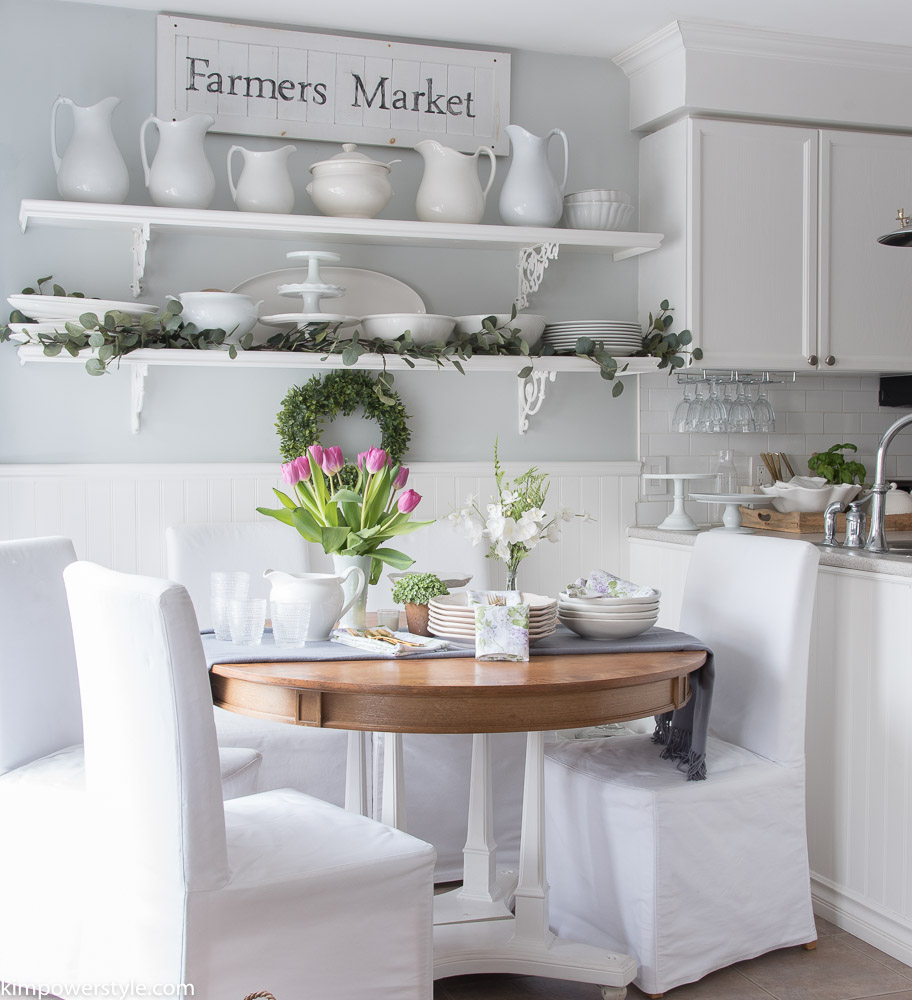
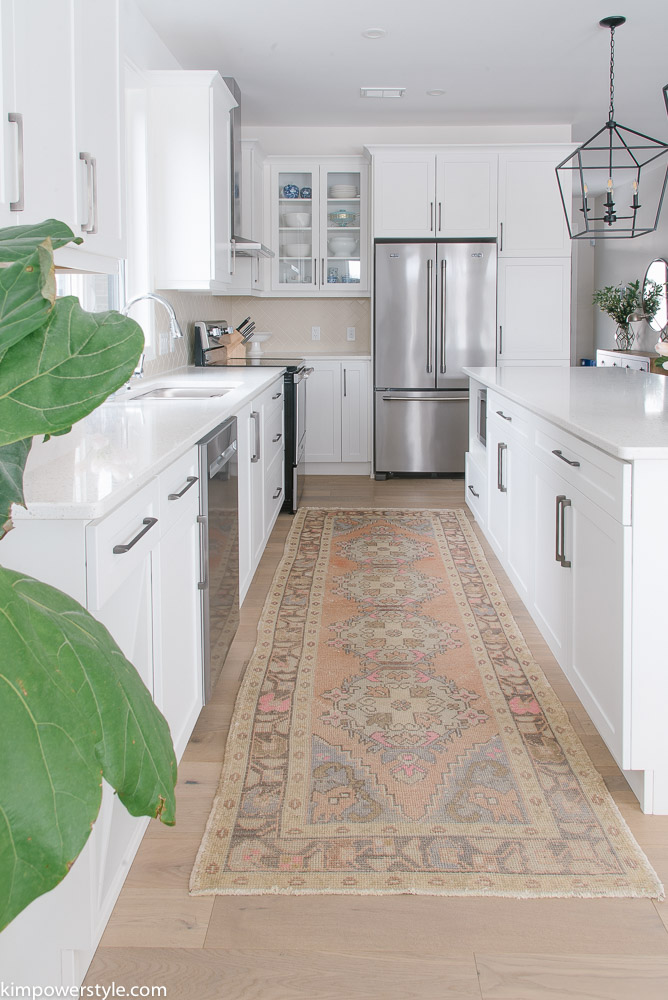
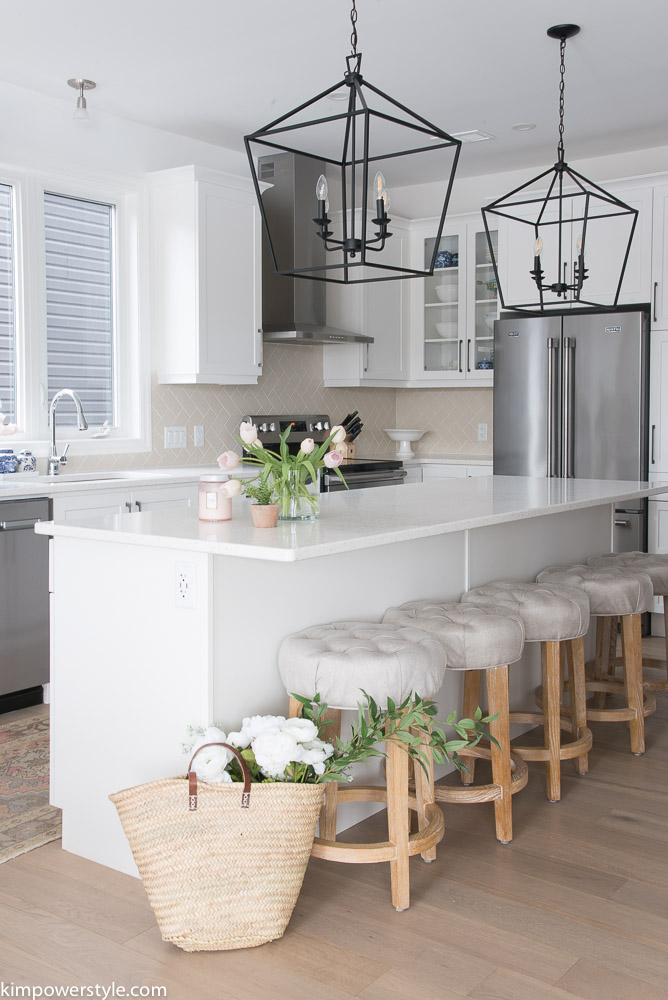
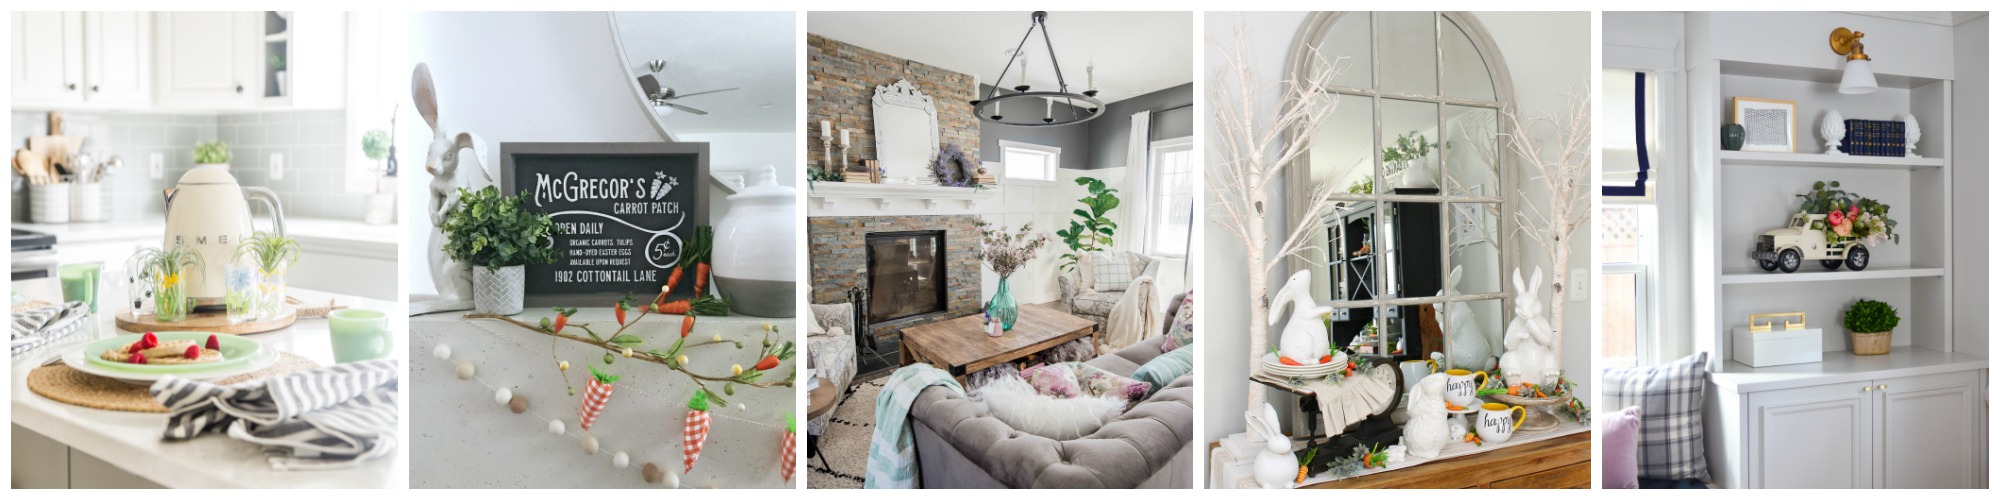
In the kitchen I placed more of the tulips along with a sweet floral scented candle. I think Baloo wants to check them out! I also changed out the lighting in here as well. I love these large lantern pendants in here and overcame my fear of electrocution and put them up myself. Lol! They fit in so well with the chandelier in the dining room.

Spring home Tour #bohofarmhouse #vintagerugs  #coastalfarmhouse #springdecor

Spring Tour in our New Home

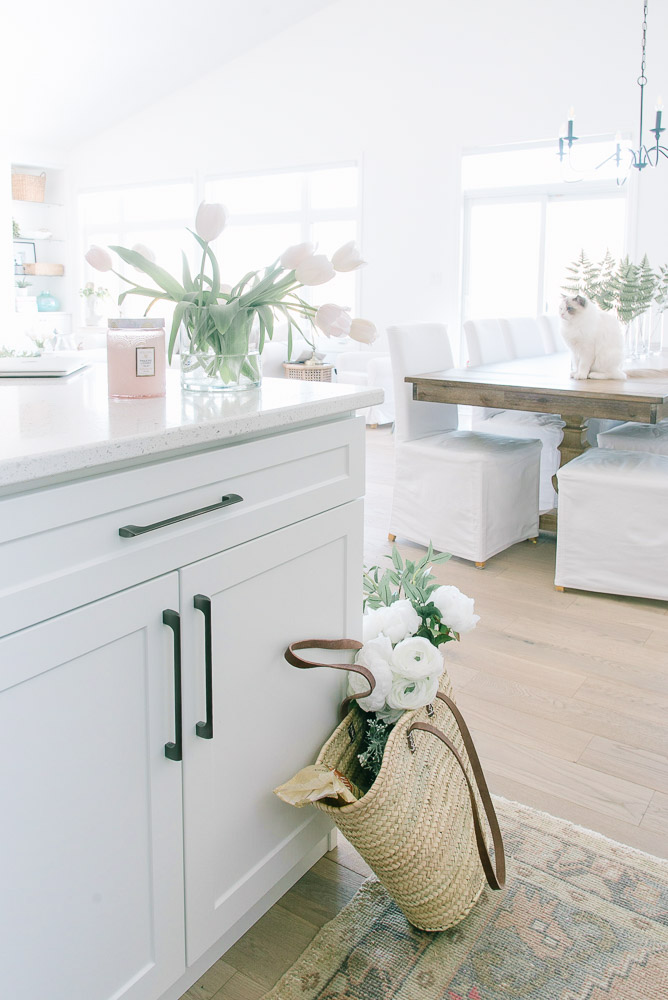
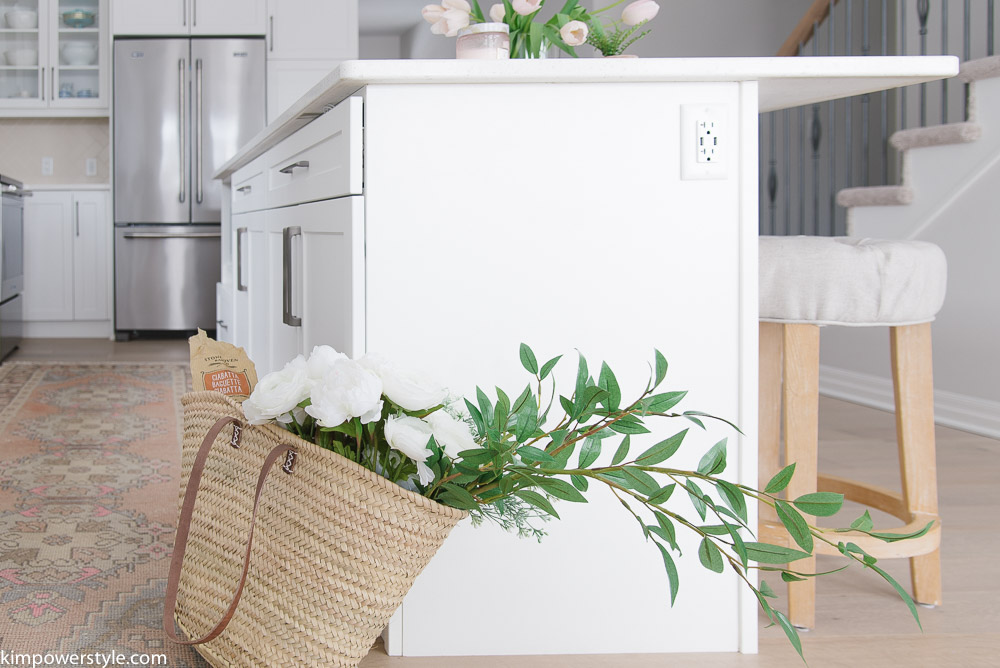
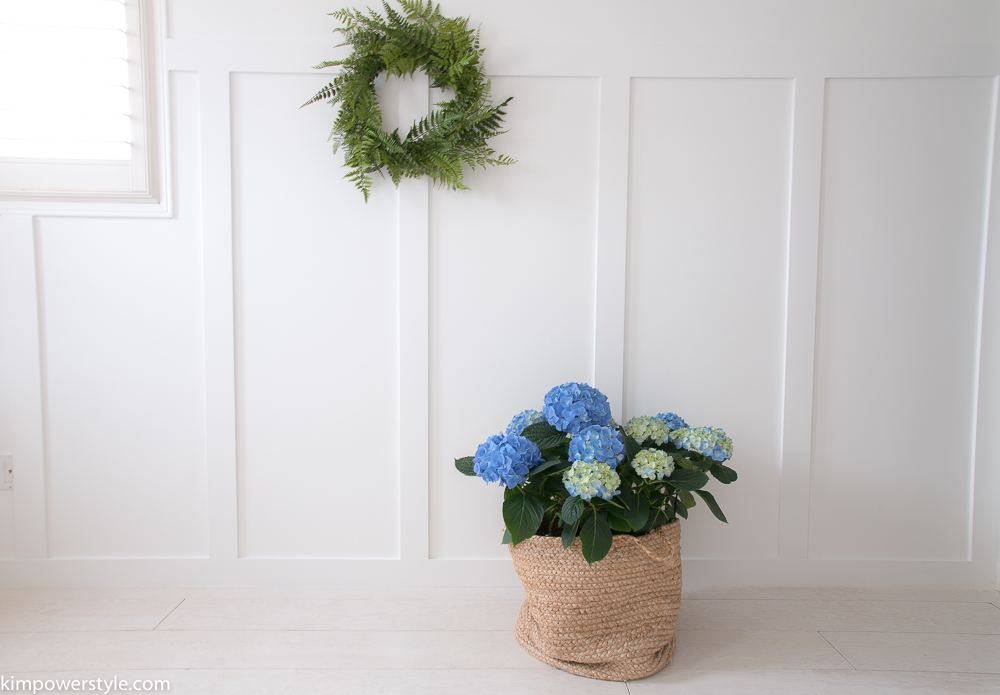
You can’t have a spring tour without flowers in a market bag! Lol. Once spring finally comes, our little city market square has a great farmer’s market every weekend and nothing feels better than getting some spring blooms along with some fresh baked goods and carrying them around in your market bag!

Spring Home Tour

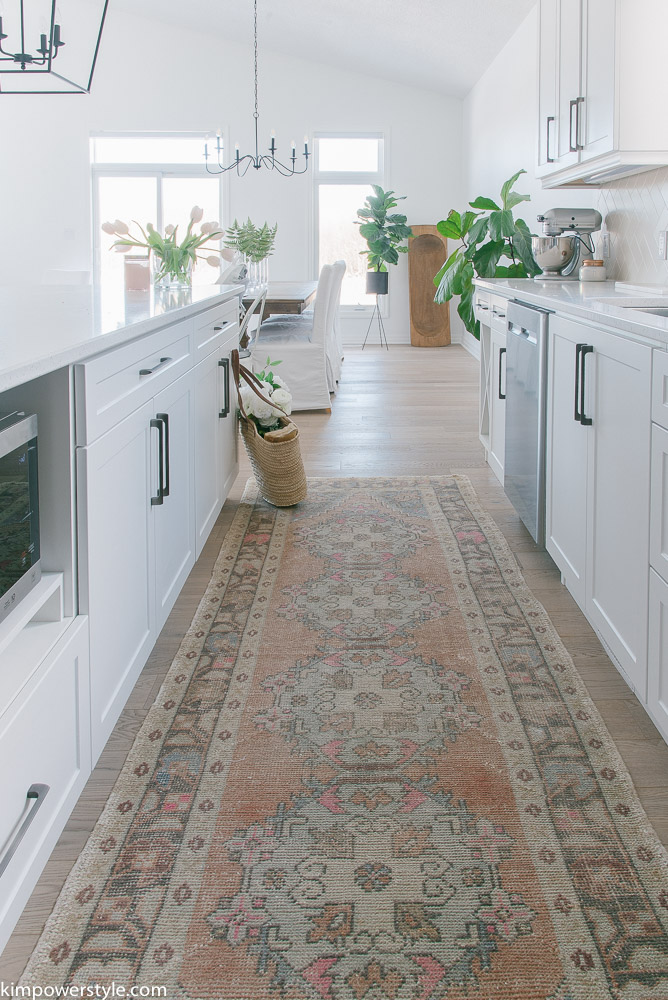
I couldn’t wait to get a vintage runner for this kitchen! The colours are amazing and I love how this eighty year old rug has managed to keep it’s hits of hot pink colour. It totally makes the kitchen!

Spring Tour in our New Home

Spring Tour in our New Home

Spring Tour in our New Home

Spring Tour in our New Home

Spring Home Tour

I hope you’ve enjoyed the Spring Tour in our new home. We’re pretty excited to share more of it in the coming days!

If you’ve been following this Seasonal Simplicity Spring Tour since Monday then you’re at the end of the tour with me. If not, you can start at the beginning of this tour with Krista at The Happy Housie

Blessings,

Kim

Also sharing today…

Thursday

Home Made Lovely // So Much Better With Age // Maison de Cinq
Craftberry Bush // Rooms FOR Rent

Maison de Pax // Zevy Joy // Place of My Taste // Deeply Southern Home // Kim Power Style


And sharing the rest of the week…

Monday


The Happy Housie // The Turquoise Home
Amber Tysl // Inspiration for Moms // Lemon Thistle

Southern State of Mind // Modern Glam
Taryn Whiteaker // A Burst of Beautiful // My Sweet Savannah

Tuesday

Jenna Kate at Home // Sincerely, Marie Designs // Town and Country Living
A Pretty Life // Hallstrom Home

House by Hoff // Tauni Everett // The DIY Mommy // Clean & Scentsible // Rambling Renovators

Wednesday

Shades of Blue Interiors // Finding Silver Pennies // Life is a Party // Bless’er House

Summer Adams// Tatertots and Jello // Paint Me Pink // This is Our Bliss


Filed Under: Seasonal tours, spring

Spring Decor Update in the Living Room

5:00 am by kim 11 Comments

Yay for Spring! Today I’m joining together with my favourite Canadian bloggers for our annual Spring Home Tour hosted by Shannon from Home Made Lovely (formerly AKA Design) and Christina from The DIY Mommy. I’ll be sharing my Spring Decor Update in the Living Room and you can follow all the links below to see what everyone else has been sharing for spring, all week long. So grab a beverage, sit back and get ready for tons of  spring decor ideas and inspiration!

Spring Decor in the Living Room

If you’ve read my previous post on my winter decor you’ll know I started with a neutral pallet in this room. I began by removing the robin’s egg blue pillows and replaced them with these pale pink pillows. Nothing says spring like soft pastels and these pale pink pillows fit the bill. I found the little pastel water colour pillow that goes perfectly with the pink and was just the right amount of colour.

I took out the winter white throws and added this pretty pink throw.  Some pretty pink roses and tulips along with the faux green wreaths and we’ve brought in spring!

Spring Decor in the Living Room

Spring Decor in the Living Room

Spring Decor in the Living Room

You can take a closer look at my spring brunch tablescape here and see my previous spring decor home tours here and here.

Spring Decor in the Living Room

Spring Decor in the Living Room

These voluspa candles are my favourites for spring. The Amaranth & Jasmine scent is like spring in a can!

Spring Decor in the Living Room

Spring Decor in the Living Room

Spring Decor Update in the Living Room

Spring Decor in the Living Room

Shop The Post

[show_shopthepost_widget id=”3054282″]

Spring Decor in the Living Room

Spring Decor update in the Living Room

Yesterday we saw the first robin of the season heralding that spring is finally here.. whether the weather wants to cooperate or not, Lol!

I hope you enjoyed my spring update in the living room. For more spring decor inspiration from my friends, be sure to check out the links below.

Blessings,

Kim

Canadian Blogger Spring Home Tour 2018

Monday

Home Made Lovely

A Pretty Life

The Happy Housie

Life is a Party

This Mama’s Dance

Tuesday

So Much Better With Age

The Dreamhouse Project

The Learner Observer

A Burst of Beautiful

Woman in Real Life

Wednesday

Clean and Scentsible

Paper Rose

Harbour Breeze Home

Emmett’s ABCs

Thursday

The DIY Mommy

Mint Candy Designs

Rambling Renovators

The Creek Line House

PMQ for two

Friday

Kim Power Style

Northern Style Exposure

Vinyet Etc

Amidst The Chaos

One House Two Barns

Filed Under: Seasonal tours, spring

Simple Spring Brunch Tablescape

5:00 am by kim 16 Comments

A Simple Spring Brunch Tablescape

Hello everyone and welcome to the spring edition of the Joyful Home Tour hosted by Marci from Lemons to Lovelys. I’ve joined together with some friends and fellow bloggers to open our homes with some great spring decor.  You can follow along with the rest of the bloggers at the end of this post.

                                 My motto is to do things simply, creatively and beautifully. So join me as I share how I created a simple, creative and beautiful spring brunch tablescape…enjoy.

A simple and easy spring tablescape

It’s been such a long, cold and seemingly never-ending  winter this year and a tough one on our family. The sooner spring can come the better! Just today I spotted our very first robin which is a definite sign around here that spring is on it’s way!

Along with robins, there’s nothing like pretty pastels to help usher in the spring season and these sweet  floral pastel cloth napkins were the jumping off point for this simple little tablescape.

A simple and easy spring tablescape

I used a purple throw as a table runner to tie in the purple of the napkins and the tulips. The greenery of the wreath and faux eucalyptus were there from my winter decor and works well in any season especially spring! I’ve used a combination of fresh and faux florals along with greenery here. I think they bring the spring vibe and make the table!

A simple spring brunch tablescape

My pink plates and blue pastel bowls fit in nicely with the spring theme and go well with the napkins. You can use white or neutral dishes if thats what you have on hand though.

A simple and easy spring tablescape

A nice white jug to hold an easy make ahead gazpacho soup, you can use glasses or bowls to hold this springy soup and a quick and easy store bought quiche would go well together and make a great little spring brunch to share with friends and family! (Soup Recipe coming.)

A simple spring tablescape. #spring #tablescape

Shop The Look

[show_shopthepost_widget id=”3054361″]

A simple and easy spring tablescape

You can see my previous Spring Tours here  and here.

A simple and easy spring tablescape

Thanks so much for joining me today! I’ll be sharing a great gazpacho recipe with you next week and stay tuned for more spring decor on Friday as I join some more fellow bloggers!

I hope you’ll go and check out my friends in the links below. There’s so much more spring decor inspiration.

Blessings,

Kim


Spring Decor www.lemonstolovelys.com

Kim Power Style

Farmhouse On Boone

TIDBITS

The Porchlight Cottage

A House With Books

Lemons to Lovelys

Filed Under: Seasonal tours, spring

One Room Challenge™ | Spring 2017 | Week 6 The Reveal

5:04 pm by kim 44 Comments

The One Room Challenge Final Reveal

Well the day has finally arrived for the One Room Challenge™  final reveal! It’s been a long, crazy  and busy six weeks for so many of us and now for the pay off! I’ve been working on making over an unused and dysfunctional office/workroom space into a  Modern Coastal Farmhouse inspired room that’s both functional and pretty. It’s been so much fun following the designers and other participants as they make over rooms in their homes all in six weeks! If you would like to see where we started  from and how we got to the final reveal,  you can follow along with our previous weeks here:

Week 1 | Week 2 | Week 3 | Week 4 | Week 5

And to give you a little reminder of what we started with:

Before:

ORC Before Pic

ORC Before Pic

ORC before

After:

One Room Challenge Spring 2017 Final Reveal

I love it! This space will function as both an office and a workroom for me. It’s a small 9’x12′ room so I wanted it to be very functional without appearing cluttered. I removed the shelving units because I knew from past history that they can become a “catch all” for me. I replaced it with this gorgeous modern sideboard from Structube that is clean and sleek and contains so much storage space. The sideboard will hold everything to do with the “office” portion of the room. Everything is neatly hidden away and no clutter means no stress for me!

And did you see that awesome light fixture? I fell for this fixture as soon as I saw it in the Westelm showroom this spring. I love the modern look of it mixed in with some of the wooden pieces in the room. It adds the right amount of tension for my modern coastal farmhouse vibe I was going for.

ORC 2017 The Final Reveal

The top of the sideboard allows me a surface to add some pretty accessories that will change with the seasons. All the lovely accessories here and on my desk (except for the wooden tray and anthropologie candles) are from Homesense!

ORC 2017 The Final Reveal

If you follow me on Instagram, you know how much I love decorating with flowers and these faux hydrangeas from Afloral look so real! They’ll definitely see a lot of use.

One Room Challenge 2017 The Final Reveal

ORC 2017 The Final Reveal

One Room Challenge Spring 2017 Final Reveal

I already had this brass mirror hanging in my dining room but I knew it had to come into this room to play off the light fixture and other brassy accents. It really goes so well in here!

One Room Challenge Spring 2017 Final Reveal

Every room needs some texture and something to hold extra pillows and throws and these baskets from Canadian Tire’s CANVAS collection do the job wonderfully!

The pillow in the back is a diy pillow I made from a scatter rug, you can find the tutorial for that here.

One Room Challenge 2017 The Final Reveal

One Room Challenge 2017 The Final Reveal

One Room Challenge 2017 The Final Reveal

One Room Challenge 2017 The Final Reveal

We added this barn door because previously there was so much “junk” in our little walk-in closet that there was no room to close the door! I’ve always wanted a barn door and this was the perfect place for one. It really does help with allowing more usable floor space in the closet. The closet will hold  everything to do with the “workroom” function of the space, such as my sewing machine, fabric, craft supplies etc.

One Room Challenge Spring 2017 Final Reveal

We still hadn’t figured out what to do for wall treatments until the first week of the challenge! We then decided on board and batten and it was the best decision. I knew I wanted something to go above it to add some colour and pattern. For budget’s sake we decided on this gorgeous stencil called the Floral Fireworks Allover Stencil by Royal Design Studio. I stencilled it using “liberty blue” by Fusion Mineral Paint and it turned out beautifully, you can find the stencilling tutorial here.

One Room Challenge Spring 2017 Final Reveal

We had originally picked another chair for this space but it just wasn’t the right colour and not the most comfy for sitting on for any length of time. I had wanted an office chair with wheels, but couldn’t find one that was both pretty and comfortable. We decided on one we already had and it’s suitable for now until I find that elusive “perfect desk chair” someday.

one room challenge final reveal

One Room Challenge 2017 The Final Reveal

ORC 2017 The Final Reveal

This rug from Rugs USA, is one of my favourite pieces in the room. It is so pretty and soft to walk on and goes so well with my coastal theme too.  I think I want one for my bedroom now!

You’ll also notice that I switched out the above dark indigo cushion for a lighter one. The indigo one was made by yours truly!

One Room Challenge 2017 The Final Reveal

Modern Coastal Farmhouse Office Reveal

I’m so happy with my new office/workroom! It ‘s such a bright, airy and functional space now. I know I’ll get so much use out of it, it’s too pretty not to want to sit in there! Stay tuned for a post on what’s in that sideboard and how I organized the closet coming later. Thanks so much for joining me on my first One Room Challenge journey and don’t forget to catch up on all the other reveals!

Thanks to Linda of Calling it home for creating and hosting this biannual design challenge. It was a great first time experience for us and you know I’m already deciding which room to do over in October. 😉

And a huge thank you to all our amazing  Sponsors who made this project possible! I felt honoured to partner with each of these great brands and businesses and share their wonderful products.

(This post was sponsored by the following sponsors. All product given, was chosen by me and all photographs, thoughts and opinions are my own.)

ORC Sponsors

Source List

  • Light Fixture: “Mobile Chandelier” in Antique Brass, West Elm
  • Rug: “Aerial Decorative Plumes” in blue 5×8 Rugs USA
  • Desk: Homesense
  • Sideboard: “Moby” in white, Structube
  • Mirror: Homesense
  • All Decorative Accessories on Sideboard and desk: Homesense
  • Large Baskets: “Nola” Canvas at Canadian Tire
  • Chair: Henriksdal, Ikea
  • Hydrangeas: Faux Hydrangea, Afloral.com
  • Fiddle leaf fig: Faux, Homesense
  • Turqoise Vase: Homesense
  • Stencil: “Floral Fireworks Allover Stencil 21″x23” by Royal Design Studios Stencil
  • Paint for Stencil: Fusion Mineral Paint in “Liberty Blue”
  • Cushions: The grey neutral one in the basket and the paisley one on chair: Homesense
  • Cushions: Dark blue indigo and the one in the back of the basket: KimPowerStyle
  • Gold file holder: Homesense

Filed Under: diy, Home decor, Makeovers, One Room Challenge™, spring, Uncategorised

One Room Challenge™ Spring 2017 | Week 5 | Our Modern Coastal Farmhouse Office

10:53 pm by kim 29 Comments

One Room Challenge | Week 5

Hello again everyone,  It’s hard to believe that it’s week 5 already and that next week is the final reveal! I’m not sure where the time has gone but this challenge has been fun, crazy and scary all at the same time.  This week we’ve been busy  trying to pull everything together for our Modern Coastal Farmhouse Office/Workroom  makeover so that we’ll be able  to style and photograph it on the weekend. If you’d like to get caught up from the previous four weeks:

Week 1: The Plan

Week 2: Board and Batten

Week 3: Stencilling Tutorial

Week 4: The Barn Door

This was the mood board I had created and helped to guide me in my plans of the makeover:

Mood board for ORC 2017

This post contain affiliate links, all photography thoughts and opinions are my own.

There have been some additions and changes to our plans since I first created this board so let’s get caught up !When I first created the board I didn’t have any idea what I was going to do with the walls. After some thought I decided to go ahead with board and batten and was so pleased with the results. You may just see a little more of that being put up in another room soon! We also stencilled  the upper part of the wall above the board and batten using a gorgeous stencil called the “Floral Fireworks allover stencil” fromRoyal Design Studios. I used  my favourite Fusion Mineral Paint in Liberty Blue. The lovely water colour effect  adds to the look and feel we were going for.

How to stencil a wall. One Room Challenge

(Week 2 and 3 saw us adding board and batten along with stencilling)

Another element we added to the room that was not on the mood board was the addition of our barn door. The barn door was added to help with the function of the closet as well as my dream to put one somewhere in my house! I simply love it! I had spray painted some of the hardware along with the handle to mimic the look of brass that would go along with the light fixture we were adding. It wasn’t brassy enough for me so I overlaid it with a couple of coats of Fusion Mineral Paint in Pale gold and it looks so much richer now and matches the brass light fixture perfectly.

A modern barn door with brass hardware

Brass painted barn door handle

(Week 4 had us adding a barn door)

So this is where we are as of today! You’ll notice that we’ve changed the chair from the one in our mood board. I’m still not sure about this one either. I’d love an office chair with wheels on the bottom but have yet to find one that is pretty to look at and comfortable too. Stay tuned to see how that saga plays out!

We have this gorgeous rug from rugsusa, desk, mirror, chair and pretty faux hydrangeas from Afloral in the room right now. My light fixture from Westelm came in on Monday and I am smitten with it! I’ll wait until next week to share that beauty! I’m still waiting for our sideboard storage unit that’s to be picked up from the store tomorrow (fingers crossed it’s arrived from another province, Ack!) I also have two deliveries scheduled for tomorrow which hold all the accessories for the room! Oh yes, I’m also waiting for delivery of a couple of cushions to add to the seating and hoping they’ll be here on time too…Phew!

I’ve learned a lot of what not to do here on my first challenge. The next time (If I survive this one) I’ll have a  better idea of how things should work! 🙂

One room challenge spring 2017 Modern Coastal Farmhouse Office

So that’s a rundown of where we started and where we are as of today. There is still so much to do but I’m excited to see all our plans come together and praying for sunny skies to photograph it all! Don’t forget to come back next week to see the final reveal. You may want to subscribe to get my posts sent directly to your inbox. You can also follow along on Instagram for more pictures and progress stories. Have a great week!

For more great design inspiration take a look at the designers and participants link up  here.

One Room Challenge

Filed Under: diy, Home decor, Makeovers, One Room Challenge™, spring

Barn Door | Week 4 | One Room Challenge™ Spring 2017

4:28 pm by kim 30 Comments

Modern Barn Door
One Room Challenge™ Week 4

One Room Challenge

Welcome to week 4 of the One Room Challenge™ hosted by Linda from Calling it Home, where designers and bloggers makeover a room in their home in 6 weeks. For those of you just tuning in, you can go back and follow the progress by reading Week 1, Week 2, and Week 3. This week I’ll be sharing this Modern Barn Door we’ve added to the space. We had planned on building our own door from plywood and molding, but when we factored in the time and cost, we decided that buying this ready-made door made more sense for us.

Modern Barn Door with brass hardware.

I had wanted a barn door for a really long time but I have a smaller home and a more open concept main floor. Meaning, there was no room anywhere for a barn door except in this room. When we were deciding on how to make this room more functional, we realized there was so much junk in our tiny walk in closet that we couldn’t even shut the closet door! However, we had to utilize as much floor space as possible in this closet, so a barn door was just what was needed! You can use all the floor space without having to worry about a door being swung open or shut. It was the  perfect solution and I got my dream of having a barn door!

If you remember my mood board, I had wanted this room to take on a Modern Coastal Farmhouse vibe:

Mood board for ORC 2017

So that meant along with some cozy pieces and texture, it would also have some clean lines and brass finishes. When we decided on the barn door, I wanted it to have the same aesthetic. Instead of going with the black hardware that I had always thought of having on a barn door, I chose this clean steel hardware. I had wanted hardware that incorporated  brass, but that was difficult to find, so I came up with my own solution.

A Modern Barndoor with touches of brass

The brass hardware is to tie in with the brass mirror and light fixture that are coming. I spray painted the two pieces that attach the door to the track, a soft gold using Rustoleum Metallic in Pure Gold before we hung the door.

A Modern Barn door with brass hardware.

I also found this clean lined and modern door handle from the Home Depot and spray painted it in the same finish. It really tied it all together. The door is painted Benjamin Moore’s “Simply White” along with the walls.

A modern barn door with brass hardware

Modern barn door with brass hardware

Our old door is still attached in there! Lol. The closet will be cleaned out and the old door removed this week. You may have noticed that I didn’t leave the space by the ceiling empty, but brought the stencil as close to the ceiling as possible. I didn’t mind it in the room at the time, but after seeing it on the blog last week, it looked too unfinished to me so I filled it in this week. I’m still loving that watercolour look!

A modern barn door with brass hardware

Thanks for stopping by to check out the progress. It’s hard to make these update posts exciting when you’re only showing little bits at a time, I know.  Stay tuned though, only one more progress post and then the final reveal! Don’t forget to follow along with the other participants here!

Blessings,

Kim

Filed Under: diy, Home decor, Makeovers, One Room Challenge™, spring

Wall Stencilling How-To | Week 3 | One Room Challenge Spring 2017

2:31 pm by kim 58 Comments

Wall Stencilling How-To

How to stencil a wall. One Room Challenge

One Room Challenge

Well it’s week 3 of the One Room Challenge and oh how the weeks have flown by! This week I’ve added some colour and pattern above the board and batten by using a stencil. I’ll share a little wall stencilling how-to but first let’s look at where we’re going. If you’re just tuning in now you can follow the progress by reading week 1 and week 2.

Here is the mood/inspiration board for the room:

Mood board for ORC 2017

If you notice, the board and batten as well as my stencil treatment above it aren’t on my mood board. I still hadn’t decided at the time what kind of a treatment to add. I knew that I wanted a modern coastal farmhouse look thats much in keeping with the rest of my home right now. Once I decided on the board and batten I knew I wanted to do something above it. Wallpaper can be pretty pricey even for a relatively small space so I decided on stencilling. There are so many gorgeous patterns out there now and when you add the colour factor, the possibilities are endless! I decided to go with Royal Design Studios Stencils for my stencil and chose the Floral Fireworks allover stencil 21″x 23″. I had the paint colour already and had been waiting for a chance to use it. I used the Fusion Mineral Paint in “Liberty Blue”.

How to Stencil a Wall to look like Wallpaper

How to stencil a wall. One Room Challenge

I have to say that I love the way it turned out! I’m still deciding on wether or not to finish the very top as I’m kind of liking the somewhat scalloped looking edge. I guess you’ll find out on the final reveal! 😉

Wall Stencilling How-To

Let’s start with what you’ll need:

How to stencil a wall. One Room Challenge

  • You’ll need a stencil of your choice
  • A small roller and/or a stencilling brush
  • Good quality painter’s tape
  • Lot’s of paper towel
  • A small paint tray or a styrofoam plate will do
  • A level
  • Measuring tape
  • Spray on adhesive for the back of your stencil (optional)

How to stencil a wall. One Room Challenge

1.Using your measuring tape, find the centre of the wall. Affix your stencil to the top and centre of your wall. Check to make sure that your stencil is level.

How to stencil a wall. One Room Challenge

2. Load up your roller/brush with paint , enough to cover the entire thing evenly.

3. Remove most of the paint by off loading it onto some paper towel. This is important as you don’t want excess paint to bleed underneath the stencil. Less is better when it comes to stencilling!

How to stencil a wall. One Room Challenge

4. Begin to roll out over your stencil. You can lift up the corner of the stencil to make sure you’re not applying too  much paint and bleeding through.

5. Move your stencil over to the the next position. Your stencil will have registration marks that will guide you to the correct placement. I found that the paint was dry enough to move onto the next placement without disturbing the previous paint.

How to stencil a wall. One Room Challenge

6. Once you come to a corner or edge. Apply your painters tape to protect the edge and the adjacent corner.

How to stencil a wall. One Room Challenge

7. Place the tape on the side of your stencil that you will be stencilling. In this case the left of the corner. Don’t tape the right side down as this will need to be flexible. (In the above pic. The right side is taped just to hold the stencil up while I photographed the pic, otherwise that side should not be taped)  Using your roller to paint into the corner by pressing into it.

How to stencil a wall. One Room Challenge

8. When doing edges and corners, you can use your roller to press into the corner/edge and  then use your fingers to press your stencil down into the corner/edge. You can continue to roll at this point or use a little stencil brush to get right into the edge. I just continued on with my roller.

How to stencil a wall. One Room Challenge

9. Continue to go around the room until you have finished. You may have to stop and clean the excess paint buildup from your stencil. I did this once and placed it in my bathtub to clean.

Royal Designs Studio has some great how-to videos and instructions on their site that I would encourage you to watch if you’re thinking of trying this out.

If you look at my walls there are lighter and darker areas. I actually love this as it gives the appearance of water colour. I also found that in places near the corners and edges where It seemed that I made some major “out of the lines” mistakes, the pattern was very forgiving. If there are areas that you feel you need to address, you can simply get a little brush and use the base colour to help clean up the lines. I thought I was going to have to do a lot of cleaning up of the lines but it seems to blend in and has just become part of the pattern.

How to stencil a wall. One Room Challenge

So here is a little peek into my Modern Coastal Farmhouse Office/Workroom. If you look to the right of the photo, you’ll see a peek of something else we’ve been working on! 🙂 Thanks so much for joining me on my first journey with the One Room Challenge and stay tuned for more projects on the way! You can follow along with others on their journey as well right here!

(This post was done in collaboration with Royal Design Studio Stencils, all photography, thoughts and opinions are my own.)


Filed Under: diy, Home decor, Makeovers, spring, Tutorials, Uncategorised

One Room Challenge Spring 2017 | Week 2 | Board and Batten

8:54 pm by kim 46 Comments

One Room Challenge | Week 2 | Board and Batten

One Room Challenge

Welcome to week 2 of the 6 week One Room Challenge hosted by Linda of Calling it Home! Well, the madness has begun and I’ve dragged the hubby into it as well and we tackled the walls in our little…wait for it, it’s a mouthful…Modern Coastal Farmhouse Office/Workroom. Lol. This is the mood board I created to steer me in the direction I want to go with in this room:

Mood board for ORC 2017

If you remember in Week 1, I wasn’t exactly sure what kind of treatment I was going to apply to the walls. I knew I wanted it to have a coastal farmhouse vibe but done in a modern way. I love shiplap and have used it in a few rooms on the main floor, but I wanted to try something different this time. After searching through my Pinterest pins and other sites,  I finally decided on board  and batten. I thought it would add character and charm to my little room and to be honest, it looked like it required less work than I was used to with shiplap!

ORC week 2|Board and batten

I think it turned out great! It seems to fit this room perfectly and I’m wondering why I didn’t do it before. It brings such character to this little 9×12 space. I think that Jack approves too! I’ve added a bit of greenery  to break up the white a bit so you have a better idea of how the space looks.

Below are the tools hubby and I used to complete the project:

Supplies for the board and batten, Spring ORC

(This post contains affiliate links, I only share products I know and love)

We used:

  • Pre-primed already cut MDF boards that were 3.5″ wide. We removed the old baseboards and used these as not only the boards but for baseboards too. We wanted a totally even and cohesive look with all the seams matching.
  • Nail gun with 2″ nails. we didn’t use PL glue on the boards, although you can if you’d like. We just nailed  every couple of feet and didn’t even worry about hitting studs as each piece is fairly lightweight on it’s own.
  • We used a level to make sure each board was straight, so important as your own eye can fool you! You can also use a laser level to level your top boards. We have one, but it was lost in the abyss that is our garage so we did without it.
  • Caulking, to caulk all the seams, I even do the bottom where the baseboards meet the floor. I think the attention to finishing details can make the difference between a “diy” and a “professional” look.
  • We used wood filler to fill in all the nail holes and the seams.
  • A sander to sand all the wood filler off. I love my B & D mouse sander. This fella has seen a lot of action!
  • Painter’s tape. I use this when I am painting the baseboards to avoid getting any paint on the floor.
  • Lastly, you’ll need the paint of your choice.

The only difficult part of this application was figuring out the math! Our walls were all different widths so the width between boards on one wall may be different than the widths between boards on another. We did the math calculations and stood the boards against the walls to test out what would look  best. Once you’ve figured out the spacing and marked where your boards will go, the project moves on fairly quickly. We placed and nailed the baseboards down first then we put up our vertical boards and left the top horizontal ones till the last. While my husband was nailing in the boards, I was right behind him applying the caulking and wood filler, so we were a quick efficient team. As with every project, always measure twice and cut once!


Spring 2017 One Room Challenge Board and Batten

Spring 2017 ORC Board and Batten

Spring 2017 ORC Board and Batten

Spring 2017 ORC Board and Batten

Spring 2017 ORC Board and Batten

Once again, I’m so happy with how this project turned out. If this is something you’ve been thinking about doing, I would say do it! It’s a small amount of work for a huge impact and would make a great weekend project. Thanks for joining me for week two, stay tuned for week 3 as it only gets better from here. We’ve got some great projects planned. You can follow along on Instagram too as I tend to share there first. To receive our blog posts as soon as they’re posted hit the subscribe button and they will be sent straight to your inbox! And don’t forget to go visit all the other participants too, you can find them here.

Blessings,

Kim

Filed Under: diy, Home decor, Makeovers, One Room Challenge™, spring, Tutorials Tagged With: Makeover, One Room Challenge

One Room Challenge Spring 2017 | Week 1 | Our Modern Coastal Farmhouse Office/Workspace

11:26 pm by kim 17 Comments

One Room Challenge Spring 2017 | Week 1

It’s time for another project! This is my first time to join in with Linda of Calling it home who hosts this biannual room makeover series called the One Room Challenge (ORC). Twenty featured design bloggers are chosen to participate as well as 200 plus guest Participants to make over a room in six weeks!  So much decor inspiration to check out on the ORC site….And so the madness begins…

One Room Challenge

For this challenge, I’ve chosen my office/workroom to makeover. Some of you may remember a pic I posted on Instagram last spring of my office, it was light bright and pretty. (Although the pic is a little yellow, I took it with my iPhone!) But it has slowly turned into a place where my extra bits of everything go to die.

Spring office space

It was pretty and comfortable but lacked the proper design to make it a real workhorse of a workspace. I need this room to be both functional as an office, where all the home administration happens and also as a workroom, where I can sew, store fabrics, keep photography equipment and also use for blog product photos etc.

Now don’t judge… but this is what my darling little office has turned into!

BEFORE:

ORC Before Pic

BEFORE:

ORC Before Pic

Where did my pretty little office go?  A combination of too much stuff and lack of proper functional storage.  I know that most of us have that one room that holds the overflow of our decor but I want that room to be back in my basement, underneath the stairs where it belongs! To be honest we had a magazine come in a and do a video interview and tour of our home, so this room became the “catch all” of all the extra bits we weren’t using. But it’s time to get this room ship shape!  So lets go with the plan.

Mood Board

So here is my Mood Board for my Modern Coastal Farmhouse Office/Workroom.. I know , it’s a mouthful!

Mood board for ORC 2017

If you’ve been around my blog and Instagram for very long, you know this mood board  is very much in keeping with my decor style. I’m loving the white and wood with shots of blue and brass.

Plan of Action

  • Declutter everything that’s in the room, including the closet. Empty the room of everything.
  • Add some cosmetic changes to the walls that will be a surprise (because I still haven’t decided yet! lol)
  • Add a rug that will anchor the room and add some colour and texture.
  • Find a good desk chair that  is not only pretty but enable me to work in comfort.
  • Change out the lighting. Although I love the little chandelier that’s there now, It’s too small. A hit of brass will add a more modern feel to the room.
  • Change out the large mirror for a round one with an antique brass finish.
  • Find proper storage. I would like to add these sideboards so that the clutter will be behind the doors, making the room more streamlined.
  • Add some wicker baskets to help with storage and to add texture.

I’ve got so much to do, so lets get this party started! I hope you’ll drop by the blog next week to see the progress. You can also find me on Instagram and Pinterest.  I’ll need the encouragement by then!

Blessings,

Kim


Filed Under: diy, Home decor, Makeovers, spring

Spring Home Tour | Part 2

5:00 am by kim 33 Comments

Spring Home Tour

Hello again everyone and welcome to my Spring Home Tour Part 2! This week I’ve joined up with 20 Canadian bloggers for the Canadian Bloggers Spring Home Tour hosted by Shannon at AKA Design and Christina at The DIY Mommy For those of you who are new around here, my name is Kim and I’m so excited to share a little more of my home with you all!

Spring Home Tour 2017

In my previous Spring Home Tour Part 1, I shared My living room and  the breakfast nook. This week I’ll be sharing the dining room, the guest room and the Master bedroom. I try to make this as simple as possible and start with a good spring cleaning. Then I change out the winter throw pillows and bedding for some fresh spring ones. Mostly using  pieces that I already have. A few little fresh and faux flowers and  greens and my home is ready for spring!  So let’s begin the tour,  grab a cup of something comfy, sit back and enjoy!

Guest room

Spring home tour 2017

In the guest room I changed out the winter bedding and added some spring bedding  I’ve had for years in beautiful shades of blue and sage. I used the same colours for the throw pillows as well. A few fresh and faux flowers and greenery and everything looks bright, fresh and ready for spring!

Spring home tour 2017

Spring home tour 2017

The guest room is the sunniest and  brightest one in the house and a favourite of Jack who loves to lay in here. He also loves to follow me around so If I’m taking pics, he’s sure to be in them! This room is used mostly by my daughter and Son in law when they come to visit so it’s nice to keep it warm and welcoming.

Spring home tour 2017

Spring home tour 2017

I’ve white washed this dresser and then sanded it down, which I may do again. 🙂 I have a tutorial for that here.

Spring home tour 2017

Spring home tour 2017

Spring home tour 2017

Sources

Bed: Craigslist find. Originally IKEA | Sidetables: IKEA | Bedding: Homesense, Pottery Barn | Armchair: IKEA ektorp|Dresser: Garage Sale|Rug:  IKEA

Master Bedroom

Spring Home Tour

In the master, I changed out the bedding from winter to spring, added some fresh flowers and the green magnolia wreath. It’s nice to have faux florals and greens, unless you’re able to keep up with fresh ones…which I’m not! Lol. I made the blue velvet pillow and the little one in front of it was made out of a throw rug. I have a tutorial for that here. The rug is from my daughter and I thought it would look great in here. It goes so well with the blues in the bedding.

Spring Home Tour


Spring Tour 2017

Spring Tour 2017

Spring Tour 2017

Sources

Headboard: Homesense | Bedside tables: Thrift finds | Bedding: Homesense | Lumbar Pillows: By me | Rug: Homesense

Dining Room

Spring Tour 2017

In the dining room I did some spring cleaning and removed a lot of extra dishes etc. I changed out the curtains for one’s that I already had. Replacing the white fur throw pillows for these blue and white linen  ones makes such a difference! I’ve had these linen pillows for years and they’re my favourite! For the mantel I placed a couple of topiaries with some vintage brass candle holders I’ve been collecting and a brass terrarium. Some gorgeous hydrangeas and a few little faux fern stems to add some freshness and greenery.

Spring Tour 2017

Spring Tour 2017

Spring Tour 2017

Spring Tour 2017

Spring Tour 2017

Spring Tour 2017

Spring Tour 2017

Spring Tour 2017

Sources

Armoires: Pier 1 Imports | Table: Thrift find | Dining Chairs: IKEA | Wing back Chairs: Thrift finds |Light Fixture: Homesense

Thanks so much for joining me again for another Spring Tour, I hope you were able to find some inspiration for your own home, and please continue on the tour for more! All the links are below.

Blessings!

Kim

 Canadian Bloggers Spring Home Tour Collage 2017

MONDAY

AKA DESIGN – LIFE IS A PARTY – LEMON THISTLE – CLEAN AND SENSIBLE

TUESDAY

BROOKLYN BERRY DESIGNS – AMIDST THE CHAOS – THE HAPPY HOUSIE – PMQ FOR TWO – ELLIVEN STUDIO

WEDNESDAY

SATORI DESIGN FOR LIVING – SUBURBLE – SO MUCH BETTER WITH AGE – POP OF PRETTY – THIS LITTLE ESTATE

THURSDAY

THE DIY MOMMY – A PRETTY LIFE IN THE SUBURBS – WOMEN IN REAL LIFE – KIM POWER STYLE – THE LEARNER OBSERVER

FRIDAY

THE CREEKLINE HOUSE – LOVE CREATE CELEBRATE

Filed Under: Seasonal tours, spring Tagged With: Spring, spring tour

Primary Sidebar

Hi, I'm Kim Read More…

Instagram

Follow along on Instagram

Sign up and don't miss a post!

Recent Posts

  • Festive Bacon Wrapped Chestnut Holiday Appetizer
  • DIY Mantel Decorated for Christmas
  • Simple and Cozy Fall Home Tour
  • Simple Fall Tablescape

Archives

Footer

Copyright © 2023 · Foodie Pro Theme by Shay Bocks · Built on the Genesis Framework · Powered by WordPress