• Skip to primary navigation
  • Skip to main content
  • Skip to primary sidebar
  • Skip to footer

Kim Power Style

  • Home
  • Contact
  • About
  • Tutorials

Archives for November 2017

White Christmas Tour

6:00 am by kim 27 Comments

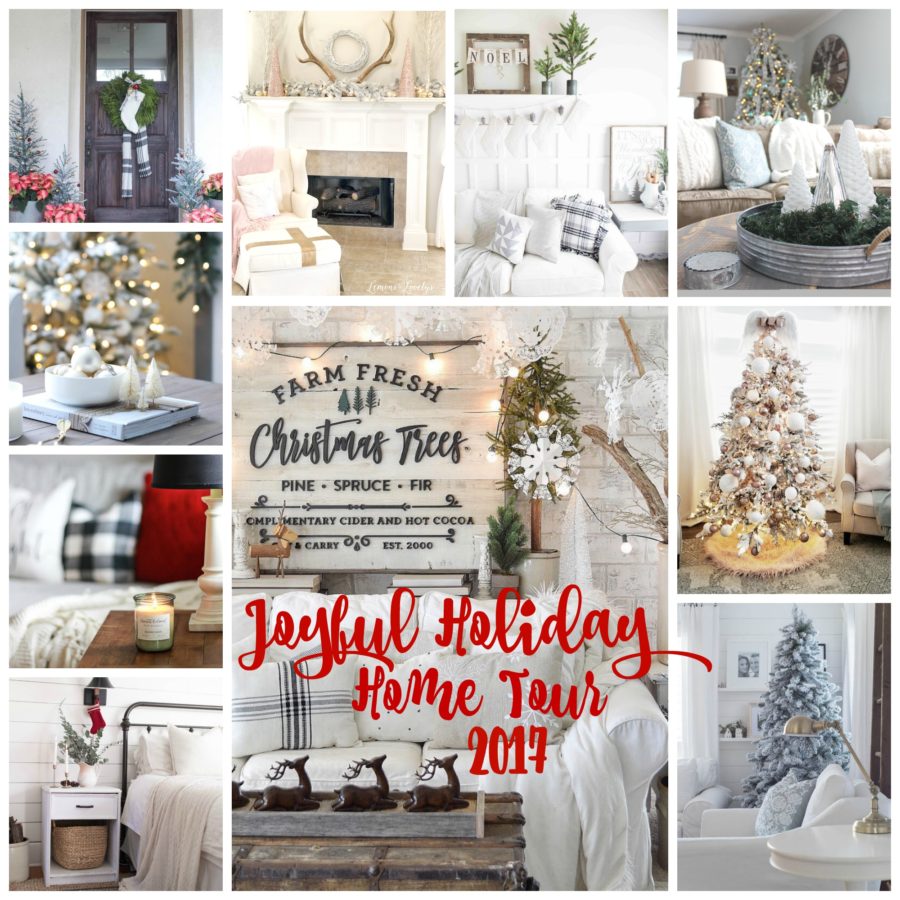
Hello Everyone and Merry Christmas! I’m joining some great ladies today for our 2nd annual Joyful Holiday Home tour. If you’ve been following along in order you’ll be coming from Marci from Lemons to Lovelies Marci has a beautiful home and is the host of our tour. I hope you’ve enjoyed all the gorgeous homes and found plenty of inspiration for the season! I’m the last stop on the tour so  grab a beverage and join me as I share my White Christmas tour!

Joyful Holiday Home Tour 2017 vertical feature image

White Christmas Tour

White Christmas Tour 2017

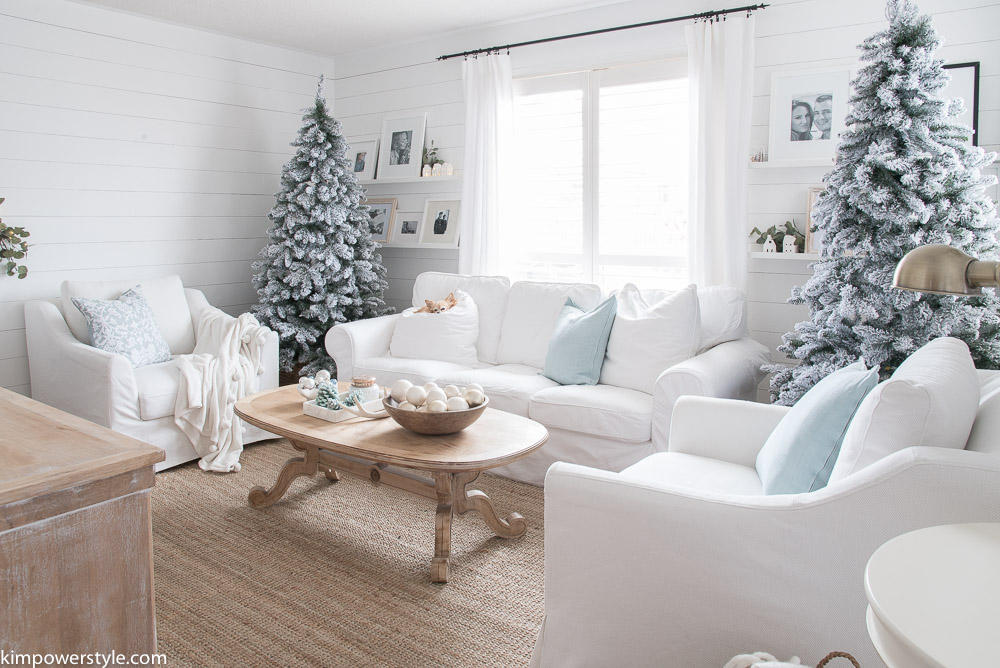
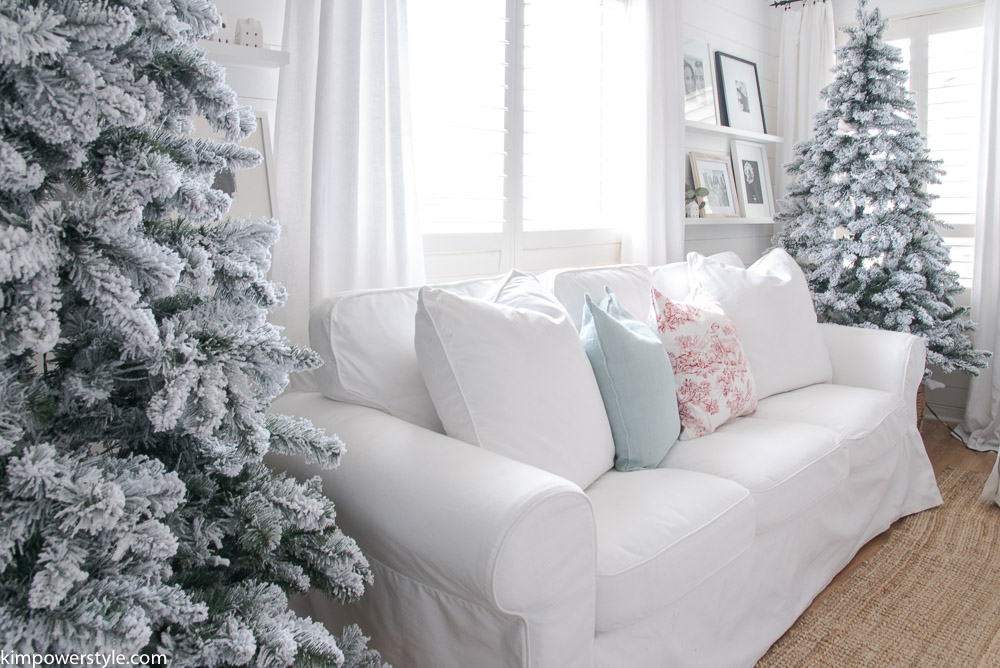
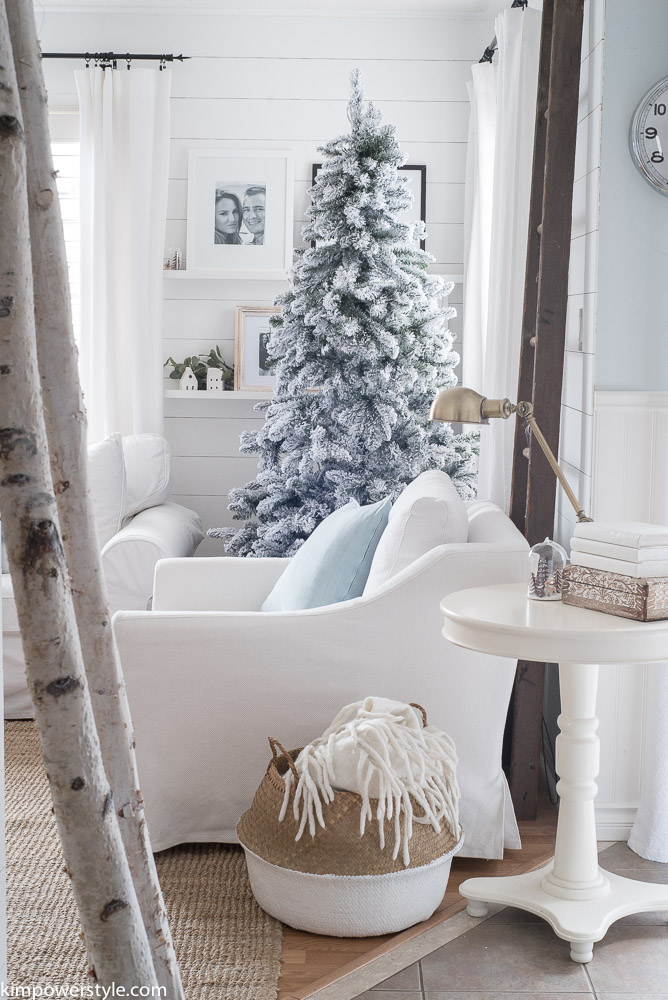
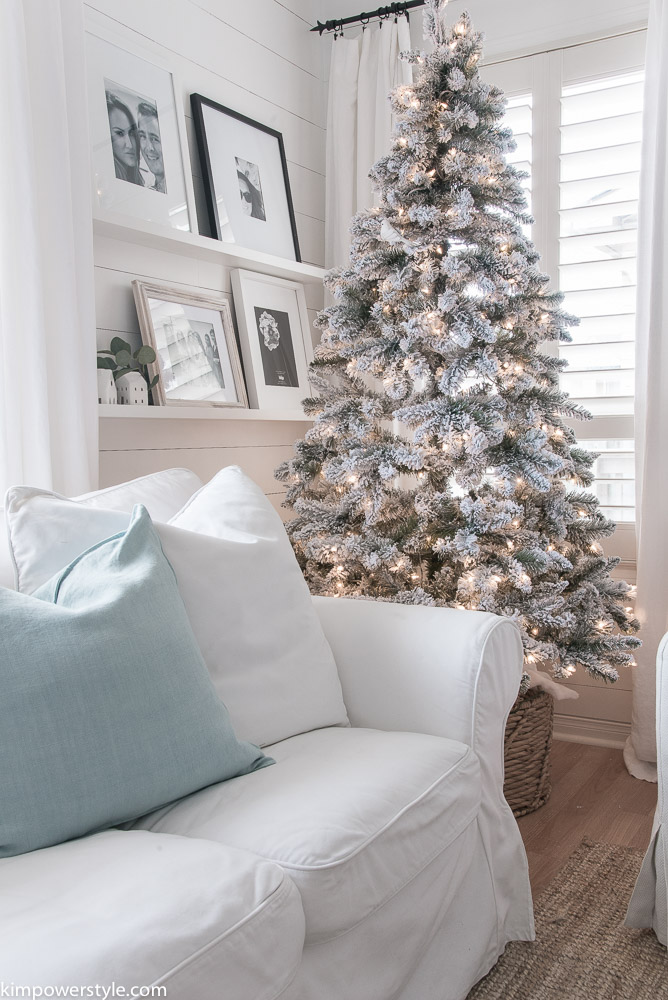
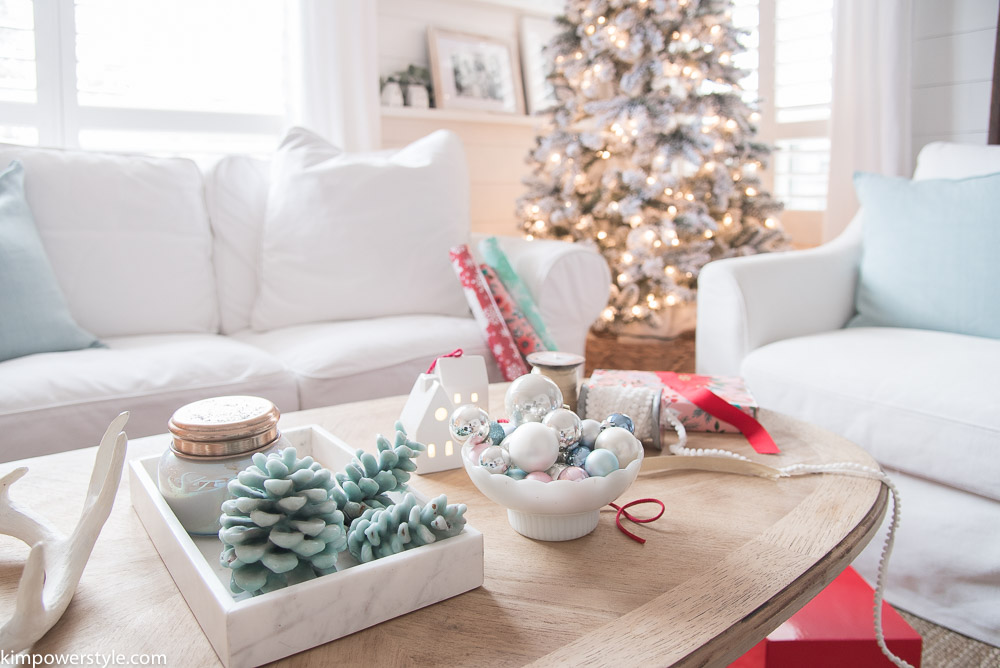
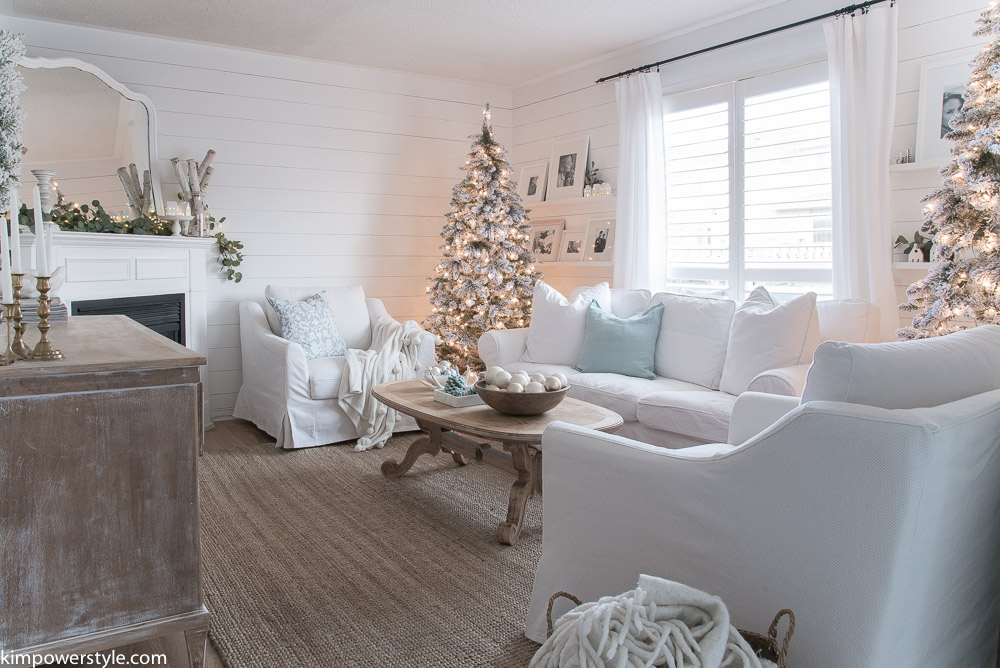
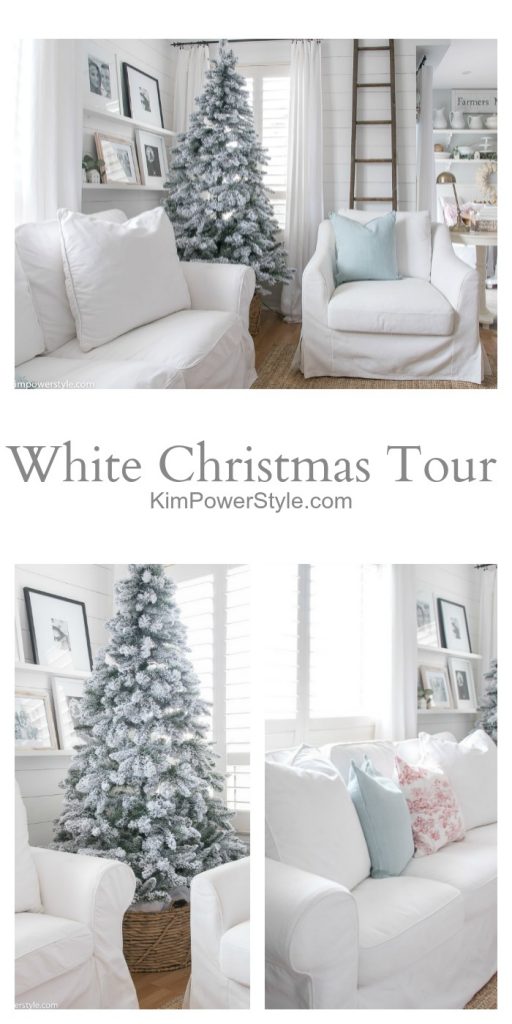
Today I’m sharing my White Christmas living room. I wanted to make decorating a little more simple this year and decided to go with my basic white. We usually have a real tree in the living room but I wanted a flocked tree and they were so pretty I got two, one on either side of the sofa. To make it even more simpler this year, I didn’t add any decor to the trees. They’re so pretty on their own!

White Christmas Tour 2017

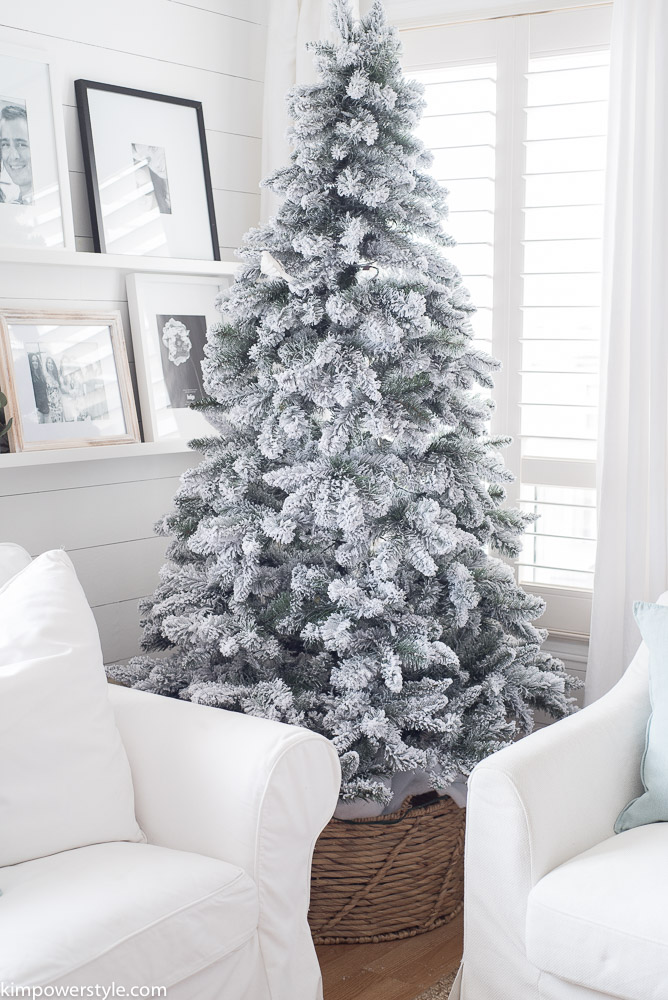
I found these great wicker baskets at Homesense and the stands fit inside them perfectly. They hide all the unattractive bits and finishes off the trees nicely.

White Christmas Tour 2017

I added a little bit of colour in a couple of the throw pillows.

White Christmas Tour 2017

White Christmas Tour 2017

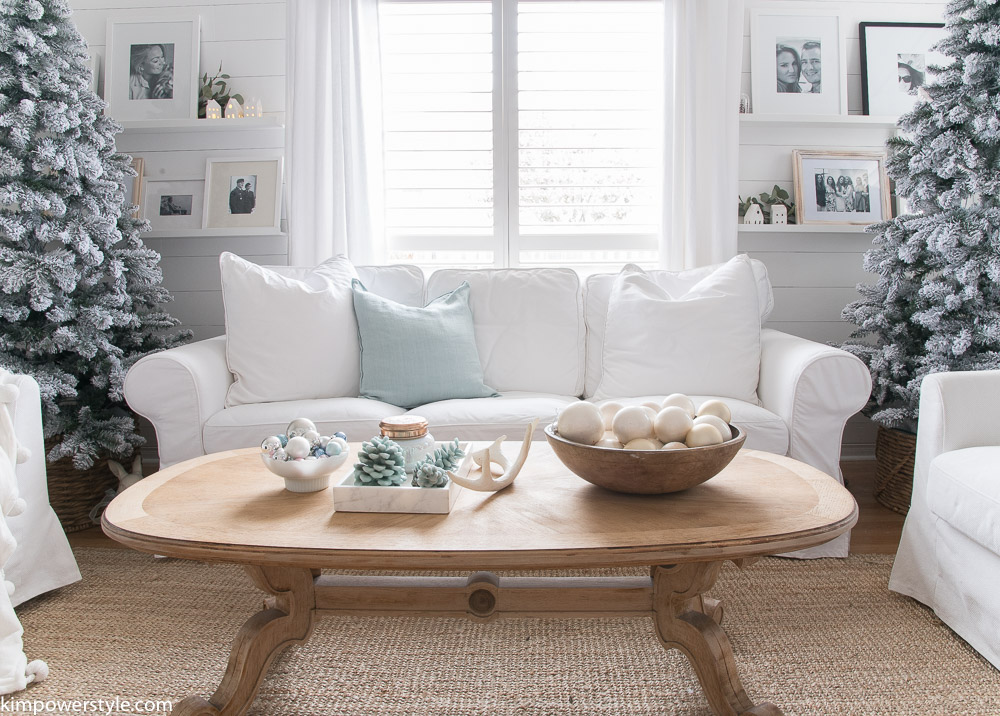
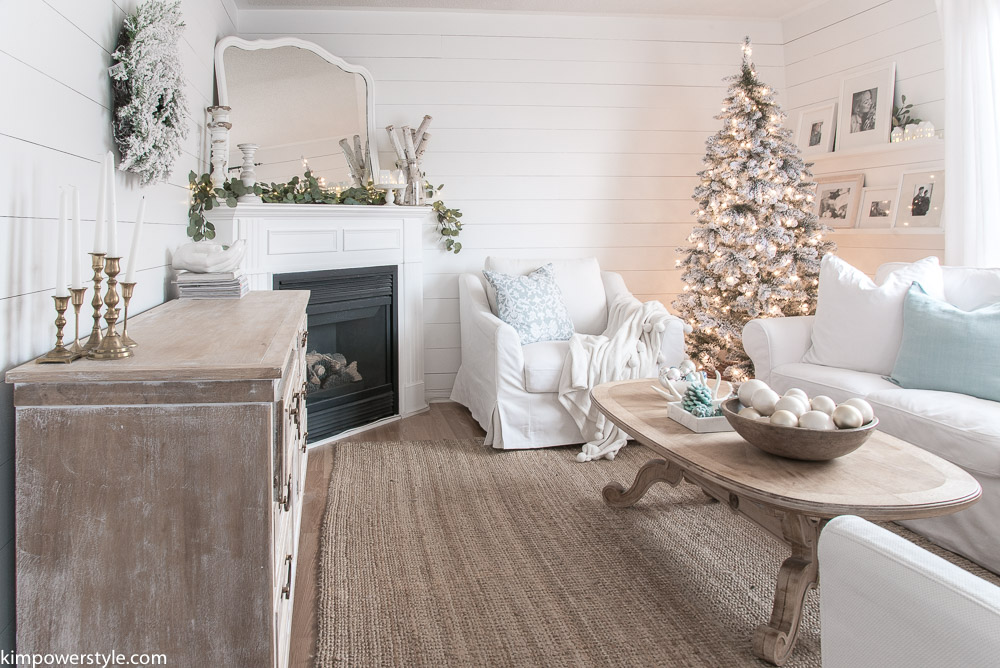
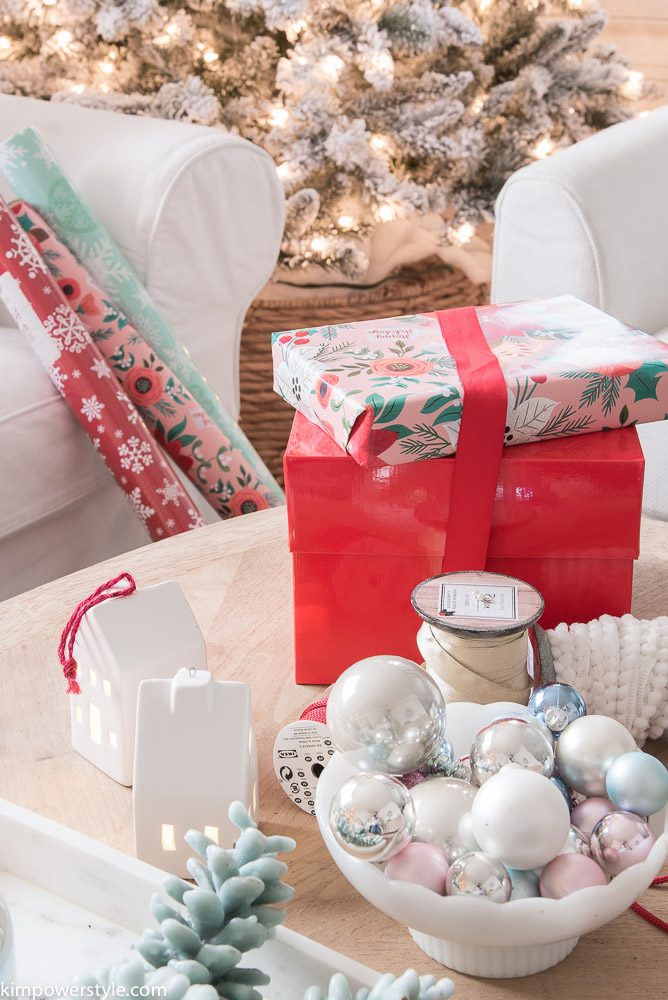
The coffee table holds some vintage bowls with my Christmas balls along with some candles and waxed pinecones that I’ve had for years. They’re scented and still smell delicious!

White Christmas Tour 2017

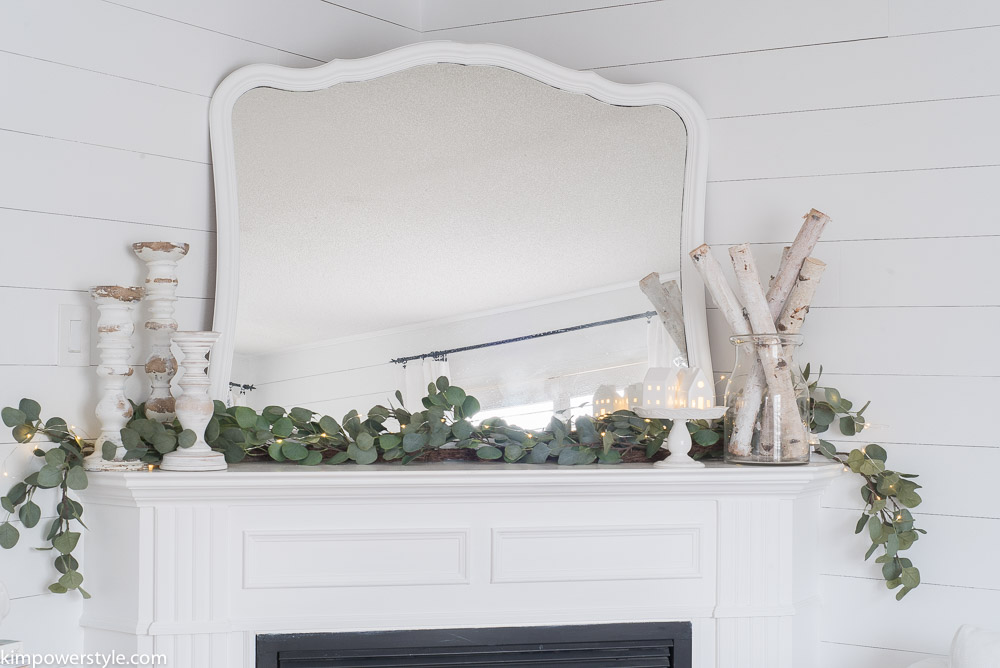
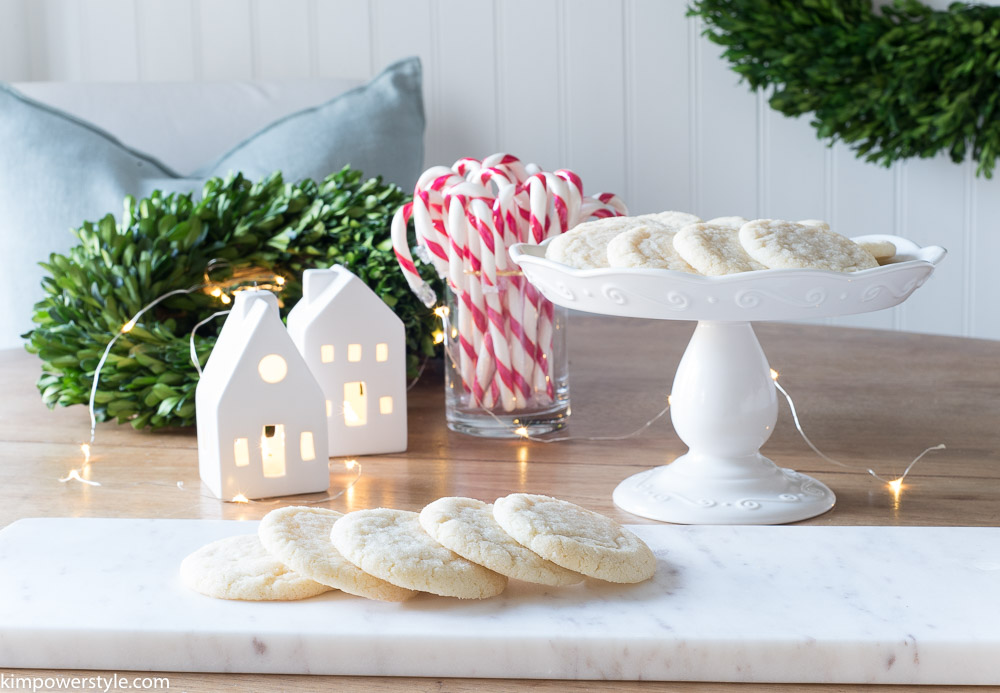
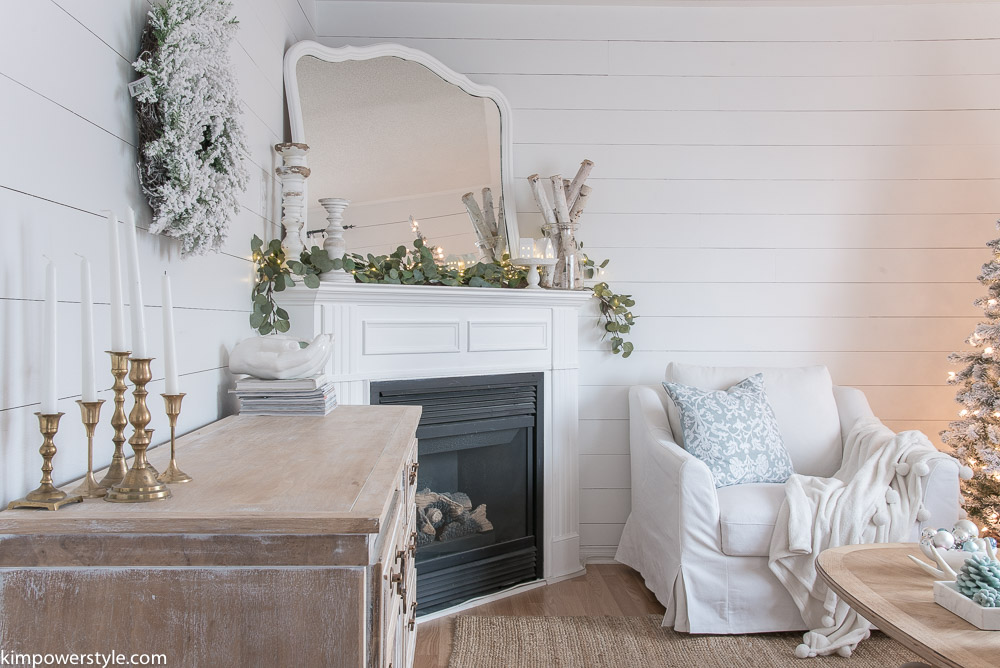
For the mantel I used a faux eucalyptus garland along with some birch logs in a vase. I found these little led porcelain houses that light up and I’m smitten with them and I’ve set them all around the house. I’ve had these wooden candle holders for years and love the way they mimic the look of the birch logs.

White Christmas Tour 2017

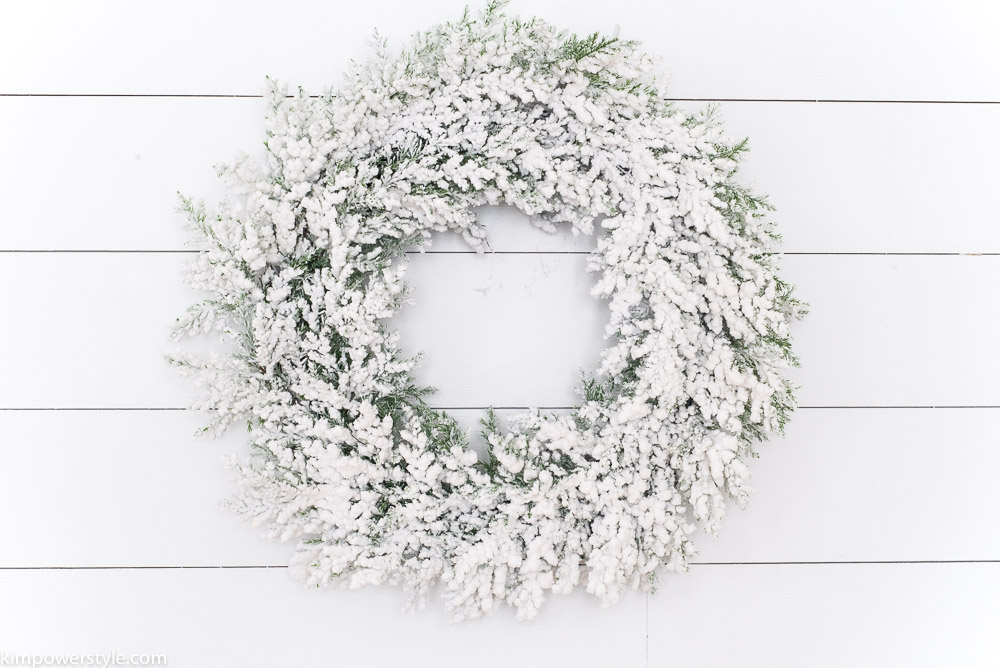
The flocked wreath is gorgeous and mirrors the look of the trees and pulls the room together creating my little version of a white Christmas!

White Christmas Tour 2017

White Christmas Tour 2017

White Christmas Tour 2017

White Christmas Tour 2017

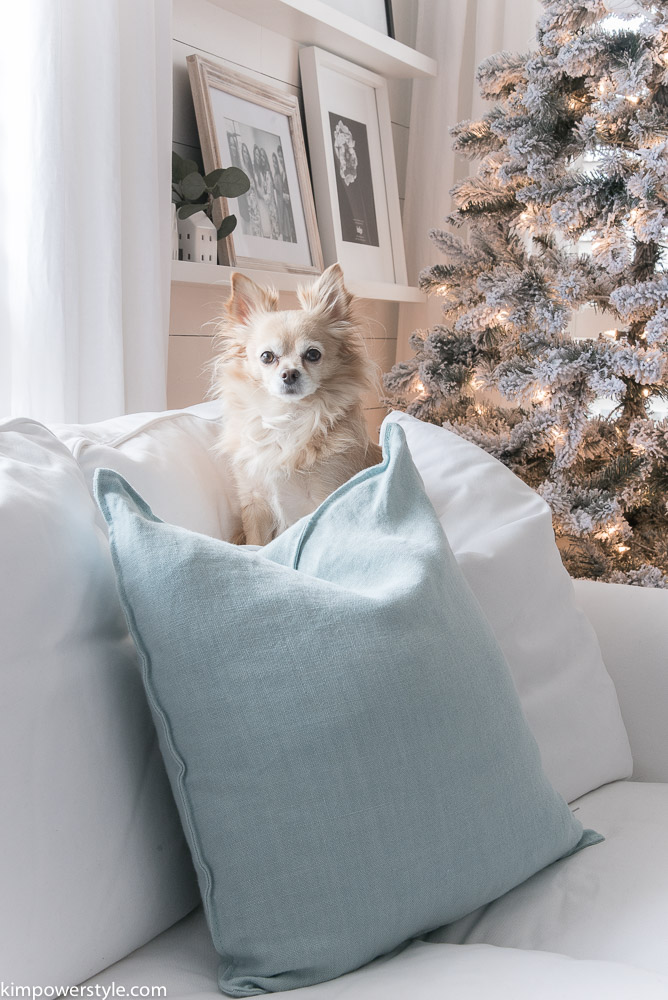
The minute you pull out a comfy throw or fluff a pillow, Butters is right there ready to nestle in and take a nap!

White Christmas Tour 2017

It’s so cozy in here with all the Christmas lights on and the candles lit in the evening. It may look a little bland to some but I’m enjoying the White Christmas look. In case you think there’s a lack of colour, don’t worry, I’ve added plenty in my wrapping paper!

White Christmas Tour 2017

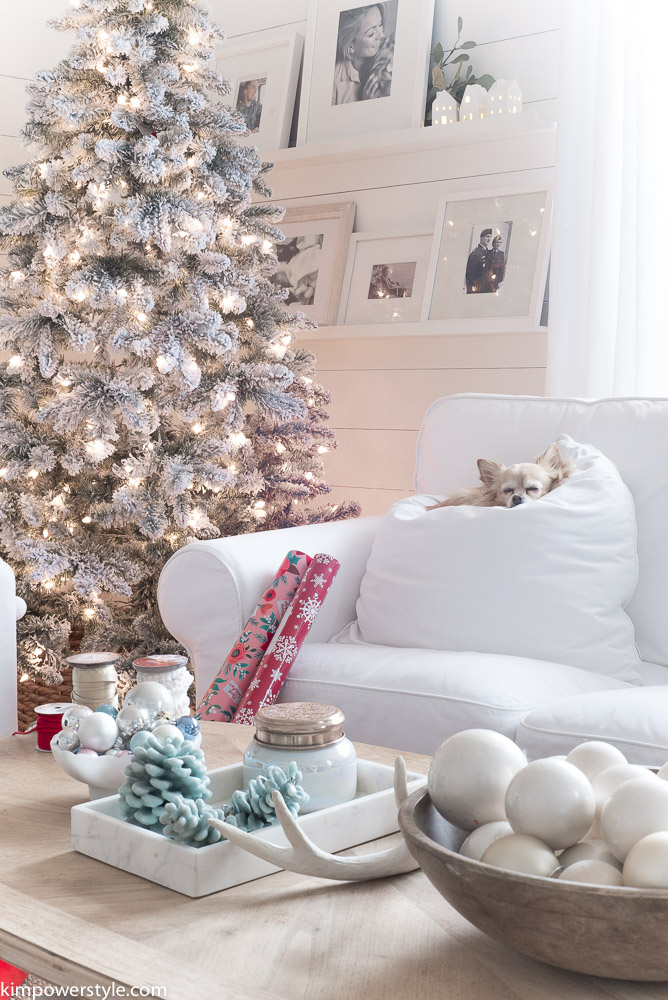
I love red at Christmas time and I’ve used it in my wrapping paper and ribbon.

White Christmas Tour 2017

White Christmas Tour 2017

White Christmas Tour 2017

White Christmas Tour 2017

[show_shopthepost_widget id=”2925755″]

White Christmas Tour 2017

White Christmas Tour 2017

I hope you’ve enjoyed this peek into our homes. I love doing this tour as it’s a chance for me to peek into some of my favourite bloggers homes sharing their Christmas decor too! In case you’ve just popped in and haven’t seen the other bloggers, there are links to all of them below!

Blessings,

Kim

Joyful Holiday Home Tour 2017

Haley – The Mountain View Cottage

Jordan- JorDecor

Rachel- The Porch Light Cottage

Natalie- My Vintage Porch

Laura- Meaningful Spaces

Stephanie- Belle Amour Blog

Kate- White Lane Decor

Lisa- Farmhouse On Boone

Marci- Lemons to Lovelys

Kim- Kim Power Style

Filed Under: Christmas, Home decor, Seasonal tours

One Room Challenge | Modern Farmhouse Bathroom | The Reveal

7:46 pm by kim 40 Comments

Hello friends and welcome to Week 7 of the One Room Challenge and the final reveal of my Modern Farmhouse bathroom! Today is the day that designers and bloggers have been working on and documenting for the last six weeks. Transforming spaces, designing, demoing, styling. For some of us It’s been 6 weeks of excitement, breakdowns, sore backs and questions as to why the heck we agreed to do it! Lol. Well today is the day we share the culmination of everything we’ve been working towards. You can follow along with my previous weeks to see the process here:

Week 1 | Week 2| Week 3 | Week 4 | Week 5| Week 6

One Room Challenge Fall 2017

One Room Challenge Modern Farmhouse Bathroom The Reveal

I decided to do the main bathroom on the second floor. It’s small and is basically used as a guest bathroom for my daughter and son in law when they come to visit. I had recently painted it white in the hopes of making it a little brighter but nothing could brighten the black tiles that covered the tub and shower enclosure. I thought it would be the perfect candidate for a reno/makeover.

So let’s see what we started with!

The Before:

Bathroom before photo

Bathroom Before Pic

One Room Challenge bathroom before photos.

You can see that black tile I was talking about!

The Final Reveal!

The After:

Modern Farmhouse Bathroom #Makeover

Modern Farmhouse Bathroom #Makeover

I basically threw everything that I love into one small room! Shiplap, white subway tiles, cement tiles, wood, linen, what’s not to love?

Modern Farmhouse Bathroom #Makeover

Modern Farmhouse Bathroom #Makeover

This black and white floor tile is the star of the show and I absolutely love it! The tile was definitely worth the splurge and using it in a smaller space made it more affordable. It may be on trend now but I didn’t mind making a trendy statement in a little space. I also used white subway tile, It’s simple, classic and you can never go wrong with that!

Modern Farmhouse Bathroom #Makeover

The Metrie Shiplap was one of the easiest projects we did in this bathroom and next to the floor tile, is my favourite thing! It’s Metrie’s Complete shiplap and comes pre-primed and pre-painted in  “Polar White”  a gorgeous clean, crisp white. I can’t tell you how beautiful this shiplap looks in person. It’s has a beautiful and uniform finish and looks like it was professionally installed. I want this all over my home now! You can see how we installed it here.

This mosaic tile is the star of the show and I absolutely love it! The tile was definitely worth the splurge and using it in a smaller space made it more affordable. It maybe on trend now but I didn't mind making a trendy statement in a little space.

I changed up the original lighting I had chosen in my vision board. I realized that we didn’t have the room to have the sconces I had planned on. The lighting I installed is part of  the Home Decorators Collection lighting from the Home Depot and is perfect for the space.

Modern Farmhouse Bathroom #Makeover

Isn’t this little wooden stool so cute?  It’s the perfect size for my small bathroom and a great place to set a book, cup and candle on when you’re taking a bath. All these great accessories in our bathroom are from Homesense.

Modern Farmhouse Bathroom #Makeover

We chose to use the over the door rack to hang all the towels on. I loved this shiplap so much I didn’t want to ruin it by placing hooks into it! I wanted to keep the bathroom as clean and clutter free as possible. The rack is also great for holding some bathrobes for your guests when they come to visit. I found these lovely turkish towels and bathrobes  along with the rack at Homesense!

Modern Farmhouse Bathroom #Makeover

Modern Farmhouse Bathroom #Makeover

Modern Farmhouse Bathroom #Makeover

Source List 

Shiplap: Metrie Complete® Pre-painted Shiplap

Vanity Light: Glenhurst 3 light vanity fixture, Home Decorator’s Collection, Home Depot

Mirror: Homesense

Floor Tile: M2 Tile

Vanity: Ikea

Faucet: Ikea

Stool: Homesense

Turkish towels, Cotton terry Bathrobes, Shower Curtains, Soap dish, Dispenser, Candle, Towel rack, Toilet paper stand: Homesense

Thanks so much for following along on this makeover journey with us! This was our first real reno and there were a lot of ups and downs, problems that we weren’t sure how to deal with and lots of youtube video watching! We were the designers, contractors and tradesmen for this project. Next time I think I just want to design and leave the rest of the work to the real tradesmen 😉 Thanks to Linda from Calling it Home for hosting another great Challenge. Be sure to follow along with all the other designers and participants to see their finished projects.

Thanks to all our Sponsors who helped to make this makeover possible!

Sponsors for ORC Fall 2017

Filed Under: diy, Makeovers, One Room Challenge™

Easy Chewy Sugar Cookie Recipe

6:44 pm by kim 3 Comments

It’s that time of the year again and the baking season is upon us! One of the first recipes I’m making are these easy and chewy sugar cookies. They don’t require any chilling and can be easily spooned out onto a cookie sheet. Once you assemble all your ingredients together you can have a batch of cookies ready in about 15 minutes.

Easy and Chewy Sugar Cookies

You’ll Need:

  • 1 cup of softened butter
  • 1 1/2 cup of granulated sugar
  • 1 large egg
  • 2 1/4 cups all purpose flour
  • 1/2 teaspoon salt
  • 1/2 teaspoon baking powder
  • 1 1/2 teaspoon vanilla
  • Extra sugar to roll your cookies in
  1. Preheat the oven to 350° F.
  2. Line baking sheet with parchment paper or use a baking mat.
  3. Cream together the butter and sugar for a couple of minutes till light and fluffy. Add the egg and vanilla and mix.
  4. In a separate bowl, lightly mix the flour, salt and baking powder together.
  5. Mix together the dry ingredients into wet ingredients.
  6. Use a cookie scoop or a tablespoon and scoop out cookie dough and form into a ball.
  7. Roll cookie ball into the extra sugar and coat. Lay out cookie balls on your baking sheet and lightly press.  (Leave a 1  1/2 to 2 inch space between cookies)
  8. Bake in the oven for 8-10 minutes.

To make sure these cookies are really chewy, I took mine out of the oven at 8 minutes. They were still pale but continued to cook on the cookie sheet for a couple of minutes. I then used a spatula and put them on a cooling rack. Once they cool  you have a delicious cookie that’s a little crunchy on the outside and chewy on the inside!


Easy and Chewy Sugar Cookies

Easy and Chewy Sugar Cookies

Easy Chewy Sugar Cookie Recipe

I hope you try this easy recipe and enjoy the cookies! It’s so quick and simple and includes ingredients that most of us already have on hand. Stay tuned for some holiday baking coming up over the next few weeks. Subscribe and you’ll receive blogposts delivered straight into your mailbox!

You can follow along with me here too:

Instagram | Facebook | Pinterest

Blessings,

Kim

Filed Under: recipes

Bathroom Makeover | One Room Challenge | Week 6

11:38 pm by kim 12 Comments

Hi everyone and welcome  to Week 6 of the One Room Challenge! If you’re new here, I’m a guest participant in Linda’s from Calling it Home One Room Challenge. A biannual event where a group of designers and bloggers  chronicle a makeover of one room in their home in 6 weeks. We’re on week 6 right now but this year the challenge has been extended for another week. So next week will be the final reveal and I’m so excited to share our makeover with you all!

You can follow along with the previous weeks here:

Week 1 | Week 2 | Week 3 | Week 4 | Week 5 |

One Room Challenge Fall 2017

Bathroom Makeover One Room Challenge Week 6

This week’s progress:

This week we finally got the grout done on the floor tile. We used a charcoal coloured grout that fits right in with the charcoal of the tiles. We used a slow drying grout and had to stay off the floor for 72 hours. It was wonderful! We basically had the weekend off which was great because the hubby and I needed the break. Don’t those tiles look amazing?

Once the grout was dried and cured we were able to get back in there and put the baseboards on.

One Room Challenge Fall 2017 Week 6

We also got the vanity in after the hubby did some (a lot) of maneuvering with the pipes. Yahoo!

One Room Challenge Bathroom Makeover

Remember those nasty pipes that came up out of the floor that couldn’t be moved? Well the hubby used the Metrie baseboards to make a box around them. It’s hardly noticeable, unless you’re down on the floor where I was when I took this photo. Once I caulk the corners and fill in the nail holes it will look great.

One Room Challenge Fall 2017 Week 6

One Room Challenge Fall 2017 Week 6

I’m so glad the vanity fit! It looks great with the gorgeous shiplap and tiles. These pictures don’t do the room justice.

One Room Challenge Fall 2017 Week 6

Task list before the final reveal:

  • Add the mirror
  • Install the toilet
  • Caulk the baseboards, sink and tub
  • Install the tub/shower hardware.
  • Accessorize

Well that’s it for this week.  It’s such a small room that there’s only so much to show without revealing it all..and that’s for next week! You can subscribe to the blog to make sure you don’t miss out on any posts. They’ll come straight to your inbox.

Blessings,

Kim

Filed Under: diy, Fall, Makeovers, One Room Challenge™, Uncategorised

One Room Challenge Fall 2017 | Week 5 | Shiplap time!

10:38 pm by kim 18 Comments

Welcome back to the One Room Challenge Fall 2017 week 5, it’s time to get our shiplap on!

If you’re new here, hello! You can follow along with the previous One Room Challenge weeks here:

Week 1 | Week 2 | Week 3 | Week 4 |

You can also follow along with all the other bloggers and designers and see what there up to this week here.

One Room Challenge Fall 2017

One Room Challenge Fall 2017 Week 5 Shiplap Time!

(This post has been sponsored by Metrie, all thoughts and opinions are my own)

This week we had some help from Metrie who offered their gorgeous Metrie Complete®  Shiplap for our Modern Farmhouse Bathroom Makeover. The shiplap comes already primed and painted in “Polar White”  which is a beautiful crisp white and you know I love me some white 😉

One Room Challenge Week 5 Shiplap Time!

I have to say this was one of the easier projects for this challenge! We’ve applied shiplap before using thin plywood boards and made our own spaces using coins. With the tongue and groove feature on these shiplap boards there was no more watching our quarters and loonies rolling away on the floor! It was simpler to lay the boards and it looked so much more uniform. The fact that the boards are all pre-painted a beautiful satin finish also saved a lot of time. Instead of filling nail holes with wood filler,  sanding then priming and painting, you fill in the holes with a wax and then buff. Metrie offers a Metrie Complete finishing kit with everything you need to finish your project:

Metrie Complete finishing kit

How We Did it and What You’ll Need:

One Room Challenge Week 5 Applying Shiplap

  1. Find the studs in your wall with a stud finder.

One Room Challenge Week 5 Applying Shiplap

2. Mark the studs  and then use a chalk line or a level to mark them down the wall.

One Room Challenge Week 5 Applying Shiplap

3. Some people start from the bottom, but I like to have full boards around the ceiling line. Place your first       board with tongue side down and use a level to make sure your first board is level.

One Room Challenge Week 5 Applying Shiplap

4. Add your boards and nail them using your nail gun. Where you nail into the tongue, you’ll need to fill in your nail hole before you place your next board. It’s much easier filling those holes before you add the next  board. (Don’t ask me how I know!)

One Room Challenge Week 5 Applying Shiplap

5. To fill in your holes,  use your wax stick or putty jar. I mostly used the wax stick.

One Room Challenge Week 5 Applying Shiplap

6. You can use your scraper card or a putty knife  to remove any excess wax.

One Room Challenge Week 5 Applying Shiplap

7. Use the abrasion pad to buff out and smooth the area.

One Room Challenge Week 5 Applying Shiplap

8. We applied cove molding to the ceiling and in the corners to make the seams uniform. we also caulked with Metrie’s caulking. All the products in the Builder finishing kit comes in the same “polar white” colour as the shiplap so that everything matches.

One Room Challenge Week 5 Applying Shiplap

Yes that’s my famous camouflage plant! I’m using it to hide those unsightly pipes sticking out of the floor.

One Room Challenge Week 5 Applying Shiplap

One Room Challenge Week 5 Applying Shiplap

One Room Challenge Week 5 Applying Shiplap

There is still a lot to do. I’m so grateful for the added week!

  • We still need to grout the floor tile.
  • Once the floor tile is grouted we’ll be able to put on the last two pieces of subway tile near the floor.
  • Add the baseboards.
  • Finish the caulking
  • Clean up the ceiling
  • Put the ceiling fan back on. (Still not sure why that is off lol!)
  • Put the vanity together and pray it fits!
  • Bring the toilet back in.
  • Hang the mirror.
  • Install the taps and hardware.

Thanks so much for joining along on our makeover/reno challenge! Just a reminder that a week has been added onto our schedule, so the final reveal will be on November 16th. To see some more makeover/renos you can follow along with all the other bloggers and designers here.

Blessings,

Kim

Thanks to our sponsors.

Sponsors for ORC Fall 2017

Filed Under: diy, One Room Challenge™, shiplap, Tutorials

Primary Sidebar

Hi, I'm Kim Read More…

Instagram

Follow along on Instagram

Sign up and don't miss a post!

Recent Posts

  • Festive Bacon Wrapped Chestnut Holiday Appetizer
  • DIY Mantel Decorated for Christmas
  • Simple and Cozy Fall Home Tour
  • Simple Fall Tablescape

Archives

Footer

Copyright © 2025 · Foodie Pro Theme by Shay Bocks · Built on the Genesis Framework · Powered by WordPress