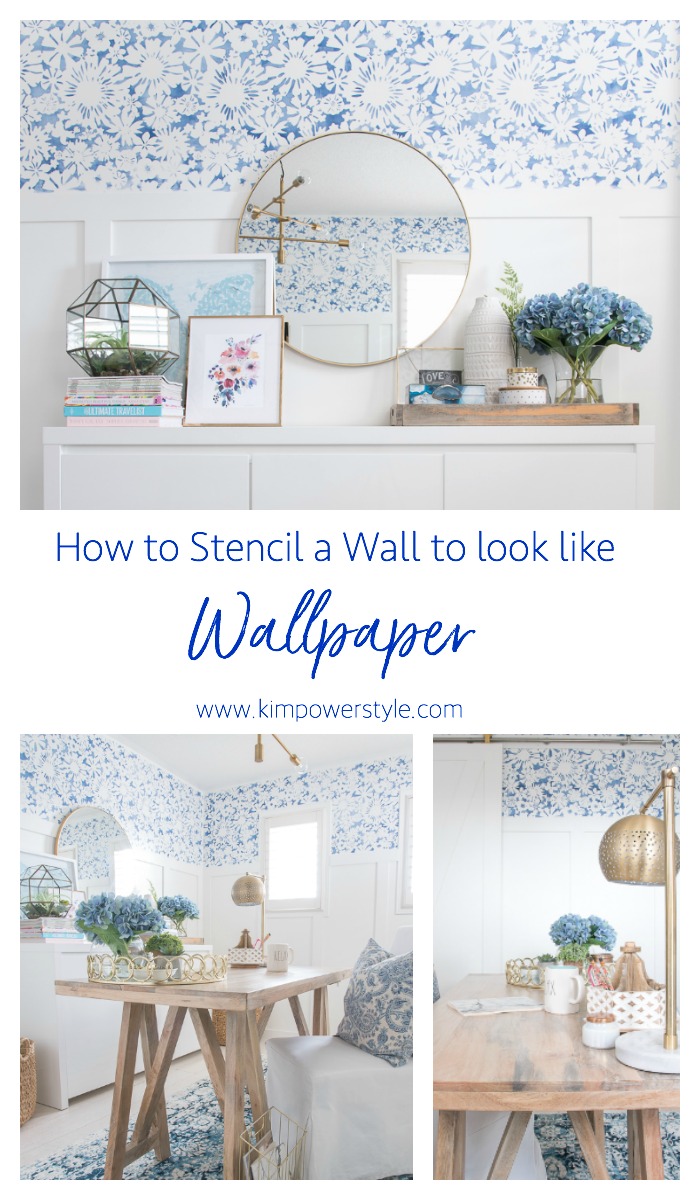
Wall Stencilling How-To

Well it’s week 3 of the One Room Challenge and oh how the weeks have flown by! This week I’ve added some colour and pattern above the board and batten by using a stencil. I’ll share a little wall stencilling how-to but first let’s look at where we’re going. If you’re just tuning in now you can follow the progress by reading week 1 and week 2.
Here is the mood/inspiration board for the room:
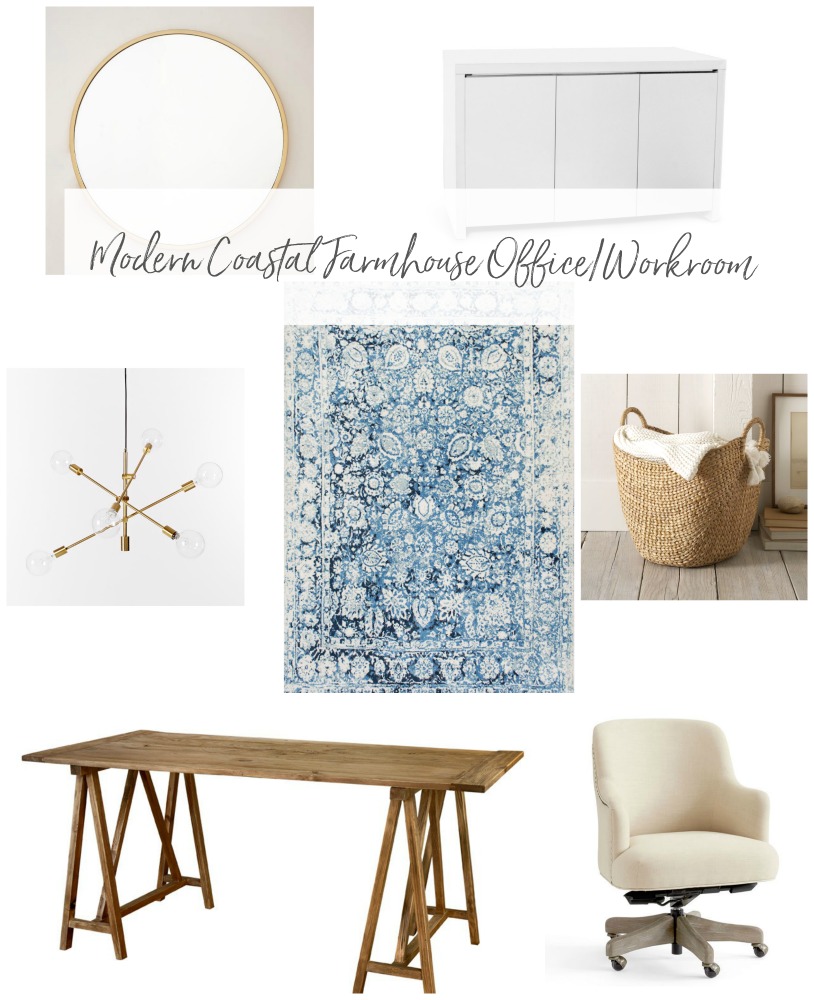
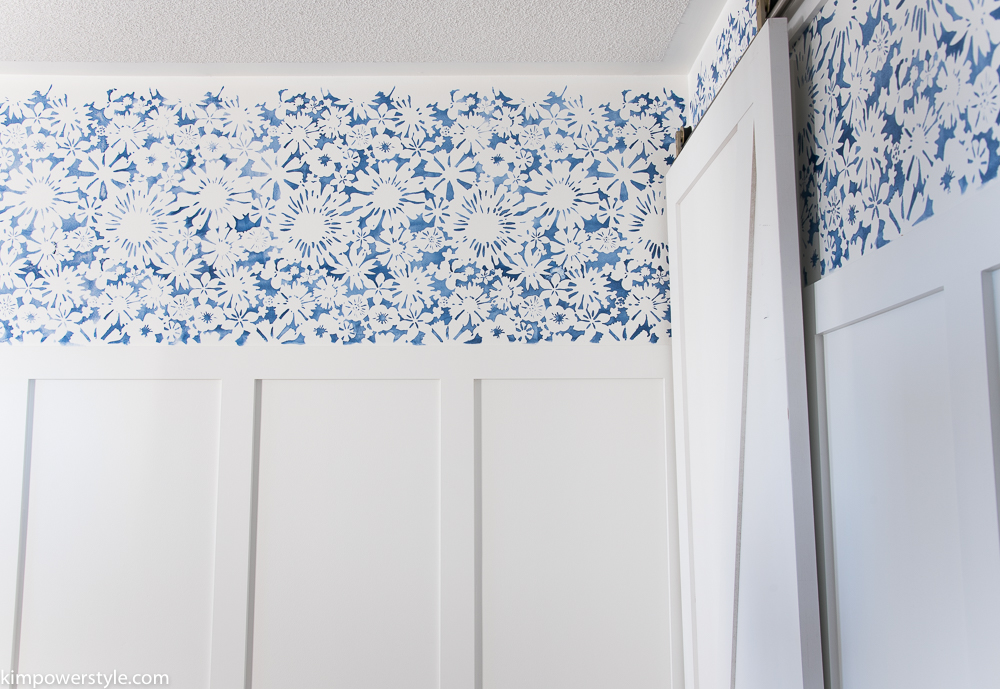
If you notice, the board and batten as well as my stencil treatment above it aren’t on my mood board. I still hadn’t decided at the time what kind of a treatment to add. I knew that I wanted a modern coastal farmhouse look thats much in keeping with the rest of my home right now. Once I decided on the board and batten I knew I wanted to do something above it. Wallpaper can be pretty pricey even for a relatively small space so I decided on stencilling. There are so many gorgeous patterns out there now and when you add the colour factor, the possibilities are endless! I decided to go with Royal Design Studios Stencils for my stencil and chose the Floral Fireworks allover stencil 21″x 23″. I had the paint colour already and had been waiting for a chance to use it. I used the Fusion Mineral Paint in “Liberty Blue”.
I have to say that I love the way it turned out! I’m still deciding on wether or not to finish the very top as I’m kind of liking the somewhat scalloped looking edge. I guess you’ll find out on the final reveal! 😉
Wall Stencilling How-To
Let’s start with what you’ll need:
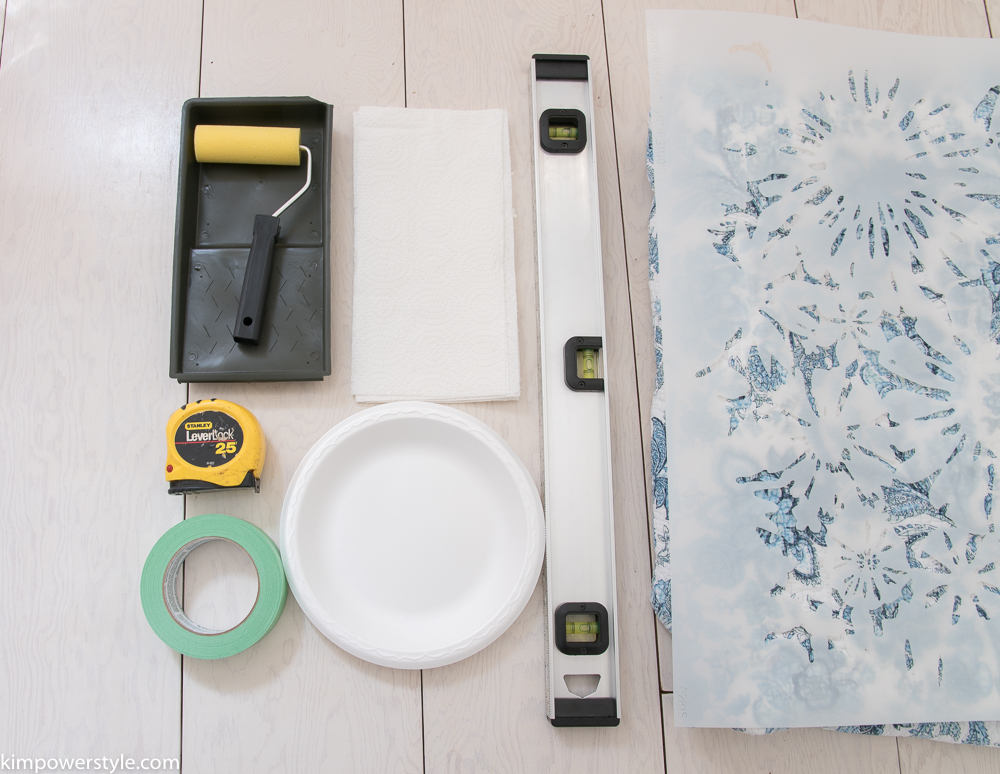
- You’ll need a stencil of your choice
- A small roller and/or a stencilling brush
- Good quality painter’s tape
- Lot’s of paper towel
- A small paint tray or a styrofoam plate will do
- A level
- Measuring tape
- Spray on adhesive for the back of your stencil (optional)
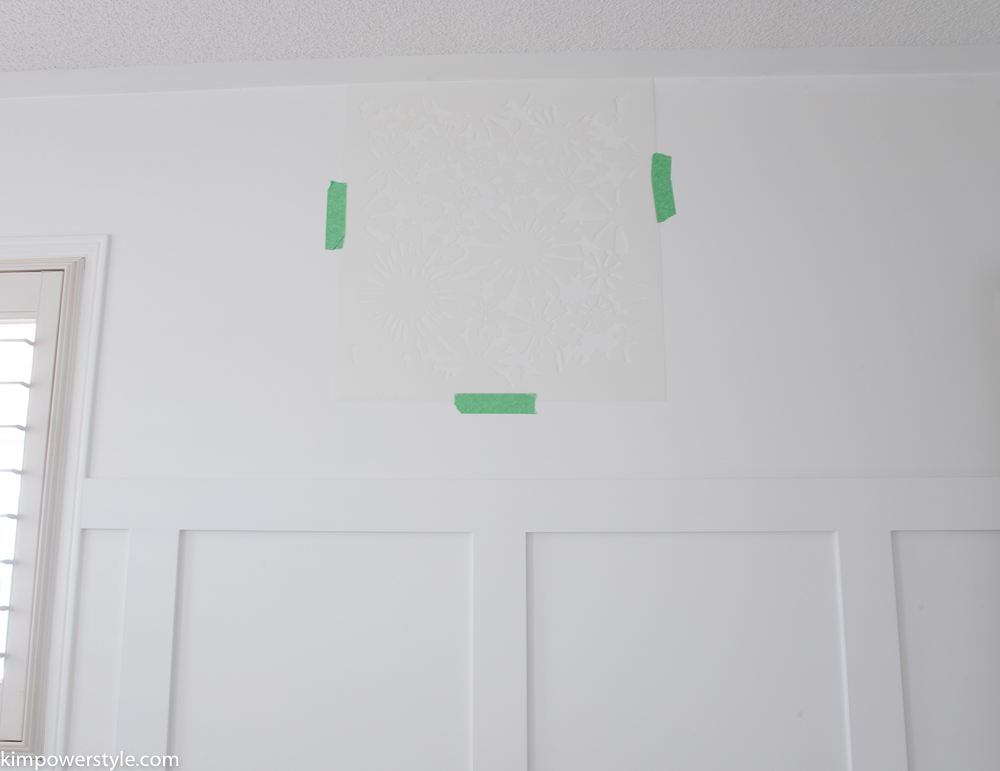
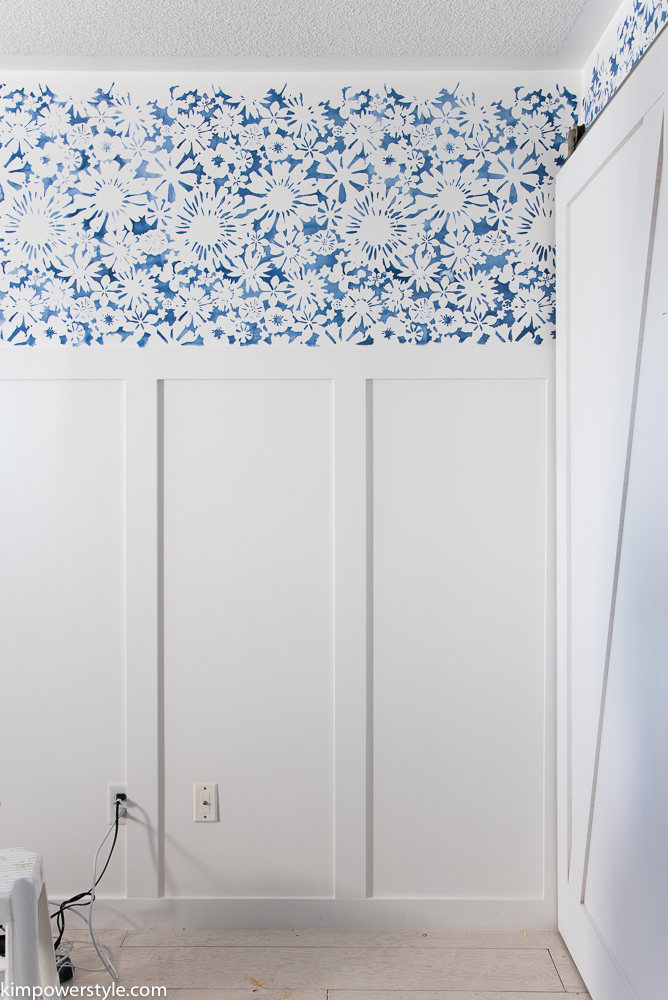
1.Using your measuring tape, find the centre of the wall. Affix your stencil to the top and centre of your wall. Check to make sure that your stencil is level.
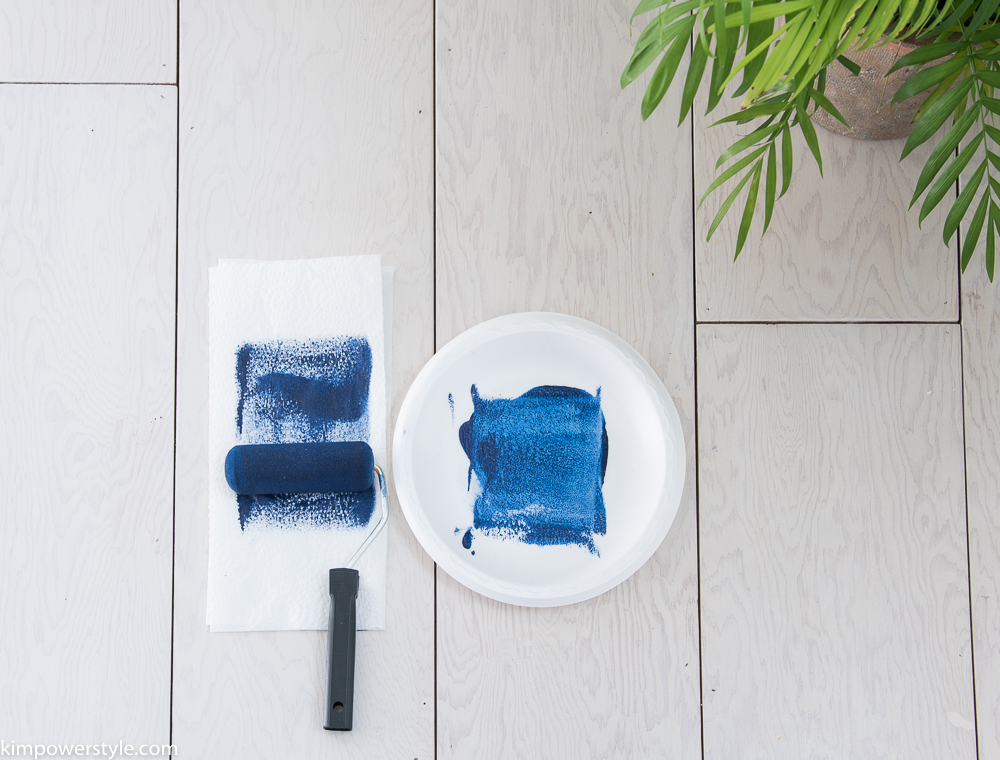
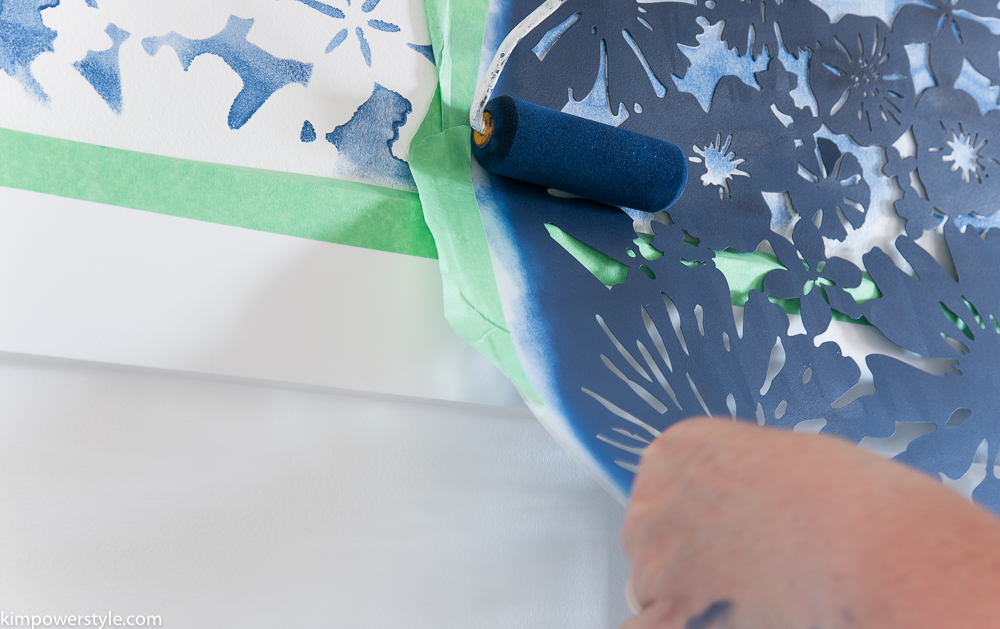
2. Load up your roller/brush with paint , enough to cover the entire thing evenly.
3. Remove most of the paint by off loading it onto some paper towel. This is important as you don’t want excess paint to bleed underneath the stencil. Less is better when it comes to stencilling!
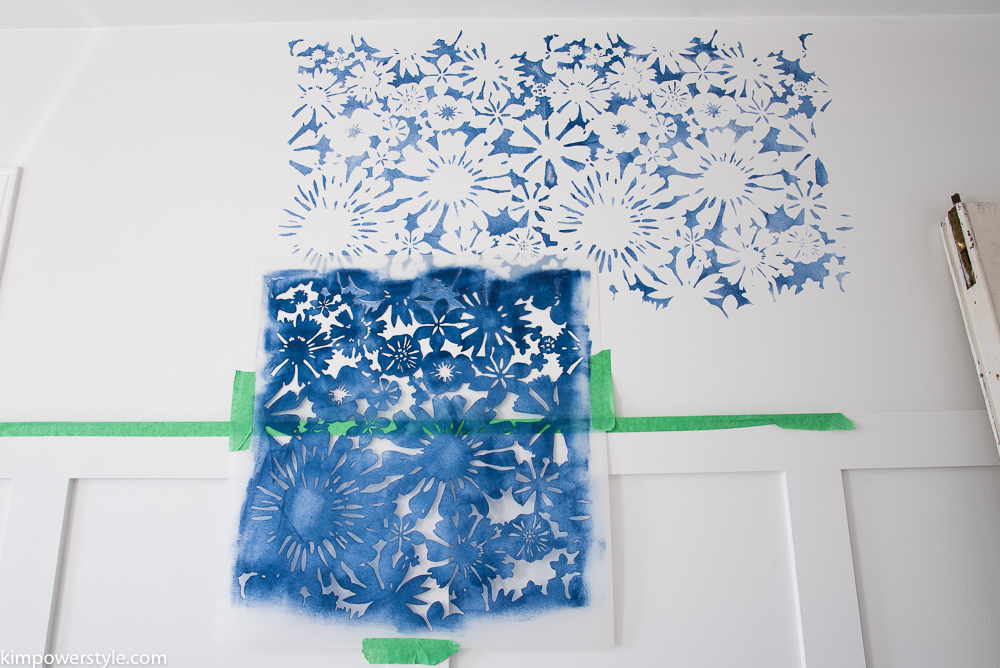
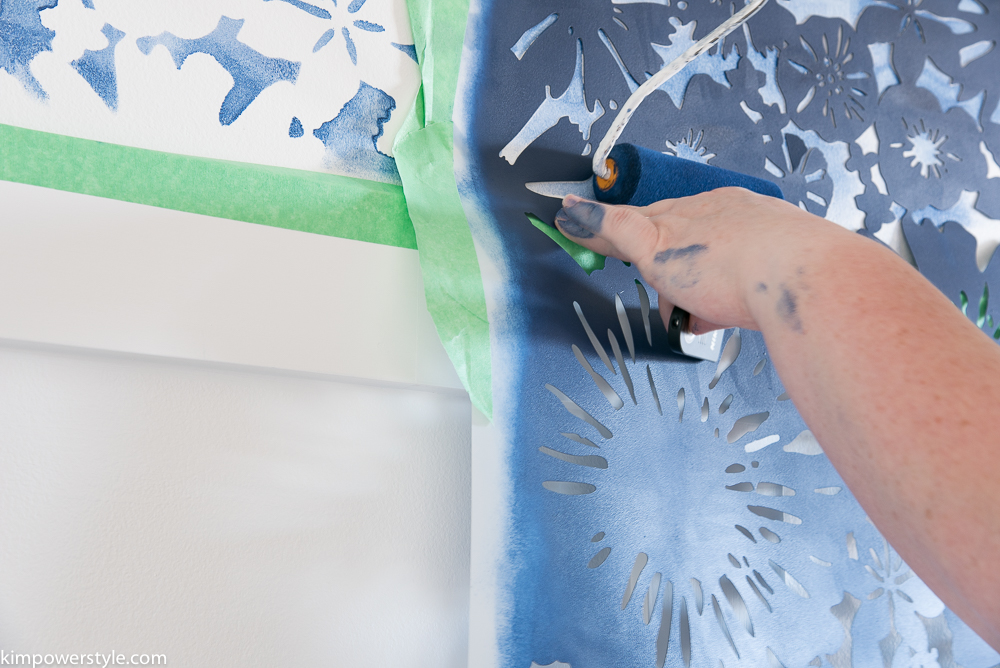
4. Begin to roll out over your stencil. You can lift up the corner of the stencil to make sure you’re not applying too much paint and bleeding through.
5. Move your stencil over to the the next position. Your stencil will have registration marks that will guide you to the correct placement. I found that the paint was dry enough to move onto the next placement without disturbing the previous paint.
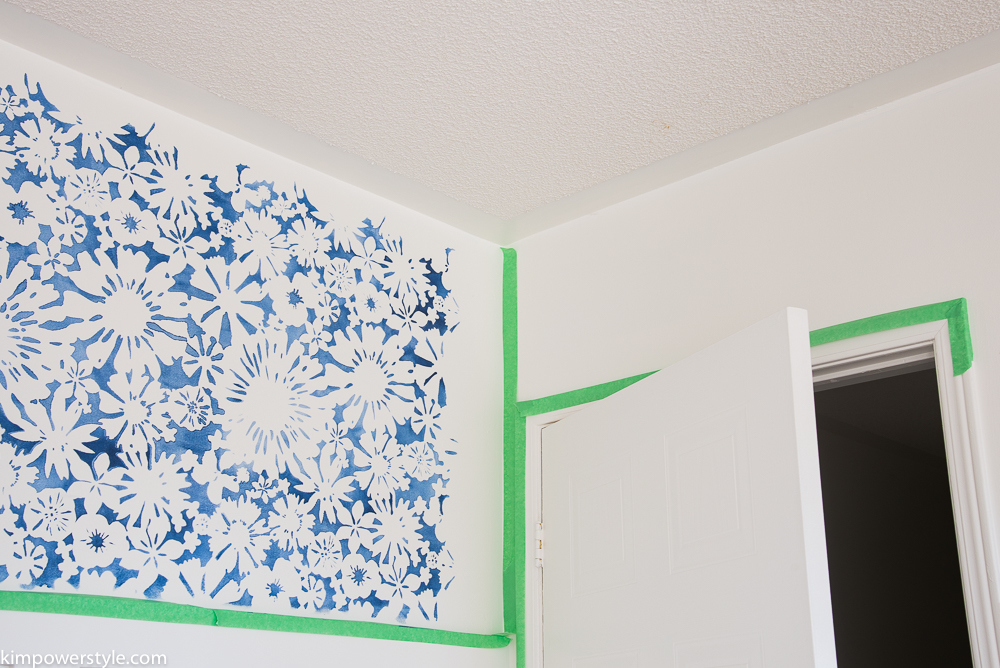
6. Once you come to a corner or edge. Apply your painters tape to protect the edge and the adjacent corner.
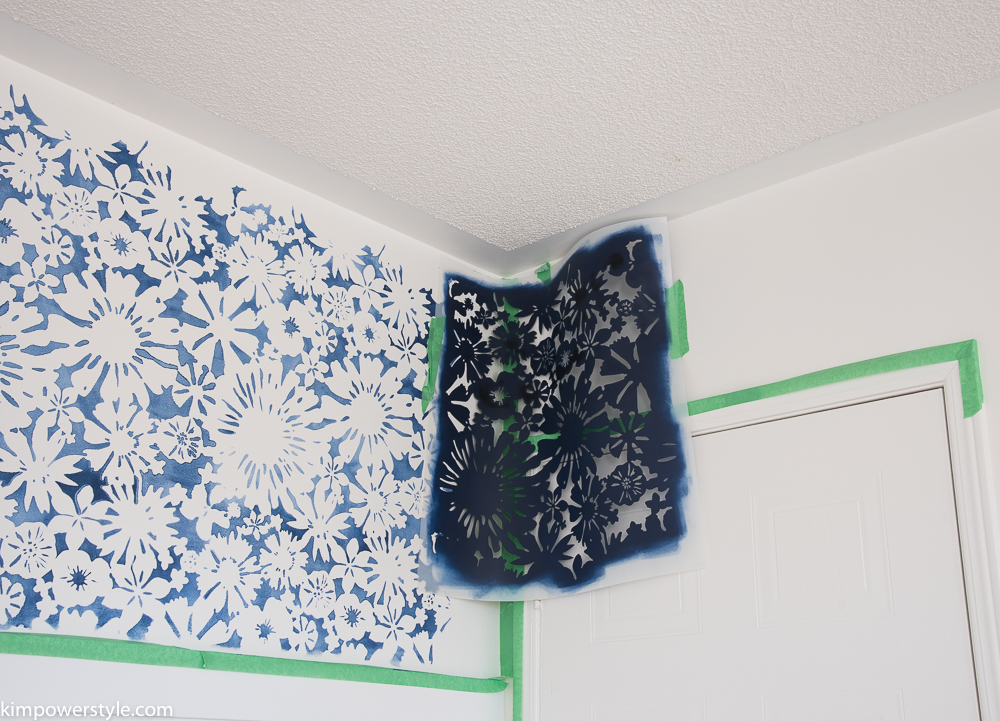
7. Place the tape on the side of your stencil that you will be stencilling. In this case the left of the corner. Don’t tape the right side down as this will need to be flexible. (In the above pic. The right side is taped just to hold the stencil up while I photographed the pic, otherwise that side should not be taped) Using your roller to paint into the corner by pressing into it.
8. When doing edges and corners, you can use your roller to press into the corner/edge and then use your fingers to press your stencil down into the corner/edge. You can continue to roll at this point or use a little stencil brush to get right into the edge. I just continued on with my roller.
9. Continue to go around the room until you have finished. You may have to stop and clean the excess paint buildup from your stencil. I did this once and placed it in my bathtub to clean.
Royal Designs Studio has some great how-to videos and instructions on their site that I would encourage you to watch if you’re thinking of trying this out.
If you look at my walls there are lighter and darker areas. I actually love this as it gives the appearance of water colour. I also found that in places near the corners and edges where It seemed that I made some major “out of the lines” mistakes, the pattern was very forgiving. If there are areas that you feel you need to address, you can simply get a little brush and use the base colour to help clean up the lines. I thought I was going to have to do a lot of cleaning up of the lines but it seems to blend in and has just become part of the pattern.
So here is a little peek into my Modern Coastal Farmhouse Office/Workroom. If you look to the right of the photo, you’ll see a peek of something else we’ve been working on! 🙂 Thanks so much for joining me on my first journey with the One Room Challenge and stay tuned for more projects on the way! You can follow along with others on their journey as well right here!
(This post was done in collaboration with Royal Design Studio Stencils, all photography, thoughts and opinions are my own.)
That looks GORGEOUS! Looking at the first photo I thought it was wallpaper. I’m so amazed that your stenciled that on!
Thanks so much! I thought it looked like paper too but wasn’t sure how it would appear to others. It looks like a water colour paper too me.:)
This looks awesome, especially with the board & batten! You nailed it.
Thanks so much Susie! 🙂
I did not know those tips about stencilling. The more you know!
I am a total fan of the varying intensities of blue you’ve got going, and love that flower stencil! Where’s it from?
Thanks my friend. The stencil is from Royal Design Studios Stencils. 🙂
Kim – that is amazing! Love, love, love!
Thanks so much Vanessa, that means a lot!
Love the stencil and the color combo! I’ve been thinking about stencilling my powder room and your post provides so much inspiration. Also appreciate your directions. Well done! Can’t wait to see more! Susie from The Chelsea Project
Thank you Susie!
It’s gorgeous – I love that it’s not all solid blue. The painterly feel is just so pretty, and the stencil pattern is so cute. Love your plans too – that pendant is amazing.
Thanks so much Lizzie! It’s much appreciated. 🙂
This is stunning! I love the color your chose. It makes the most perfect little statement with the board and batten!
Thanks Amanda! I love the colour too and was waiting for an opportunity to use it!
This looks amazing! Totally rethinking my wallpaper plans now 🙂 I love the watercolor effect. Can’t wait to see next week!
Thanks Beth, loving that watercolour effect too!
That looks fabulous! i love the subtle variations in color. You did an awesome job of it. I think i may have to give stenciling a try.
Thank you Erica, t gets a little tricky around the corners, but patience pays off!
i totally love how that turned out- it’s like granny chic meets modern shibori and i LOVE it! a perfect marriage!
Thanks Cassie, love your description, I was thinking of shibori too!
I cannot believe that is a stencil! Totally looks like wallpaper! Great job!
Thanks so much Cristy, I was hoping for that!
It turned out so pretty! It reminds me a lot of indigo dye! Beautiful!
Yes, I had so much left on my hands, it looked like I had indigo dye on them. Thanks!
It looks great, love your coastal blue. So pretty, it really does look like paper. Great job!
Thanks so much Dannyelle!
What a cheerful space you have created! Looks so pretty 🙂 Nice work with the stencils, dang that can be tedious! Def worth it.
Thanks Karen, it was tedious around the corners, but so worth the outcome!
I love the pop of blue with all that white! It looks beautiful!
Jaclyn
Thank you Jaclyn, blue and white are my favourite, with a little wood too!
Looks so good! I didn’t even think of stenciling – that pattern is so nice too!.
Thanks Andrea!
Holy moly!! I honestly have to say this is one of the PRETTIEST stencilled walls I have EVER SEEN!! And your mood board is spot on. Love love your style!
Thanks so much Erin, I appreciate that! 🙂
That looks so pretty! I love it.
Thanks so much Rochelle! 🙂
I am in love with the stencilling job!!! And I have to say, that scalloped edge at the top is kind of awesome!!
Thanks Thalita!
Absolutely gorgeous!!!!!! You’ve added such interest and a beautiful contrasting pattern to your upper walls, it’s perfection against the white board and batten! SO good Kim!
Aww thank you my sweet friend! You always make my day!
It’s so pretty! Love the watercolour effect, Kim.
Thanks so much Jen, I appreciate it! 🙂
So pretty!
Thank your Rachel! 🙂
Love the board and batten and I am really loving that indigo blue color! Cannot wait to see the final reveal Kim!
Thanks so much Lauren! I’m hoping it turns out the way I envisioned! 🙂
The stencil looks amazing! In the photos it looks like a watercolour effect. I thought your room looked really good before the ORC but now it’s incredible.
Thanks so much Robyn, I love how the watercolour effect came out!
Hi Kim, would you share which White Color paint you used on your walls. I am considering paint our living room white. Thanks.
It’s BM’s “Simply White” 🙂
This room is shaping up to be as absolutely beautiful as the rest of your home. I’m just wondering if you could tell us about the narrow picture shelves in yoyr living room? I’ve searched Pinterest but there are no tutorials for ones like yours. Are theyjust extra narrow store-bought floating shelves or did you make them? Adore your home! Thank you.
Thank you! Those picture shelves are from IKEA and very reasonably priced!
Lovely!! I love how the stencil almost has a watercolor feel.
Thanks Jessica, I love the watercolour effect too!
The stencil is absolutely amazing! I thought it looked nice with just the board and batten, but the stencil truly took it to a whole new level. Can’t wait to see what you do next! 🙂
Thanks so much Diana! The board and batten did make such a difference but I wanted to try out a bit of pattern to add some interest and I think it definitely did! 🙂
It definitely looks like wallpaper — what a pretty stencil!
Thanks Lora, I think so too!:)