• Skip to primary navigation
  • Skip to main content
  • Skip to primary sidebar
  • Skip to footer

Kim Power Style

  • Home
  • Contact
  • About
  • Tutorials

One Room Challenge™

Barn Door | Week 4 | One Room Challenge™ Spring 2017

4:28 pm by kim 30 Comments

Modern Barn Door
One Room Challenge™ Week 4

One Room Challenge

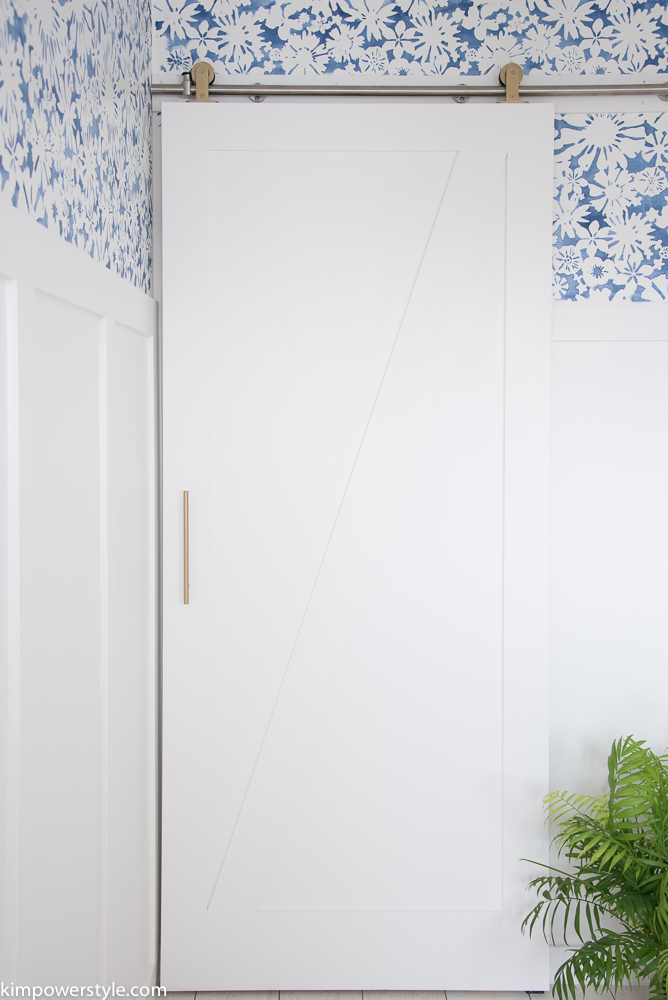
Welcome to week 4 of the One Room Challenge™ hosted by Linda from Calling it Home, where designers and bloggers makeover a room in their home in 6 weeks. For those of you just tuning in, you can go back and follow the progress by reading Week 1, Week 2, and Week 3. This week I’ll be sharing this Modern Barn Door we’ve added to the space. We had planned on building our own door from plywood and molding, but when we factored in the time and cost, we decided that buying this ready-made door made more sense for us.

Modern Barn Door with brass hardware.

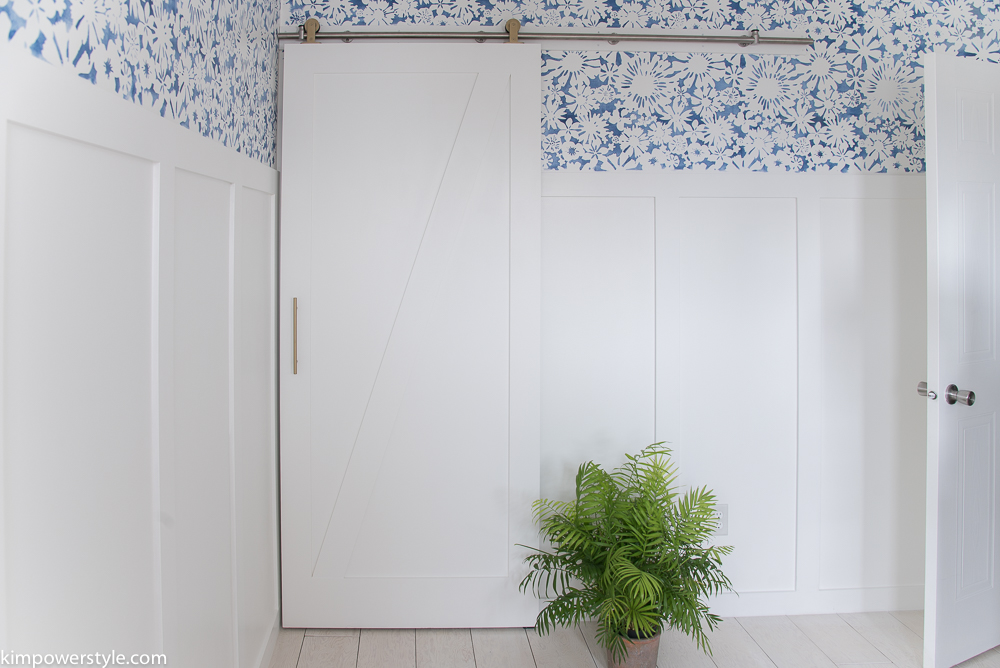
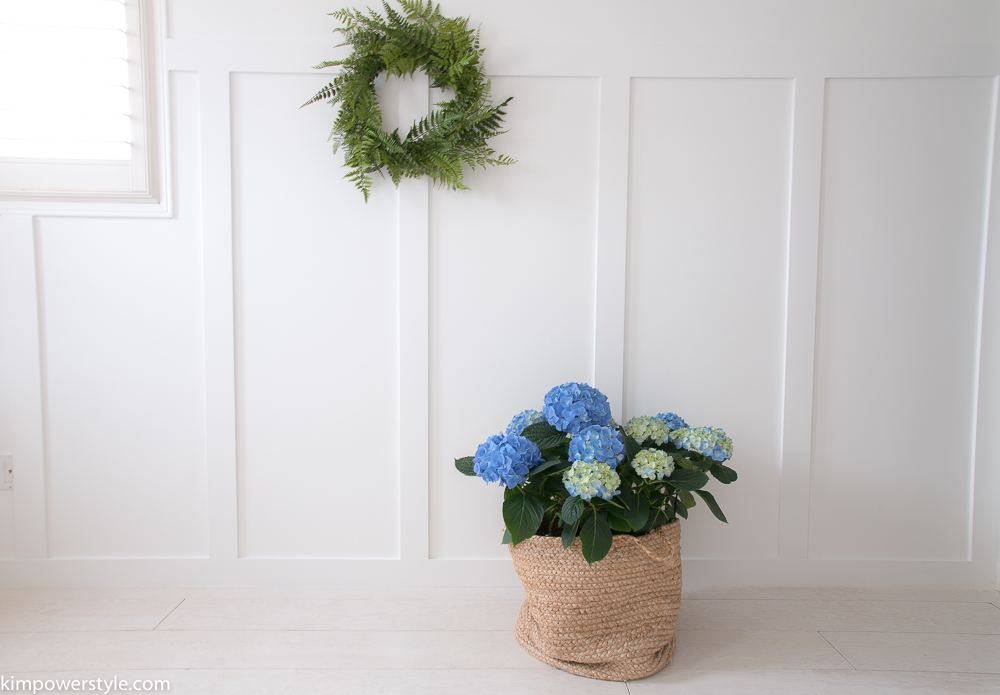
I had wanted a barn door for a really long time but I have a smaller home and a more open concept main floor. Meaning, there was no room anywhere for a barn door except in this room. When we were deciding on how to make this room more functional, we realized there was so much junk in our tiny walk in closet that we couldn’t even shut the closet door! However, we had to utilize as much floor space as possible in this closet, so a barn door was just what was needed! You can use all the floor space without having to worry about a door being swung open or shut. It was the  perfect solution and I got my dream of having a barn door!

If you remember my mood board, I had wanted this room to take on a Modern Coastal Farmhouse vibe:

Mood board for ORC 2017

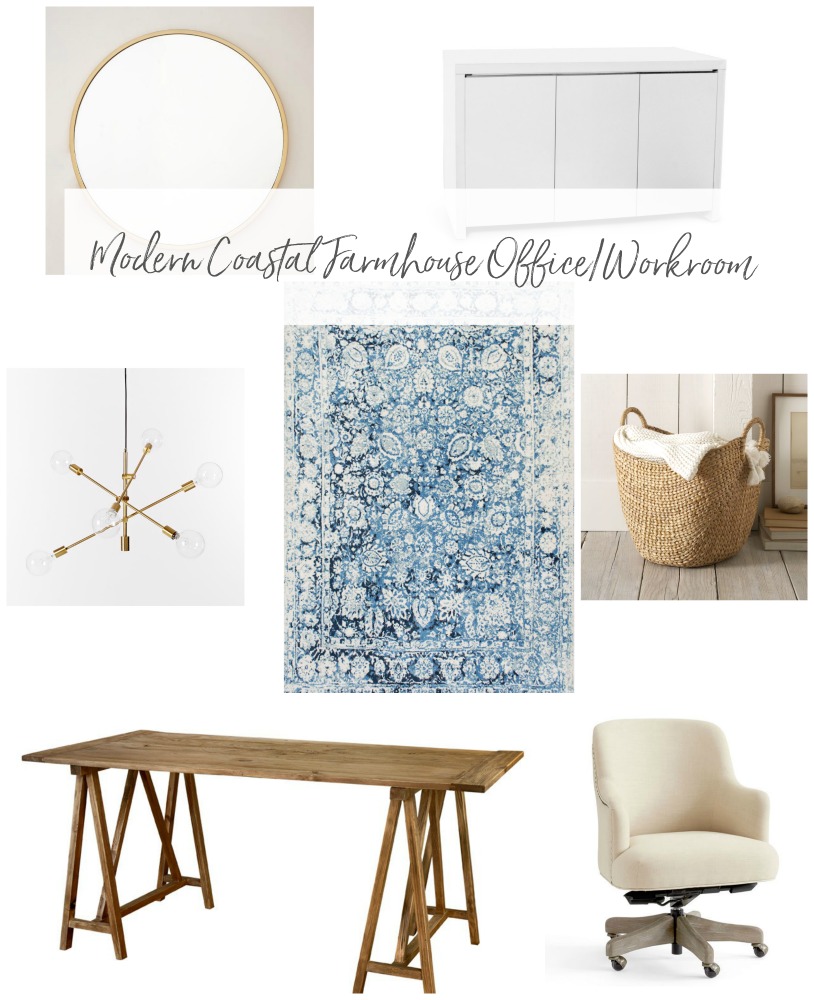
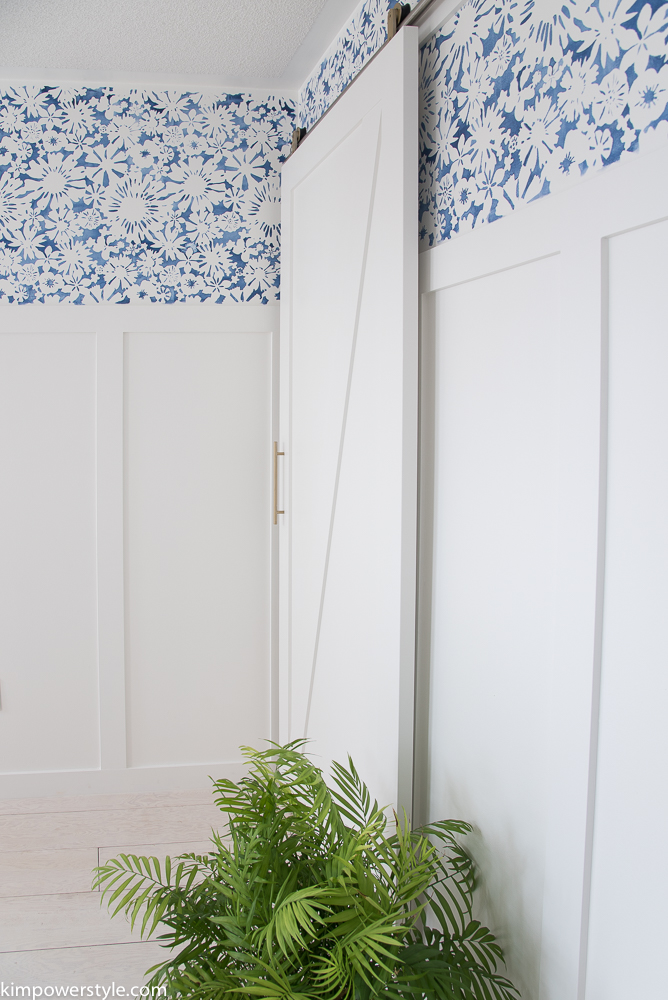
So that meant along with some cozy pieces and texture, it would also have some clean lines and brass finishes. When we decided on the barn door, I wanted it to have the same aesthetic. Instead of going with the black hardware that I had always thought of having on a barn door, I chose this clean steel hardware. I had wanted hardware that incorporated  brass, but that was difficult to find, so I came up with my own solution.

A Modern Barndoor with touches of brass

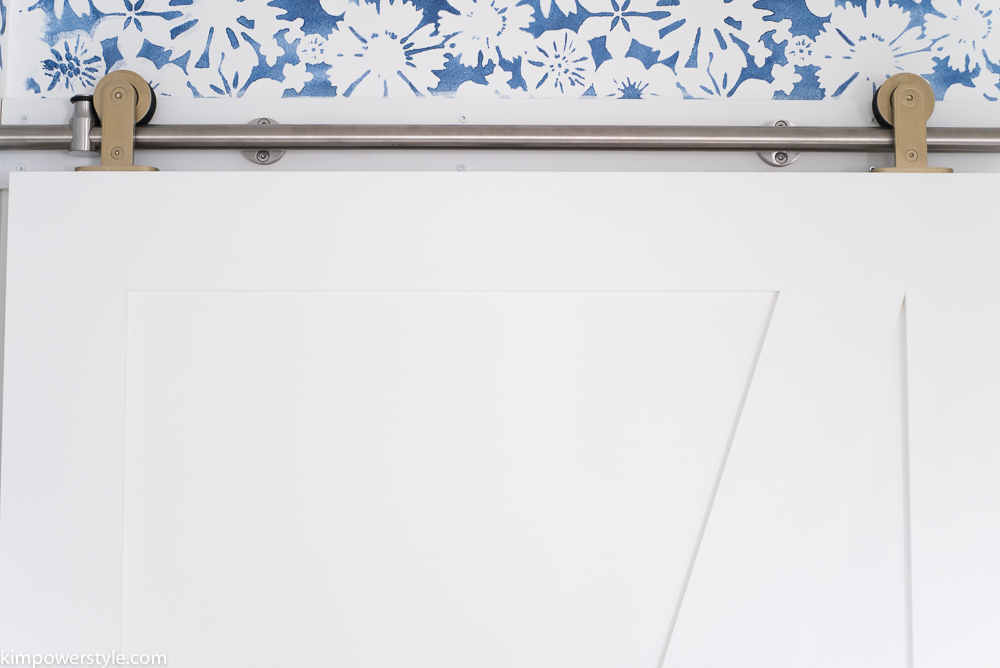
The brass hardware is to tie in with the brass mirror and light fixture that are coming. I spray painted the two pieces that attach the door to the track, a soft gold using Rustoleum Metallic in Pure Gold before we hung the door.

A Modern Barn door with brass hardware.

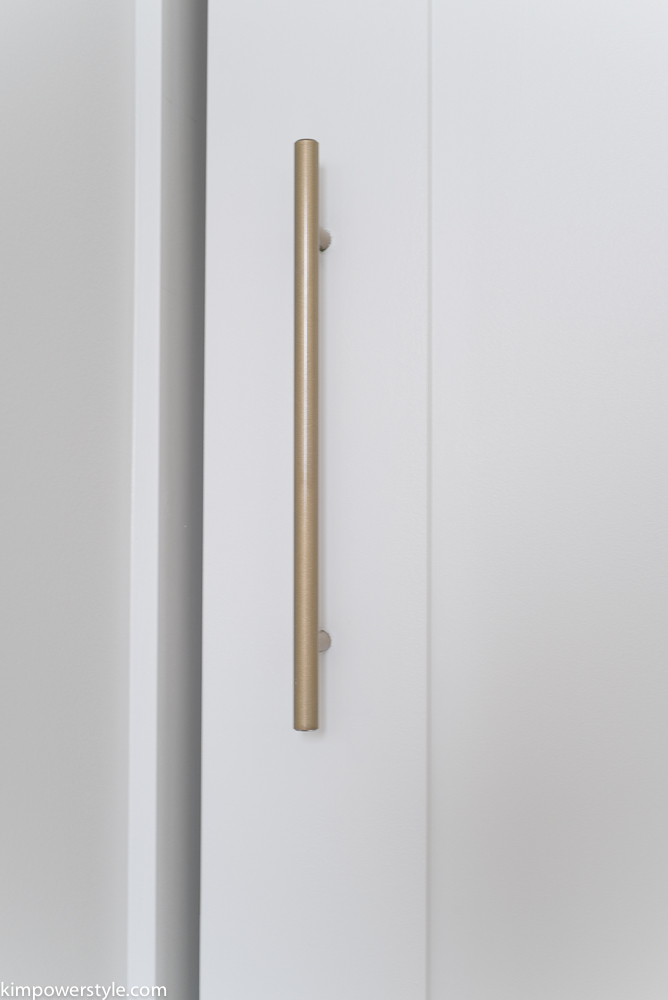
I also found this clean lined and modern door handle from the Home Depot and spray painted it in the same finish. It really tied it all together. The door is painted Benjamin Moore’s “Simply White” along with the walls.

A modern barn door with brass hardware

Modern barn door with brass hardware

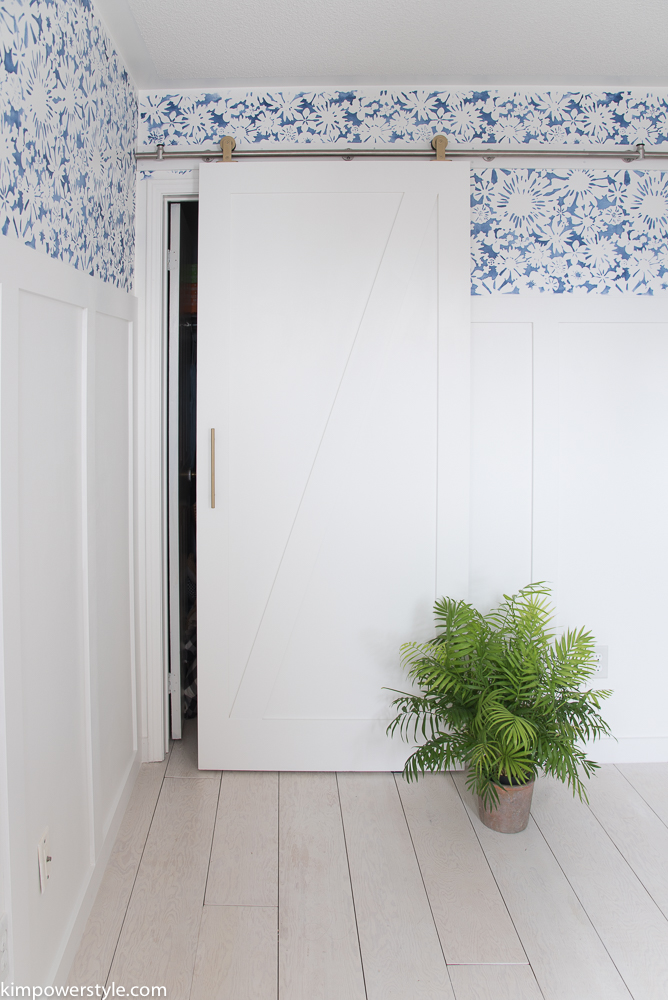
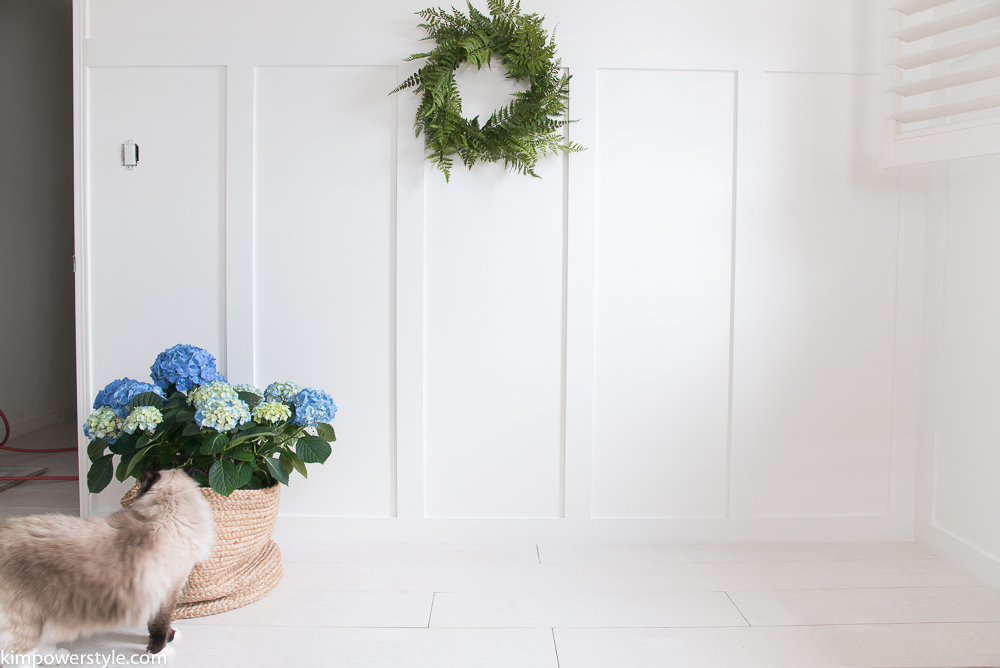
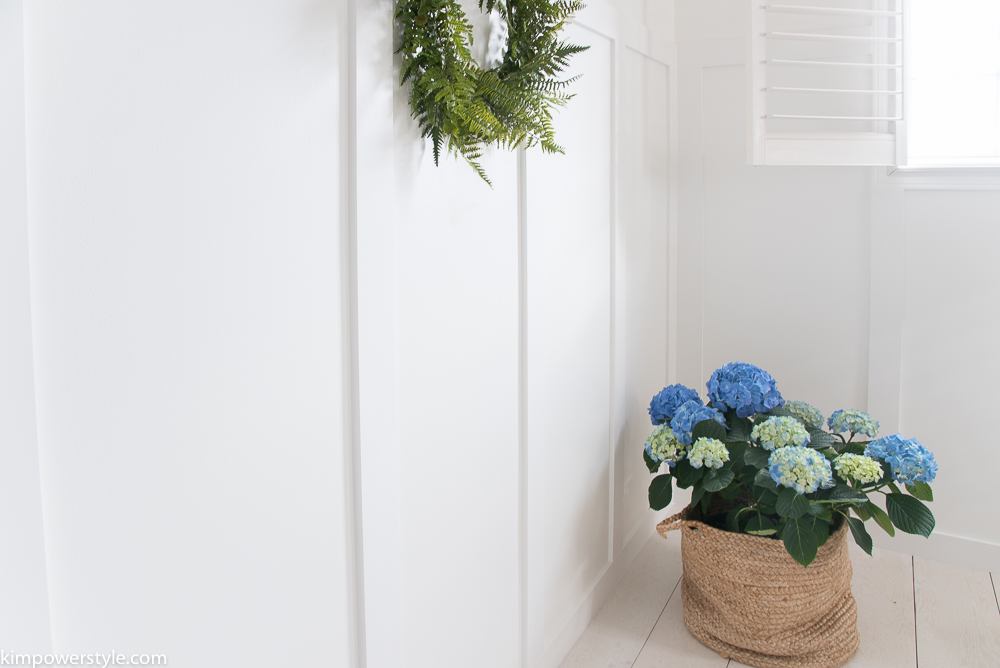
Our old door is still attached in there! Lol. The closet will be cleaned out and the old door removed this week. You may have noticed that I didn’t leave the space by the ceiling empty, but brought the stencil as close to the ceiling as possible. I didn’t mind it in the room at the time, but after seeing it on the blog last week, it looked too unfinished to me so I filled it in this week. I’m still loving that watercolour look!

A modern barn door with brass hardware

Thanks for stopping by to check out the progress. It’s hard to make these update posts exciting when you’re only showing little bits at a time, I know.  Stay tuned though, only one more progress post and then the final reveal! Don’t forget to follow along with the other participants here!

Blessings,

Kim

Filed Under: diy, Home decor, Makeovers, One Room Challenge™, spring

One Room Challenge Spring 2017 | Week 2 | Board and Batten

8:54 pm by kim 46 Comments

One Room Challenge | Week 2 | Board and Batten

One Room Challenge

Welcome to week 2 of the 6 week One Room Challenge hosted by Linda of Calling it Home! Well, the madness has begun and I’ve dragged the hubby into it as well and we tackled the walls in our little…wait for it, it’s a mouthful…Modern Coastal Farmhouse Office/Workroom. Lol. This is the mood board I created to steer me in the direction I want to go with in this room:

Mood board for ORC 2017

If you remember in Week 1, I wasn’t exactly sure what kind of treatment I was going to apply to the walls. I knew I wanted it to have a coastal farmhouse vibe but done in a modern way. I love shiplap and have used it in a few rooms on the main floor, but I wanted to try something different this time. After searching through my Pinterest pins and other sites,  I finally decided on board  and batten. I thought it would add character and charm to my little room and to be honest, it looked like it required less work than I was used to with shiplap!

ORC week 2|Board and batten

I think it turned out great! It seems to fit this room perfectly and I’m wondering why I didn’t do it before. It brings such character to this little 9×12 space. I think that Jack approves too! I’ve added a bit of greenery  to break up the white a bit so you have a better idea of how the space looks.

Below are the tools hubby and I used to complete the project:

Supplies for the board and batten, Spring ORC

(This post contains affiliate links, I only share products I know and love)

We used:

  • Pre-primed already cut MDF boards that were 3.5″ wide. We removed the old baseboards and used these as not only the boards but for baseboards too. We wanted a totally even and cohesive look with all the seams matching.
  • Nail gun with 2″ nails. we didn’t use PL glue on the boards, although you can if you’d like. We just nailed  every couple of feet and didn’t even worry about hitting studs as each piece is fairly lightweight on it’s own.
  • We used a level to make sure each board was straight, so important as your own eye can fool you! You can also use a laser level to level your top boards. We have one, but it was lost in the abyss that is our garage so we did without it.
  • Caulking, to caulk all the seams, I even do the bottom where the baseboards meet the floor. I think the attention to finishing details can make the difference between a “diy” and a “professional” look.
  • We used wood filler to fill in all the nail holes and the seams.
  • A sander to sand all the wood filler off. I love my B & D mouse sander. This fella has seen a lot of action!
  • Painter’s tape. I use this when I am painting the baseboards to avoid getting any paint on the floor.
  • Lastly, you’ll need the paint of your choice.

The only difficult part of this application was figuring out the math! Our walls were all different widths so the width between boards on one wall may be different than the widths between boards on another. We did the math calculations and stood the boards against the walls to test out what would look  best. Once you’ve figured out the spacing and marked where your boards will go, the project moves on fairly quickly. We placed and nailed the baseboards down first then we put up our vertical boards and left the top horizontal ones till the last. While my husband was nailing in the boards, I was right behind him applying the caulking and wood filler, so we were a quick efficient team. As with every project, always measure twice and cut once!


Spring 2017 One Room Challenge Board and Batten

Spring 2017 ORC Board and Batten

Spring 2017 ORC Board and Batten

Spring 2017 ORC Board and Batten

Spring 2017 ORC Board and Batten

Once again, I’m so happy with how this project turned out. If this is something you’ve been thinking about doing, I would say do it! It’s a small amount of work for a huge impact and would make a great weekend project. Thanks for joining me for week two, stay tuned for week 3 as it only gets better from here. We’ve got some great projects planned. You can follow along on Instagram too as I tend to share there first. To receive our blog posts as soon as they’re posted hit the subscribe button and they will be sent straight to your inbox! And don’t forget to go visit all the other participants too, you can find them here.

Blessings,

Kim

Filed Under: diy, Home decor, Makeovers, One Room Challenge™, spring, Tutorials Tagged With: Makeover, One Room Challenge

  • « Go to Previous Page
  • Go to page 1
  • Go to page 2

Primary Sidebar

Hi, I'm Kim Read More…

Instagram

Follow along on Instagram

Sign up and don't miss a post!

Recent Posts

  • Festive Bacon Wrapped Chestnut Holiday Appetizer
  • DIY Mantel Decorated for Christmas
  • Simple and Cozy Fall Home Tour
  • Simple Fall Tablescape

Archives

Footer

Copyright © 2025 · Foodie Pro Theme by Shay Bocks · Built on the Genesis Framework · Powered by WordPress