• Skip to primary navigation
  • Skip to main content
  • Skip to primary sidebar
  • Skip to footer

Kim Power Style

  • Home
  • Contact
  • About
  • Tutorials

kim

New old thrift table

5:01 pm by kim 55 Comments

Hi Everyone!
First up I wanted to thank you all for the lovely comments on my 24th wedding Anniversary, So sweet!

I found another little table at GW to go with the one I found last  fall.

Isn’t she cute?

This is what she looked like before!

I gave her a coat of white paint (Ben Moore’s Cloud White) and a coat of wipe on polyurethane.
I love the way she looks with my grey baskets. She now sits on the right side of my sofa.

This is the first table I found at GW and posted about it here. I wanted to find another one similiar to this one as she fit in so well.

This is the first table seen here after I did my bookcases post. It sits on the left side of my sofa. 

I’d been looking for another table to match  the first one and was willing to take the time to find it. I didn’t think I would find the exact one and was really excited when I found this one that had the same look and dimensions as the first.

Love her little scallop trim on the bottom.
I think she fits right in.

After my bookcases were put in the family room I had to move some pics and mirrors around and will show the whole room when I replace them.  Isn’t everything a work in progress? lol

Thanks for stopping by, be blessed!

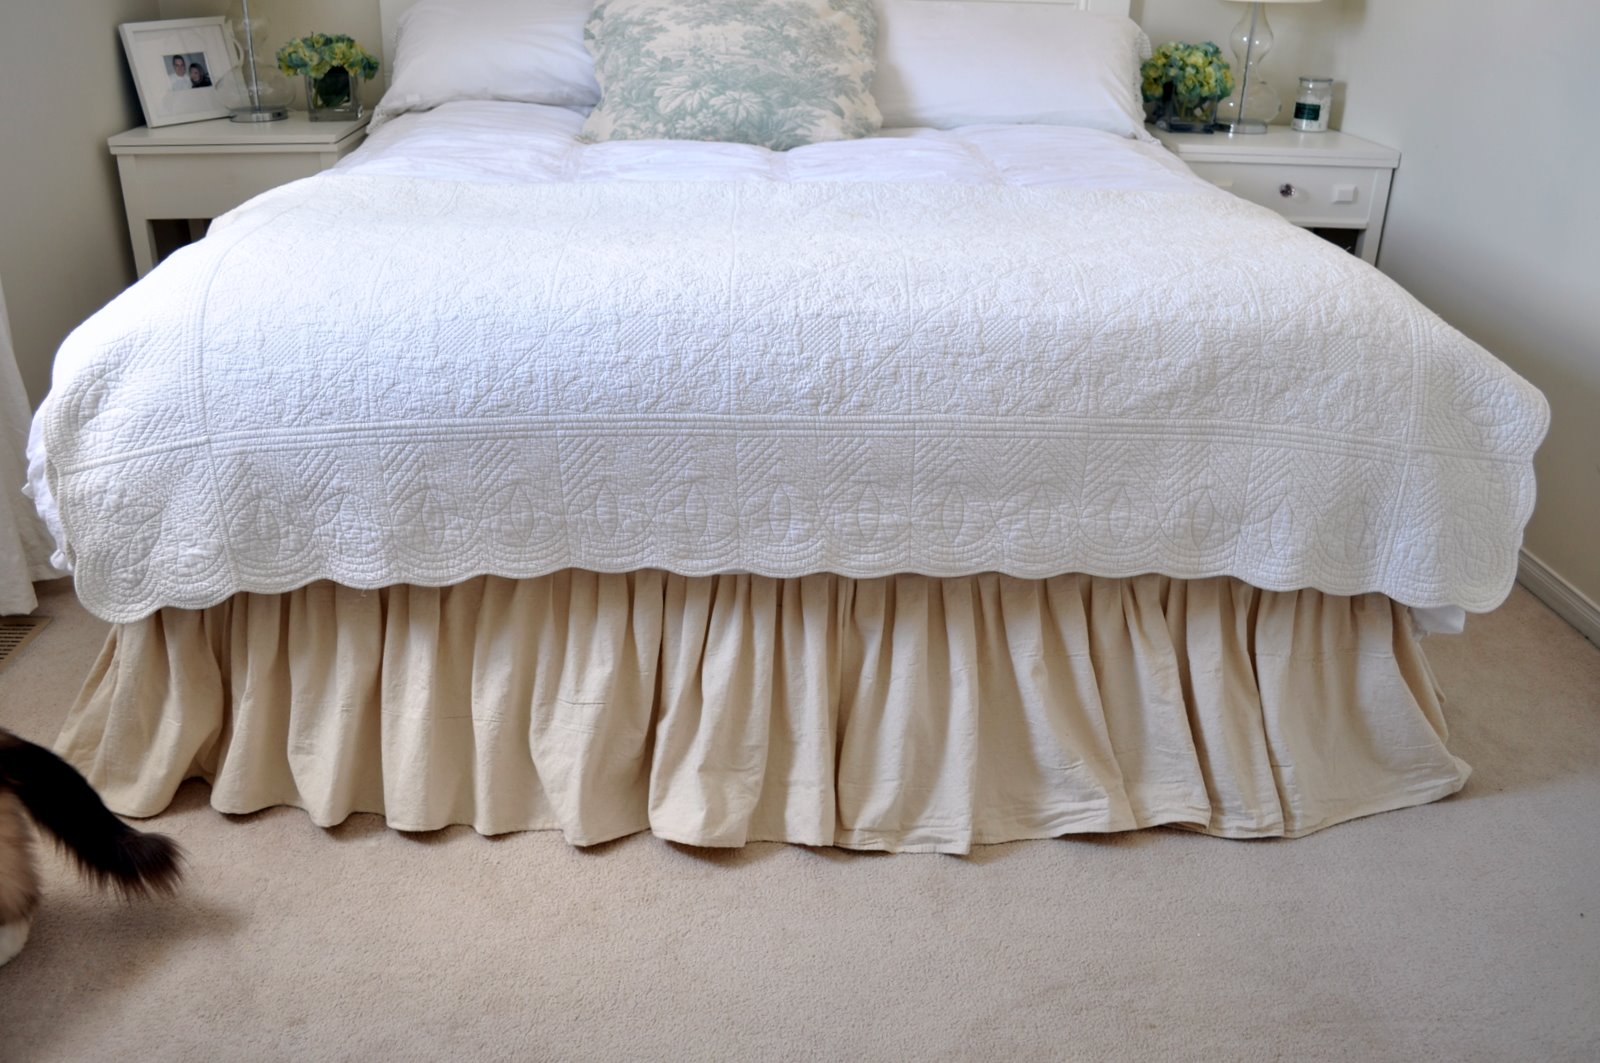
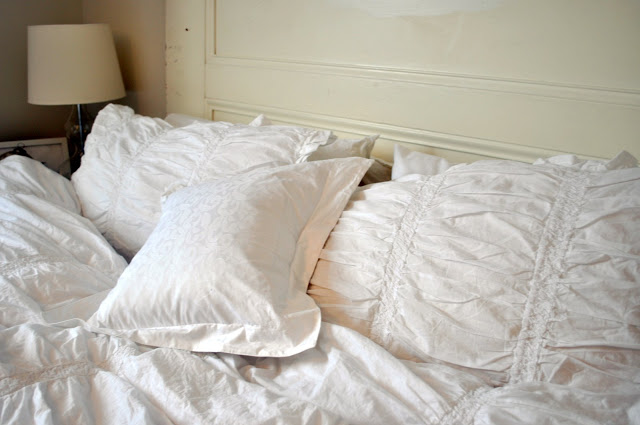
Will post the rest of the bedroom makeover shortly…stay tuned! Lol

I’ll be partying with these ladies this week:

White Wednesday @ Faded Charm
Beach Life Wednesdays @ Beach Cottage
Transformation Thursdays @ The Shabby Chic Cottage
Strut Your Stuff Thursday @ Somewhat Simple
furniture feature Friday @ MMS
Fabulous Friday finds @frou frou decor
Frugal Friday @ The Shabby Nest
Flaunt it Friday @ chic on a shoestring decorating
SNS @ Funky Junk Interiors

Filed Under: Uncategorised

Mini Makeover part 3…the headboard

12:48 am by kim 53 Comments

Hi everyone, I said I would post this today but was called away to see my sick sis. I quickly made my bed and tried to take some pics while I had the light.
Better late than never!

Here is my headboard we were so blessed to get as an old door from our church a few weeks back.

This door was original to our Church building which was built in 1899.

Here is the before. She had a few chips but not enough to make her chippy. I wasn’t sure what to do with her and got a lot of suggestions and lovely comments from you all.  I thought about removing the old paint but didn’t want to get into the whole lead thing. Even after a cleaning she still seemed a little “dirty” looking to me. I knew I had to finish her off in a way that I would feel comfortable spending all my nights with her!

Hubby and I put up some molding on the top to give it a finished look and  provide a little shelf. I gave her a couple coats of Ben Moore’s “cloud white” which also match the night tables. I wanted to keep the paint color a little uniform to create a sense of space as the room is not that wide on this end.
As soon as I put my first coat of paint on her I knew I had made the right decision for me.
I love it!

Yes, Jack managed to get into another pic! I think he goes so well with the bed!

I added baskets under the table for extra storage space. I placed a couple of lovely crocheted pillow cases I got from GW in there for the pic but I’ll be using the baskets  for junk magazines and books.

You get to see a pic of Jack and Tara. Seeing Tara in a pic is a rare sight as she is quite camera shy so I thought I would provide you all with the thrill of seeing her. Lol.

She’s not shabby or chippy but hey! If you get to be 112 years old you may want a little paint job too! I’m really pleased with how she turned out!

I will probably post a part 4 to this mini makeover because I’m trying to milk it for all it’s worth I’ve got a couple of  ideas for my blank wall. Stay tuned!

Be blessed

I’ll be partying with these ladies this week:

Transformation Thursdays @ The Shabby Chic Cottage
Saturday Nite Special @ Funky Junk Interiors
Frugalicious Friday @ Finding Fabulous
Flaunt it Friday @ Chic on a Decorating Shoestring
Show off your cottage Monday @ The house in the roses
Metamorphosis Monday @ BNOTP
The DIY showoff
Show me your style @ In  my own Style
Power of Paint Party @ Domestically Speaking
Furniture Feature Friday @ MMS

Filed Under: Uncategorised

Mini Makeover Part 2…dropcloth bedskirt

3:16 pm by kim 45 Comments

Hi everyone.
Thanks for the lovely comments regarding my sewing tables to night tables!
I am really pleased with them. They’re the perfect size for my room and I love the height. There is also room to place baskets underneath for added storage!

Well, here is part 2 of my little mini makeover.
I’ve been planning on doing this project for months now as my old bedskirt just wasn’t cutting it. There were very few bedskirts that I liked and the ones I did like were too expensive. So…I would have to make my own, back to my old standby fabric, the dropcloth.

Yes that’s Jack’s tail in the pic. He was all over this bed. He loves to be in  the middle of my photo shoots for some reason.lol

Here is the before bedskirt. A little bland eh!

 I just love the casual look of dropcloth, wrinkles and all.

Here is a sideview.
Jack thinks it’s His bed.

A view from the other side, In case you couldn’t tell!

Jack says thanks for visiting and admiring His my new bedskirt.
Stay tuned for tomorrow when l reveal what I did with that 112 year old door/headboard!

Be blessed!

I’ll be partying with these ladies:

Wow us Wednesdays Party @ Savvy Southern Style
Good Life Wednesdays @ Beach cottage

Filed Under: Uncategorised

Sewing table to night table and bedroom mini makeover…

8:37 pm by kim 36 Comments

Happy Tuesday everyone!
I was busy last weekend working on a bedroom mini makeover!
Here is a part of the makeover.

I had found an old sewing table a few months back and thought what a great night table it would make! It cost twenty dollars without the sewing machine in it.  I spent the following months trying to find one to match it from a thriftstore. I finally found another one this weekend. It came with the sewing machine in it and was thirty-five dollars, too much for me but it was 50% off Fridays so it only cost me seventeen dollars!

You can see here in an old post what I had been using as night stands before. They were two little metal tables from IKEA.  While they held most necessities, It dwarfed in comparison to my kingsize bed. My bed is quite high and I wanted a table that would be high as well.

I painted both tables in my favourite white, Ben Moore’s Cloud White. This table had three little diamond shapes on the front which I removed. I may add a knob to match it with the table on the right.


You can see the before pic of one of the tables here in an old post. You can also see those little diamonds on the front, a little too retro for me!

I removed the knob the table came with and added a little pink glass knob.

Thanks for stopping by and stay tuned tomorrow when I reveal my new bedskirt!

Be Blessed!

I’ll be partying with these ladies this week:

HOG
Domestically Speaking a beach cottage http://linda-coastalcharm.blogspot.com/

Filed Under: Uncategorised

New thrift mirror and dining room spruce up…

6:15 pm by kim 61 Comments

Hi everyone!
I hope you’re all enjoying the wonderful weather we’re having! Lol
All kidding aside I hope everybody is safe as weather all over the world is a little crazy right now.

The snow has stopped here in Southern Ontario and I’m hunkered down in front of the fire with my laptop.

I was at the Salvation Army this week and found this lovely mirror. I took it out of the garage today and introduced it into the dining room.

I took out my white frame and coffee filter wreath I had in there from Christmas and replaced it with
my thrift find.

 .

I have two armoires in the dining room that I use to house extra plates, platters and dishes that the kitchen doesn’t have room for.
The square basket is a file holder and holds all our files and the round basket is filled with magazines.

My daughter has told me no more plates! She says we don’t have anymore room! Do you think there is a problem?! lol

I gave this wooden frame a wash of white primer, let it dry and gave it a light sanding.

I couldn’t help but add a pic of lavender that I have on top of my armoires. I love lavender.

I took out some of the winter themed accessories and spruced up the room with some lovely dried hydrangeas.

Hydrangeas are another love.

I think the mirror picks up on the wood of the dining room table and helps tie the room together.What do you think?

Thanks for dropping by for a visit!

Be blessed!

I’ll be linking up with these ladies:

Twice Owned Tuesdays
Good life Wednesdays
White Wednesdays
Winter Blues Wednesday
Transformation Thursdays
Boring to Better Party
Show and Tell Friday
 The Shabby Nest Frugal Friday
Flaunt it Fridays

Filed Under: Uncategorised

Looking for a pop of green while waiting for spring?

2:37 pm by kim 30 Comments

                                                                       
                                                          Hello everyone! It’s Friday!!!

I don’t know about you but I am really craving a pop of green right about now. It’s all white outside and You all know how I love white but…I need some green!
 I usually buy flowers to brighten things up but they are a little pricey right now so instead of buying those lovely flowers I decided to add some spring like color using apples.
 
Look at how pretty this little apple centerpiece is and it’s edible!
I did a little photoshopping on this photo to really make the green pop! I must say that my daughters have already eaten a few bits from my centerpiece.


Just makes everything so fresh!

 
Here I am playing with my camera and trying to achieve bokeh. That green really pops!
Jack is enjoying the pop of green too!
Yeah he is lying on the table. I know, I know, but if you were as cute as he is I’d let you lay on my table too! lol.

Have a great weekend everyone!

Filed Under: Uncategorised

Sign tutorial and more inspiration…

5:02 pm by kim 27 Comments

Hello everyone!
. A number of you have asked for a tutorial for the GROCERIES sign I posted a couple days ago. I was a little hesitant because for the most part I NEVER REALLY KNOW WHAT I’M DOING! lol here.
I look at how things are made and I try to replicate what I see or what I want. I try to find tutorials on the subject pick out the parts that are the easiest for me to do and try to use products that I already have on hand.
So here it goes. Please take from this what you want and discard
anything you don’t.

Some of you asked if the wooden board was already old. I actually bought this with hubby last spring at the HD to attach lattice to on the bottom of our deck. We never used it and it’s been sitting in our garage since then. It is pressure treated wood so it has a bit of a green tint that doesn’t show well in the pics.
 
This is the before.

For this project I used some acrylic paint in white and black, some  verathane stain I had left over from my breakfast nook table, a sanding block, paint brushes, scissors, pencil, a bowl of water, and old saucer to mix my paints, and the lettering that I got form my word program.

I started by painting my board with the white paint, I mixed the paint with water to give the board a color wash. You can add more color/water as you need. I just wanted the wood to look a little aged but you could certainly make it more opaque.

You can see the difference here between the color wash and the original board.

While the board was drying I picked out my font and size for the lettering,  printed them out and  then cut them out. (originally I thought I could find some stencils and stencil the letters on but they were limited in size and font and were too expensive. It may have been a little less time consuming but you have more options by printing the letters out yourself and much cheaper!)
(Since posting this I’ve received a really good tip! Instead of doing all the cutting, use a ball point pen and trace over the letters with a bit of pressure. You could also use tracing paper! Who knew? apparently some of you and not me! lol)

Once they are all cut out, I placed and spaced them evenly.

I then took a pencil and traced each one out. I thought that this would be difficult considering the paper was so thin and flimsy but it was quite easy using both hands and it took me about ten minutes to trace them all out.

After they are all traced out. I painted them. I mixed a little of the white and black together for a more charcoal color so it would look a little more aged as opposed to stark black. Here again you can you can use so many different colors, mixes etc. to get the look you want.

After all the letters were dry, I used a little bit of my stain to add a little more aging, texture etc. I used an old cloth and just added it randomly, wiping most of it off.
(Marian at MMS has a great glaze/stain that she uses and I think I will try that one next time. She mentions how some glaze/stain can look like a bronzer and orangey,  my stain did this slightly but I was able to work it in well.)

Once the stain is dry you can begin to sand and distress your board. This is the fun part as it really adds that aged look to your sign.
( I’d like to add that at this point if you feel you need to you can add more paint, stain etc. I added a little of my gray water left in the bowl from mixing to do a soft wash over some places that were unever and it just added to the rustic look of it).

You could also beat the heck out of it if you feel it needs it! lol
I’m hoping you will all try your hand at this as it’s a lot of fun and very rewarding.
For some more inspiration I have a couple of signs that I seen this week and loved!

Look at what Marian from MMS did this week! Loving this Lions coffee sign   Look at the old hardware that she left on.
This is what my lovely friend Robin from Happy at Home painted.

Isn’t it great! We’ll have to ask Robin how she did it. I love it!

 Ali at My Third True Love is a new follower of mine and while visiting her blog I seen this. This is her first sign too!

Jaime over at That’s My Letter has posted a great tutorial for this lovely sign as well.
She traces over the letters as opposed to cutting them all out. Makes it much easier!

Last but certainly not least is Lori from Frugal Farmhouse Design. Her sign was also inspiration for my GROCERIES sign. Lori does awesome work on very tight budgets!

Hope this has helped to  inspire you to start creating and restoring!
Be blessed and thanks for visiting!

Filed Under: Uncategorised

New Sign

6:26 pm by kim 53 Comments

Hello everyone!
I hope you all had a great weekend.
I was busy working on finishing up my other Ikea bookcase and making this new sign!
I really like it.
Whadda ya think?

I’ve seen signs like this around blogland and from fleamarket style’s header
in particular. I’ve wanted to make one for a while now and finally took the plunge. There’s no stopping me now. I’ve got big plans for other signs!

I was thinking of placing it above the cupboards here. The wallpaper will eventually be removed and…I’m going to start  painting my cupboards in the spring. A big job and I’m hoping the whole family will get involved!

This is a close up of the sign, you can see where I distressed it to make it look a little more vintage.

Here is the other bookcase just finished.

I’m still in the midst of dressing these shelves.

I got these little wire baskets from homesense and added a little bit of paint to anitque them a bit.
They’re great for holding magazines.

Here is my sign again on the sofa.(Can you tell I like this sign? I just carry it around the house with me! Lol)
I’ve got some ideas for other signs and will keep you posted.
Blessings on you all and thanks for stopping by!

I’ll be partying with these ladies this week.

Between naps on the porch, Metamorphosis Monday
Coastal Charm, Nifty thrifty tuesdays
House of Grace, Twice owned Tuesday
Domestically Speaking, Power of Paint Party
A Beach Cottage, Good life Wesnesdays
The Shabby chic cottage, Transformation thursdays
My Romantic Home, Show and tell Friday
The Shabby Nest, Frugal Friday
Funky Junk Interiors, Sat nite Special
Under the table and dreaming, Sunday showcase party

Filed Under: Uncategorised

Giveaway Winner!!!!!!

10:15 pm by kim 3 Comments

Hello everyone! I’ve been excited all evening waiting  to choose the winner for this giveaway.  You’d think I was getting the prize!
I’m pretty much computer illiterate and was not sure how to get to that random generator whatchamacallit!
 I asked my daughter Hope to pick a number from 1-94 from a glass. She’s pretty shy and did not want to be a star in blogland so here is the results of the draw.
The lucky winner is:
#57 Heather Ryan
 please email me with some info so I can contact you and send you your prize.
Congratulations!

Thanks everyone for participating in my first giveaway, it was a lot of fun.

Have a great weekend!

Filed Under: Uncategorised

Old door new headboard…

2:43 am by kim 43 Comments

Hi everyone!
I hope you are all  having a wonderful start to the week.

If you are a follower, please leave me a comment telling me so to enter my giveaway that ends Friday night!

I’ve been thinking about getting a headboard , well  probably making my own. I’ve been tossed between making one and slipcovering it in…well…white of course or maybe adding a little vintage wood. I love all those vintage ones out there made of gates and fences etc. but where would I find one of those at a reasonable price?

A few months ago our Pastor told us that the fire marshall had come in and our church that was built in 1899 would have to get our old 112 year old vintage doors replaced with new fire doors!

To make a long story short, I got to take one of those lovely doors home. Here was the headboard I’ve been looking for!

My husband, daughter and I spent an hour or so hanging this baby, It weighs about 150 lbs.!
It came painted in white. Not sure what kind of wood is underneath but it is solid.

Well here she is! ( I always genderize my new finds!)
 In these pics I was going for that lovely unmade bed look but didn’t really achieve it. But you get the idea!
Yes, I know, I also need a new bedskirt and nightstands, that’s in the project book.

Here is the top end of the door. You can see some of the 2×4 that is helping to support it, this will be painted out…eventually! lol

This is the bottom end with  some chips and scuffs.

In this pic you can see that someone painted over it unevenly with a different paint finish.

(I do add some colour and pattern to my bed  by way of throw pillows, just not in these pics!)

I was thinking of adding some trim at the top maybe giving it a little ledge with molding.
I was also thinking about giving it a good paint job and maybe adding some contrast with another color/glaze.

I’m actually afraid to distress it due to the fact that there is old paint on it and most old paint was made with lead!
Still not sure what to do with her but I think she needs a little something.

Thanks for stopping by and don’t forget to enter the giveaway!

I’ll be partying with|:

Beach Cottage Good Life WednesdaysThe Shabby Nest<br><br><br><b>Join us every Friday...</b>

Filed Under: Uncategorised

  • « Go to Previous Page
  • Go to page 1
  • Interim pages omitted …
  • Go to page 11
  • Go to page 12
  • Go to page 13
  • Go to page 14
  • Go to page 15
  • Go to page 16
  • Go to Next Page »

Primary Sidebar

Hi, I'm Kim Read More…

Instagram

Follow along on Instagram

Sign up and don't miss a post!

Recent Posts

  • Festive Bacon Wrapped Chestnut Holiday Appetizer
  • DIY Mantel Decorated for Christmas
  • Simple and Cozy Fall Home Tour
  • Simple Fall Tablescape

Archives

Footer

Copyright © 2025 · Foodie Pro Theme by Shay Bocks · Built on the Genesis Framework · Powered by WordPress