• Skip to primary navigation
  • Skip to main content
  • Skip to primary sidebar
  • Skip to footer

Kim Power Style

  • Home
  • Contact
  • About
  • Tutorials

Archives for October 2017

Bathroom Makeover | One Room Challenge Week 4

4:17 pm by kim 14 Comments

Hello everyone and welcome to the Bathroom Makeover One Room challenge week 4! I’ve heard that week 4 is one of the most difficult weeks of the challenge. I think I’ll hold judgment on that until week 5 is over! If you’re just tuning in now,  the One Room Challenge is hosted by Linda from Calling it Home. A challenge where designers and bloggers make over one room in their home in 6 weeks. You can follow along on with everyone’s progress here and my (somewhat) bathroom makeover progress here:

Week 1

Week 2

Week 3

One Room Challenge Fall 2017

Bathroom Makeover One Room Challenge Week 4
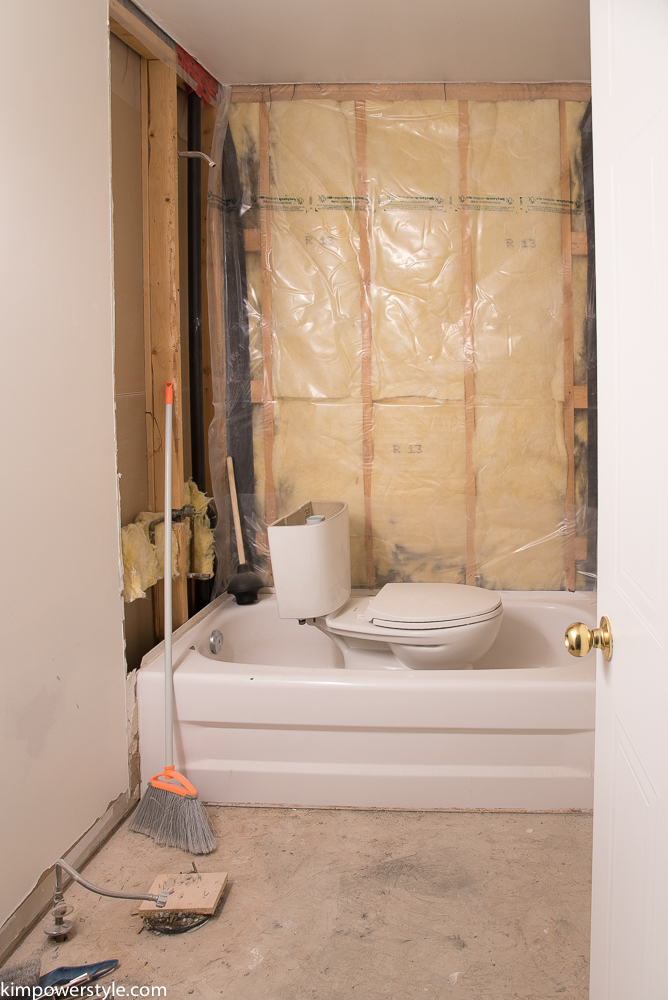
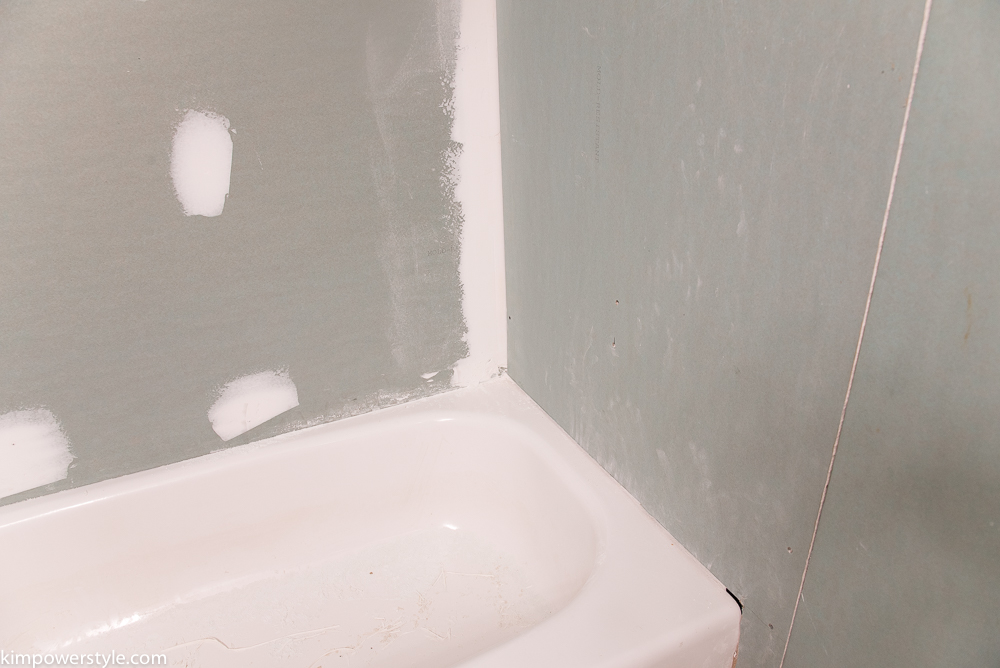
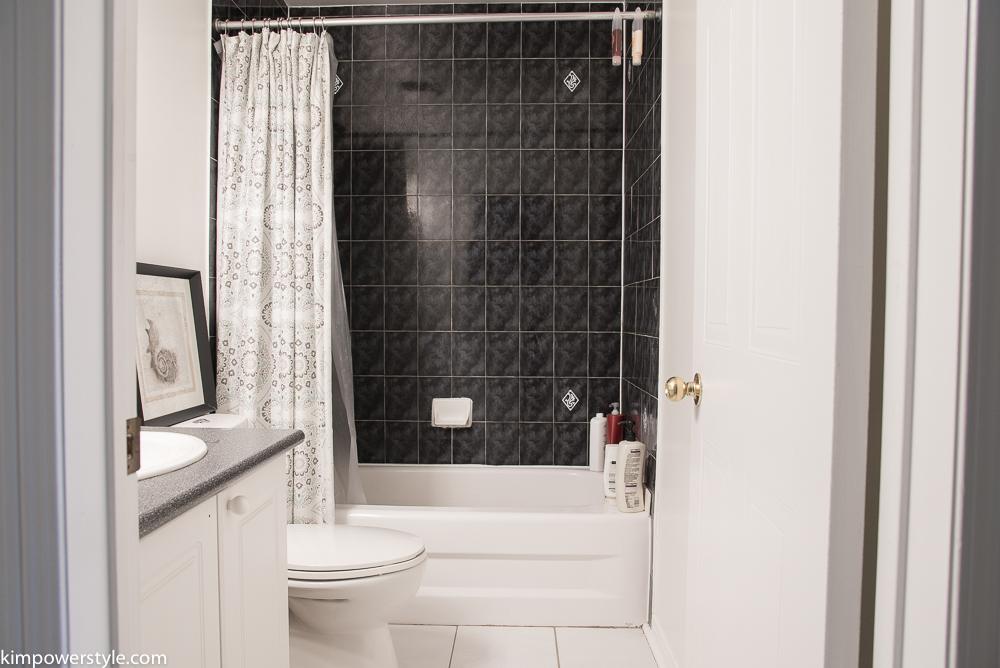
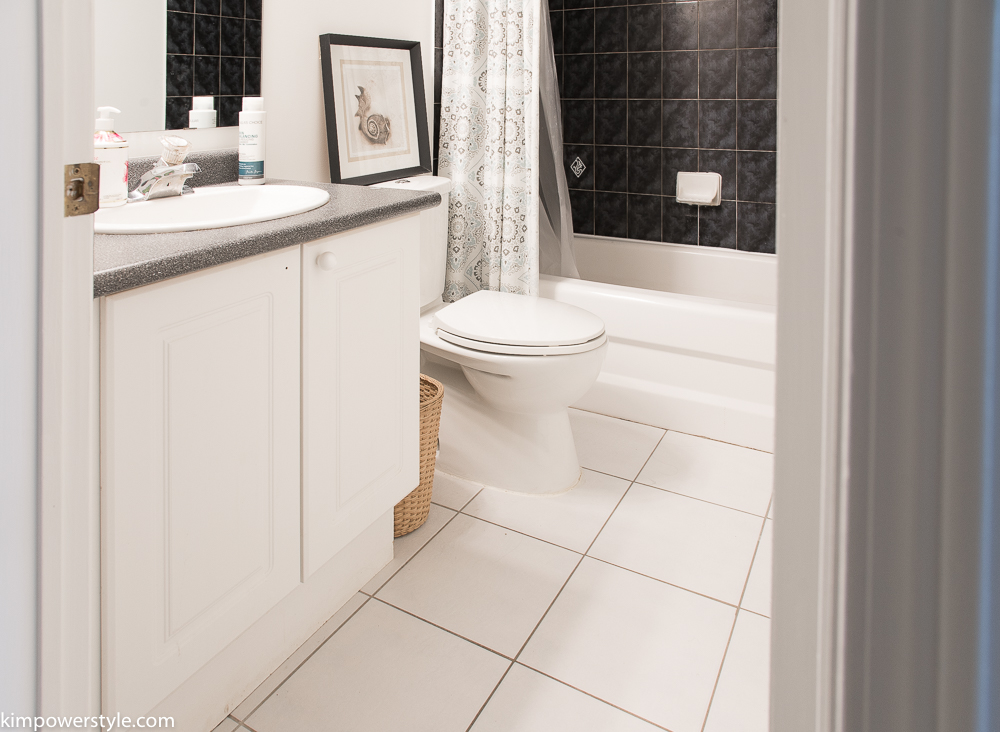
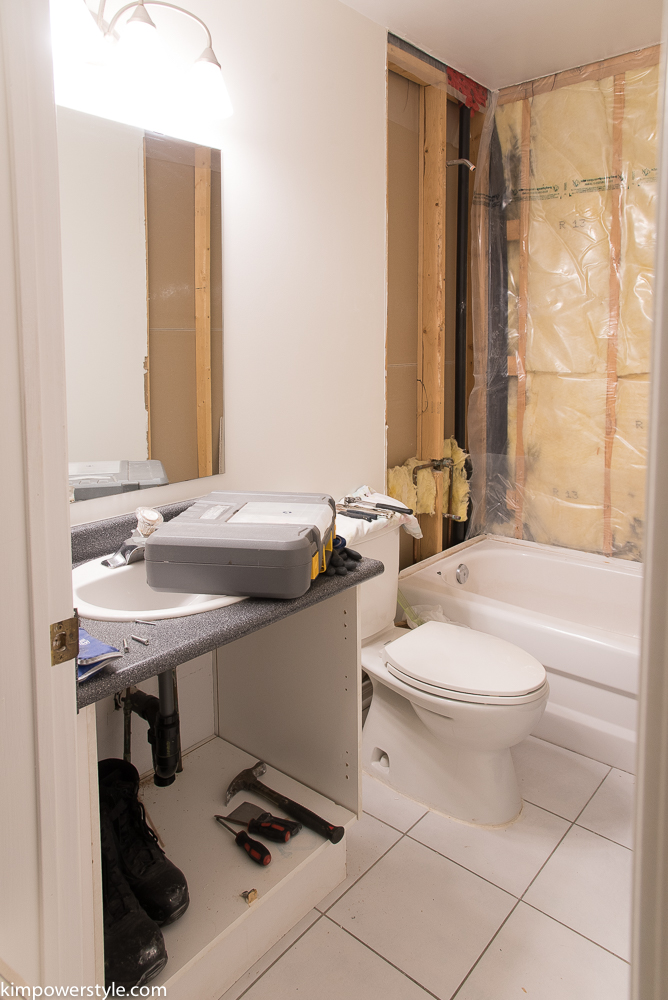
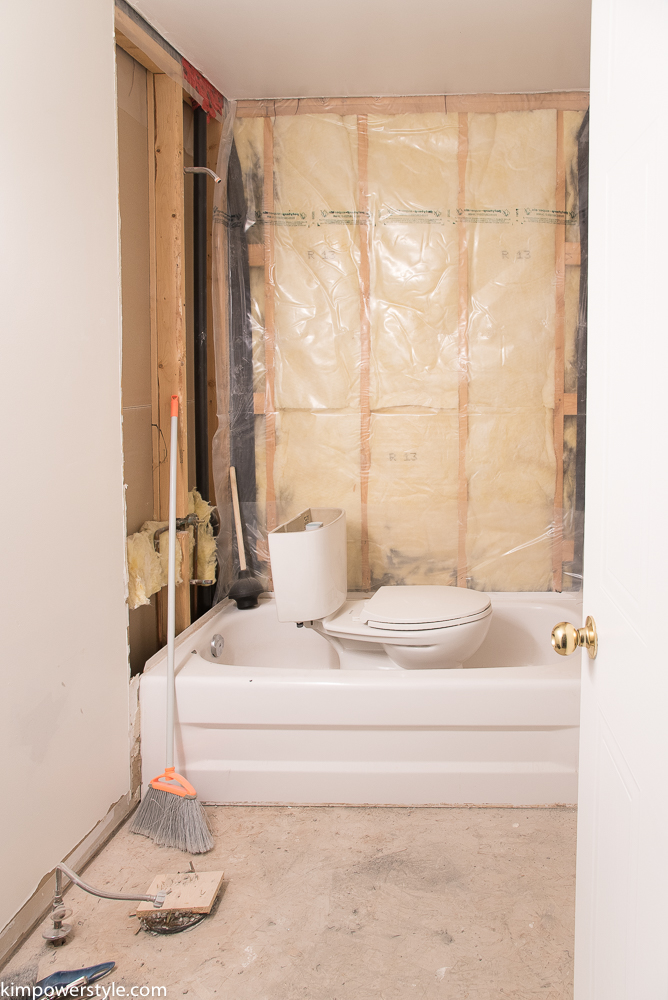
Before:

Lets take a look at what we started with:

Bathroom Before Pic

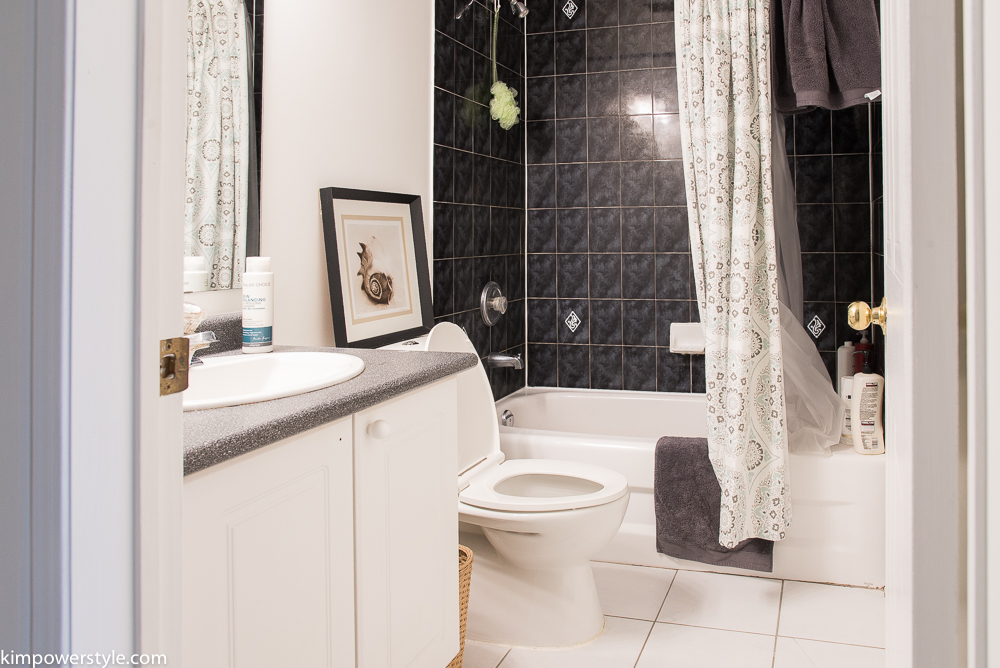
(After everything we’ve been through the last few weeks, this before doesn’t really look so bad anymore!)
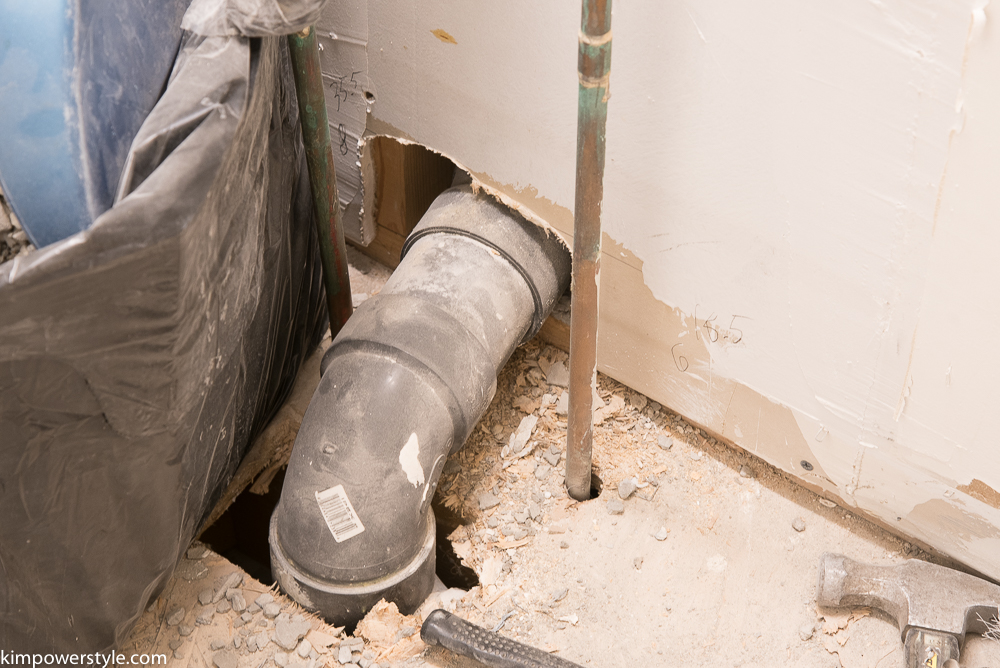
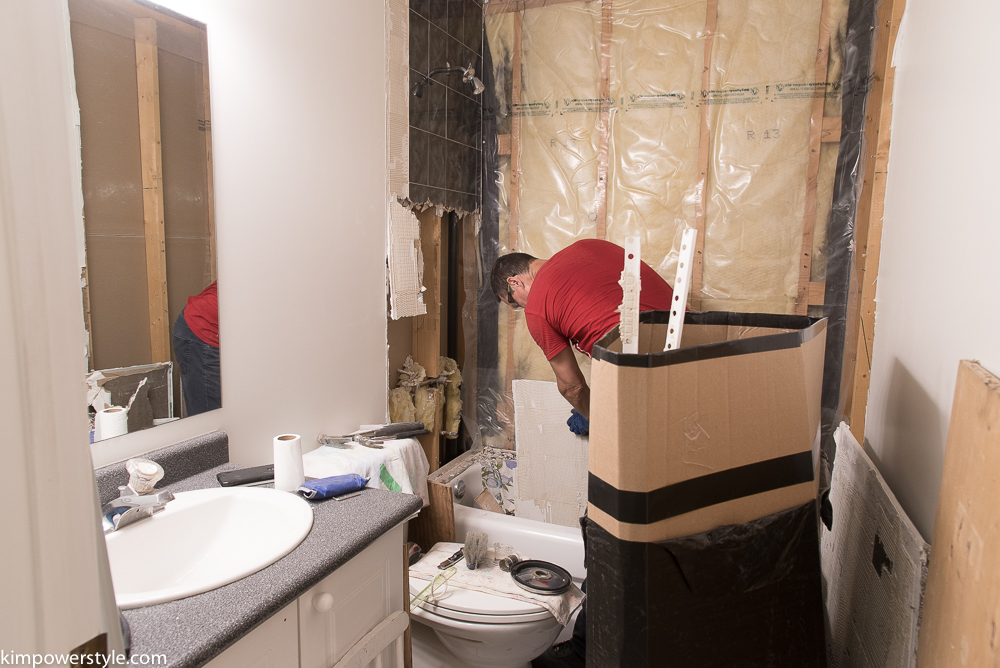
Progress:

Week 2 ORC, demo week

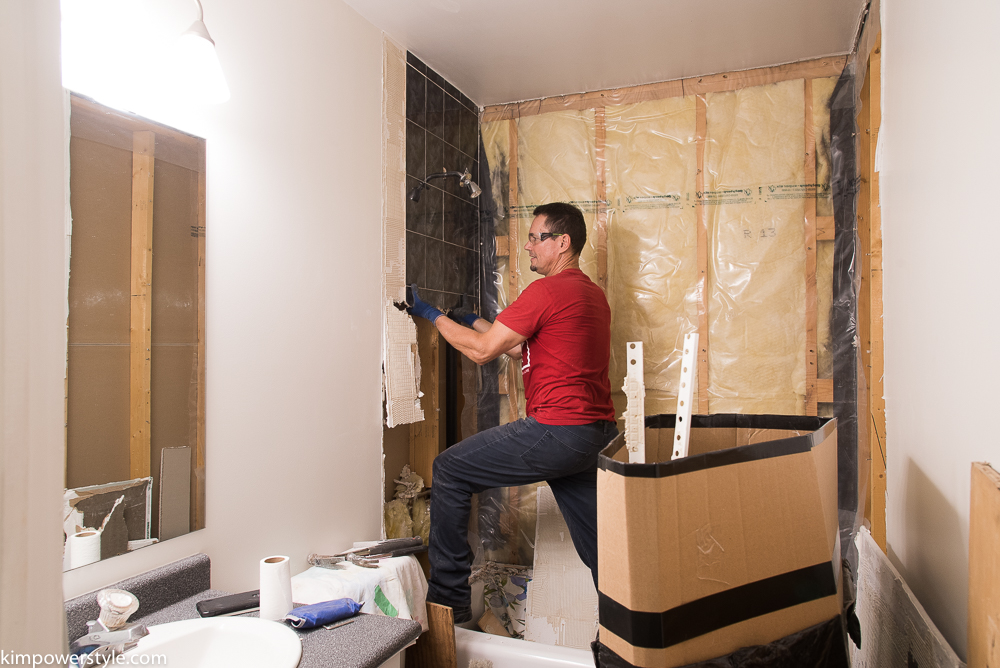
It took nearly a week to demo this whole bathroom.

Week 2 ORC, demo week

Week 2 ORC, demo week

We changed out that insulation behind the tub after this photo was taken.

Fall ORC Week 3 the challenge

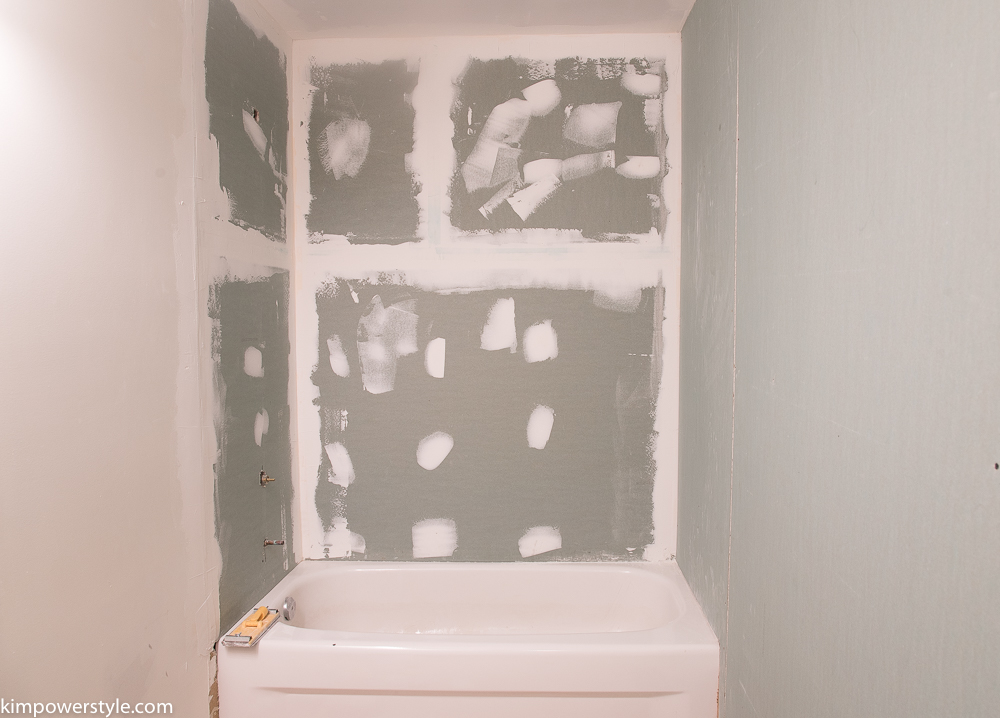
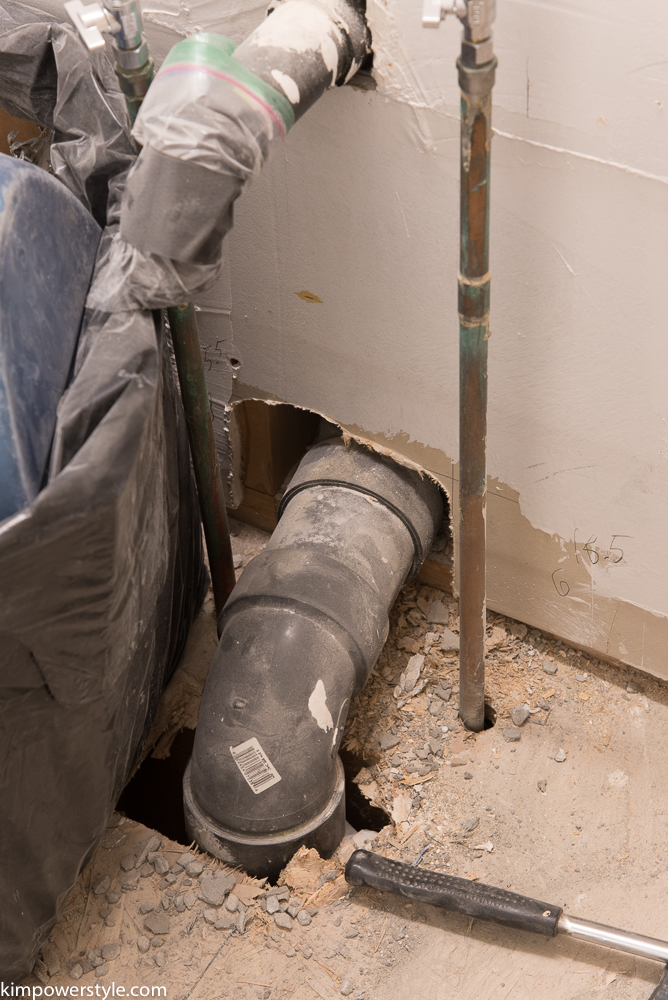
I explained all about our drywall issues in last week’s post.

Fall ORC Week 3 the challenge

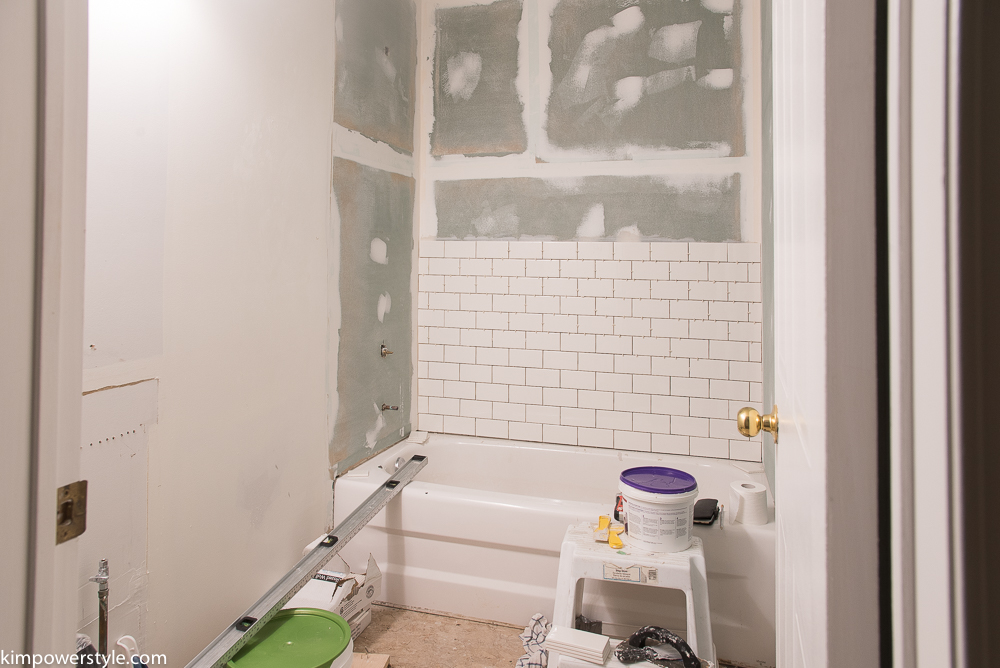
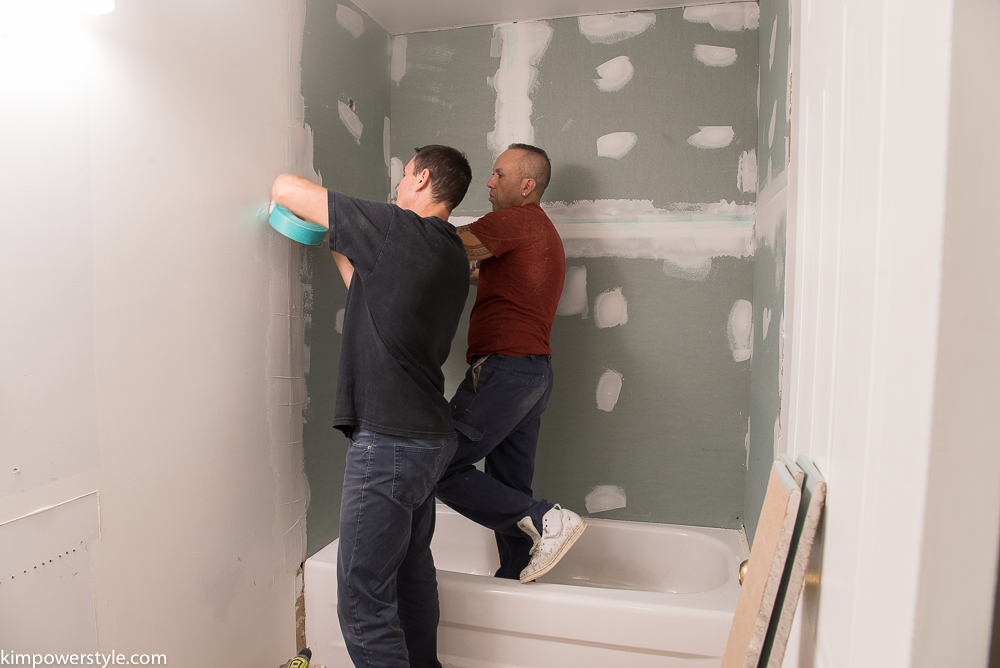
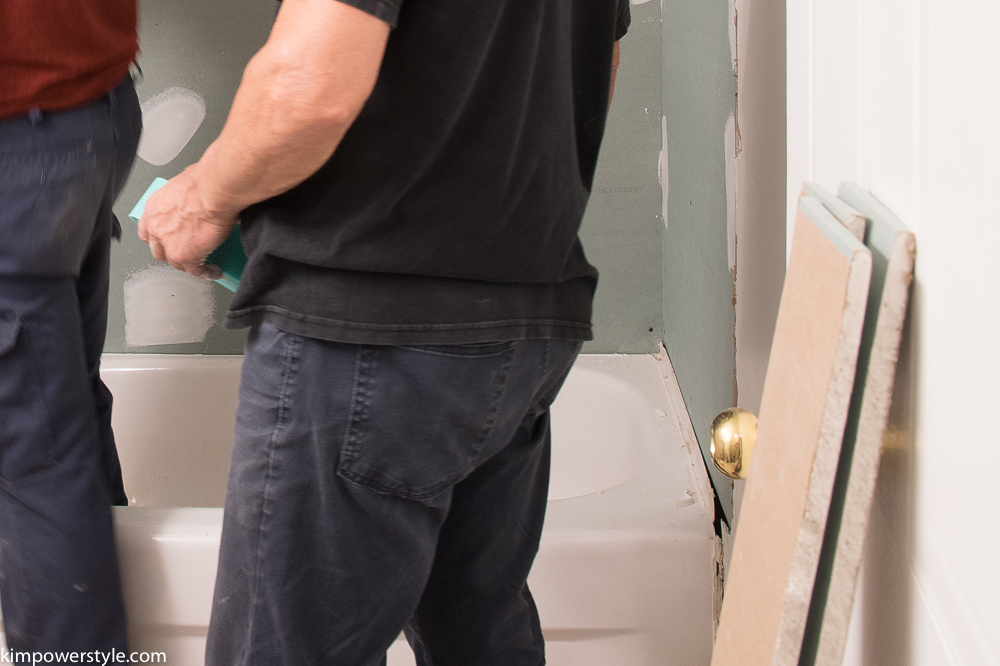
We finally got to tiling the surround and it took a lot of time due to uneven wall issues.

Fall ORC Week 4 Bathroom Makeover

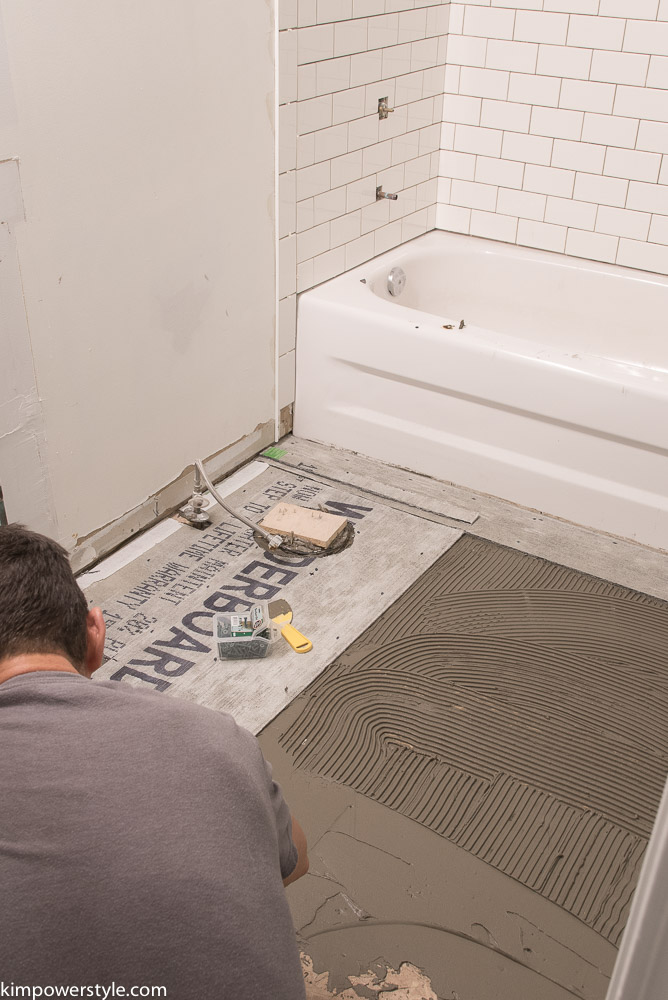
Before we could apply the floor tiles, we had to apply the cement board which required some thin set to adhere it.
Fall ORC Week 4 Bathroom Makeover

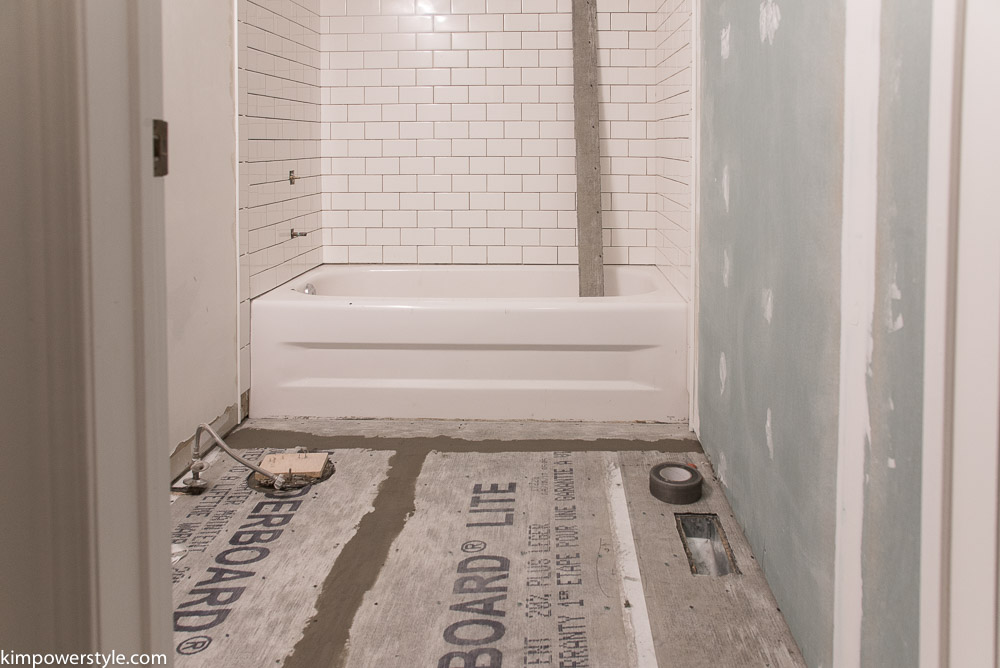
The cement board is down and now we’re ready to tile the floor and then grout everything.

Where we’re at now:

Bathroom Makeover | One Room Challenge Week 4

untitled-7352

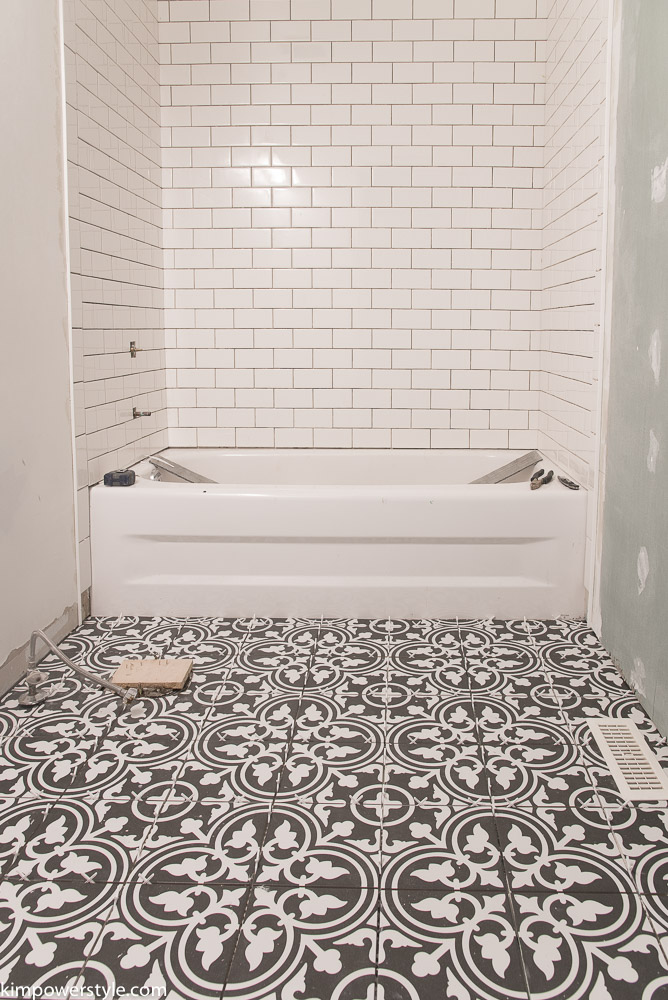
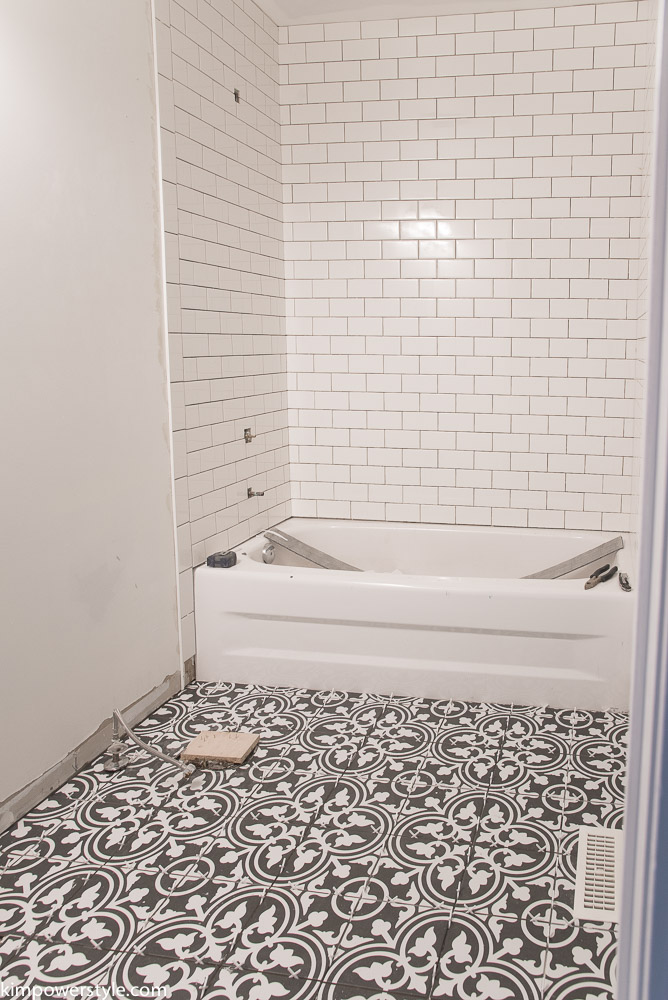
Hooray! All the tiles have finally been applied but still need to be grouted. We’ll have to wait  48-72 hours before we can do that because we used the longer drying thin set mortar. The hubby and I will not want to see, measure, cut, saw, chip and glue another darn tile for a loooong time!
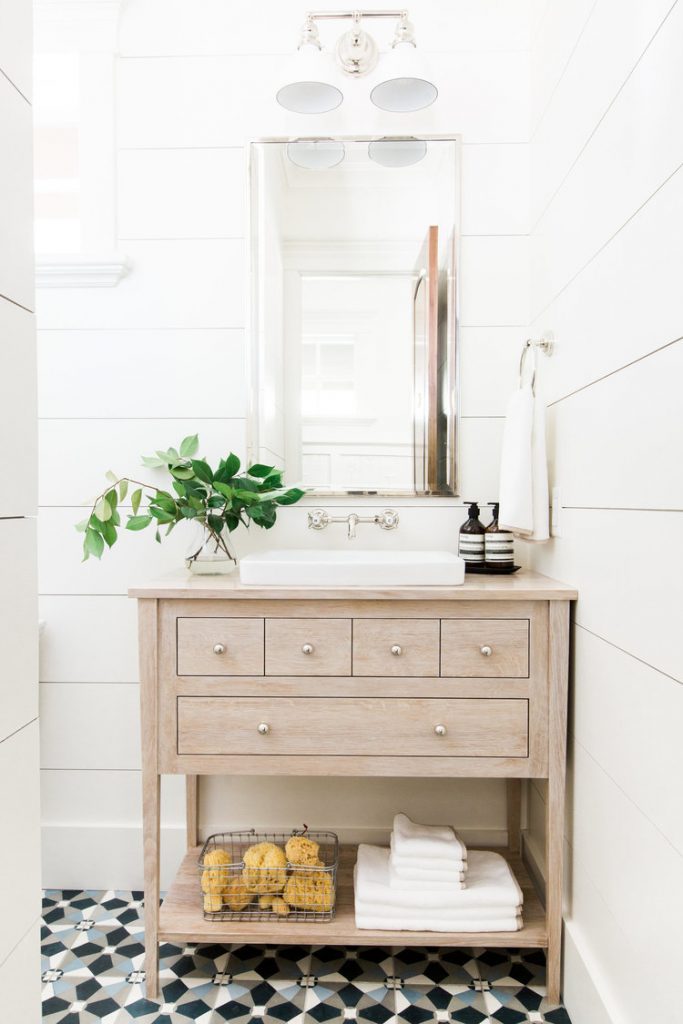
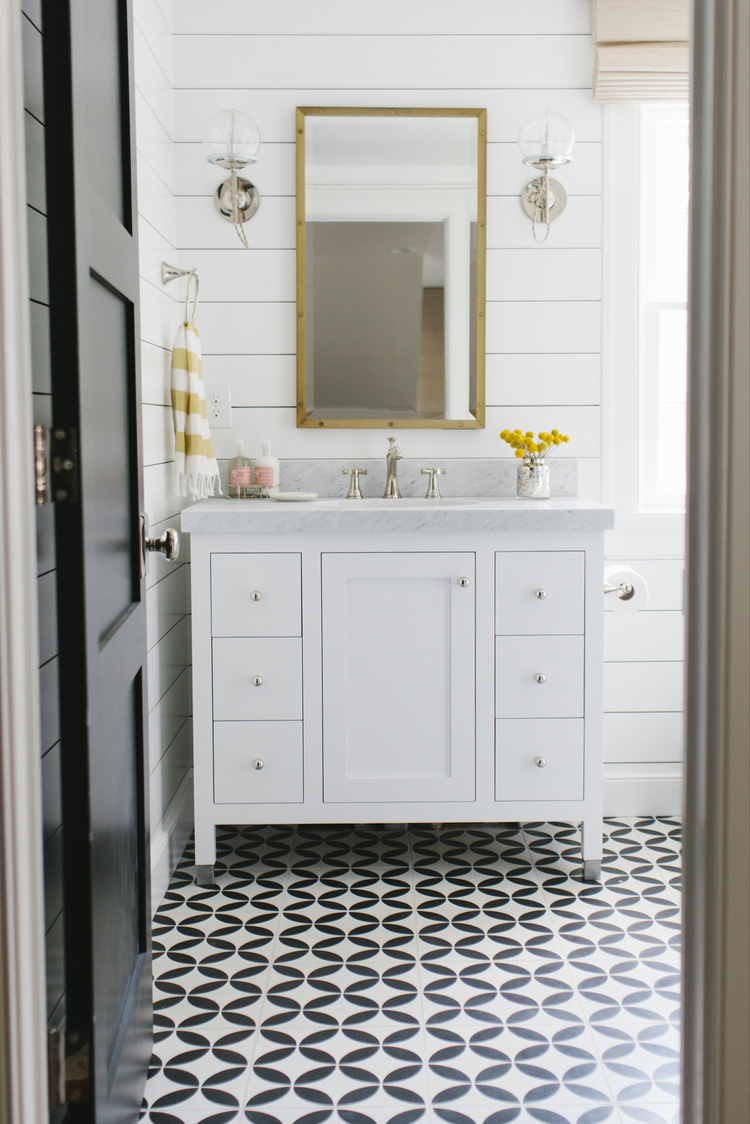
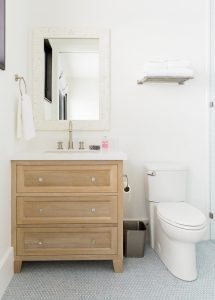
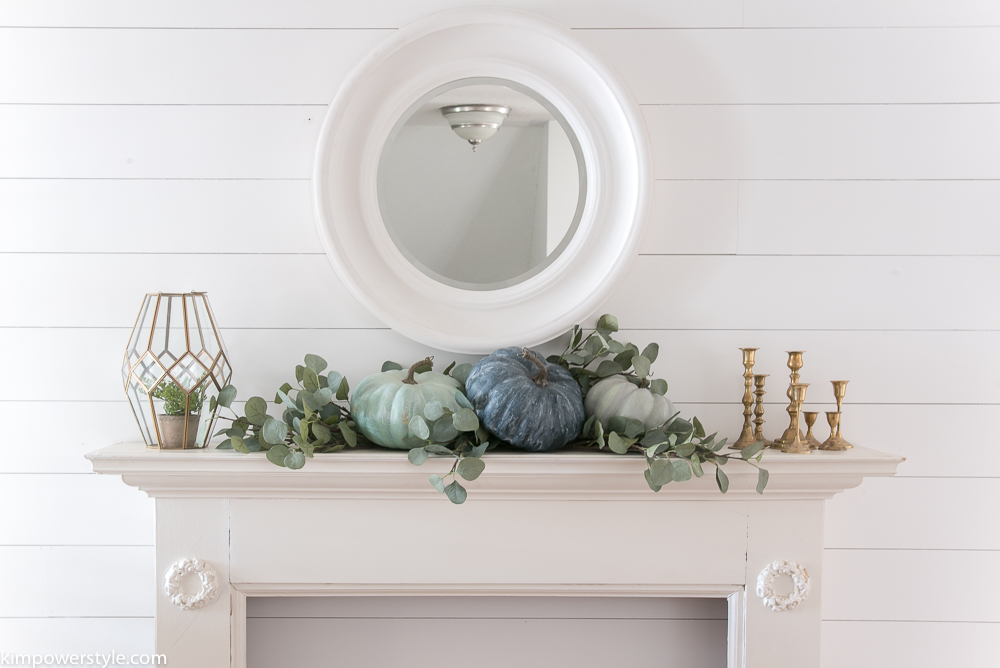
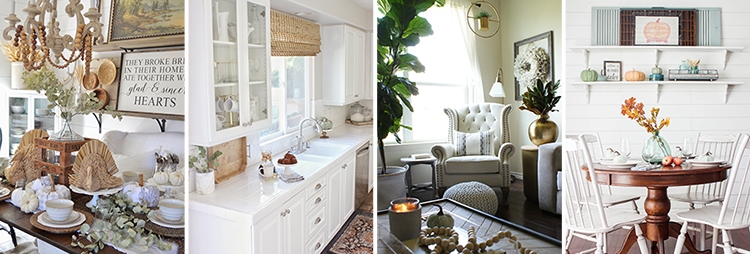
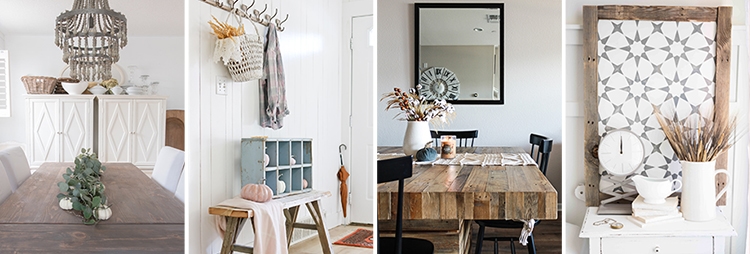
Inspiration:

This is my mood board and inspiration. At times it’s hard to believe it’s going to resemble any of this!

Modern Farmhouse Bathroom

Shea from Studio McGee has the most gorgeous bathrooms on her site. You can see some of them here. They’ve been such an inspiration to me. When you’re in the thick of a messy reno, you need to keep the pretty pictures in front of you to remind you why you’r e doing this!

Studio Mcgee

(source)

Still To-do List:

  • Grout floor and wall tile
  • Paint ceiling
  • Apply trim to door
  • Apply Metrie shiplap to remaining walls
  • Assemble and Install vanity (Pray it fits!)
  • Add shower/bath/sink hardware
  • Install toilet
  • Install/add accessories!

Thank you everyone for joining me as I share our long and hard fought for progress! Just a little note to let you know that the ORC will be extended for one more week. Due to all the natural disasters happening, many participants have had difficultly in getting their products in time etc. So for the first time in ORC history this challenge has been extended by a week and the final reveal will be on Nov. 16th. That gives us all one more week to get this done!

blessings,

Kim

Thanks to my sponsors for helping to make this makeover possible!

Sponsors for ORC Fall 2017

Filed Under: Home decor, One Room Challenge™

One Room Challenge Fall 2017 | Week 3 | Reno Challenges

12:32 am by kim 12 Comments

Hey everyone! It’s week 3 of the One Room Challenge and it’s been a doozy. There may have been the odd swear word, some wringing of hands along with some tears (all me)! I’ve watched enough home renovation shows to know that a renovation rarely goes smoothly. Well we were no exception…

One Room Challenge Fall 2017

One Room Challenge Fall 2017 Week 3 Reno Challenges

Let’s do a brief recap of Week 2 the demo week..

Fall ORC Week 3 the challenge

We spent an entire week and removed everything except the drywall on the bathroom walls. (Not sure why the plunger and toilet are in the tub! haha)

Fall ORC Week 3 the challenge

We found this large drainage pipe coming up out of the floor!

My meltdown and what we did this week..

Fall ORC Week 3 the challenge

My husband removed the old insulation and replaced it. He and his friend then put up the drywall in the tub/shower surround. This is where it kinda went downhill. After the drywall was attached I went to inspect it and noticed that one of the drywall walls was sitting outside the tub lip.  I’m not sure how the previous wall/tiles were placed but there was no way I was going to be able to apply tiles with a crooked wall!

Fall ORC Week 3 the challenge

You can see the problem here.

We were at a loss as to what to do. We could take that piece down and put it over the lip, but then it wouldn’t match up with the other main wall. We would be fixing one problem but causing another. We were then told by  2 plumbers that the giant black pipe couldn’t be moved because of the joists and would have to stay. Yep, by this time I was having a bit of a meltdown. I put on my best Scarlett O’Hara impersonation and said “tomorrow is another day”. Our daughters came over for a visit and we took the weekend off and ignored the whole situation!

By Sunday I knew we had to address the problem and stop pretending that I hadn’t just demolished my whole bathroom! I was thinking that we could just call the whole thing off. Tell our sponsors how sorry we were. Maybe find a contractor that wasn’t booked up till next year and let him/her sort it out.

But then I pulled up my big girl pants and found an old friend to come over and take a look at the situation. He advised us to drywall over that wall again and continue along the length of the whole wall. So that’s what we did. We made our 145th trip to the Home Depot and picked up our supplies. We had the drywall hung and mudded by that evening. All the walls were flush!

One Room challenge week 3 The reno challenges

Fall ORC Week 3 the challenge

I finally got my tiles and started tiling!

Fall ORC Week 3 the challenge

My bathtub is a little lower on one side so It took a bit of time to get everything level, but we’re on our way!

Fall ORC Week 3 the challenge

What we still have to do:

  • Finish installing the tile on the tub/shower surround.
  • Apply the Metrie Shiplap and finishing.
  • Tile the floors.
  • Install the vanity…and pray it fits!
  • Install the taps, shower head etc.
  • Add all the accessories.


In the middle of all the mess, it’s good to have  your mood board in front of you. It let’s you know that there’s an end to the craziness and it’ll be beautiful!Modern Farmhouse Bathroom

Having anything by Shea and her team for inspiration doesn’t hurt either. 😉 It also adds a little bit of pretty in these  unpretty reno posts too!

Studio Mcgee

(source)

Special thanks to my sponsors who are helping to make this bathroom possible!

Sponsors for ORC Fall 2017

Thanks for checking in on the progress and hearing about my woes. You can follow along with me on Instagram as I share the day in and day out progress.

blessings,

Kim

Filed Under: One Room Challenge™

Giving Back: Volunteering with Wayfair at Habitat for Humanity

6:53 pm by kim 1 Comment

Hi everyone! Last week I had the privilege of volunteering alongside the team from Wayfair.ca at Habitat For Humanity.  Emily Moran from Wayfair had me at hello when she invited me to join them to spend the day volunteering at Habitat’s GTA site. It was such a great opportunity to participate in something that I have always wanted to do!

Giving Back: Volunteering with Wayfair at Habitat for Humanity

Wayfair Workday at Habitat for Humanity


Wayfair workday with Habitat for Humanity

I met this young man named Kenneth and we worked together for a few hours cutting drywall. There are so many volunteers that donate their time, energy and expertise. If you’re thinking about volunteering, don’t worry about not being skilled. Habitat for Humanity has so many different areas you can work in from putting up drywall to scraping paint off the floors to cleaning windows. There is something for everyone to do and everything is provided for you, tools, footwear, hats and gloves. You just need to show up!

Wayfair workday with Habitat for Humanity

Wayfair workday with Habitat for Humanity

Joining with Wayfair at Habitat for Humanity

Wayfair workday with Habitat for Humanity

A work in progress.

Wayfair workday with Habitat for Humanity

You can see how this building is almost finished and in fact, some people had already begun moving in! We were able to hear from a single Mom and her two children as they shared about their experiences and how Habitat for Humanity is changing their lives in providing decent and affordable housing.

Habitat group shot

Here is the whole Wayfair team in our purple shirts!

 I had no idea that Wayfair has been partnering with Habitat for Humanity for over five years now and have contributed $1 million! They continue to provide fundraising, product donations and volunteer mobilization.

I was so excited to be a part of this workday with Wayfair. It’s an amazing feeling to give of your time and/or resources and know you’re making a difference in an individual or family’s life. If you feel you’d like to contribute but maybe volunteering is not something you’re able to do, Wayfair.ca has a donation button at checkout! With this check-out feature, you can easily support Habitat’s vision that everyone deserves a decent place to live!

Blessings,

Kim


Filed Under: Lifestyle Tagged With: Lifestyle

One Room Challenge Fall 2017 | Week 2 | Demo Week

8:45 pm by kim 16 Comments

Demo Week

Welcome to week 2 of the ORC. If you’re just joining in with me today, here is a link to week 1 where I explain my plans to turn this dated room into a Modern Farmhouse bathroom. We’ve all  watched the home makeover shows where the “demo day” is  that amazing day where you’re able to start tearing out walls, tiles and aged appliances etc. At the end of the day everything has been removed and you’re left with a clean slate to start building from. Well folks, as the old saying goes, “only on TV”!  Unless you have a team of workers working behind you, there is no such thing as a demo day! It’s taken the hubby days to remove tile, drywall, a vanity, mirror, toilet and the dreaded floor tile. This One Room Challenge week 2, has kicked our butts. What we thought would be that lauded “demo day” has turned into the seemingly never ending “demo week”!

One Room Challenge Fall 2017

So this is what happened…get ready for some non-pretty pics.

Week 2 ORC, demo week

At first my hubby tried to take each tile off at a time. With the hopes we could save the drywall behind it and not have to worry about replacing it. No. somewhere or somehow you damage that drywall behind and you end up having to take it all down. After this lesson was learned, my hubby just took the drywall and tile down together in sheets. It was a much faster process doing it this way.

Week 2 ORC, demo week

Week 2 ORC, demo week

When it came time to take out the vanity, we noticed there were no water shut-off valves. So after turning off the water in the whole house and many trips to the Home Depot later, we were able to avoid a flood and remove the vanity…only to find this!

Week 2 ORC, demo week

The water pipes come up straight out of the floor! There is also this gigantic black drainpipe jutting out of the floor and into the wall. If you look at my mood/vision board you’ll notice that the vanity I wanted  was up off the floor. In fact every vanity I liked was up off the floor. It makes a smaller space seem airier and larger. Well now I have to change my plans on that vanity. This whole pipe mess will have to be covered up.

Week 2 ORC, demo week

The floor tile, mesh and concrete thingy was the worst. We finally called up a friend and we borrowed a jack hammer, yep, we ( and by “we” I mean the hubby)  were jack hammering this room until late last night. We finally got it all up. Other than removing a few staples and a few stray pieces of dry wall, I think we’re done the demo stage. Phew! When things look like this, it’ hard to believe it will ever be done!

So now before those pictures burn a hole into our retinas, let’s take a look at how I envisioned this room to look. It may completely change by the time I get through but nevertheless  lets focus on my pretty vision.

Modern Farmhouse Bathroom


Here is some lovely inspiration via Studio Mcgee because Shea and her team know how to do a bathroom!

Studio Mcgee

(source)

Studio Mcgee

(source)

Studio Mcgee

(source)

My vision for how this space can look is the only thing that’s keeping me sane at this point. This reno thing is not for the faint of heart! Don’t forget to join me back here next week to follow along as well as pop in and see all the other participants, I’m hoping there will be major progress in this room by then. Please let there be progress!! Lol.

Thanks to my sponsors who are contributing to my Modern Farmhouse Makeover this time around!

Sponsors for ORC Fall 2017

Filed Under: diy, Fall, Makeovers, One Room Challenge™

One Room Challenge Fall 2017 | Week 1 | Our Modern Farmhouse Bathroom

8:54 pm by kim 14 Comments

One Room Challenge Fall 2017 | Week 1

Call me crazy but I’m doing it again! This will be my second time participating as a guest in the biannual room makeover series called the One Room Challenge hosted by Linda from Calling it Home. Twenty featured design bloggers are chosen to participate, as well as 200 plus guest Participants to make over a room in six weeks!  So much decor and makeover inspiration to check out on the ORC site….And so the madness begins…again!

One Room Challenge Fall 2017

To say I’m a little nervous is an understatement! The last time I participated in the One Room Challenge we were making over our office space. We applied board and batten, hung a barn door and the rest was decor and cosmetic changes. This time around we will be making over our small main bathroom and there will be demoing involved people, Eek! This bathroom is used by my daughters when they come to visit and stay in the guest room. When it’s clean and the shower curtain is pulled across, it can almost look pretty. I even had my daughter do a fresh coat of paint on it a few months back. But that black tile has been the bane of my existence (a little dramatic I know) since we bought our home. It’s the one thing I told my husband had to go! The vanity was passible when we first moved in but it has served it’s purpose and is ready to go as well.  So let me share this room with you.

Here is the before (It sounds better than right now, because these photos are a little embarrassing!) Please don’t judge. Yes there is a missing  knob on the  vanity door.

Bathroom Before Pic

Maybe I wasn’t being too dramatic when I said that the black tile was the bane of my existence?!

Bathroom before photo

One Room Challenge bathroom before photos.

So let’s move on to what I hope our after will look like:

Mood board

So here is the moodboard/vision I have for my new Modern Farmhouse Bathroom:

Modern Farmhouse Bathroom


I placed all my favourite things in this moodboard to achieve this modern farmhouse look. It’s a look that will go well with my coastal farmhouse/cottage vibe I have going on in the rest of my home and I love every element from colour to texture.

 Plan of Action

  • Remove the black tile and replace with plain white subway tile.
  • Apply white modern shiplap by Metrie to the rest of the room.
  • Change out the hardware in the shower/tub stall.
  • Do something creative with the floor tiles.
  • Remove the old vanity and replace it with something more up to date.
  • Remove the builder basic mirror and replace it with a new round one.
  • Remove the old lighting and replace it.
  • Add accessories, shower curtain, waste basket, stool etc.

It’s exhausting just reading this! You can find all the other participants here.  Don’t forget to check back next week to follow along with the process as well as to check if the hubby and I are still alive and married… Okay let’s get this party started.. Honey, get the hammer!


Filed Under: diy, One Room Challenge™, shiplap

Simple and Easy Fall Tablescape

6:00 am by kim 13 Comments

Today I’m joining my “Year of Feasting” friends. We’ve been sharing our tablescapes and how we entertain with our friends and family throughout the year. Thanks to Dannyelle from Life is a Party for hosting our little group!

Join me today as I share a simple and easy fall tablescape all ready for Thanksgiving. There will be links at the bottom of the post for you to check out my talented friends too.

Simple and Easy Fall Tablescape

Next week will be the first weekend in October and we Canadians will be celebrating our Thanksgiving Holiday.  I recently shared my dining room decorated for fall using faux eaucalyptus, baby boo pumpkins and some glass tea lights up the centre of the table. It looks great for the fall season and I knew it would transition into a beautiful Thanksgiving tablescape too. I simply added place settings to what was already there. What could be easier than that?

Thanksgiving tablescape

Thanksgiving/Fall tablescape

Thanksgiving/Fall tablescape

Thanksgiving/Fall tablescape

Thanksgiving/Fall tablescape

Thanksgiving/Fall tablescape

Simple and Easy Fall Tablescape

Simple and Easy Fall Tablescape

Thanksgiving/Fall tablescape

I love collecting vintage white ironstone pieces, they go with everything and they’ve stood the test of time. A platter for the turkey, tureens for the veggies, stuffing and gravy and all we need is the food! I used rattan placemats from Ikea, plain white napkins and my workhorse white plates. These fun blue ceramic bowls tie in the rest of the blue decor I used for fall and add a bit of colour to the table.

Thanksgiving/Fall tablescape

Thanksgiving/Fall tablescape

Last year my daughter and son in law hosted us at their house to Celebrate their first Thanksgiving together as a married couple. It was such a great time for all of us and a bit of a break for me! We’ll be back at our house this year as my son in law is out of the country with the military. We’ll have to make this one a little extra special as we’ll all be missing him. I love to decorate and make my home as cozy and inviting as possible for  my family. It’s really about making memories!

Thanksgiving/Fall tablescape

Thanksgiving/Fall tablescape

I hope you enjoyed my little tour and that you all have a warm and memorable Thanksgiving with your family and friends! Don’t forget to check out the links below to follow along with my friends as they share their Thanksgiving tables.

Blessings,

Kim

(I’ve added some affiliate links below so that you can shop this post!)

[show_shopthepost_widget id=”2875052″]

The DIY Mommy || Life is a Party

Kim Power Style || Vin’yet Etc.

The Leaner Observer || Woman In Real Life

Sustain My Craft Habit || Flourish and Knot

Filed Under: Fall, Seasonal tours

Simple Fall Decor In Our Dining Room

7:00 am by kim 15 Comments

This week I’m continuing my simple fall decor in our dining room and I’ve joined another great group of bloggers for our Joyful Home Fall Tour. We want to welcome you into our homes and  share how we celebrate the season, making our homes cozy and welcoming for friends and family alike. There are links to everyone at the bottom of the post so be sure to check them out for some great inspiration!

Simple Fall Decor In Our Dining Room

This year I wanted to make decorating our home for fall to be as simple as possible.  I started by giving this room a good decluttering…it tends to be that one room  that we dump all the little extras into. I think most of us have a room that serves that purpose. At least I hope it’s not just me!

I love the look of white and wood with a bit of greens thrown in and incorporated this into my fall scheme. If you’ve been following along on my home tours this year you’ll know that I’ve kept a lot of my blues and have used blue and sage in my pumpkins too. Finding this faux eaucalyptus garland and faux baby boos on sale from Pottery Barn was a score. It’s a bit of an investment but I love using both of them in my decor and they can be difficult to find in my neck of the woods. This way I have them whenever I need and they always look fresh! I’ve also found some faux eucalyptus at Ikea that was very reasonably priced. If budget  or a lack of time is an issue, you can always use leaves and branches from your yard. They’ll look great and the littles can help you forage for some too.

Cozy fall home tour

I placed the garland down the centre of the table and interspersed it with the baby boos and a few glass votive tealights. I love fairy lights and use them all year round, they can really make something simple into something special. We all need a little sparkle! That’s it for the table, It can stay up until the season is over and I’ll use it for Thanksgiving dinner as well. We Canadians have our Thanksgiving in early October, so I’ll be sharing my simple Thanksgiving tablescape next week.

Cozy Fall Home Tour in the Dining Room

Cozy Fall Home Tour in the Dining Room

If you’ve been following along on my home tours this year you’ll know that I’ve kept a lot of my blue decor and have used blue and sage in my pumpkins as well. You can find my previous tours here and here. On the mantel I added those faux pumpkins along with some faux eucalyptus. The brass terrarium and thrift store candlesticks were already there and look so pretty with the the lovely sage and navy pumpkins. It’s quick and  simple but makes a lovely festive statement.

Cozy Fall Home Tour in the Dining Room

Cozy Fall Home Tour in the Dining Room

Cozy Fall Home Tour in the Dining Room

Cozy Fall Home Tour in the Dining Room

Cozy Fall Home Tour in the Dining Room

I added a few fairy lights on the mantel as well. You can never have too many fairy lights. 🙂

Cozy Fall Home Tour in the Dining Room

I kept my blue velvet pillows from the summer and they fit right in.

Simple fall decor in our dining room

My hope in sharing these tours is to inspire you. I love showing people that it only takes a few little simple touches to change out your decor. It doesn’t have to be elaborate or expensive to make your home cozy and inviting.

Thanks for stopping by and don’t forget to check out all the great inspiration below!

Blessings,

Kim

Maison de Pax | White Lane Decor | Farmhouse on Boone | Lemons to Lovelys

My Vintage Porch | Meaningful Spaces | A House With Books | Delightfully Noted

Kim Power Style | Tidbits | Belle Amour Designs | The Mountain View Cottage

Filed Under: Fall, Seasonal tours

Primary Sidebar

Hi, I'm Kim Read More…

Instagram

Follow along on Instagram

Sign up and don't miss a post!

Recent Posts

  • Festive Bacon Wrapped Chestnut Holiday Appetizer
  • DIY Mantel Decorated for Christmas
  • Simple and Cozy Fall Home Tour
  • Simple Fall Tablescape

Archives

Footer

Copyright © 2025 · Foodie Pro Theme by Shay Bocks · Built on the Genesis Framework · Powered by WordPress